| Author | Message | ||
Nocompromise |
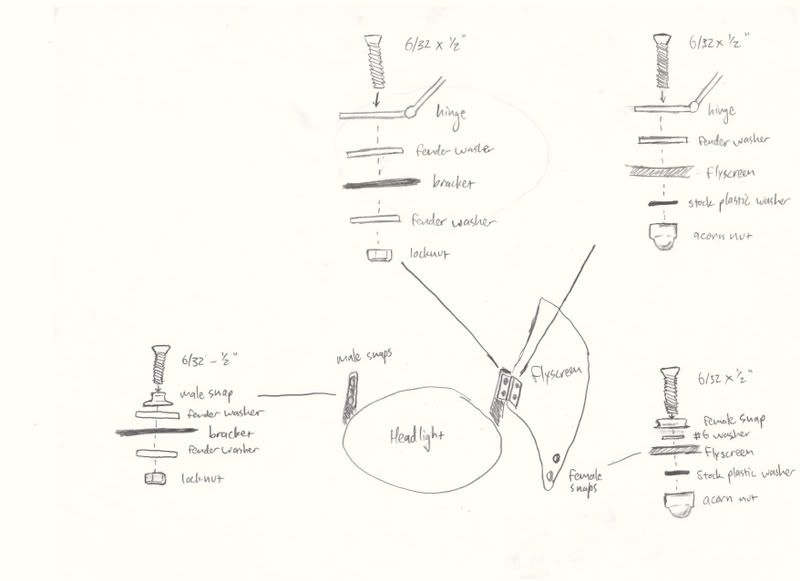
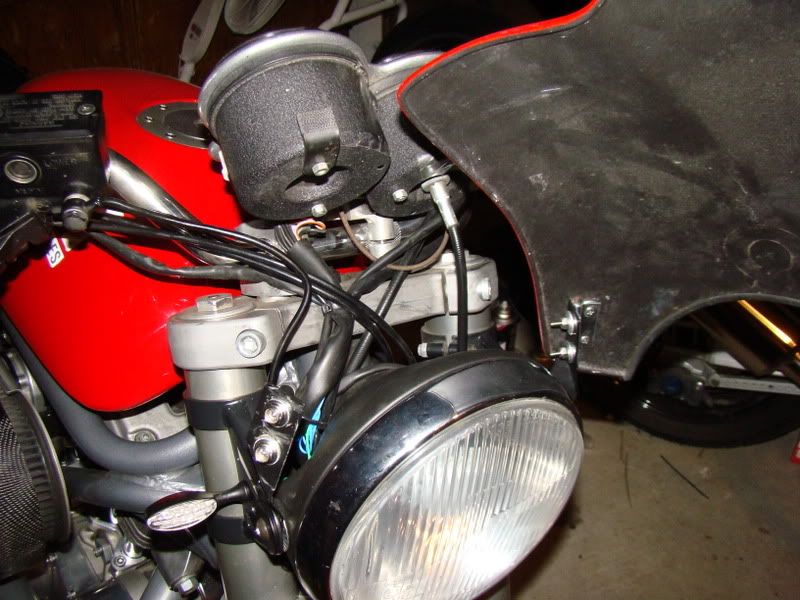
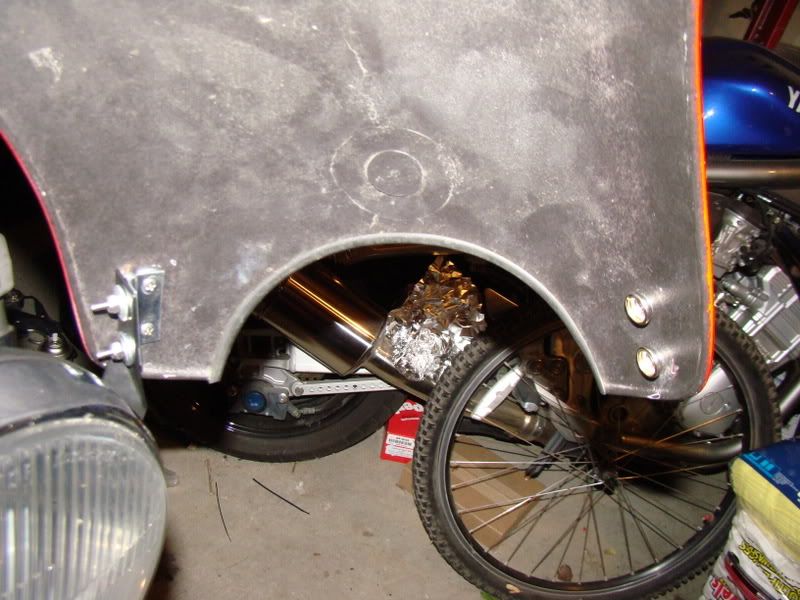
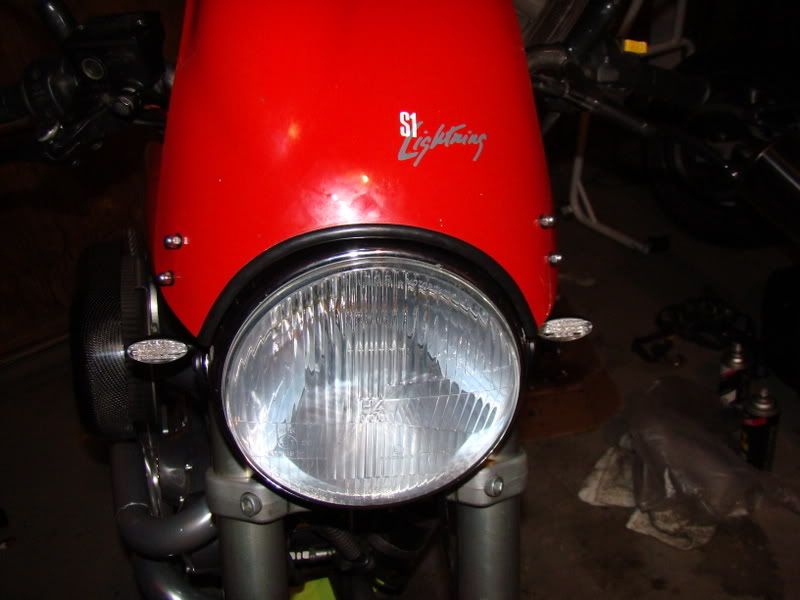
So, evidently Yodude as a company is gone and its successor no longer offers Buell parts, including the flytrap for tubers. For those not familiar, this is just a set of hinges and snaps that allows you to swing your flyscreen out of the way. You can store tools/tire repair kit/beer/whatever in the space between your headlight and the instrument cluster. Since I REALLY want to have a tire repair kit/toolkit on the bike somewhere (a backpack would really bug me, and a small tankbag would kind of ruin the lines of the bike, but I still may get one), I decided to attempt to replicate the flytrap. It only took me 1 trip to the fabric store (for snaps), and 2 trips to Ace Hardware to get the right stuff. Here is a list for anyone wanting to do the same: Heavy duty snaps (check a fabric store - do NOT get the package with the punch and rubber base. You will not need to 'join' the two parts of each male and female ends. You just use 1/2 of the male end and 1/2 of the female end.) 2 x male half of snap 2 x female half of snap 2 x #6 washers 8 x 6/32 - 1/2" machine screws (I think that's what they're called - they are bolts that have the tapered top, which is IMPORTANT) 10 x fender washers (I don't know the exact spec - they are bigger diameter than regular washers, but the hole is the same size as a #6 washer. They're also quite thick. I'll try to swing by Ace and check the exact description.) 4 x 6/32 acorn nuts 4 x 6/32 locknuts 1 x 1.5" hinge (if you're motivated I think you could lengthen the hole(s) on the hinge and mount it at an angle. That way the screen would open with less interference from the instrument cluster) Step one - drill out the center of 2 'half' male snaps (don't use a punch to put the halves together or the heads of the bolts will prevent the snaps from closing), and drill out the center of 2 'half' female snaps with a 9/64 drill bit (I'm pretty sure that's the size I used - whatever barely allows the 6/32 bolts to go through). Step two - install all the hardware according to the diagram I posted. Step three - enjoy a well deserved brewski for a project well done!  I also put some clear tape on the instrument cluster where the flyscreen can rub. If you manage to mount your hinge at an angle you may not have to do this. You can see my new LED turn signals in the picture too.  I'm not a mechanic by any stretch of the imagination, so if someone has a better way to do this then by all means say something! I'm not a mechanic by any stretch of the imagination, so if someone has a better way to do this then by all means say something!     | ||
Crashbuell |
This is exactly why our group is the coolest. No one else does stuff like we do. Kevin, you do fine work my friend. | ||
Rich |
 | ||
Cecil1 |
How ironic I just finally gave up on finding a yodude setup and made my own. I used velcro on the opposite side of the hinge and it seems to be holding up good. I have a gameboy carrier behind the flyscreen to hold registration,insurance card and a few tools. Tim | ||
Reepicheep |
Yeah, it may work, but you miss the installation instructions that came with the original "Fly Trap". They were a hoot! Cool setup, thanks for taking the trouble to post it all. I loved that thing on my M2. | ||
Wile_ecoyote |
Nice job! Have to say, I think I might do mine. | ||
Nocompromise |
Thanks guys! I have received sooooo much good advice and even personal help (Thanks Again Jim!!) from this forum, I'm happy to finally be able to do a little something to help the other members here. Hopefully it will save someone multiple trips to the hardware store and experimenting to find the right combination of parts.  | ||
Tattoodnscrewd |
I dig the idea ... Excellent spot for a toolkit if not using luggage or a backpack .. I would have to find something other than acorn nuts though ... wonder if smoothie bolts/screws could be adopted in this situation .. make for a cleaner look on the front ... | ||
Mikef5000 |
I never knew anything like that existed! And I didn't know that much room was behind that flyscreen! Now I want to do it! Gee, thanks guys. Sheesh. | ||
Ratbuell |
Are the snaps rivet-able to the flyscreen? You can get some pretty nice polished or black anodized rivets these days and have the flush side facing out... | ||
Nocompromise |
Brian, what are smoothie bolts? I agree that the acorn nuts don't look as good as the stock ones, but the storage space is an essential for me. I would like to clean up the look though! Joe, I'm not sure exactly how rivets would fit. I have never used rivets before (except removing the ones on the timing cover). The main problem is that whatever you use to fasten the snaps has to have a very thin head on it. Otherwise it interferes with the male and female ends being able to 'snap' together. Even a button head screw is too thick. I'm all ears for improvement ideas. | ||
Devdawg |
I have a fly trap, I'm not using...A Badwebber was interested but we never followed through....so anybody intersted...let me know | ||
Wardan123 |
Devdawg, I'd love to have it! Andrew | ||
Tattoodnscrewd |
I was thinking something similar to the ones Al sells for footpegs ... http://www.americansportbike.com/shoponline/ccp0-p rodshow/5775.html Someone has to have some that would work in this application ... | ||
Nocompromise |
Quick update - I found lower profile nickel acorn nuts at Lowe's. The ones in the picture are stainless from Ace, and they are about 20-30% taller than the ones from Lowe's. Comparing the acorns with the stock bolts (looking at the other S1 sitting in my garage), they really don't protrude that much more. So far I velcro strapped a tire repair kit in with plenty of room to spare! My Xena disc lock is enroute, and now I just need to build a half-decent tool kit! | ||
Wile_ecoyote |
No C, please let us know how it ends as I am already piecing mine together. Great idea, looked at mine and the only drawback would be that I have a carbon windscreen. Worried about cracking and the like. I suppose it will be reinforced somehow. Gonna see how I can tidy up the wiring back there to get more room also. |