| Author | Message | ||
Aaomy |
hello my bad web brotheren,,, it's time to post again,,,,todays menu is billet clip on for the s2/ my s2t... for the people whom do not have s2's,, the s2 came with 54mm clip on bars. the bar portion is 1" and used the stock harley big twin 95 and earlier controls.. their are two small advantages to these controls. 1 they came with self signal canceling and. 2 if anything goes wrong almost every harley dealership in america has them in stock.. the disadvantage is that some people dont like the diameter of the stock grips.. i will address the grips in latter posts.. this is the stock s2t set up. 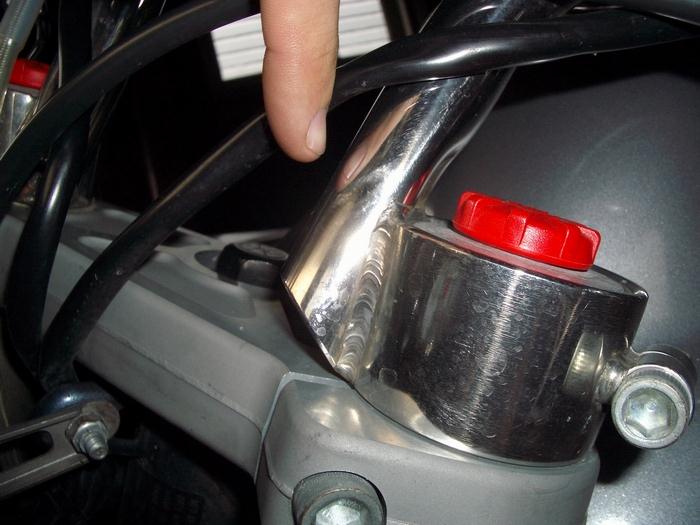 ok so these pictures show you the stock clip ons and mounting. the 1" hollow bar in my mind makes a great amplifier for the vibs created by these bikes.. and ok,,ok ,, the mirrors and fairing arnt stock s2 stuff 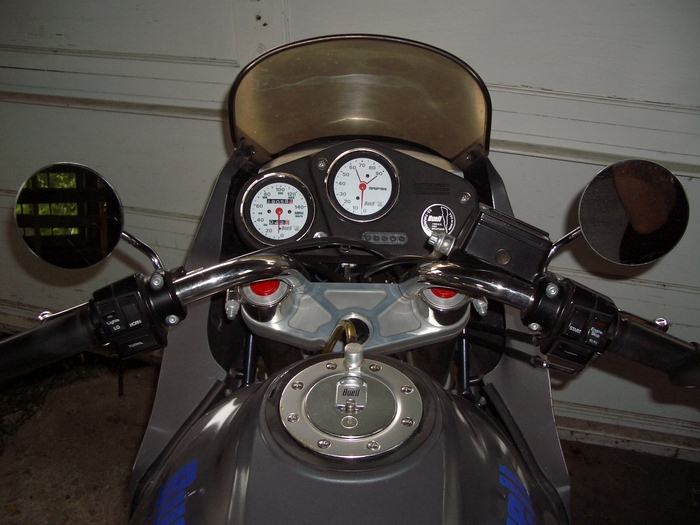 | ||
Aaomy |
so here is the starting point for my project.. 6061 billet al,, 3" round stock.. a quick pass to make sure she is round and then let the fun begin!!! 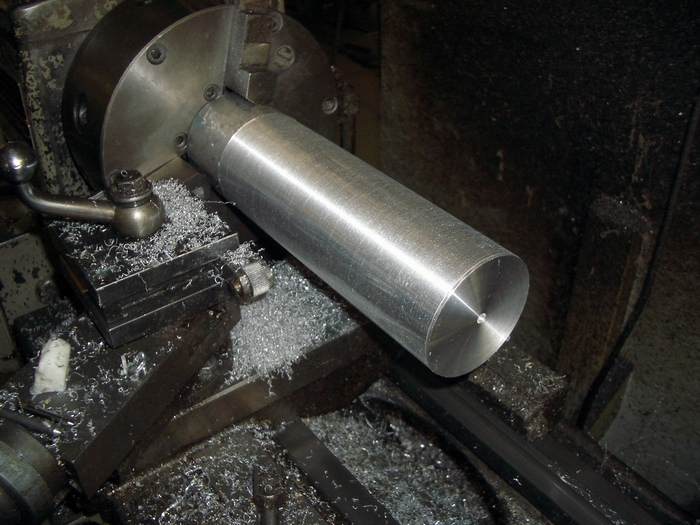 after cutting the material to length, then you clean up the ends. 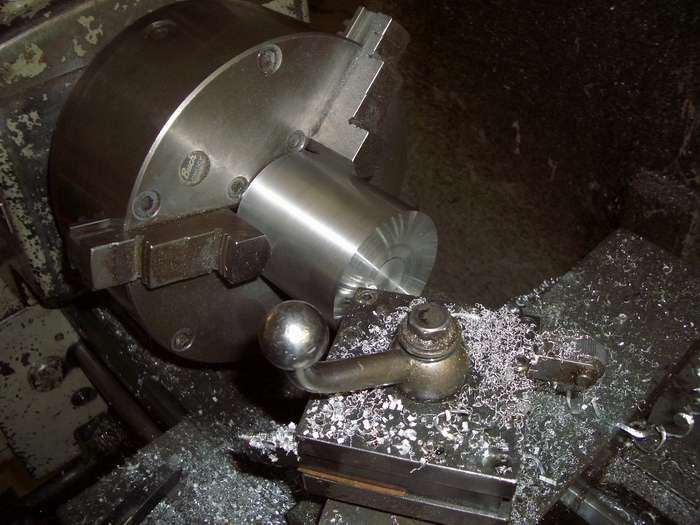 when your done you should have two beautiful billet slugs to start from!! 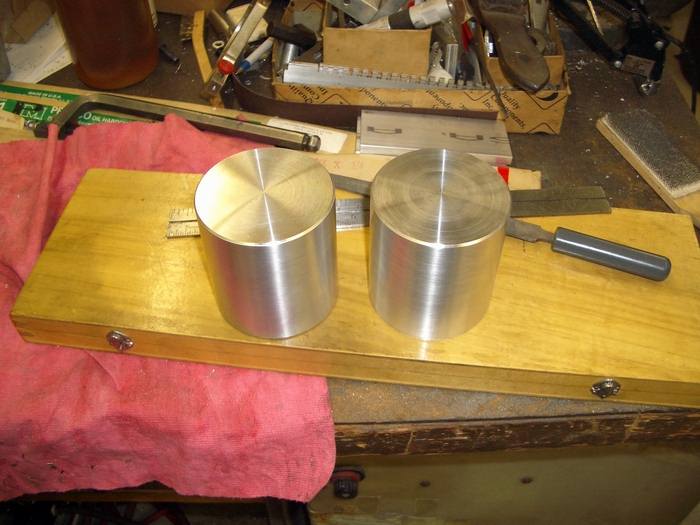 | ||
Aaomy |
at this point we head to the mill..here we are putting flats on the sides of the clip ons trimming a little fat and making a beautiful place to hold them by. 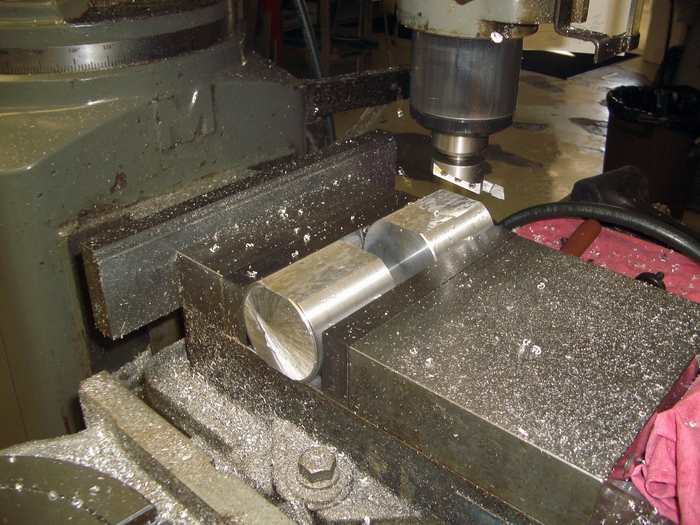 after cutting a flat on each side we stand them up to trim them both to the same length 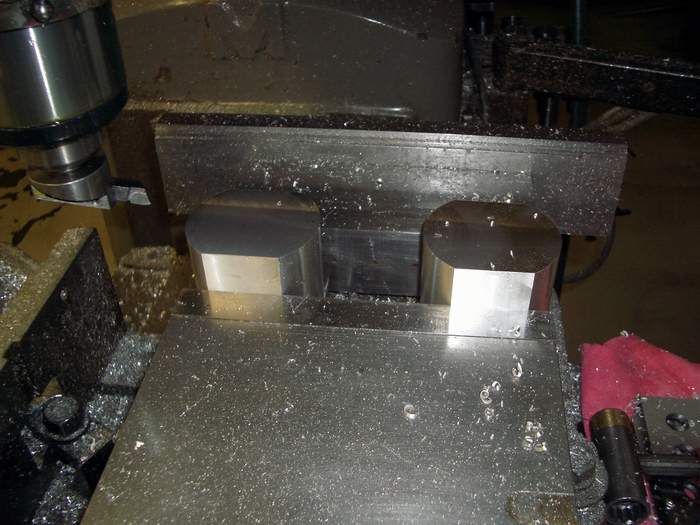 apparently by we i mean me and the voice in my head,, humm used to get away by saying me and igor,, no igor and i still say we... oh well.. we dont mind!!! gotta go for now.. will keep posting till i get it all in,, just takes a while,, latter! | ||
Johnnylunchbox |
can't wait to see what you come up with | ||
Seth |
I'm proud if I drill a hole in something strait  ... ... ...you, my friend, are a freakin' artist!  | ||
Tsispyder |
becuase lal of us have CNC lathes and shit lol good idea can;t wait to see it! | ||
Aaomy |
thanks guys,, so now with them blanked out i start to create the pocket that will actually clip on the top of the fork.. personally i like the way my bike handles with some one on the back. at times i wished my bike had a little more trail. so i decided to leave room so that i could raise my triple clamp up an extra 1/4 of an inch. this way if i wanted to play with the bikes geometry a little i had some free space to play with. "this is just a personal thing" ok so here i start to create the pocket. 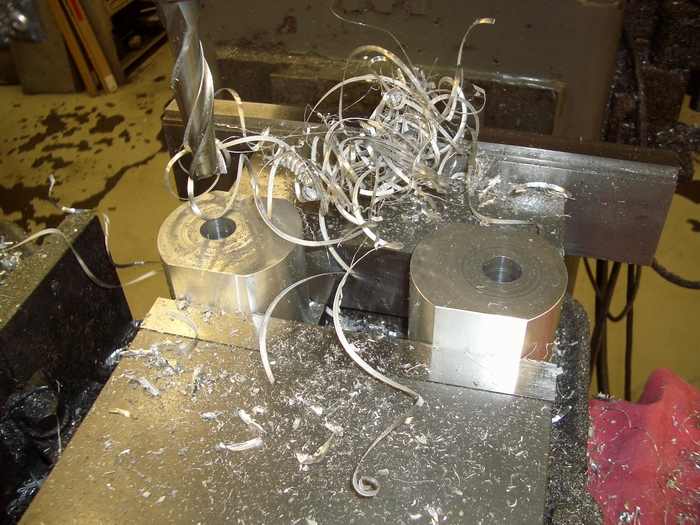 dont forget the rebound dampening adjustment knob on the top of the forks. you have to make a small pocket at the top of the fork pocket for this. 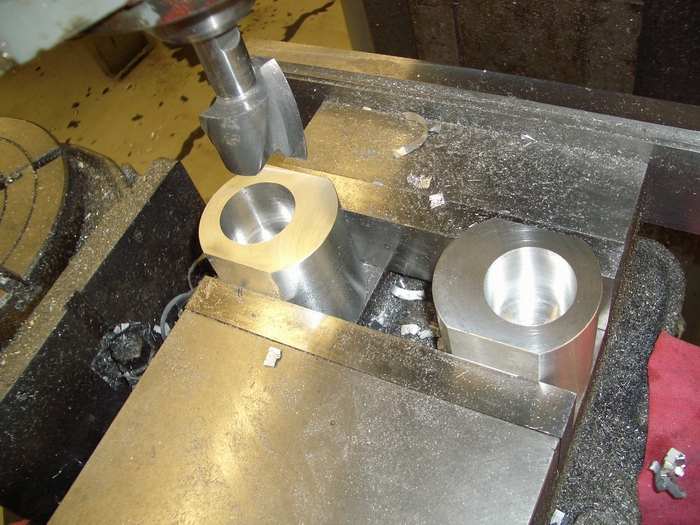 here i am just roughing out the pocket. trying to get it as close to the size a possible with out going over., 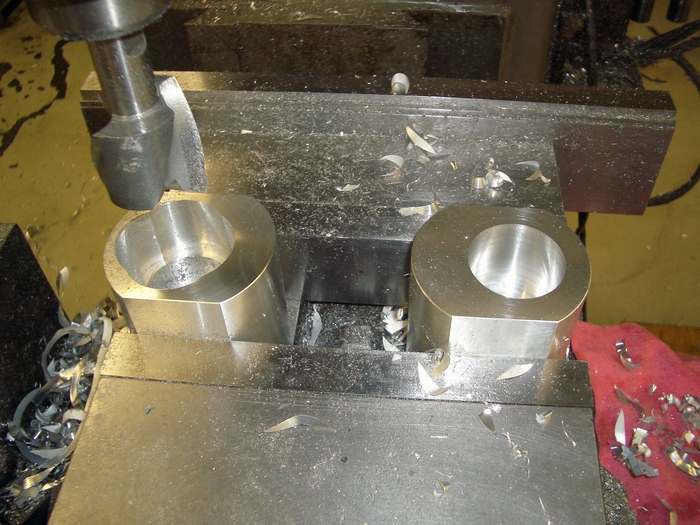 and then come the boring part!! no pun intended,, well, some pun intended now i bore the pocket to the proper size.  in the bottom you can see the pocket for the rebound adjustment knob | ||
Aaomy |
ok now that we have the pocket that will clip on the tops of the forks, now we will start on the hole for the bars. like i said before the s2 takes a 1" bar. 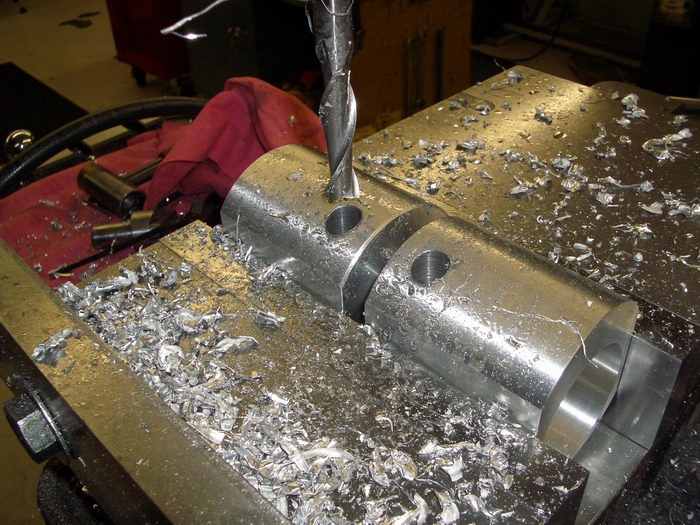 once again i start small and then open the hole up to the proper size 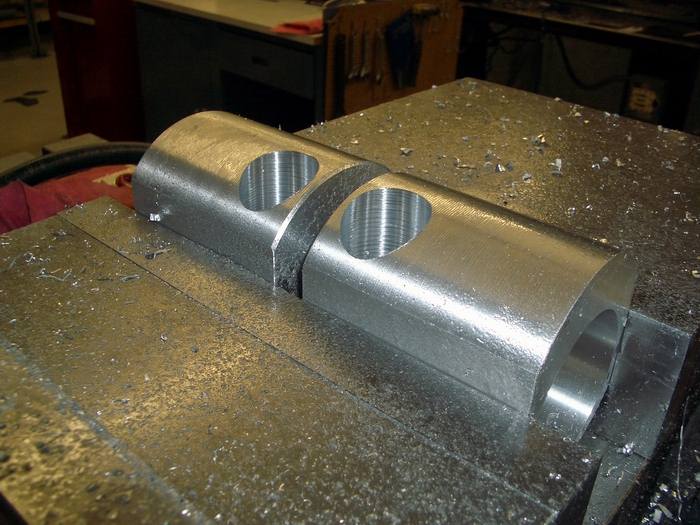 so now you should have two much light billet blocks with a pocket for the tops of the forks and a hole for the bar. 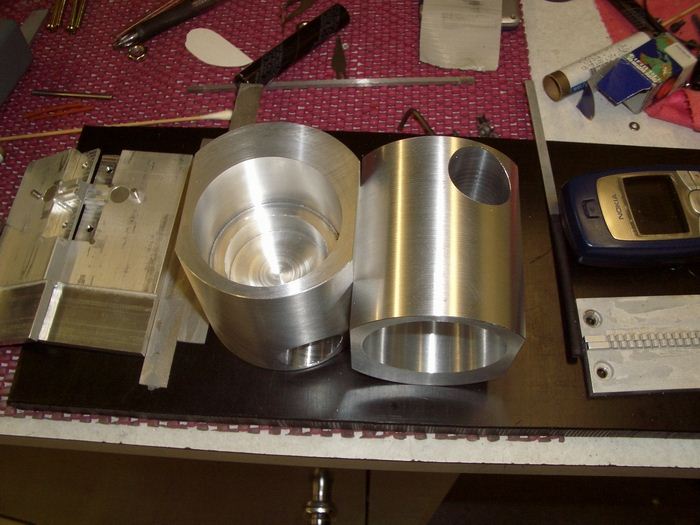 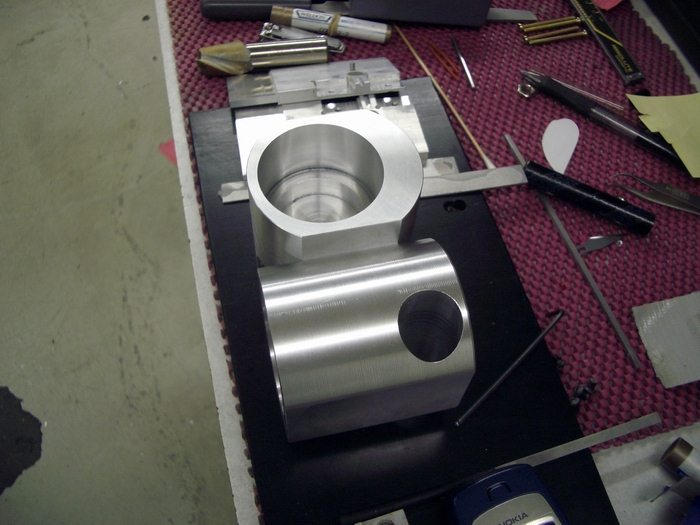 | ||
Aaomy |
sorry for the delay in posting.. blew brake lines on the cager.. and have several other projects going on at the same time.. race header, rear brake, and adjustable levers,along with about 6 other bike projects, also with life stuff, relationship stuff, grandfather in hospital " out now,stroke",and buying more property as rentals.. please bear with me, will finish posting the project pictures as soon as possible,, thanks for the understanding, aaron | ||
Tom_b |
Just buy a set of these 52mm billet end clip ons http://cgi.ebay.com/ebaymotors/zx9r-tz250-superbike-clipons-clip-on-handlebars-5 2mm_W0QQitemZ4639045285QQcategoryZ35587QQrdZ1QQcmdZViewItem | ||
Jersey_thunder |
Just buy a set of these 52mm billet end clip ons..... JUST PAINT THE "MONA LISA"...JUST PAINT THE CEILING OF THE "The Sisteen Chappel" Aaomy is a true artist...you just don't buy his mind, his vision...GEEZ JT | ||
Tom_b |
Whatever Jersey,GEEZ! we all don't have a mill and lathe in our shop. Not bagging on aaron or his ability. Just a suggestion for those who don't have his ability or can afford a custom made set. From what I've seen aaron is very talented and I look forward to seeing the finished product. | ||
Firemanjim |
Except those clip-ons are meant to go under the triple clamp for a "racing" stance where an S-2's bars sit above the triple and Aaron is trying to improve on the position of these. Probably run into interference with the front fairing and the gas tank as I know even with the S-1 tank on my Bonneville bike the bars hit one or the other. And is 52mm the correct size?Does not sound right---just re-read the first post and saw I was correct.S-2 takes a 54mm clip-on. (Message edited by firemanjim on May 13, 2006) | ||
Tom_b |
I understand Jim what aaron is trying to do. My bad on the sizing, these will work on a non fairing bike if you drop the front down about 1" thru the trees and clamp on top. On an s-2 you clamp them on top similar to how the ones aaron has pictured. By the way. Saw your bike on the Lake Gairdner speed week site. How did you do? I may have missed a post or two about your trip. Like I said, Not bagging on aaron or his talent. (Message edited by Tom_B on May 13, 2006) | ||
Firemanjim |
Bettered my old mark,but was way off expectations as I burnt a valve before the timing lites and basically coasted through.Will be fixed soon and backm at it.The whole thing is over on Team Elves site. | ||
Jersey_thunder |
Tom_b, we all don't have a mill and lathe in our shop.... LMAO...I HERE YA BROTHER..JUST PLAYING..  | ||
Aaomy |
wow,, did i miss some posting.. sorry guys life was a little crazy.. ok so heres some info for you guys,, you need 54mm clipons.. to use the stock controls on a s2 you need 1" bars.. most clip ons are 7/8" bars.. you can get around this by having some one turn the ends of 1" bars down to 7/8". then next thing is that the harley bars have dimples for the wires to pass threw.. if you were to clamp you controls on a smooth 1" bar you would cut your wires!!! bad mojo! so you have to cut a "wire grove in the bars.. all the clip ons i have seen have pretty much been straight tubes.. no wire dimples.. if some one want to simply purchase the clipons... i will gladly help in making them fit your bike,, just drop me a line... here is another little bit of info.. i make my parts because 1 usually no one makes them 2 if they make them i can afford them 3 or i make them better.. combine two thoughts instead of just one into my design. thust see #1 i invent and make machines all day for a living.. and where i work i am probably severly under payed..most of you would probably laugh if i said what i actually make.. so if i want cool toys for my bike.. i make them... when i post them here its just for other peoples enjoyment.. another aaron used to post here long ago,, and his post are still dearly missed.. just trying to help out my "band of brothers" and keep badweb a great, educational, and entertaining place to visit... | ||
Aaomy |
ok so now back to the project.. now that i have the basic shape milled out. its time to start throwing in a couple screw holes.. 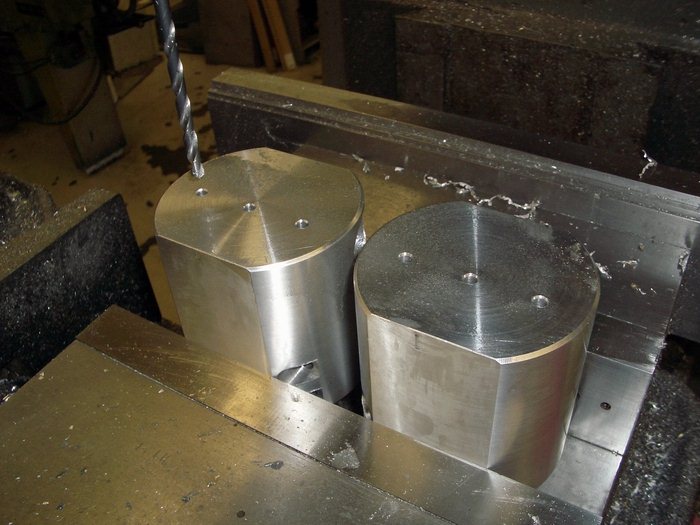 after drilling the tap hole then clearencing the tops and counter boring for the socket head cap screw heads i remove some more "dead weight". 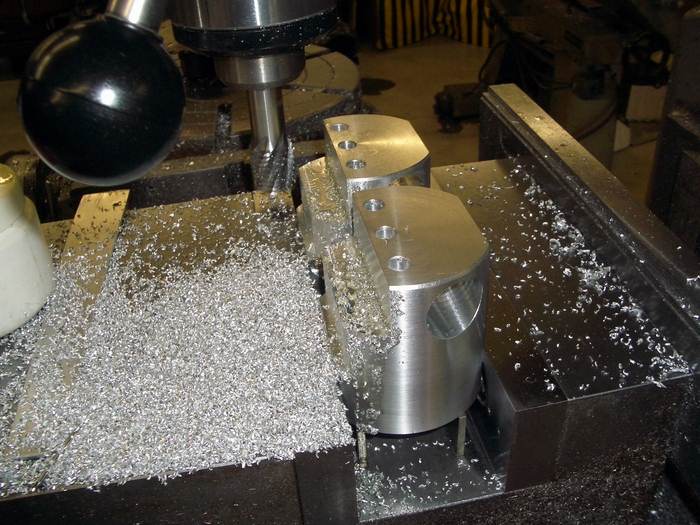 this is what they look like after a little dressing up.. now you can see the adjustment point for you rebound dampening knobs.. 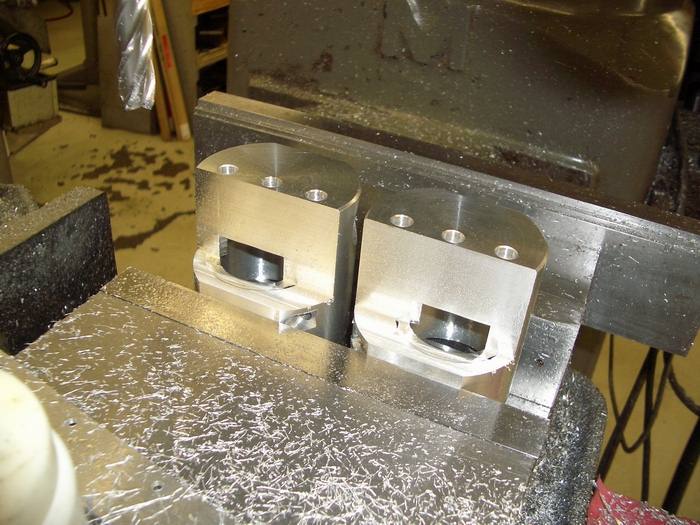 | ||
Aaomy |
now we put in a 45 degree cutter to dress up the top of the clamp a little. 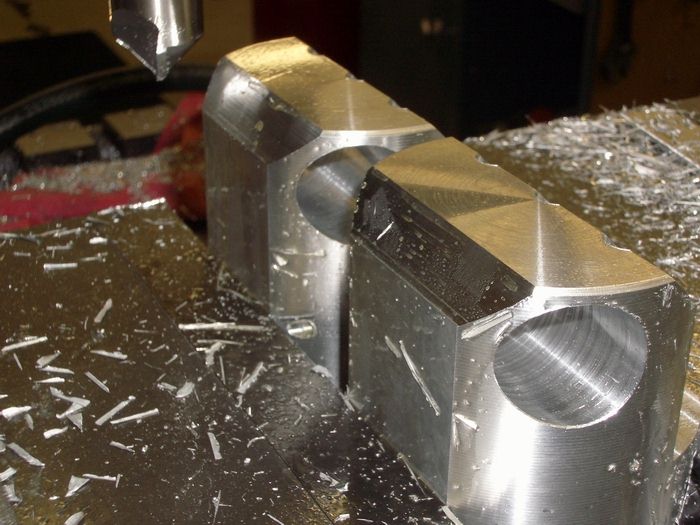 and then 45 the other side a little too. 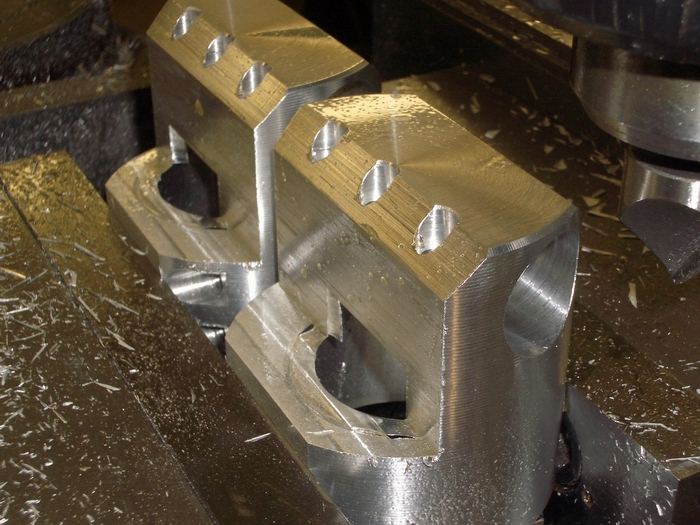 next we throw in the slotting saw and cut a grove so that the top will flex and clamp on the bars.. 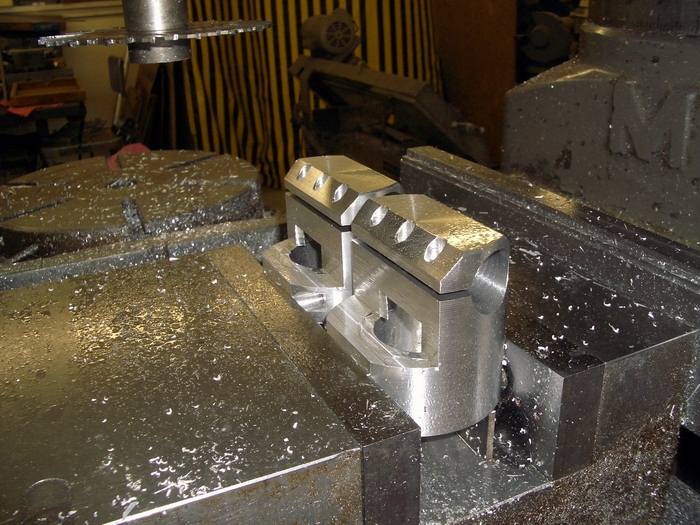 | ||
Aaomy |
now you throw in a couple more slots to allow the the lower parts of the clamps to close properly. 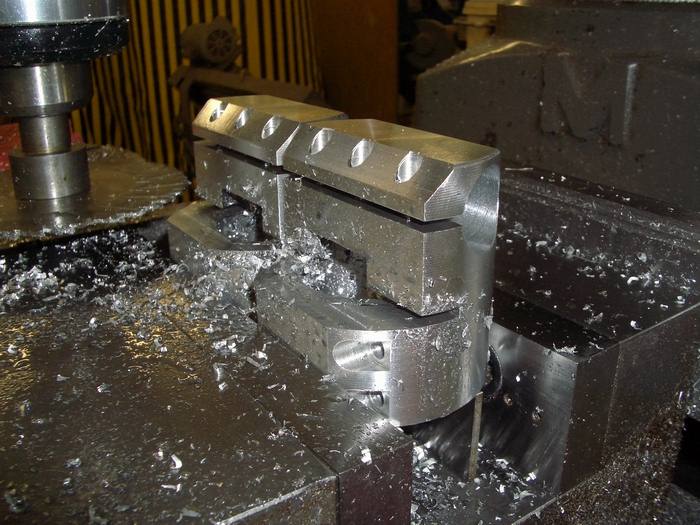 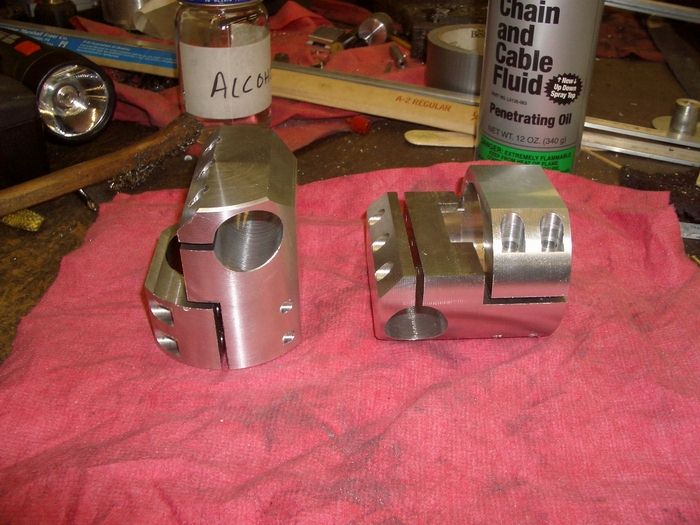 voila,,, a little deburring and they will be ready for the bike... 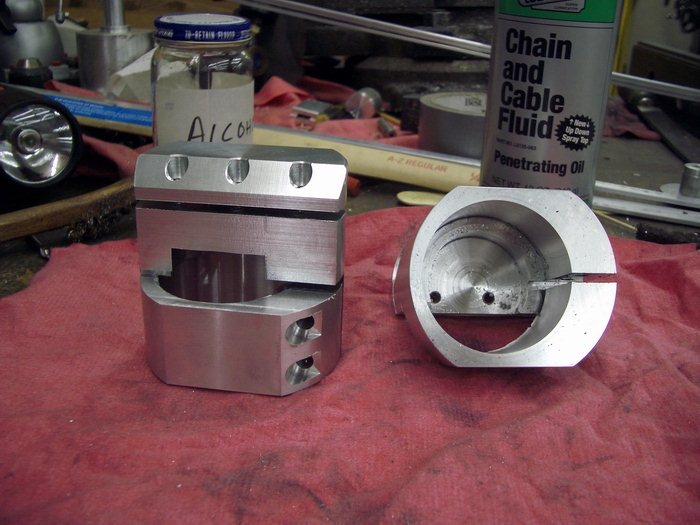 | ||
Aaomy |
ok,, so now the clamps are done we need bars.. 1" 6061 al,,, solid.. i will explain latter.. cut the ends a little for decoration 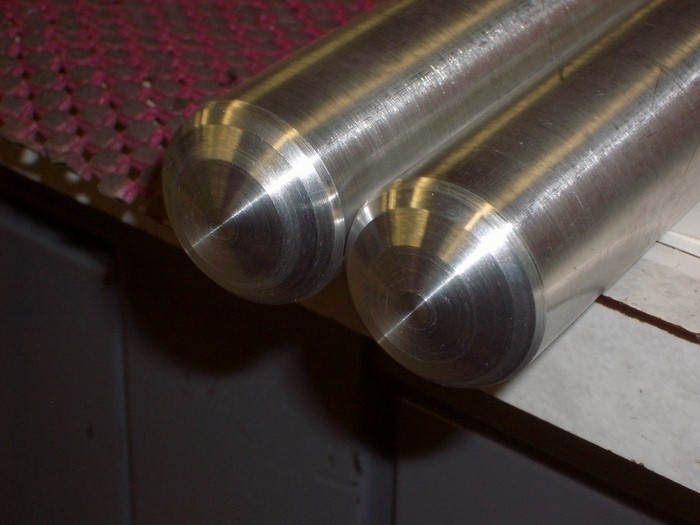 and here you can see the necessary wire dimples..  | ||
Essthreetee |
GEEESH....  It is stuff like this that REALLY makes me wish I was talented at something...Great Job Aaron. | ||
Aaomy |
ok so heres the end results.. 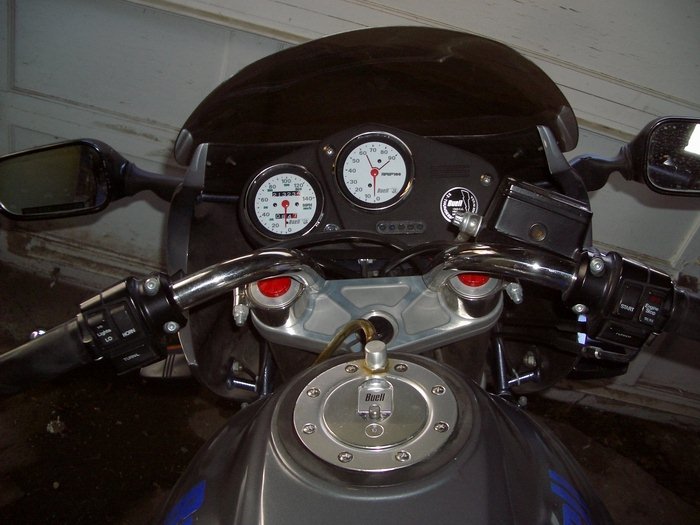 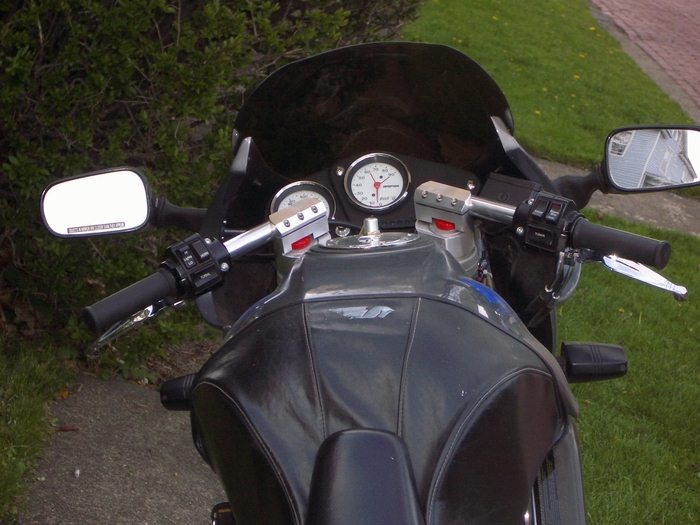 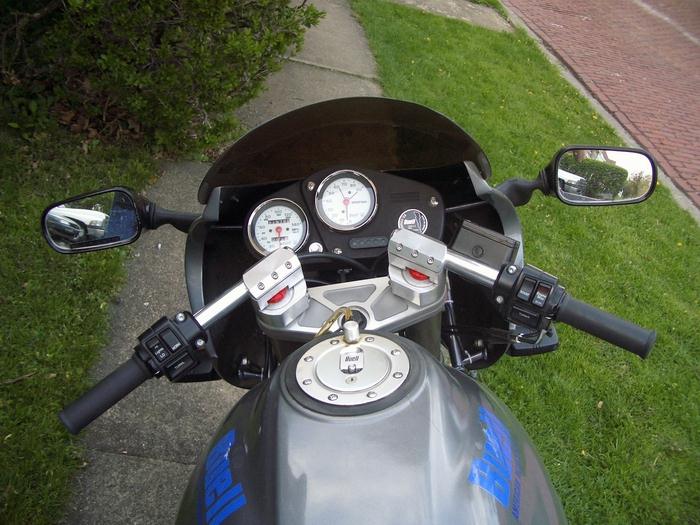 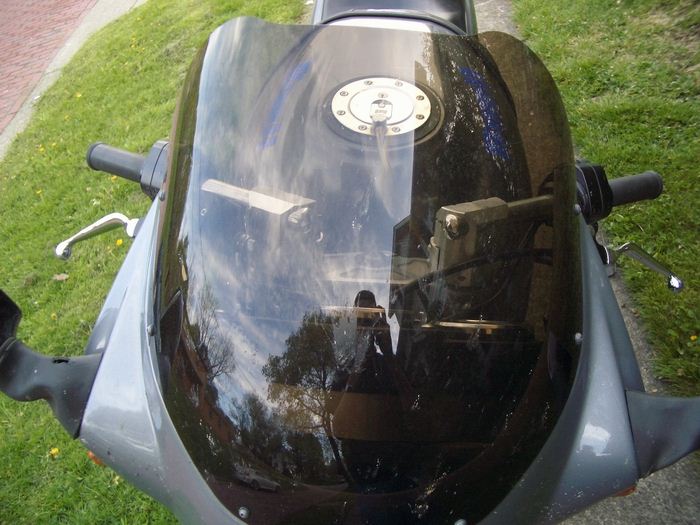 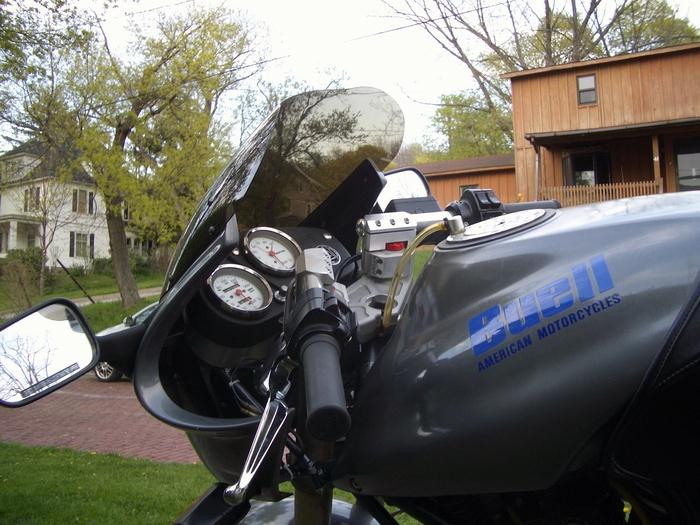 they started gettin designed for a non s2 front fairing.. then i finally broke down and had to get the right one.. i kept the 1" bars solid and made the clip ons extra beefy to help get ride of some of the vibes.. lets just say,, they work beautifully.. and the position is probably some what like a s2 but with a little greater leverage. its just a hair lower that my s2t bars.. probably its a cross between the two..mounted the way you see them on the bike their.. there is no contact between any parts . not tank or fairing. well,, gotta go guys.. its mothers day and we all gotta pay our due's | ||
Oldog |
As usual beautimus!  thanks for sharing... | ||
Marijane0569 |
SWEET. Aaomy There is nothing better than to custom fab something for your own use. Especially when it turns out looking and working so perfectly. Thank you for taking the time to allow us to follow this project through to completion, even if it only in pics. Thanks "MJ" | ||
Road_thing |
Gorgeous, Aaron, just gorgeous! A question: 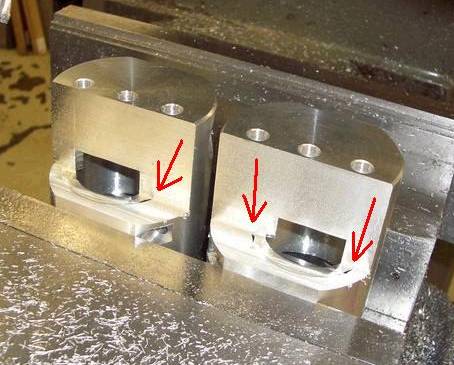 What are those little gaps at the ends of the red arrows? Is there a sleeve inside the mounting block, or is that just the edge of a cut you took in there? rt | ||
Djkaplan |
Holy crap... that turned out pretty darned good. Did you design it on CAD first? That's pretty inspired, dude. | ||
Eboos |
That is awesome. | ||
Firemanjim |
Now you just need to make them adjustable in multiple axis.  | ||
Aaomy |
thanks guys for all your approval.. road thing.. that is just a paper thin layer of al that flows down into the unsupported area under it as the cutter passes.. no sleeve. it has extra support at those locations so it cuts the al away there. creating the "holes" that you pointed out. just touch it with you finger and a probably .002 thick layer of al peals out.. djkaplan.. yeah some of the things i design in cad first.. others i just take measurements to memory and machine away.. the majority of those were done in cad to begin with.. fireman.. multi axis,, yeah i thought about that. i think henrik set me a picture of some with rotation collets. i liked that idea.. but the more joints and connections.. more vibes.. these babys are rock solid when mounted and greatly reduced my vibes over the stock s2t controls.. besides when you make them for your self you dont need as many adjustments as when you are trying to accommodate thousands of different riders.. |