| Author | Message | ||
Oldog |
First a disclaimer I am not a professional motorcycle mechanic: I am doing an exhaustive maintenence [ IRAN ] on the bike this year, this is information on the steering head bearings and tripple clamps. a couple of points 1. The FSM says to remove the head lock ( I did not have to, I did loosen it.) 2. Read the procedure in the FSM watch the heating, My shaft moved in the clamp 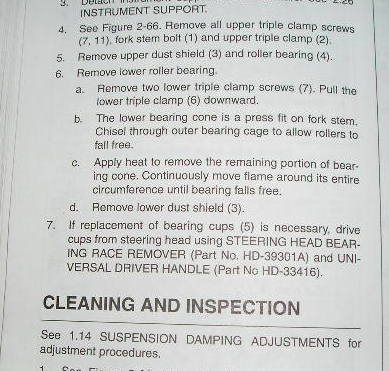 3.you need to get a chisel to cut the cage and remove the rollers, the lower bearing race is pressed on to the stem, to remove it you must cut the cage and remove it and the rollers, then you must heat the inner race and it "should" fall off I did not have that experience I heated it with a mapp gas torch(souped up propane) and had to drive it off, in doing so I moved the aluminum lower tree on the steel stem, I heated the lower clamp and tapped the pin back into the tree to the shoulder. I hope that this is right because I dont see any other way unless you can control the heat better, the step in the shaft is a locking shoulder 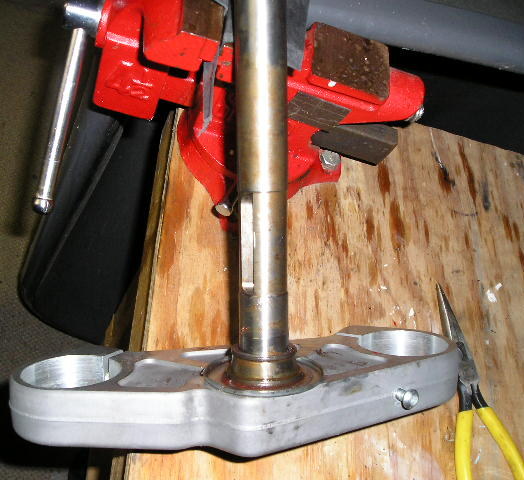 tree with lower race(inner after removing rollers) | ||
Oldog |
Driving the lower race off, I placed the assm in the vice with soft jaws on it in the inverted position and heated the race until blue began to appear on the race (~600F in those blue spots) tried pliers no good, removed the inserts and clamped to the Hot bearing race, I then placed the top bolt in the stem and smacked it. hitting the bolt prevents damage to the stem, don't hit the stem! with any thing at the tapped end!. Both the race and the tree bottom moved on the shaft, When you do this make some sort of reference to check the lock shoulder position and use the bolt and a dead blow hammer or an aluminum block (I don't have one that I can beat on)to prevent marring the bolt head I will file any burrs off and paint it black as it was. 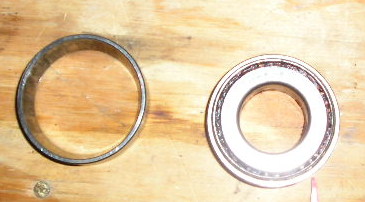 The bearing Outer races were rough to the touch in places especialy the bottom the required interval is 10K miles to relube you would not have to remove what I have done here to drop the tree and re grease & inspect. This has ~ 14K on it but I would not swear that you could get 20K 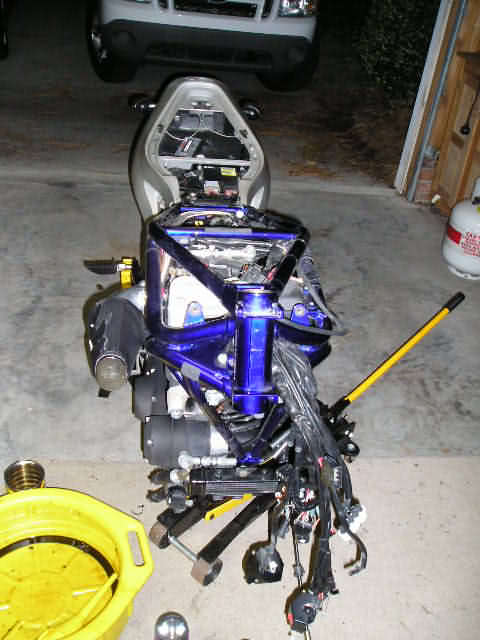 I ride in the rain from time to time there was lots of sand in the LOWER "dust cap" and it was working on the bearing The head bearings were timkin L4464 I dont wheelie the bike much and the races were dogeared, there was enough grease but there was dirt in it, for those who would place a zerk in the head, It will not work for regreasing with out a number of other items, MY '01 -X1 head pipe is open to the other frame tubes so a zerk will jsut allow you to grease the frame tubes from the inside. A good dust seal would be a plus the sheet metal things are almost useless ################################################# From Else Where in the KV inner #L44643 and race #L44610. ################################################# Pluses were how easy some of these items came apart, tomorrow fork oil change and new bearings for the head (Message edited by oldog on October 26, 2005) (Message edited by oldog on October 26, 2005) | ||
Oldog |
Day 2 Fork Oil Change & Re assembley For the life of me I don't know why the FSM has you disassembling the fork for oil change. There have been no seal leakage issues or any other for that matter So I opeted for Oil change only, the FSM is not clear in some respects I had the legs out of the tree, IF I had thought it through I would have loosened the top nut then removed the legs} 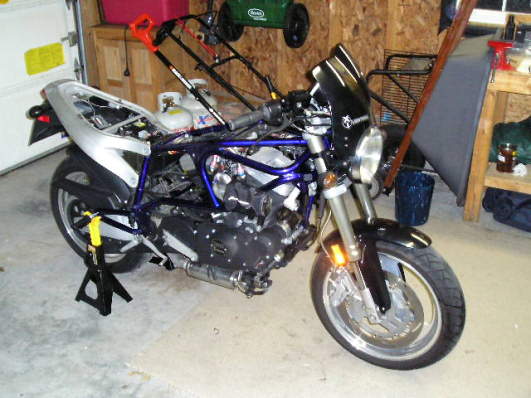 1.with the trees apart use one or the other as a holder for the leg top loosen the top nut & unscrew it from the upper tube, clamp the bottom in a vice, soft jaws work well here.( I used gasket paper [heavy weight] ) 2. then using an end wrench & socket remove the top nut from the damper rod assm, the damper rod tip (visible in top nut, Blue?) is the part you hold with the wrench not the lower be careful these parts are aluminum dropping them may ruin them, I don't recomend using cresent wrenches here either.  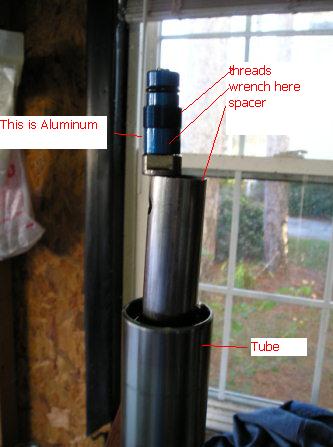 pour out the old oil I was supprised the oil in the front end looked like straight hydraulic oil no dirt. Be sure to "pump" the damper untill all of the oil is out of them Here the FSM is Clear and accurate as posted else where the fork took about 13 oz, the whizzie oil level tool would make this a snap, 3. If you dont have the cool spring compressor you may be able to pull down on the spacer and remove the keeper, not bad to do with stock springs. 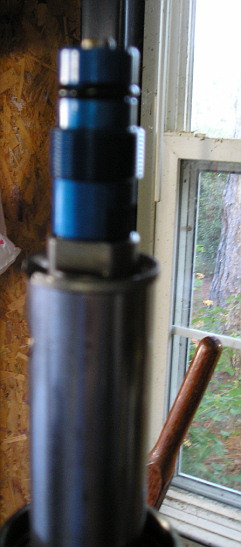 catch the spacer under the damper and then push the clip under it to re assemble these, I believe that the XB bikes have preload adjustments built into their top nuts so their procedure is different. while I had it apart I checked the spring length I could not tell the ends apart, so I kept WEU straight I checked free length too. (Message edited by oldog on October 27, 2005) | ||
Oldog |
New bearings for the head I drove the old "cups" out of the frame and the inner race (cone) from the stem yesterday. I got some washers thread rod nuts and a 1' length of 1" pipe it just fits over the stem and fits nicely on the cone for the bottom 1. I took a hard wood block and drove the top cup in flush, then with the "rig" and an old cup that I ground down. I seated the top cup. The bottom is done the same way, I took and placed a thin film of anti seize on the outside of the cups, and checked the inside with a mirror to be sure that they were fully seated. 2.I placed the lower tree on the floor, packed both cones with grease and fitted the bottom bearing by driving it the last 1" or so to seat using a driver that bears against the race, Remember to PUT the Dust shield on Before you install the bearing, the tightening and check sequence is like the tight spot on the primary chain thing its a judgement call fully assembled with a scale no more than 5 lbs to trun the front wheel, 3.I assembled the trees and legs tightening only the bottom bolts. I then tightened the top bolt to load the bearing until I felt increased resistance to turning, I then releived the tension SLIGHTLY and re checked it when I was comfrotable I locked the top clamp set down, all pinch bolts are to be ANTI SIEZE-ED the wires and cables were tied up out of the way, this is NOT how it is specified to be done I am comfortable that the bearings are not loose but are not overly tight, I sympathise with the engineers here How could you describe this feel? | ||
Oldog |
Some final thoughts doing this the "hard way" has forced me to take time to examine many other parts, interesting the clutch lever is bushed! I have never removed either of the PM wheels. I was suprised How light they were!, I have spotted a couple of other items look for a topic about them soon. | ||
Bookyoh |
Thanks for the detailed post Oldog. I serviced the steering head and fork oil on my 2000 M2 at 11,000 miles and will need to do it again early in 2006 (now have 20,000 on the bike), For that first service I took off the forks and triple clamps as Oldog had. Fortunately, my bearings and races were good and just needed new grease. I am looking for some feedback on my plan for the 20,000 mile service. Here is what I propose: 1. support the rear and jack up under the front shock mount. 2. remove the front wheel to make it lighter and I need it off for the final bearing preload adjustment check anyway. Support under the forks. 3. take off the speedo bracket and handlebar clamp. 4. remove the top triple clamp and bearing. 5. jack up the front or lower the forks enough to expose the lower bearing and inner race. 6. clean the lower bearing and race with brake cleaner. 7. if both bearings and races look good, then grease them and put it all back together again. As long as my bearings and races are in good condition, it seems like this should work and greatly reduce the amount of disassembly. Any thoughts??? Thanks, Mark Cincinnati, OH | ||
Oldog |
you have to rmove the assembley to inspect the lower cup any way, removing the lower bearing is going to take removing the legs from the trees its just 2 more bolts and they are out of your way 1. remove the shock and lift under the engine 6/7 removing the grease in place may be a bit messy, If you have not done it check the arm bearings too they will need attention. (Message edited by oldog on November 30, 2005) | ||
Lake_bueller |
I've been busting my Azz for the past week trying to get the lower bearing cone out. I've heated, pounded, cursed and otherwise. It's still not budging. Are there any other suggestions/recommendations? |