| Author | Message | ||
651lance |
Every time I take a top end off an Buell or Evo motor I install pig tails on the bottom of the cylinders. I talked about them a few times when some has their top end off so this time I have the old S2 top end off so I thought I would take a few pictures of what they look like and how they install. 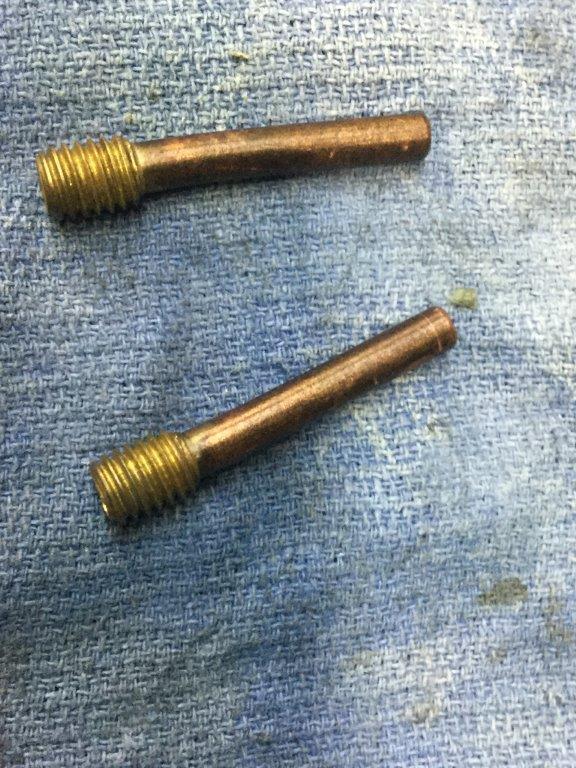 This is what the pig tails look like. 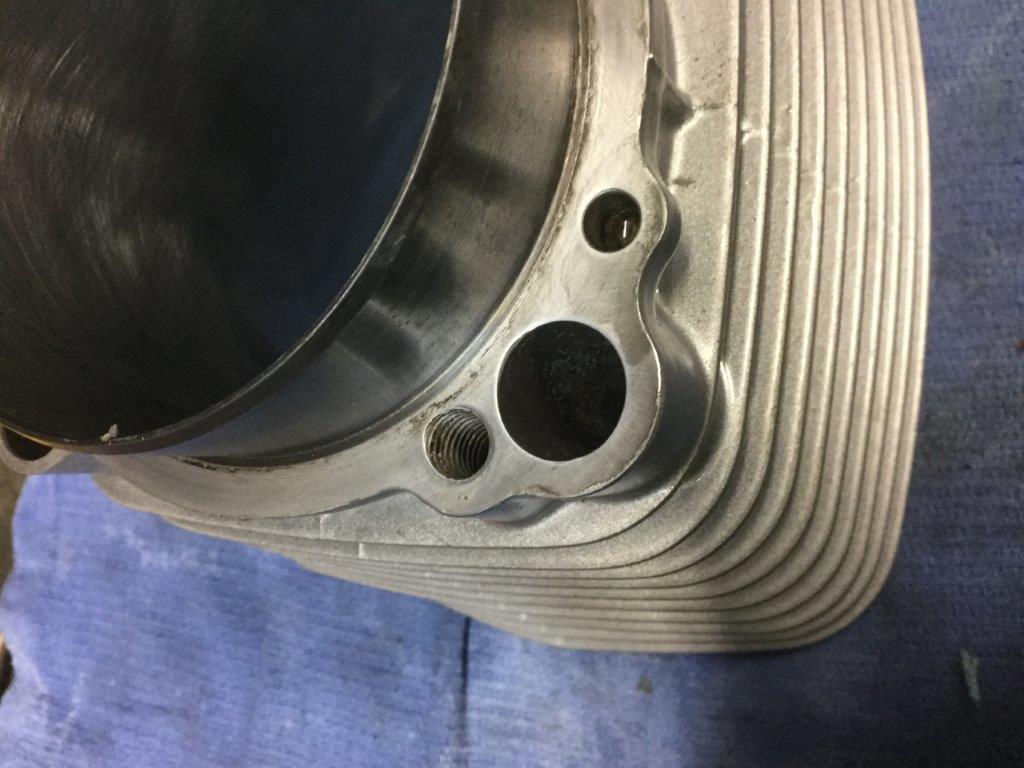 You will have to tap threads into the oil return port on the bottom of your cylinders. Make sure your gasket surface it clean and all the old gasket is removed. Make sure you clean up the cylinders extremely well and re-oil the cylinders after cleaning. 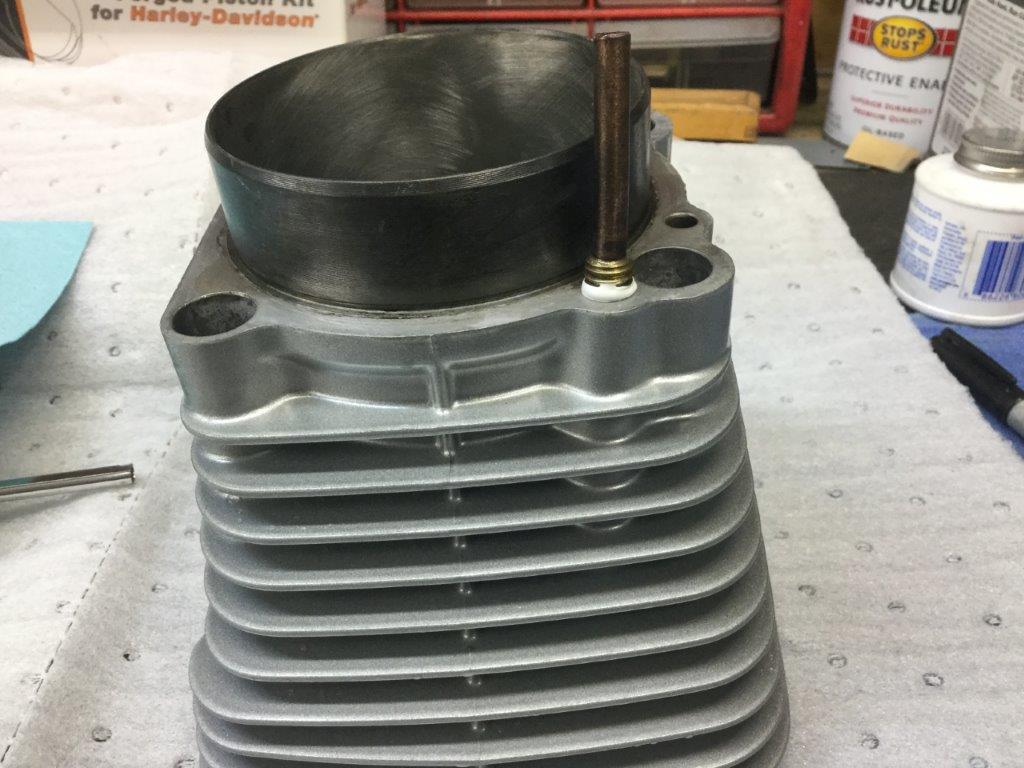 The oil return port is is at an angle. The tubes fix flex a little when installing to fit into the cases. 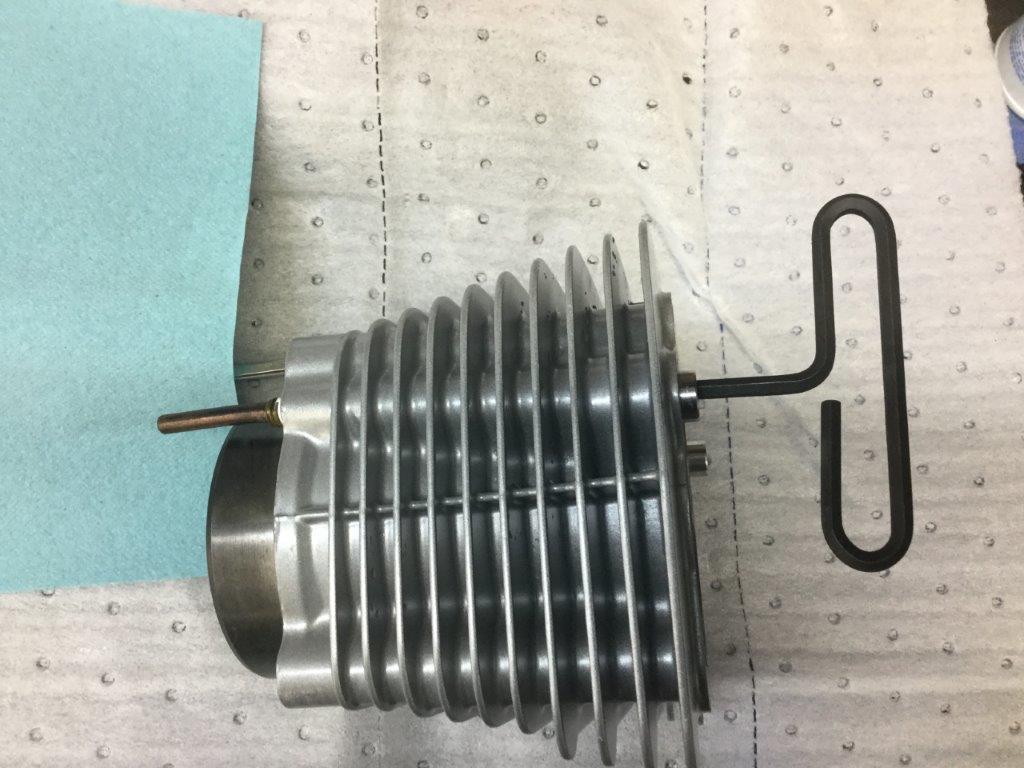 You'll need a vary long allen wrench to go from the top of the drain port and back the pig tails in. I put a little PTS on the threads to prevent oil from seeping pass. 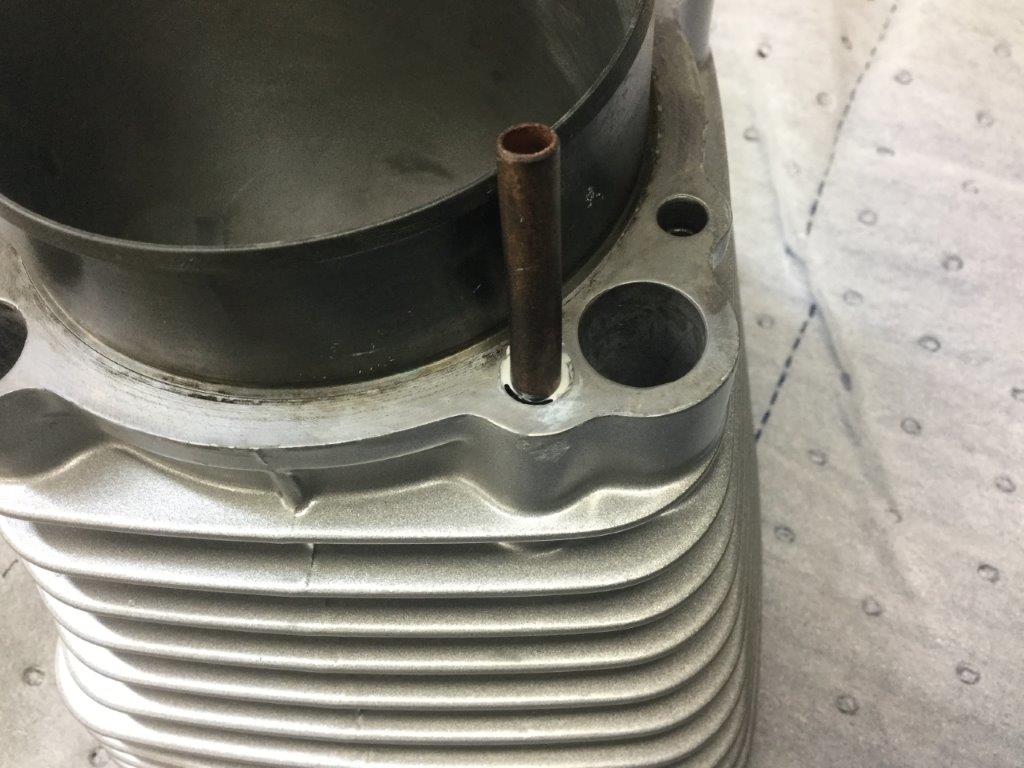 Ready for the piston to be installed. 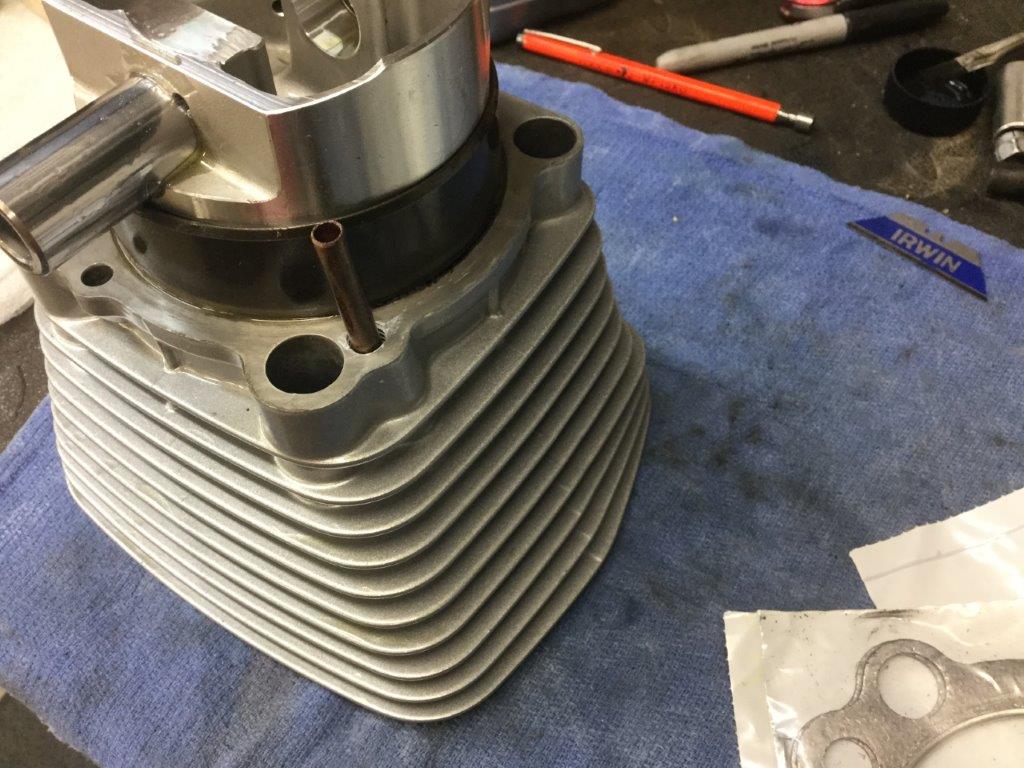 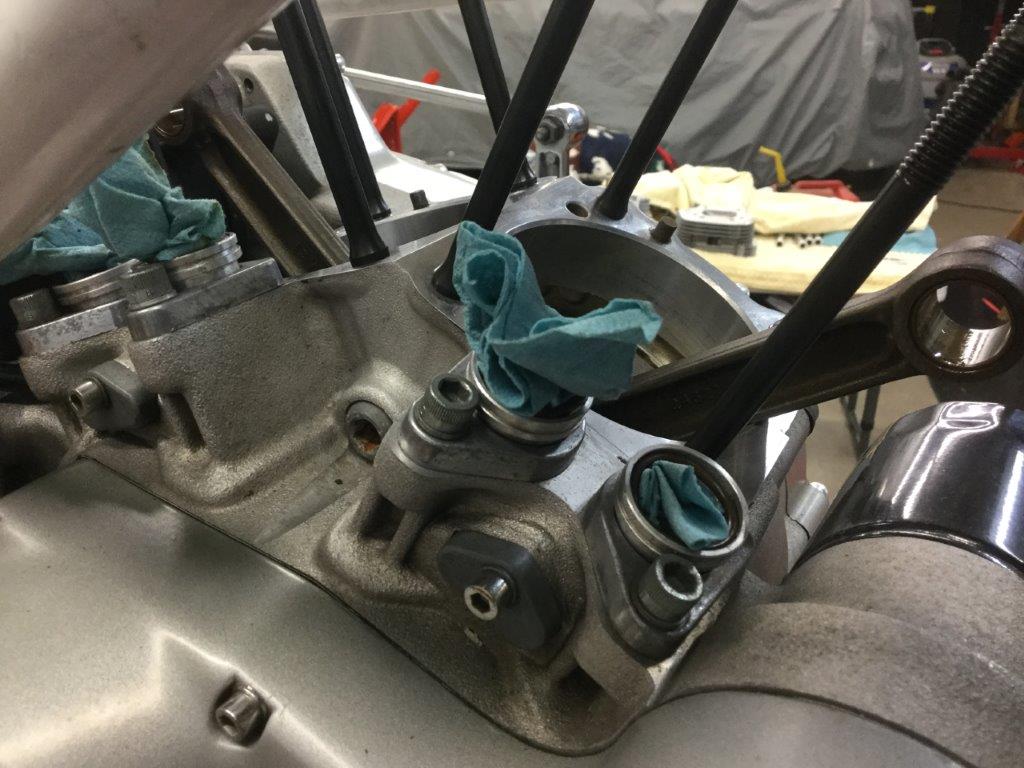 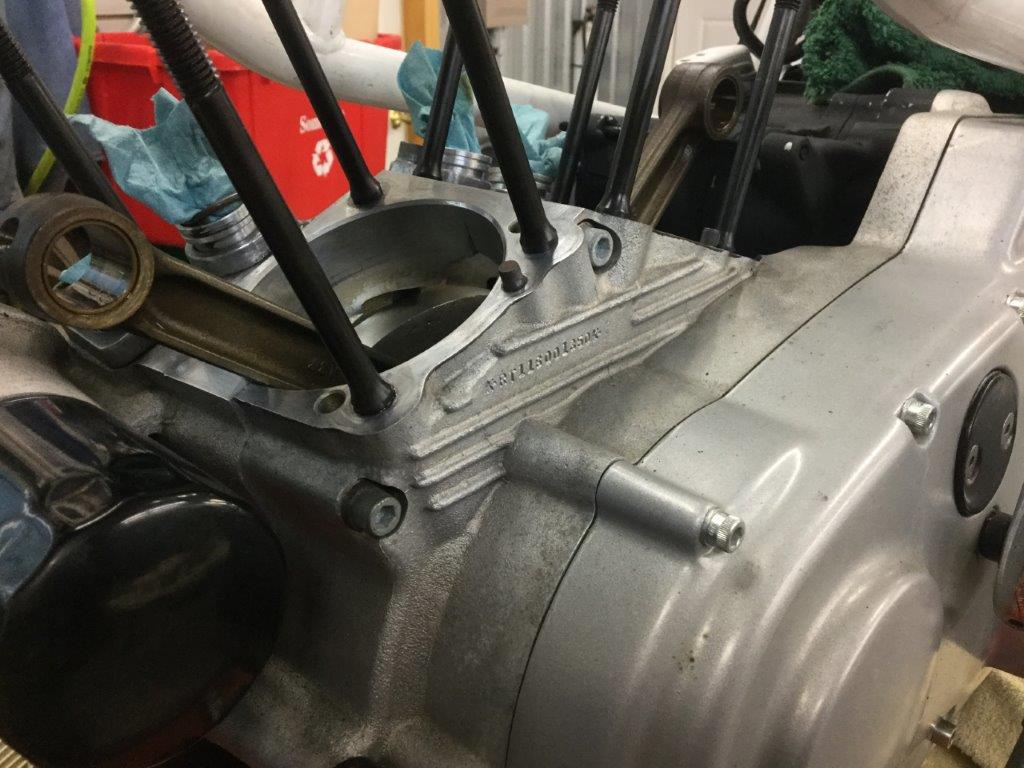 Make sure you base surface is clean. At this time I installed new ARP cylinder studs. keep your spigot opening sealed off with clean rag to keep scrap from falling in. 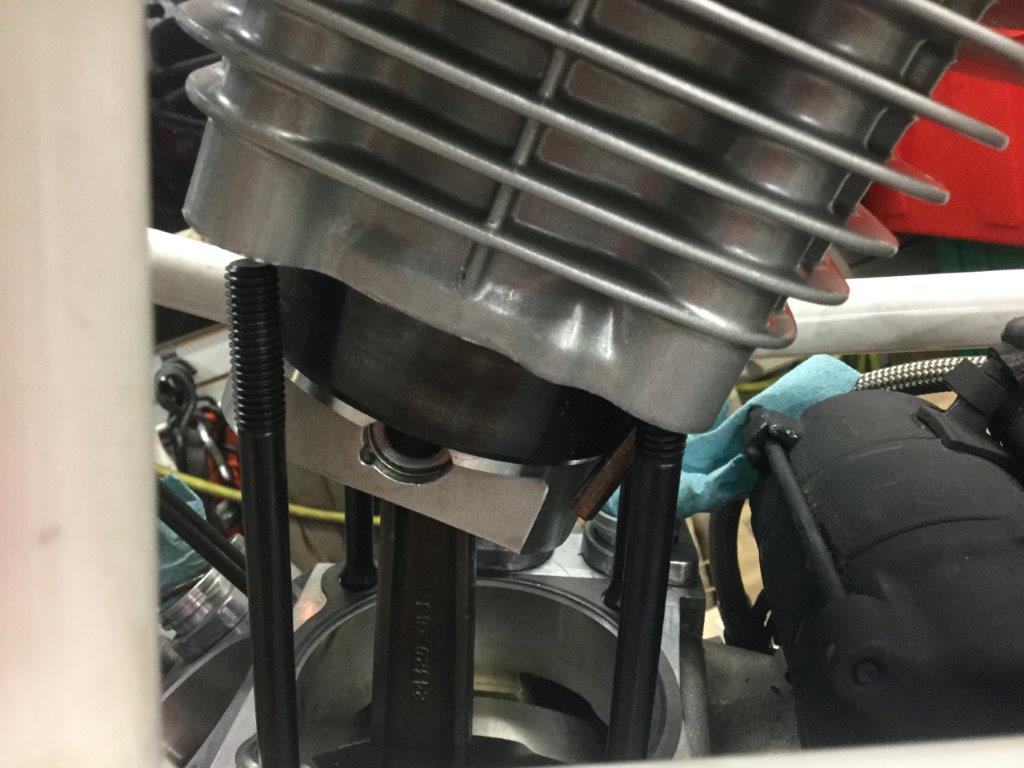 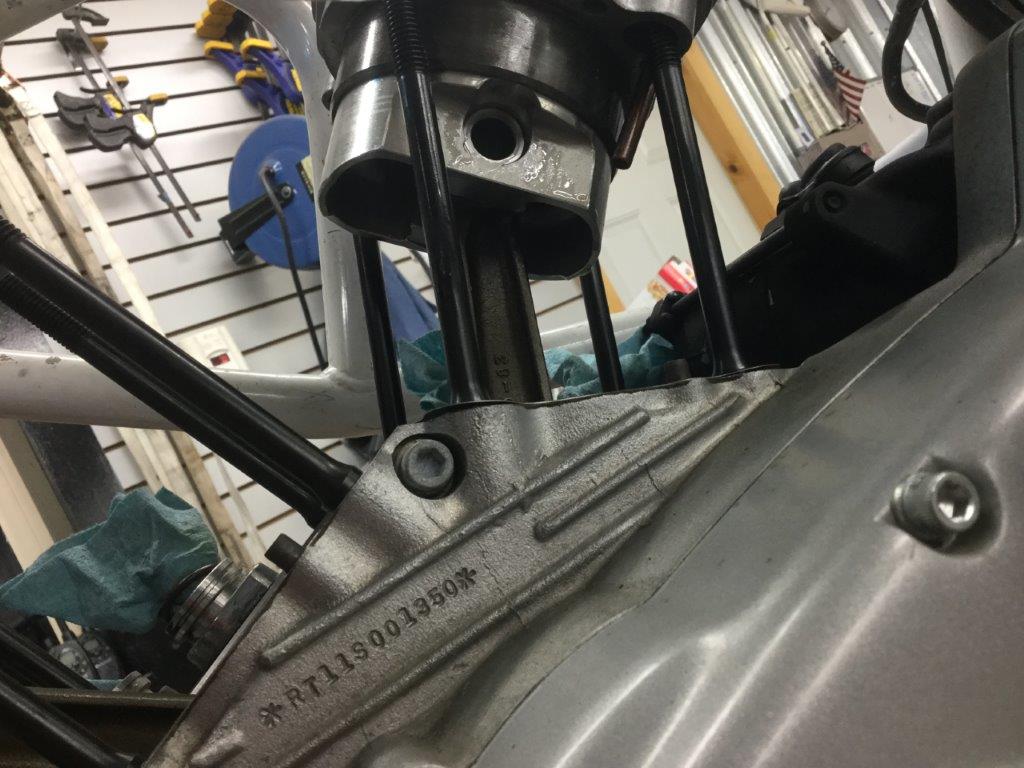 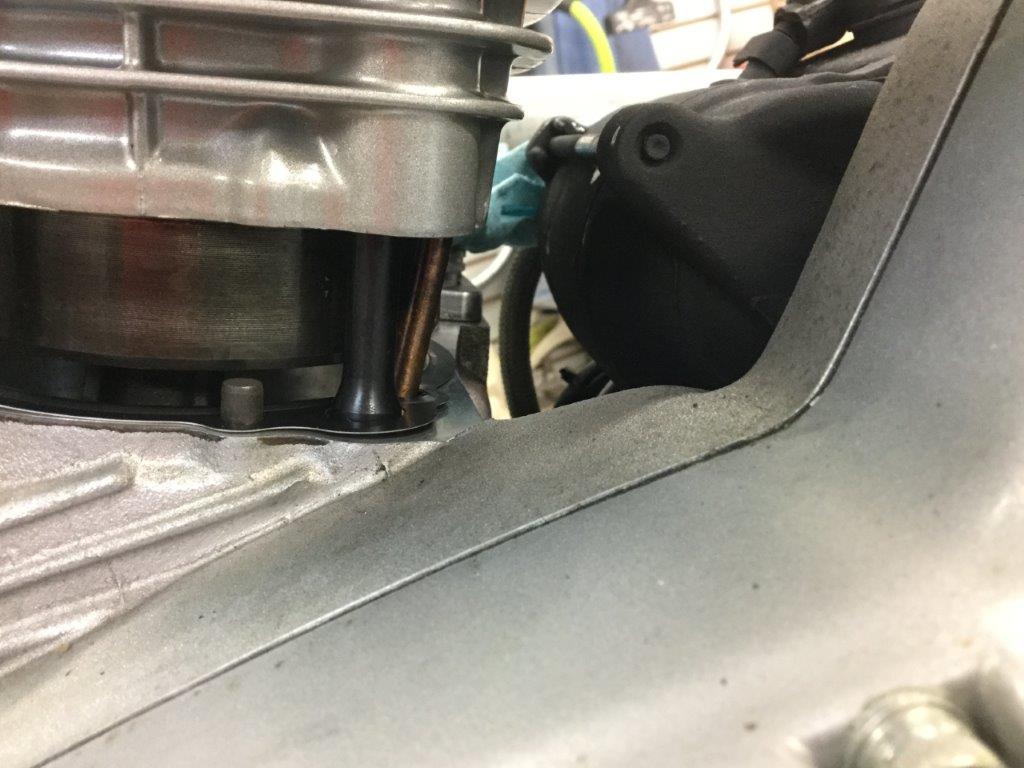 You still need to install a new base gasket. Once you start to drop the cylinder down push the pig tail to line up with the case drain hole. 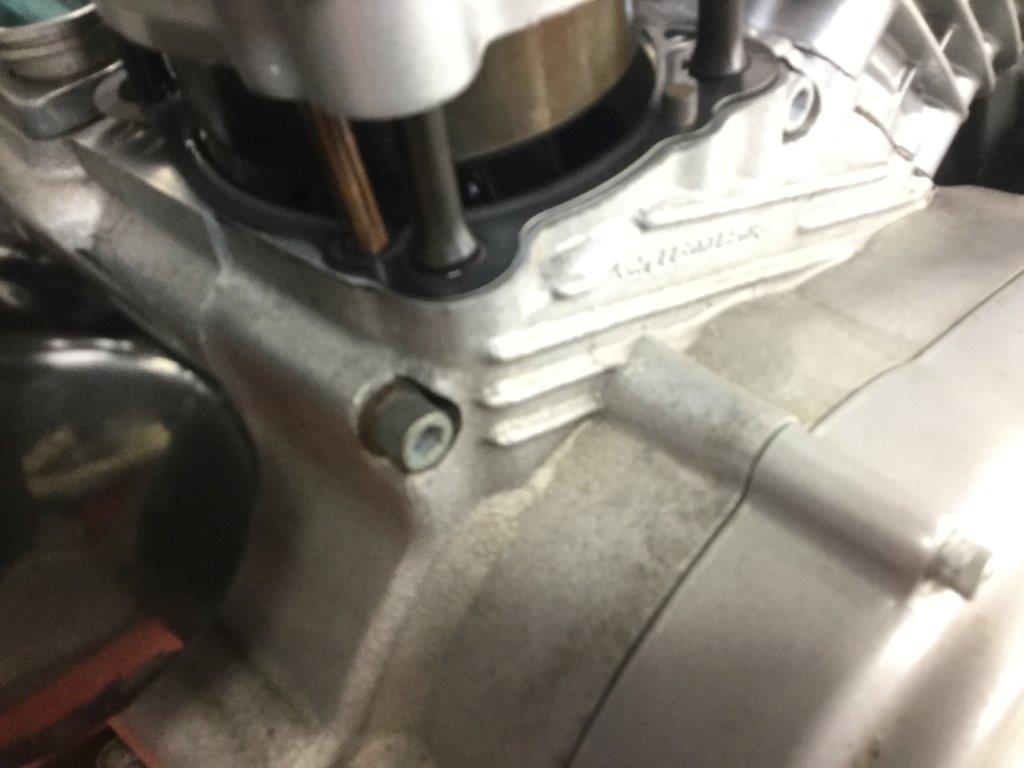 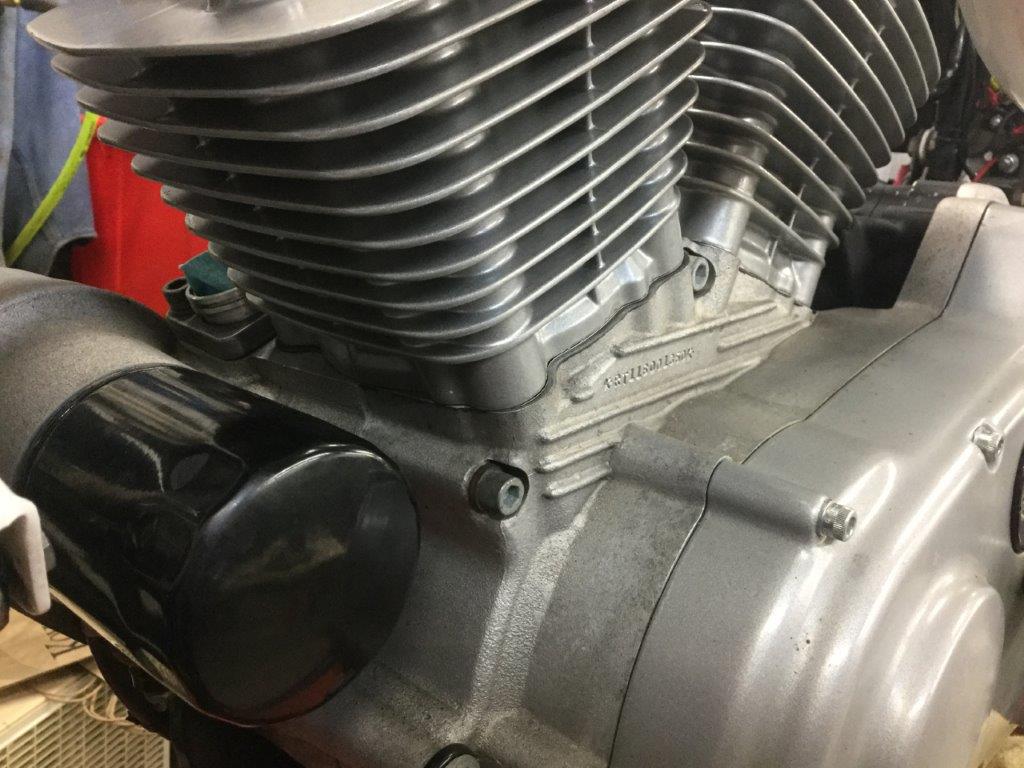 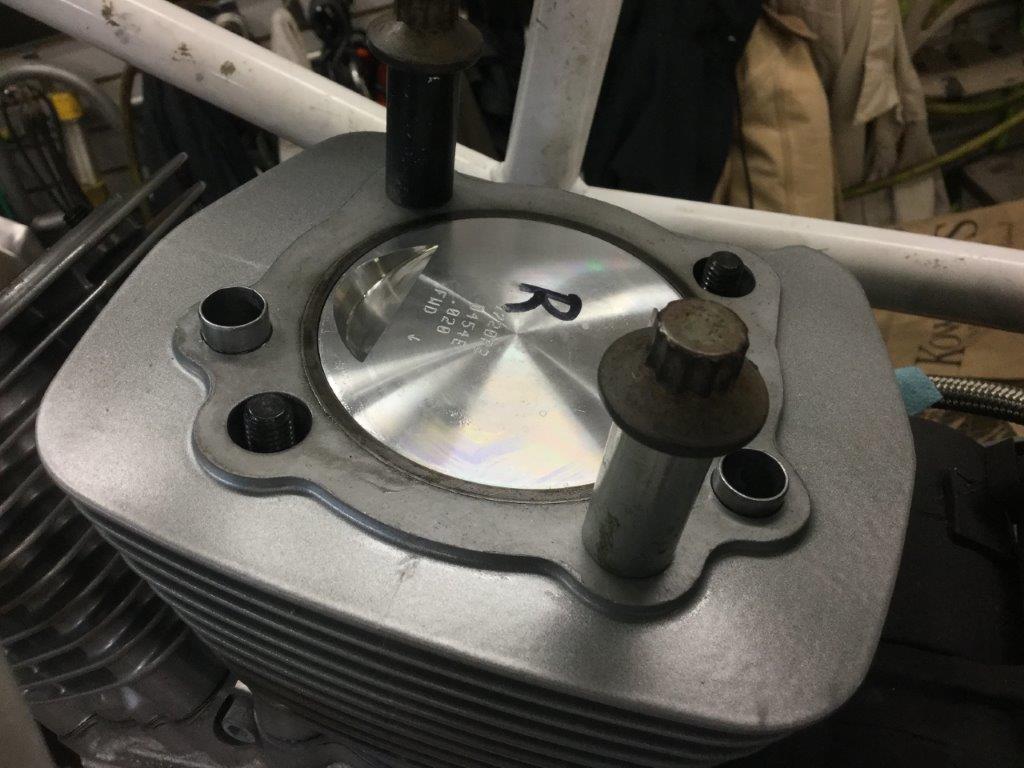 Once the cylinders are installed continue with the normal top end install. I've install several of these without any leaks. | ||
Upthemaiden |
I haven't had the top end off of my motor yet to know what the common problem is. Is the idea that the pigtail gives the oil a straight passage past the gasket without ever making contact, just to reduce the chance of a leak because the returning oil has no way to get to the gasket? Oil from the bottom end of the motor would still have access to that area from under the piston, but I'm guessing the common cause of the leak is the oil return, and not the oil around the crankshaft? Also, is it just me or does it look like the pigtail is at an angle in picture #11. Does the oil return naturally go that way, or is the pigtail just bent? Trouble getting the cylinder back on when you're sliding it straight down over the studs and the pigtail at an angle? Aside from all of my questions, this definitely seems interesting. Has anyone else on the forum had experience with this? I'll bookmark this thread for future reference. | ||
Natexlh1000 |
I thought the oil drained down from the rockers through the pushrod tubes? Isn't that tube on the supply side? | ||
Ratbuell |
Yes. I did this on an old 1340 evo I had. If you look at the jug assembly, there is already a cylinder sleeve that goes through the gasket area so cylinder wash doesn't leak through the gasket. These pigtails perform the same job on the oil drains, keeping oil out of direct contact with the base gasket. And yes, the passageway in the case is at an angle so the pigtails go in at an angle. They're brass tubing so they can bend as needed at install. I built my evo (in an old FLHP) with bumped compression, ported heads, hot cam, and single fire ignition. It was 80 hp and 80 lb-ft at the tire from 80" displacement. I rode it more than 50k miles before I sold it. Rode it like I stole it and so did the guy I sold it to. Never leaked a drop. These are worth the money. | ||
Ratbuell |
Some oil drops through the pushrod tubes but the majority of it goes through the return tubes. Supply is through the pushrods I believe. | ||
651lance |
The return oil passage is at the front of the front cylinder and the rear of the rear cylinder. These are the lowest points of the heads for the oil to collect. The oil can also return through the push rod tubes but they are fairly high in the head. The pig tails are made out of copper so you can move them around to get them to line up while installing the cylinder. With the return ports being at an angle you will need to move them around to get them to fit into the case holes. This pair has been removed and reinstalled after the cylinders where fitted for new pistons. | ||
651lance |
The rocker boxes get all there oil through the push rods so some of the oil will go back down the push rod tube. | ||
Upthemaiden |
Sounds good, I'll definitely put it on my list of things to do when I have to rebuild my top end someday. Are the pigtails something you sell, or did you just buy them from somewhere online? I know I still have a whole list of parts in my email you quoted me a while back I've been too busy to order. I'll probably just pass it along to my wife when father's day is getting closer.  | ||
Blks1l |
Just found this kit on Amazon, seems expensive could probably be found cheaper, Lance probably even does sell these I would bet. https://www.amazon.com/Generic-Cylinder-Tube-Drain -C01050472/dp/B00JAH97DA | ||
651lance |
There are two kits made: Replacement tube kit with allen wrench $49.83 or Complete kit with tap, and allen wrench $74.83 We stock both of them. | ||
Tpehak |
Hey Lance, do these pig tail tubes work for 2009 Buell XB12 cylinders? I did not have base gasket leak problem, but that is just probably because of I had to replace the base gasket too often due to I had to fix another leaks like pushrod cover O-rings. Now I'm trying different Viton O-rings on pushrod covers and if those will last long enough the base gasket might become the next thing will leak and I just want to install the right permanent solution while the cylinders are off the engine. (Message edited by TPEHAK on May 13, 2021) | ||
34nineteen |
I think these are only for the tuber/Sportster motors. I dont know why they wouldnt work on the later bikes, but I'd bet if you asked this on XLforum, Aaron Wilson could probably give you a definitive answer. I know you're a smart cookie, but are you installing the o-rings on the pushrod covers correctly? I believe they go in the groove in the head and the pushrod cover pushes into it. Not the other way around. I'm sure you know that already, though. https://st-paul-harley-davidson-buell.myshopify.co m/products/cylinder-oil-passage-drain-tube-kit-als o-lnown-as-pig-tails-l3e5?_pos=1&_sid=f9d16f692&_s s=r | ||
Tpehak |
I installed everything according the service manual. The service manual says to install the O-rings on top of the pushrod covers first  I believe the problem is the pushrod cover plastic part surface is not smooth, especially the rear one. The front pushrod cover is smoother for some reason, and I have another pushrod covers set and those sets have exactly the same imperfections on the sealing surfaces. I have leak on the rear one. There are molding defects on the o-ring interface and if the o-ring lays on such defect the oil will go thru it. So the pushrod covers installation is gambling. I'm going to try Super-Resilient Viton o-rings instead of the standard Viton o-rings. Those o-rings should bounce back to the original shape better than regular Viton o-rings and maybe will fill those textured surfaces on the plastic pushrod covers better. https://www.mcmaster.com/1288N169/ If this will not work well I have a plan to design and machine my own leak proof pushrod covers. (Message edited by TPEHAK on May 13, 2021) | ||
89rs1200 |
There is a ridge in the head the O-Ring must be pushed up and past. Might have better luck putting the O-Rings into the heads first. You will be able to look from the top to see whether they are seated up as far as possible. | ||
34nineteen |
TPEHAK, You're right there. It could be you have a set of pushrod covers that need replacing. Or like 89rs1200 said, you may not be pushing past that ridge. When I did my last XB motor, I didnt do it on one of the heads. Luckily I caught that when I was putting the rocker box back on. Unfortunately, as you know, that part of the bike is a pain to get to, so I do agree with making sure everything is 100% perfect. I will have to inspect my pushrod covers to see what that mating surface looks like as well. Maybe you have a set of covers that were "made on a Friday afternoon"? | ||
Tpehak |
What is the diameter of that copper tube exactly? James Gasket Cylinder Base gasket oil drain hole is 7.2 mm diameter and it is slightly smaller than the oil drain hole diameter in the engine case. It looks like you used OEM Buell cylinder base gasket and the oil drain hole diameter can be larger than it is in the James Gaskets cylinder base gasket and the tube might not fit and might require too much sanding that the wall thickness will be too thin. | ||
Tpehak |
Anybody installed pigtail in the oil drain in-between the cylinder and the cylinder head? This is another common leaking spot  | ||
Victory |
that head gasket hole doesn't live the same life as the base so its a no for me. Like Ratbuell said there is already a factory sleeve in place there too. So its a no from me (Message edited by victory on June 19, 2021) | ||
Tpehak |
The sleeve in than hole is just for aligning the cylinder head and the cylinder and holding the sealing o-ring in place. But that sleeve does not prevent oil contacts the seal. | ||
Victory |
Well the guys who make these don't advertise putting them there but you can do what you want.  | ||
Tpehak |
Yes those pig tails will not fit that hole because of that hole is larger and do not have access from the back side. Pig tail for that hole should have larger threaded portion diameter and should have different allen wrench interface to be able to be installed from the bottom. And I am wondering if this product already exists. (Message edited by TPEHAK on June 19, 2021) | ||
Tpehak |
I was thinking about machining pigtails out of brass rod and attach those to the cylinder head oil drain holes with high temperature thread sealant like x-Pando    I also checked the pigtail for the cylinder base for the 2009 Buell XB12Scg on the CAD model. The pigtail does fit.  (Message edited by TPEHAK on June 20, 2021) | ||
Tpehak |
I have designed a fixture for FDM 3D printer for tap alignment with the holes. So now there is no need to align the tap manually trying to figure out the hole angle, just drop the tap in the fixture and crank it. Here is the link for the fixture files you can use https://drive.google.com/file/d/1G010737uG0lMk5rOj hyiPM2EpofVHToi/view?usp=sharing  Print the file on a 3D printer    Attach the jig to the cylinder base  Lube the tap  Drop the tap into the jig hole. Holes on the jig are marked. "R" is for rear cylinder, "F" is for front cylinder  Start tapping the hole.  After a few turns of the tap you can remove the jig and finish tapping without the jig checking the drain tube fitment often to not cut the threads too deep.  I maintained the tube height at 33.5mm above the cylinder base    | ||
Tpehak |
Cylinder head pigtail sneak peak, stay tuned!      | ||
Tpehak |
Alright, I designed and built two more jigs for cylinder base pigtail installation. One of them is pigtail bending jig (to bend the pigtail to necessary shape to perfectly fit the engine cases) and another is fitment check jig to check how the pigtail will fit the engine cases without attaching the cylinder to the engine. The parts can be 3D printer on FDM 3D printer out of PLA plastic. The jigs are designed for 2009 Buell XB12 Scg cylinders but might work for another motorcycles. Here is the download link to the 3D files of the jigs you can 3D print. https://drive.google.com/file/d/1G010737uG0lMk5rOj hyiPM2EpofVHToi/view?usp=sharing  Apply the sealant to the pigtail   Attach the pigtail to the cylinder and tighten it   Wipe off the sealant excess  Take 3/16" drill bit and mark the length of the pigtail how it showed on the picture below  Attach bending jig to the cyclinder  Stick the drill into the pigtail up to the mark  Bend the pigtail levering the drill bit up to the point when the pigtail end will be in the marked zone on the jig  Take the bending jig out and put fitment checking jig on the cylinder   See how the pigtail goes into the hole in the fitment checking jig. If you can attach the jig without issues the cylinder will fit the engine.  Let the sealant dry and assemble the engine. | ||
Normthenomad |
Color me impressed. If you ever start making this up as a kit let me know. Thanks, Norm. | ||
Tpehak |
OK, I just received a private message asking me to share all the 3D printed jigs for installing the pigtail. For some reason I posted only the tap guide jig. Anyway, here is the link to download files for 3D printing for all 3 jigs (tap guide jig, pigtail bending jig, pigtail fitment check jig). By the way the cylinders still do not leak, so this stuff works flawlessly. https://drive.google.com/file/d/14XNgbM5c61s_F4VYX CKcqUTEqFvZz-SG/view?usp=share_link |