| Author | Message | ||
F_skinner |
So, I have the tool to install the main oil seal but it is for the old oil seal. I guess I need the new (HD-45206) tool as they do not interchange with with old and new part. Does anyone have one I can borrow? Or can someone explain to me how to install this without the special tool? I read through the threads and I am more lost than before. Frank | ||
Jramsey |
Do you mean the the crank seal on the primary side? | ||
F_skinner |
Yes, the crank seal.... I went tot he local HD store to order the spacer as well because mine looks pretty worn. Of course they did not have it. I ordered it so I guess I have some time (they said 5 days and they are usually close). The new seal looks pretty good but it is not going on with the old tool as it does not line up right. I have no idea how far it should go in beyond being flush... I doubt it is that easy. | ||
Alfau |
http://www.badweatherbikers.com/buell/messages/384 2/370024.html?1214575981 | ||
Reepicheep |
Good threads. Basically, you want it deep enough that the seal isn't rubbing the balls in the bearing, otherwise they will cut through. I cut a notch in the end of a tinker toy (hardwood dowl). It let me tap in the seal slowly and gently, but control it so it wouldnt go too deep. =========| =========| =========| ===========| ===========| LIke that. I got the depth from either the service manual (showed tools with dimensions) or here on badweb somewhere... The right tool does make it easier though. | ||
Weatherbyman |
Right tool is absolutely necessary for the Buell. Do it right the first time, not worth the hassle of doing it again soon.... ask me sometime how I know that  | ||
F_skinner |
If I could get the "right tool" I would. Looks like I will have to fab something up. Thanks for all the input | ||
Brinnutz |
Frank, Need to borrow?  | ||
Bigslug |
Frank, I have a new style tool that I made when the M2's seal went out. Also I have a used spacer that looks good. If you need them send me a pm. Mike | ||
Brinnutz |
Mailed off this morning Frank. Should be there early next week. USPS. | ||
Zrx1100 |
All, i need to rip into the primary case this weekend. Also thinking it may be a good time to change out the crank seal. Can any of you lend me the hd-45206 tool? Thanks in advance | ||
89rs1200 |
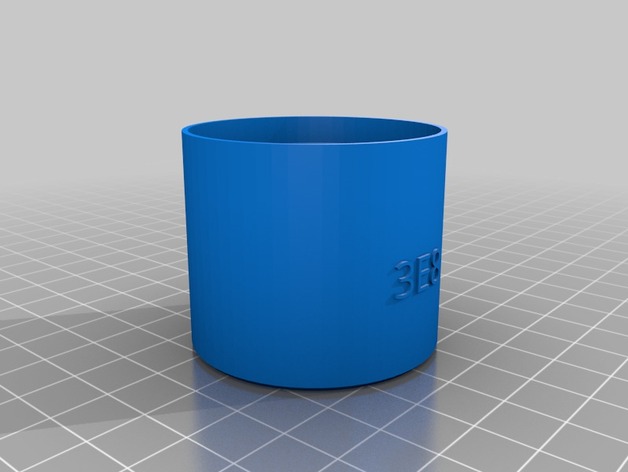
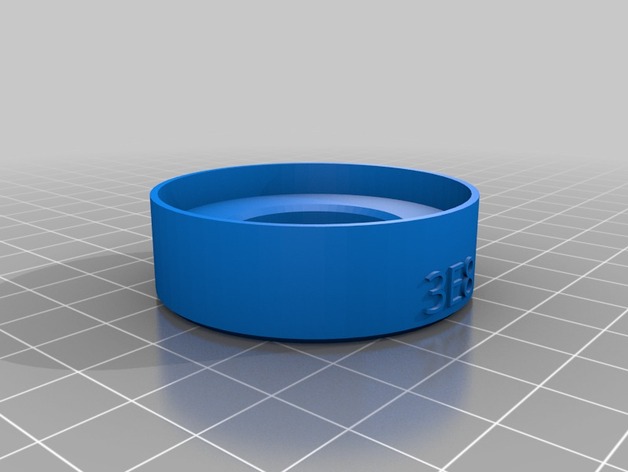
I found and purchased the 3D printed HD45206 / HD-45206 / 45206 Sprocket Shaft Seal Installer. * Only $16 for two, and yes, it is plastic, but it worked great without deforming! * The taller tool is just the right height as no spacer washers were needed. * It worked! Could not have properly installed the seal without the tool. The seal sits out a bit from flush with the opening. I would have seated the seal too deep without this tool. https://www.thingiverse.com/thing:1784320 This taller one will not need spacers as it is just tall enough to use the stock nut to press the seal in;  Copy of the Harley tool HD45206 / HD-45206 / 45206 Sprocket Shaft Seal Installer;  | ||
89rs1200 |
To complete the discussion as to how to get this part printed: 1) Download the file from the above link. I recommend printing the extended tool, (HD45206_ext.stl). 2) Go to this site to upload the file and select someone to print it; https://www.treatstock.com/my/print-model3d |