G oog le Buell 1125R Forum | Login/out | Topics | Search | Custodians | Register | Edit Profile


Buell Forum » 1125R Superbike Board » Archive through June 24, 2019 » Oberon cluch cylinder not going in. « Previous Next »

Author Message
Top of pagePrevious messageNext messageBottom of page Link to this message

Rage10
Posted on Wednesday, July 25, 2018 - 04:04 pm:   Edit Post Delete Post View Post/Check IP Print Post    Move Post (Custodian/Admin Only) Ban Poster IP (Custodian/Admin only)

So I'm trying installing the new slave cylender and it won't go in all the way. The nub is lined up but it won't slide in. Anyone had this issue?
-isaac
Top of pagePrevious messageNext messageBottom of page Link to this message

Rage10
Posted on Wednesday, July 25, 2018 - 07:29 pm:   Edit Post Delete Post View Post/Check IP Print Post    Move Post (Custodian/Admin Only) Ban Poster IP (Custodian/Admin only)

I think I found the problem. Oberon didn't drill the notches deep enough and there is a slight shoulder preventing it from going al the way in. Imma file it off tomorow and see.
Top of pagePrevious messageNext messageBottom of page Link to this message

Shoggin
Posted on Wednesday, July 25, 2018 - 09:02 pm:   Edit Post Delete Post View Post/Check IP Print Post    Move Post (Custodian/Admin Only) Ban Poster IP (Custodian/Admin only)

I just fought mine 2 days ago. Didn't file it though.
Lined it up with the C/L mark and had to press VERY HARD (like the instructions say) and pop! Right in.
The very top lip was actually was very slightly past the outside of the cover.

Amazing difference in clutch pull. About HALF as measured on a luggage scale. You'll love it!
Top of pagePrevious messageNext messageBottom of page Link to this message

Rage10
Posted on Wednesday, July 25, 2018 - 11:03 pm:   Edit Post Delete Post View Post/Check IP Print Post    Move Post (Custodian/Admin Only) Ban Poster IP (Custodian/Admin only)

It goes pop like you said but it does not seat all the way. I'm going to file the housing not the slave cyl.
Top of pagePrevious messageNext messageBottom of page Link to this message

Rage10
Posted on Wednesday, July 25, 2018 - 11:04 pm:   Edit Post Delete Post View Post/Check IP Print Post    Move Post (Custodian/Admin Only) Ban Poster IP (Custodian/Admin only)

It should go slightly past the outer cover but it won't. Did yours go almost all the way in the pop in?
Top of pagePrevious messageNext messageBottom of page Link to this message

Shoggin
Posted on Thursday, July 26, 2018 - 01:11 am:   Edit Post Delete Post View Post/Check IP Print Post    Move Post (Custodian/Admin Only) Ban Poster IP (Custodian/Admin only)

yes.
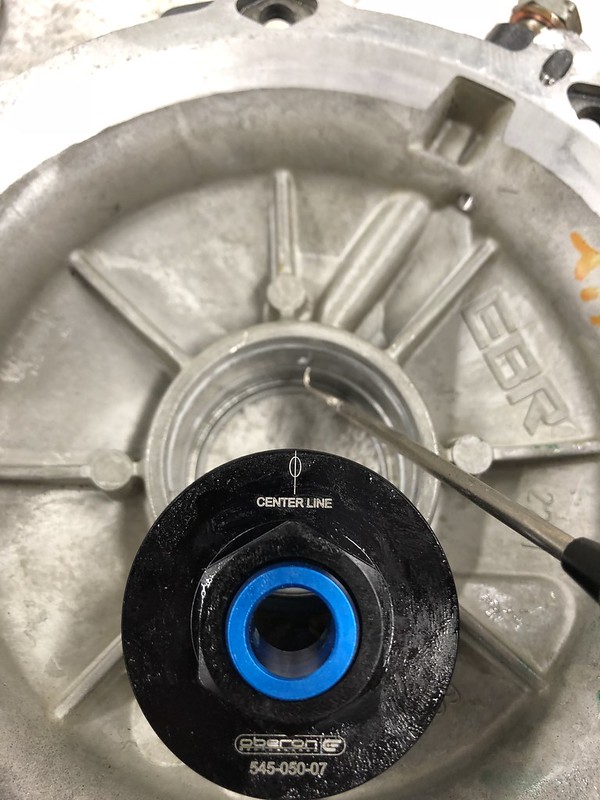
Line it up:

Put a 1" deep socket over the hex:
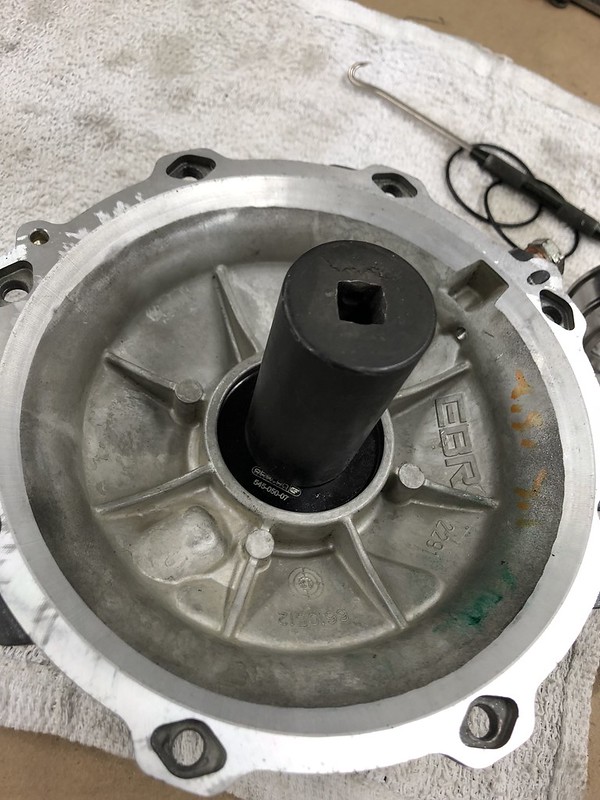
Flip the assembly over and push evenly with both hands against a solid workbench:

The top flange should look like this when seated:
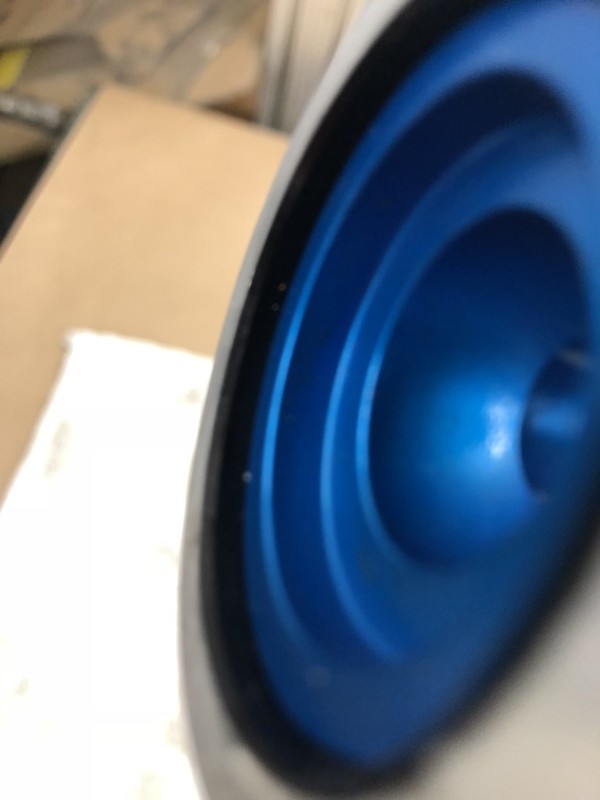
NOT this:
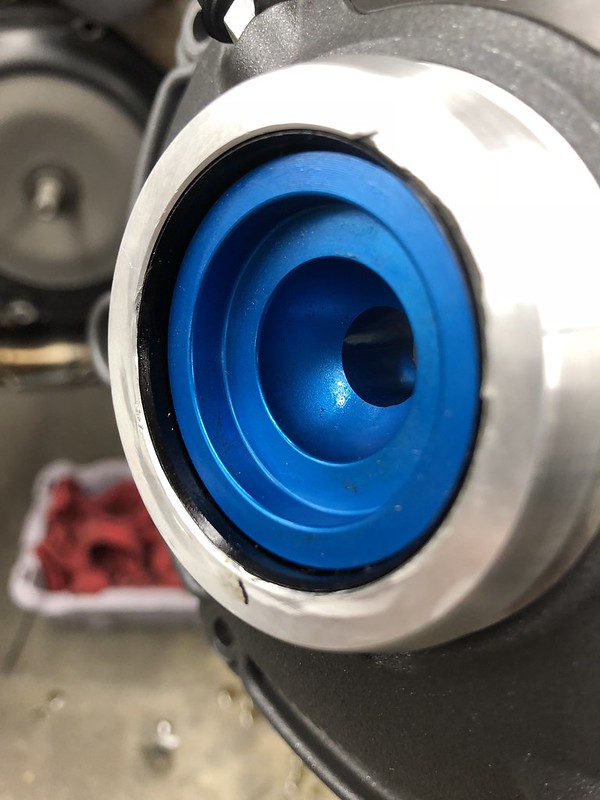
Snapring and done: )
Top of pagePrevious messageNext messageBottom of page Link to this message

Rage10
Posted on Thursday, July 26, 2018 - 06:06 pm:   Edit Post Delete Post View Post/Check IP Print Post    Move Post (Custodian/Admin Only) Ban Poster IP (Custodian/Admin only)

Yeah... I put a socket on like that and pushed. It didn't go in...its exactly like the not like this photo
Top of pagePrevious messageNext messageBottom of page Link to this message

No_rice
Posted on Tuesday, August 21, 2018 - 01:17 pm:   Edit Post Delete Post View Post/Check IP Print Post    Move Post (Custodian/Admin Only) Ban Poster IP (Custodian/Admin only)

for some reason i dont see what im supposed to be noticing is different between the, like this, and not like this photo...

Ive had one of these laying around for years, that ive never put in yet
Top of pagePrevious messageNext messageBottom of page Link to this message

Bubba_
Posted on Tuesday, August 21, 2018 - 08:30 pm:   Edit Post Delete Post View Post/Check IP Print Post    Move Post (Custodian/Admin Only) Ban Poster IP (Custodian/Admin only)

it seated kinda tilted/ skewed in the 'not this' photo. if you notice - the right side is near the edge, or outside it. the left side is well inside. (thats my view anyways)

when i did mine, it required a do-over. i had mis-aligned the little notch the it seats in. (and didnt realize it)
I bled and bled that brake line LOL. couldnt get the air all out. finally disassembled and fixed it.
(wasnt the Oberon part however.. the EBR one)

(Message edited by bubba_ on August 21, 2018)
Top of pagePrevious messageNext messageBottom of page Link to this message

Rage10
Posted on Thursday, November 22, 2018 - 12:35 pm:   Edit Post Delete Post View Post/Check IP Print Post    Move Post (Custodian/Admin Only) Ban Poster IP (Custodian/Admin only)

So I finally got around to fitting it. It fits just fine without the Orings. With the orings it's incredibly tight. Either the orings are too thick or too hard to property squish into the grove. Im thinking the latter. Ended up clamping it with a bolt to get it to fit. The inner Oring got a little but of the outside shaved off going in. I'm going to try and get a new one...
Top of pagePrevious messageNext messageBottom of page Link to this message

Shoggin
Posted on Thursday, November 22, 2018 - 02:19 pm:   Edit Post Delete Post View Post/Check IP Print Post    Move Post (Custodian/Admin Only) Ban Poster IP (Custodian/Admin only)

It is a very tight fit, but more about precise location than force. It will go in!

Try spinning it while its close to all the way in so the notch lines up with the cover. I know its a PITA, but I STRONGLY disagree with using a bolt/nut press. You will easily crack the clutch cover casting

The difference with the "this" and "NOT this" pics is the lip of the slave will NOT be higher than (or level with) the cover. It will be slightly inset.

Keep trying, it's worth it.
Top of pagePrevious messageNext messageBottom of page Link to this message

Stimbrell
Posted on Friday, November 23, 2018 - 06:23 am:   Edit Post Delete Post View Post/Check IP Print Post    Move Post (Custodian/Admin Only) Ban Poster IP (Custodian/Admin only)

If I remember correctly you need to lube the O rings with dot 4 which will help if you have not done so and yes it is tight.
Top of pagePrevious messageNext messageBottom of page Link to this message

Shoggin
Posted on Friday, November 23, 2018 - 02:26 pm:   Edit Post Delete Post View Post/Check IP Print Post    Move Post (Custodian/Admin Only) Ban Poster IP (Custodian/Admin only)

100% yes, lube with DOT 4. Good catch: )
Top of pagePrevious messageNext messageBottom of page Link to this message

Rage10
Posted on Monday, December 17, 2018 - 05:06 pm:   Edit Post Delete Post View Post/Check IP Print Post    Move Post (Custodian/Admin Only) Ban Poster IP (Custodian/Admin only)

I used red grease. I'll try DOT 4 when ever the orings come in from oberon.
Top of pagePrevious messageNext messageBottom of page Link to this message

Skntpig
Posted on Saturday, January 05, 2019 - 08:51 am:   Edit Post Delete Post View Post/Check IP Print Post    Move Post (Custodian/Admin Only) Ban Poster IP (Custodian/Admin only)

I have clutch weep but like the strong lever. Does this fix the weep? I don’t want to have any weaker clutch actuation if I drag race occasionally.
Top of pagePrevious messageNext messageBottom of page Link to this message

Shoggin
Posted on Sunday, January 06, 2019 - 09:44 pm:   Edit Post Delete Post View Post/Check IP Print Post    Move Post (Custodian/Admin Only) Ban Poster IP (Custodian/Admin only)

Yes, this will fix the OE weep problem.

A clutch slave cylinder has nothing to do with "clutch actuation", it is the part that disengages the clutch. Clutch springs are the thing that increase clutch pressure.
Top of pagePrevious messageNext messageBottom of page Link to this message

Tribalreaper
Posted on Tuesday, January 08, 2019 - 06:44 pm:   Edit Post Delete Post View Post/Check IP Print Post    Move Post (Custodian/Admin Only) Ban Poster IP (Custodian/Admin only)

I took of the o rings then dry fitted mine first, marked the case to the arrow. Put the o rings back on added a little silicon grease.Slid the slave cylinder back in lined up the marks, it did a pop at the end.
The dry fit was to make sure notch fitted.
« Previous Next »

Add Your Message Here
Post:
Bold text Italics Underline Create a hyperlink Insert a clipart image

Username: Posting Information:
This is a public posting area. Enter your username and password if you have an account. Otherwise, enter your full name as your username and leave the password blank. Your e-mail address is optional.
Password:
E-mail:
Options: Post as "Anonymous" (Valid reason required. Abusers will be exposed. If unsure, ask.)
Enable HTML code in message
Automatically activate URLs in message
Action:

Topics | Last Day | Tree View | Search | User List | Help/Instructions | Rules | Program Credits Administration