| Author |
Message |
    
Brother_in_buells
| | Posted on Monday, November 21, 2016 - 10:08 am: | 


|
The s1 above has a stainless steel tank!
There are only one or two ever made. |
    
S1owner
| | Posted on Monday, November 21, 2016 - 10:39 am: | 


|
It is polished Aluminum not stainless. |
    
Brother_in_buells
| | Posted on Monday, November 21, 2016 - 12:05 pm: | 


|
Your right Ken!
What was i thinking!? 
http://www.wilcoxmetal.com/usa.htm |
    
Analbeard
| | Posted on Monday, November 21, 2016 - 01:13 pm: | 


|
I`ve two Holtworks ali tanks and mainly use the Manta one for the extra mileage, done about 6000 miles with it and no problems other than scratches from jeans. Just got fed up with the paint scenario. |
    
Zhen13
| | Posted on Monday, November 21, 2016 - 02:32 pm: | 


|
OK I did a little research on a European Buell Facebook group and they have conformed the holtworks tanks are in fact Aluminum and have been making aluminum motorcycle gas tanks for years and should be very sturdy and well-built . |
    
Lakes
| | Posted on Monday, November 21, 2016 - 05:58 pm: | 


|
Thanks for input, Analbeard would you sale the small tank?
i have a stock Manta ion my M2 now but would love a small S1 tank for the weight reduction also am going to see how quick i can get my m2 to go in quarter mile with me riding it, the two different size tanks would be interesting to test out on a drag strip on bike as i ride it on street no make it easier changes i'll just have to learn how to ride it riding clutch out & shifting quick as i can by foot. i'm thinking the S1 would let me use a full tank of gas and save some weight over a full tank of gas with the manta, anyone know weight difference? of the two with full tank of gas?
Analbeard let me know if interested in selling the small alloy tank. thanks |
    
Analbeard
| | Posted on Tuesday, November 22, 2016 - 04:10 am: | 


|
Hi Lakes, I`ve a few S1`s so the ali tanks are for keeps. I know they are expensive to first buy, but they will hold their price. I have a spare small tank in the UK which was used as the holtworks pattern. |
    
Milar
| | Posted on Wednesday, November 30, 2016 - 02:35 pm: | 


|
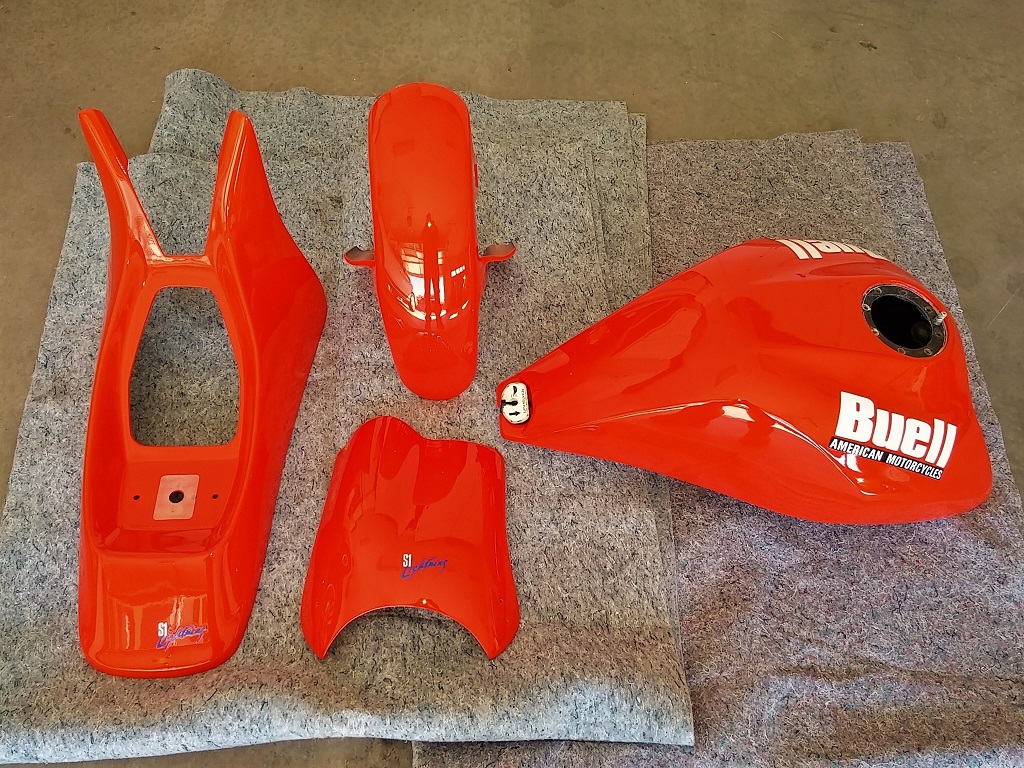
First: thanks to all who contributed to this thread. I got my bodywork back from the painter. I compared the color to a stock piece I have. Probably not fair since the stock stuff is nearly 20 years old and faded. But the new color is close. Who knows which is correct? The attached pic isn't accurate either. Blame it on a cell phone camera.
I'll try and sum up what I learned:
1. All the info on painting from the factory is pretty obsolete. It is for acrylic paint which is mostly not available. Urethane paints are a different animal.
2. The old paint codes are no long valid. The new PPG code for molten orange is a tri-coat system: #91853. A white base layer #91853ALT/1 and orange mid layer #91853ALT/2) It's not cheap, around $80 quart. It took almost a quart to do the job below.
3. My painter has had poor luck with Caswell Tank Sealer on plastic tanks. It does not adhere well to the plastic. Great for metal tanks. I did not seal the tank.
4. Instead of the sealer I'm going to try and buy ethanol free gas. If not available then use StaBil 360 ethanol treatment. Will it help with paint bubbles? Who knows. But as some here have stated, ethanol may be the prime culprit. My painter thinks so.
Mike
|
    
Charger22
| | Posted on Wednesday, November 30, 2016 - 03:24 pm: | 


|
Amazing work. Looks great! |
    
Theshue
| | Posted on Wednesday, November 30, 2016 - 03:27 pm: | 


|
www.pure-gas.org web page that has a state by state listing (also those in the great white north) of ethanol free gas stations. |
    
S1owner
| | Posted on Wednesday, November 30, 2016 - 03:41 pm: | 


|
Looks great
2 things
1- are those decals the raised ones or flat are they cleared over?
Here is why
If they are not the raised you will most likely see the bubbling appear there first
2- do not use any of the cream stuff. Non of it works on plastic tanks. And if you need to seal a steel tank bring it to a radiator shop they can seal it the same way the do radiators and its a much better cheaper option! |
    
Milar
| | Posted on Wednesday, November 30, 2016 - 05:14 pm: | 


|
>Amazing work. Looks great!
Thank you. I have a great painter who works cheap.
>are those decals the raised ones or flat > they cleared over?
Raised decals. Man decals are getting expensive.
>if you need to seal a steel tank bring it >to a radiator shop
Great tip. My next bike is a metal tank. I'll check it out.
Mike |
    
S1owner
| | Posted on Wednesday, November 30, 2016 - 05:32 pm: | 


|
Yep I just reworked a 79 xs1100 tank the Po had coated it with cream the radiator shop was able to get two diffrent layers of cream cleaned out and cleaned and resealed the inside of the tank. Well worth it they even pressure tested it. |
    
Oopezoo
| | Posted on Wednesday, November 30, 2016 - 06:12 pm: | 


|
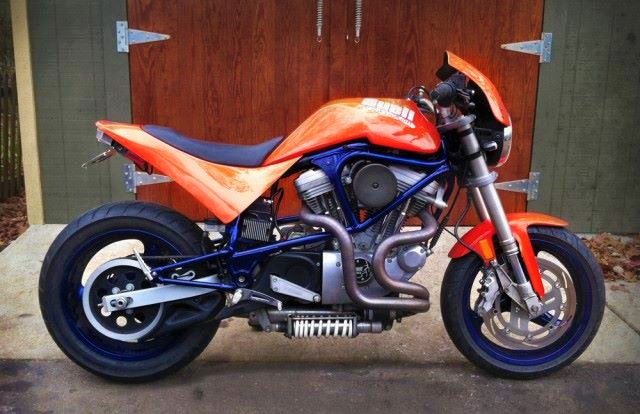
wow, that looks great. What color frame and wheels will they be matched with? |
    
Milar
| | Posted on Wednesday, November 30, 2016 - 10:35 pm: | 


|
>wow, that looks great. What color frame and >wheels will they be matched with?
Nuclear Blue
|
    
Serialk
| | Posted on Monday, December 12, 2016 - 11:38 pm: | 


|
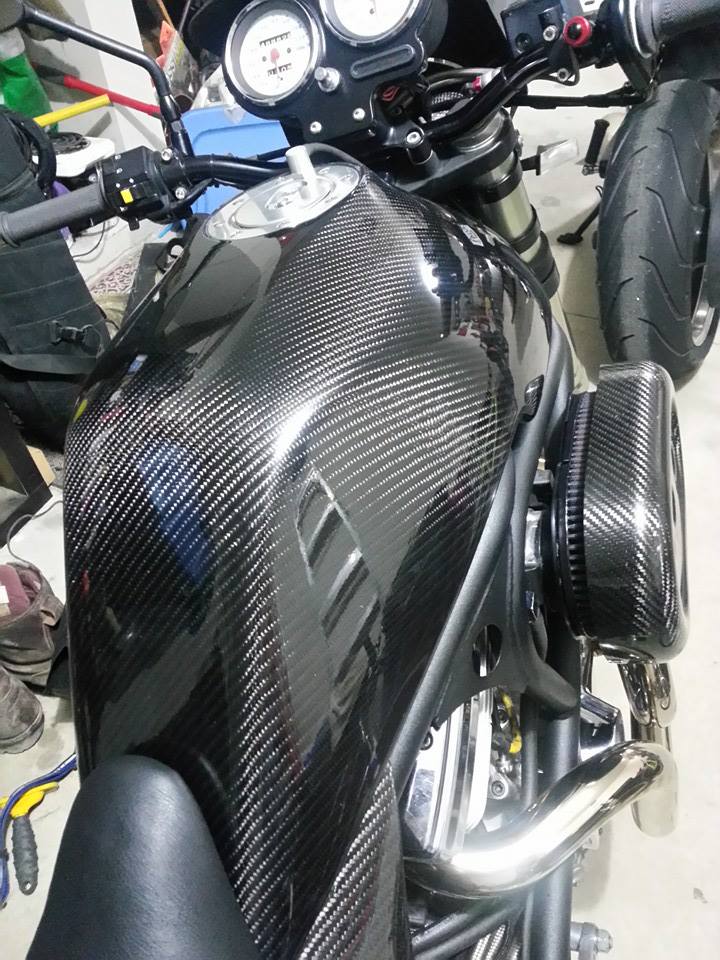
Only a matter of time until it bubbles. The tank expands. I went as far as doing a carbon overlay to prevent it. it split the carbon up front in 2 spots after being in the sun all day with a full tank of fuel.
|
    
Ralph
| | Posted on Tuesday, December 13, 2016 - 09:47 am: | 


|
Serialk, I need to communicate with you about your overlay. Is it okay if I send you a PM? |
    
Upthemaiden
| | Posted on Tuesday, December 13, 2016 - 11:38 am: | 


|
Agreed, I've love to hear about that tank. Carbon has never really been my thing, so I don't think I'd ever go that far with mine, but it looks great, I'd definitely be interested to hear what it took to make it look like that! Would it work on smaller parts like that little heat shield bolted to the frame that goes under your right thigh when you're on the bike?
I also agree about the ethanol. My last bike was a Speed Triple with a plastic tank, and those tanks were well known to expand due to the ethanol. Their paint held up very well though, so I'm not sure what the difference was there though. |
    
Ralph
| | Posted on Tuesday, December 13, 2016 - 01:37 pm: | 


|
Up, different type of plastic would be my guess. You can wrap most anything with carbon, the less convoluted the easier it is.
My winter project is to wrap a tank. I want to touch base with Serialk to see if I can pick up any pointers. It's been done before by another 'weber, but he's long gone. |
    
Upthemaiden
| | Posted on Tuesday, December 13, 2016 - 02:01 pm: | 


|
SerialK, I'd love to see more pictures of your whole bike if you have some!
Ralph, make sure you post up some pictures when you're done! Maybe you can start with Serialk's experience and fill your tank with gas and let it sit in the sun for a few hours, then start working from there. I assume there'd be much less chance of the carbon cracking when it contracted than it would when it expanded. I like the idea S1owner posted earlier too about just making a cover that goes over the tank.
I agree the S3 probably just had a tank made from different plastic. I definitely remember it being a bit thicker/heavier, so that might've helped too. The other thing I had on that bike was some carbon heat shields on the exhaust. They worked really well and looked nice. I wouldn't mind trying to make a carbon version of the heat shield that mounts on the rear header. That thing is a definite eye sore but don't want to risk my leg by riding without it. |
    
S1owner
| | Posted on Tuesday, December 13, 2016 - 02:43 pm: | 


|
Remamber when you wrap you will need to space it out to the suze if the expanded tank. The tanks shrink so much without fuel in them you cant even get the fuel mount ring on |
    
Serialk
| | Posted on Tuesday, December 13, 2016 - 03:06 pm: | 


|
I don't own the bike anymore. built it up then sold it to fund my FXR project. I believe it is for sale again if anyone is interested.
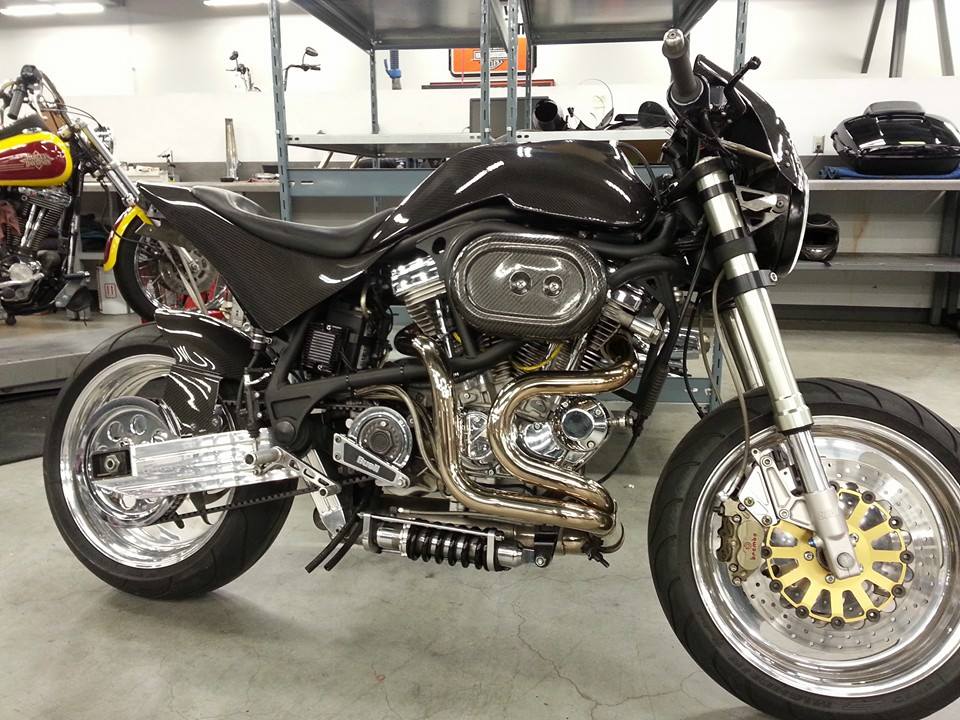
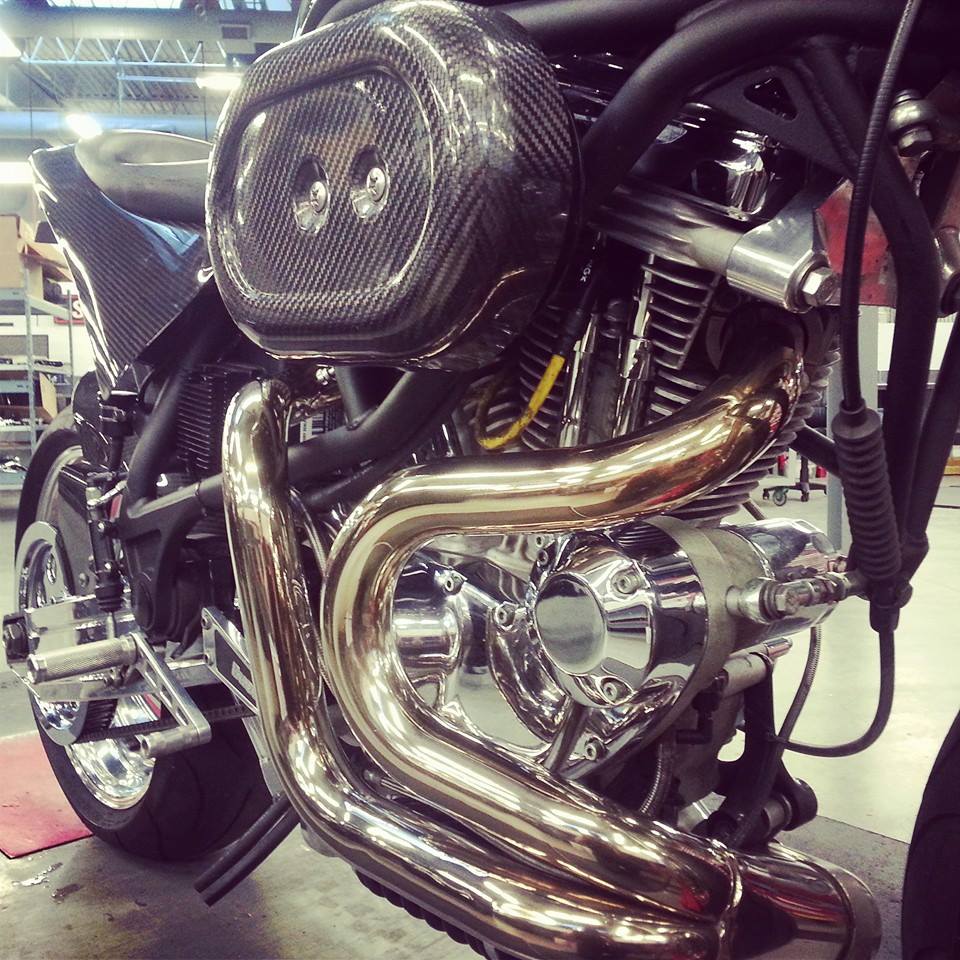
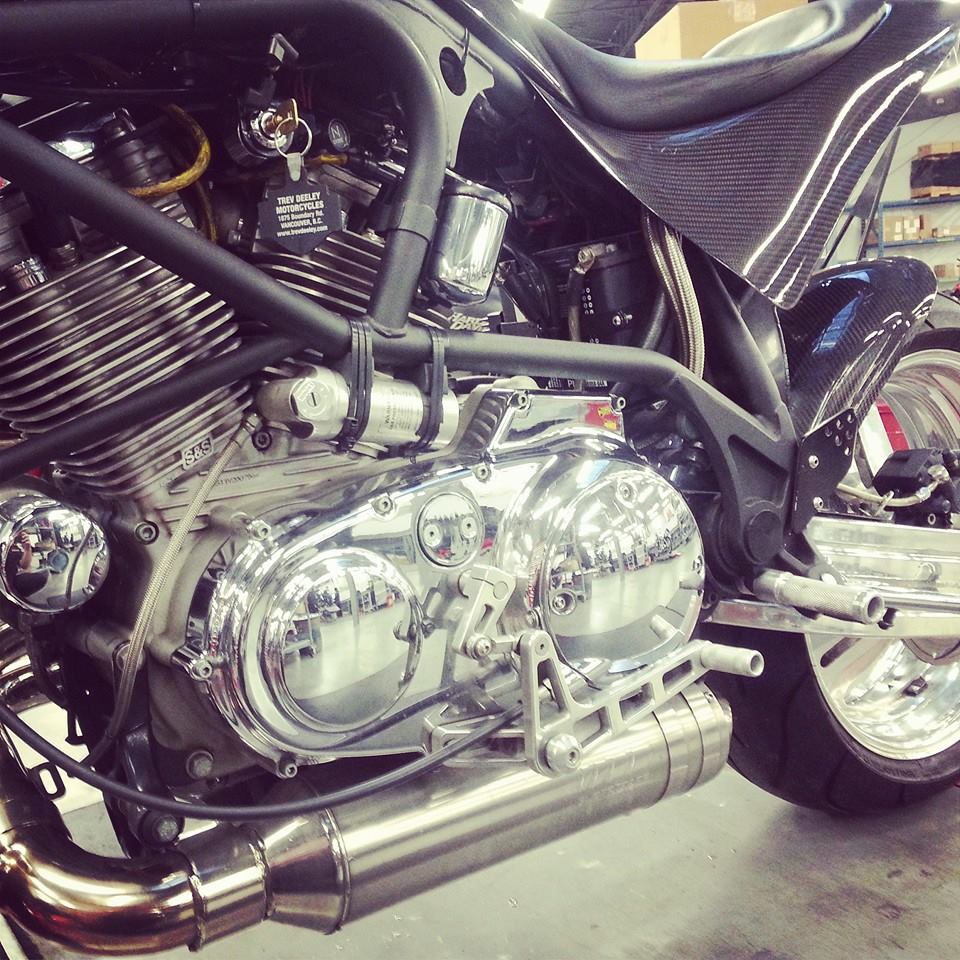
The Carbon Overlay process is as follows
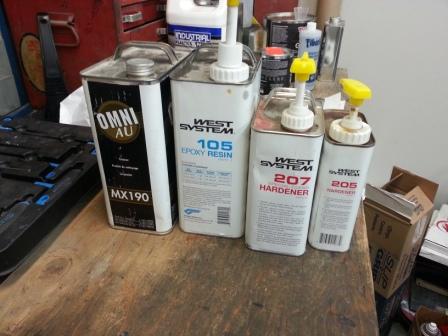
The Carbon Overlay Process is tedious and time consuming. each step takes 2-3 hours and once complete need to wait 24 hours before doing the next step in this process.
The epoxy is expensive. I did not buy it. I pitched some money to a friend that had the epoxy at his shop.
use the 105 with the 205 and some black epoxy tint. wait 3-5 hours till its tacky. then lay the carbon on carefully. once its on. its staying there. let it dry 24 hours. make sure the weave is consistent and splice in the middle up front. My splice was not the cleanest so I will have to do some body work and air brush to hide the mess up up front.
once that is done you need to seal the top of the carbon weave so dust or dirt does not go in the weave. apply 105 and 207 together and coat carbon with a light coat.
24 hours. light sand apply next coat of epoxy. 24 hours sand and use a pin, compressed air and spray bottle of water to get the sand dust out of the pinholes. took me almost 4 hours picking out the dust after I wet sanded the tank. epoxy. 24 hours wet sand. inspect for pin holes and wet sand until it is smooth and no dimples or runs. if not smooth then apply another layer of epoxy and wet sand. each time you do a layer of epoxy make sure no hairs from the brush get stuck on the tank or air bubbles or runs. This epoxy is self leveling to an extent.
Then clear coat. build up the clear and then wet sand.
Then apply whatever paint job or pin striping you want.
Carbon twill is $50 a yard and thats more then enough.
the west system resin and hardeners will run you around $400. Or find someone that already has some and pitch some cash. each coat is 2 pumps epoxy 2 pumps hardener. |
    
Upthemaiden
| | Posted on Tuesday, December 13, 2016 - 03:24 pm: | 


|
That's a gorgeous looking bike. It's making me really look forward to having a second bike again someday so I can pull my S1 apart and put it back together after I've thoroughly gone over every part. The headers really look nice, and I'm really starting to like those cut down right side engine covers. I never used to think anything of the size of the original covers, but after you see how much excess metal there is on there, they look so big and bulky.
Do you remember what kind of footpegs those are? They look really good on there.
You've definitely convinced me that overlaying that side heat shield isn't worth the money though haha. I'll just live with the black plastic. |
    
Brother_in_buells
| | Posted on Tuesday, December 13, 2016 - 06:08 pm: | 


|
Every time seeing the carbon s1 ,it's a artwork!
Josh ,those heatshields on the s1's are or were available in carbon! |
    
Brother_in_buells
| | Posted on Tuesday, December 13, 2016 - 06:10 pm: | 


|
http://m.ebay.com/itm/BUELL-S1-TWILL-Carbon-Fiber- Heat-Shield-/142201226963?nav=SEARCH |
    
Ralph
| | Posted on Tuesday, December 13, 2016 - 10:19 pm: | 


|
Serialk, many thanks! It really helps to have some idea of what is going on heading into this.
Ken, I'm debating exactly how I want to pursue this project. One of the questions in my head is dealing with the tank shrinking when it's empty, but even more, it acting like a balloon when it's hot. I have ideas, we'll see which I go for.
Up, don't worry, once I have a tank covered I'll post everything. |
    
Williamscottrobertson
| | Posted on Tuesday, December 13, 2016 - 11:00 pm: | 


|
Ive considered making new rear hugger and lower belt guard for my s2. Question is, what to make a mold out of and how? With fiberglass I have used styrofoam to mold then carnuba wax the piss out of it, and lay on the fiberglass, then it pops right off. Carbon fiber epoxy resin - will it let go with wax over a mold? |
    
Pontlee77
| | Posted on Wednesday, December 14, 2016 - 06:39 am: | 


|
Cool, what swing arm is that? |
    
Serialk
| | Posted on Wednesday, December 14, 2016 - 01:33 pm: | 


|
Footpegs I believe were Banke foot pegs.
Swingarm is Spondon.
Both are Unicorn pieces and I highly doubt you will ever find them for sale.
williamscott I have the carbon hugger and belt guard in carbon for a s2. saves you the hassle of making one. can dig them up later on today if you are interested |