| Author | Message | ||
Sstlouisjak |
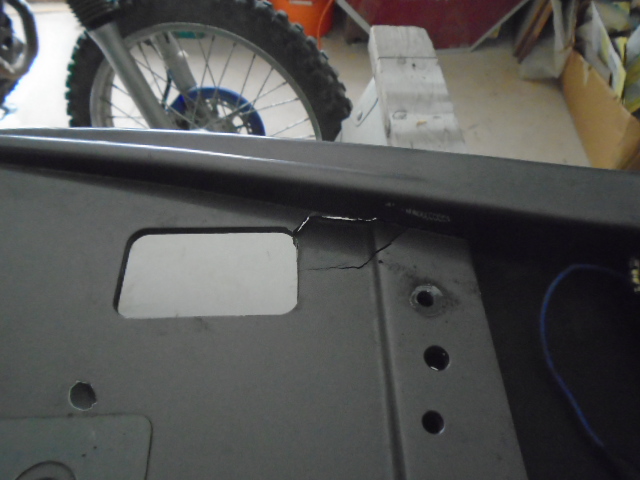
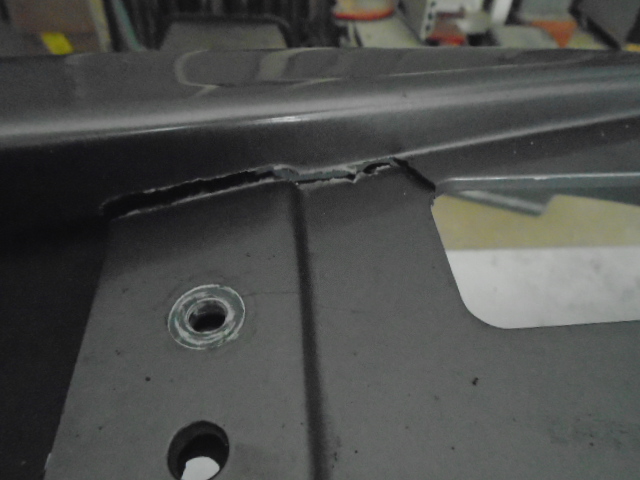
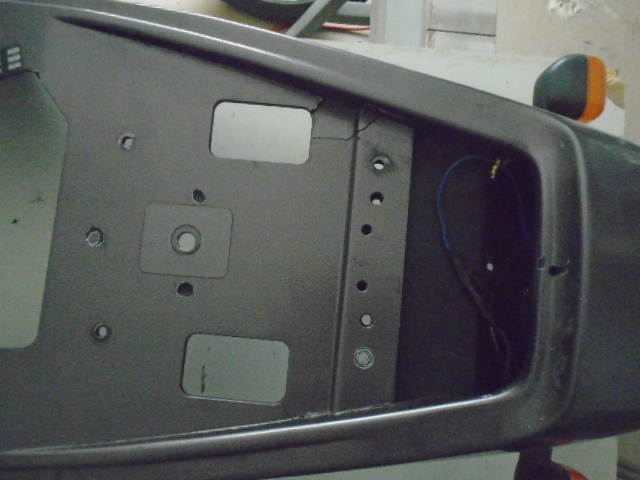
I took my tail section off the other day and noticed that it has cracked on both sides and was wondering if anyone has ever had this happen. I'd like to try and fix it, but I'm not sure what to use at this point and was wondering if anyone might have any suggestions. Thanks!!!    | ||
Blackm2 |
Jak, fiberglass it from the bottom, just mind your mounting points and any other places it may rest on. Mine was worse than that, on both sides, fiberglass did the trick. | ||
Sstlouisjak |
Awesome, thank you Blackm2! I'm glad fiberglass worked for you. Hey, I'm a poet and didn't even know it..lol Seriously tho, I'm glad to know that mine isn't the only bike this has happened too. I'm not sure how it happened, but it has. Now I need to take your advice and make sure I know where not to use the fiberglass. Did you have to remove the paint to get the fiberglass to bond? I've never used fiberglass before so it'll be a new experience for me. Thanks again Blackm2... | ||
Sstlouisjak |
Disregard that question, I just realized there is no paint underneath it. | ||
Sstlouisjak |
Hey Blackm2, I was just checking out your profile picture which is really cool. I was curious whats the deal with the shifter on your M2? It looks like its above where mine is at. Both bikes are awesome, but your M2 is really sweet. | ||
Jim2 |
I did the fiberglass repair on mine and it's been great for years. I first mend the cracks with a Medium Thick CA adhesive. This holds the cracks together and makes working with tailpiece and the fiberglass easier. Then I used a light weight fiberglass cloth and polyester resin, applying the fiberglass cloth only to the bottom of the tail piece. Sand the area you are going to apply the cloth to. This roughs it up and cleans it at the same time. Wipe it with alcohol to remove the dust. I cut pieces of cloth to size and then pre-wetted them on wax paper then apply to tail, one piece at a time. One layer of lightweight cloth is all you need. The normal heavy cloth found at most autoparts stores is too thick and harder to work with and can cause interference issues. I bought the cloth and CA adhesive at the Model Airplane Hobby store. You could use epoxy instead of polyester resin. I just had the resin already. I like to use 30 minute epoxy so I have a little time to work. If you use polyester resin be sure you mix it properly as a bad mix can fire (harden) too quick. Let it fully cure over night before tugging and twisting on it. | ||
Sstlouisjak |
Thank you Jim. I will start looking for the cloth and CA adhesive and take it from there. This sounds like a fun project now that I have some advice. I'm looking forward to it thanks to you guys. | ||
Oldfartnbuell |
stlouisjak, have it plastic welded. Same thing happened to mine. {99 cyclone}. Had it done about 40,000 miles ago and still holding good. Some plastic you can't weld but your's can be done. Tonto | ||
Blackm2 |
You're welcome Jak. The one in the pic is my S1. Sold my M2 a couple years back. This S1 just spoke to me, had to have it! The M2 had to go. | ||
Nitrokeeb |
My tail section looked like that. I think the old well nuts rotted away, and the previous owner just bolted the tail directly to the subframe. There should be a layer of rubber between the two. | ||
Sstlouisjak |
Whoa Nelly Oldfartnbuell, I'd never heard of plastic welding before just now. I did a Google search and found this gizmo for 20 bucks. It has mixed reviews, but it still looks pretty cool to someone who had no idea there were such things, like myself...lol Check it out; https://www.5secondfix.com/?mid=7320253 | ||
Sstlouisjak |
Blackm2 I can see why your S1 spoke to you, its really a slick look'n bike. I guess I've never seen an S1 before, it looks a lot like an M2 but slicker somehow. I'm going to have check into the S1 seeings how you brought it to my attention. | ||
Sstlouisjak |
Nitrokeeb you solved the mystery as to why its cracked like it is. It had been a few years since I've had the tail section off and I noticed while I was taking them rubber well nuts off they had basically turned themselves into a wadded up hunk of not much usefulness. I never imagined that would have caused the cracks like it did tho, but I can see how it could have. I will make sure I replace them with with new ones. I hope I can still get them...If not I'll find something , I hope... | ||
Nitrokeeb |
I bought mine at the hardware store. Like 25 cents apeice. The rubber doesn't like oil, so if you overfill the tank they get oily and start to degrade. I repaired my tail with plastic epoxy, you can find it Autozone or home depot. I ground a groove down the crack with a dremel to give more surface area. If I ever have to do it again I would plastic weld. I bought a plastic welder at Harbor Freight for less than 20 bucks to do bumper repairs on a car, and it works pretty good. | ||
Sstlouisjak |
Thank you, that sounds fairly simple finding them well nuts. I'd never thought to look at a lumber store. Even tho lumberyard in Bourbon does have all kinds of stuff like that. I have a friend who does body work he might have a plastic welder, but if he don't I'd rather buy one like the one you got from Harbor Freight then the one I posted earlier. | ||
Sstlouisjak |
I still haven't ruled out fixing it with the medium thick CA adhesive and thin cloth and fiberglass. I have found some of the medium thick CA adhesive on Amazon, but they didnt the thinner cloth. At least I have a lot more ideas how to go about fixing it before I started this thread. Whatever way i end up doing it, I'll post pictures Thank you all. |