| Author | Message | ||
General_ulysses |
Just picked up a '97 S1 and am really excited about getting her on the road. It's in awesome shape, but appears to have been sitting for a long time. I'm going through the fuel system now, draining out the old gas, replacing the hardened fuel line and cleaning out the Mikuni 42mm carb. The carb was hard to remove from the rubber O-seal thing, which was partially damaged in removing it. I've also read alot about the intake seals leaking on these bikes. So now that all of that stuff is pretty accessible, I'm wondering if I should replace it all now while I'm in there. What do you guys think? I also noticed that the rear motor mount/rubber isolator thing appears to be broken or off center. When I look into the hole in the frame that has that hex bolt in it, it's way off center, which I'm guessing means the mount is shot. Does that sound right? (I'll post a pic of it later). I know I've read a lot here about the rubber isolators failing, so I assume that's what's going on here. The bike only has 6000 miles though, somewhat surprising the mount could go bad that quickly. Is there anything else I should attend to while I have the carb off or while I replace the rear isolators? Or any other "better take a look at this..." or "better preemptively fix this before it bites you..." kinda things I should deal with? I want to properly maintain this bike. Also, I plan on running Amsoil 20-50 in the motor, what should I run in the transmission? I don't have a manual yet but plan on getting one soon. I run the HD trans oil in my Uly because it has the helical cut gears that came on the later bikes. As far as I know, that isn't necessary for the earlier bikes and many just use motor oil. Does that sound right? All inputs are welcomed. | ||
Davefl |
Isolators being off center does not automatically mean that they are shot.. I would run the Amsoil 20-50 in the trans as well, Harley recommends their syn in both. | ||
Spiderman |
-All Isolator -Head stock and swing arm bearings -Rocker box gaskets and if you have the time do a whole top end -New oilpump drive gear -lube or replace throttle cables and speedo cable -New shift detent plate if it hasn't been updated -Primary chain adjuster -New Brake fluid front and rearif they are more than 50% worn, new pads (better safe than sorry) (Message edited by spiderman on April 01, 2014) | ||
Phelan |
definitely do the intake seals. I wish I would have when I cleaned my carb. Now I gotta take it off again and clean it. Don't forget to disassemble and clean the petcock while you're cleaning the tank. | ||
Robertb1958 |
My S1 blew a fork seal last year, parts are cheap for the forks. | ||
Hootowl |
Pics of isolators please. If you've got the new style isolators, they're likely fine. Being off center is fine. They're supposed to be. That allows the isolator to flex when the frame presses down without mashing the bolt head into the frame. | ||
General_ulysses |
Here's a pic of the isolator. Best one I have right now, will try and post another later. Thanks for the responses, I will follow ya'lls advice. 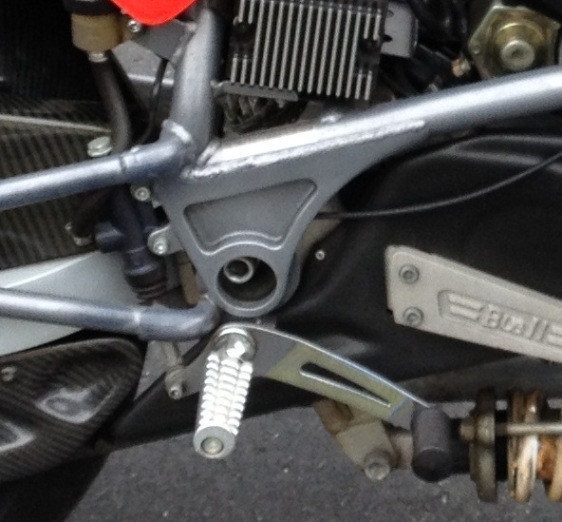 | ||
Hootowl |
Um...those are shot. The bolt should be near the bottom. It looks like your frame is hitting the bolts. And those are the old style isolators. | ||
General_ulysses |
Just ordered the isolators, intake seals, primary chain tensioner and some other stuff from Al at American Sportbikes. Al provides awesome customer support, he's extremely Buell knowledgeable and a heck of a nice guy to talk to as well. Gettin' excited to put this puppy on the road man! | ||
Pash |
Wot Spiderman says but my list of luxury would go: XB rocker covers - less mess X1/M2 swing arm - stiffer and looks good X1/M2 front master cylinder - part of stopping faster 1125R front brake lever - more hand comfort and more controlled stopping X1/M2 front caliper - part of stopping faster 2001 X1 gear lever - get rid of all the claptrap and rattling Ten bobbin disc or EBC Pro Lite - get rid of the loose 6 bobbin disc Buell Pro Race exhaust - loud XB barrels, pistons and heads - better than Thunderstorms Alternatively enjoy it how it is (with new isolators). | ||
Littlebuggles |
Err, on that brake lever, talk to Al - he's got an adjustable one specific to tubers, and I think the XB/1125 spec part has a slightly different cam or throw or whatever, making it pretty much always engage, and creating a very real risk of suddenly locking up the front end while riding, with no warning whatsoever. ...ditto to Spidey's advice except just check the oil pump drive gear, if it's been upgraded to the bronze part you're good. | ||
Pash |
1125 and tuber have the same cam XB has a slightly smaller radius so runs loose on the piston I run the 1125 levers in all my tubers | ||
General_ulysses |
Thanks everyone for the helpful advice. Well, I had the whole bike torn apart all this week trying to get the god @#$%&* isolators out. What a nightmare that was. The picture I posted above showing the isolators off center from the frame? It means nothing. The isolators on my 6000 mile bike were in perfect condition (they were the old style originals from 1997). There was nothing wrong with them and they are designed with an off center hole that bolts into the aluminum block that bolts to the engine and swingarm. So they're supposed to look like what you see in the picture above. Anyway, I went ahead and replaced them after a "learning experience" with the bike getting the old ones out, even trying the "Scott Free" method, it was a complete pain in the a**...which didn't work anyway. I also replaced all of the intake seals and disassembled the mikuni 42mm carb and cleaned it all out and then put it all back together. A lot of things are hard to get to on this bike, despite its rather rudimentary "Harley look." It's a strange motorcycle, like nothing I've ever owned or worked on (always had Jap bikes my whole life). Drained all the old gas and cleaned out the petcock. Replaced the old fuel line with a new one. Replaced the old rubber breather lines with new. Repaired the aftermarket carbon fiber air cleaner thing, will probably replace it pretty soon with a newer model more to my tastes. The battery was stone cold dead, so I charged it with a 2 amp charger for a few hours every day all last week. Tires were low on air, inflated to 32 psi front, 36 psi rear. Adjusted belt tension to a little looser than what factory spec calls for. I have the updated transfer case chain tensioner thing, but haven't installed it yet. That's for another day. Rolled it out to see if it would start or of the stone cold battery would come back to life. I poured a little fresh gas into the tank and stood by with a fire extinguisher in case any surprises popped up during its first start. To my pleasant surprise the lights came on and the engine would turn over fine. The battery seemed to be revitalized after the multi-day charging strategy. After chugging the starter off and on for about a minute the only thing that happened was a few chuffs of smoke coming out of the pipe. I checked the petcock and I had it on "on." I only put a small amount of gasoline in it so I realized I needed it on reserve. After switching it on reserve some fuel came out of the overflow tube on the carb. I turned the fuel off and tapped on the carb with a plastic screwdriver handle, hoping the float valve just need a slight seating to stop the overflow condition. Then turned the fuel back on and it stopped overflowing. Started cranking on the engine again, and she fired to life! It ran a bit rough for the first few minutes but then appeared to clear its throat. The Vance and Hines pipe has a different sound than my stock Uly. It's not as loud as I thought it might be though. I don't know how long this bike has been sitting, the previous owner passed away. It felt good to rejuvenate it and get it running again. Hope to ride for the first time today. Thanks to all for the helpful advice in the meantime. Ill post pics a little later... | ||
Hootowl |
"There was nothing wrong with them and they are designed with an off center hole that bolts into the aluminum block that bolts to the engine and swingarm. So they're supposed to look like what you see in the picture above." That's not right. The bolt should be near the bottom of the opening so that when the isolator flexes under the weight of the rider on the frame, the bolts come up to the center. That's why they are offset. If they weren't torn, they were in upside down, possibly swapped left to right, or spun around (pin missing or broken). I don't know. But I do know that the bolt should not be that close to the top of the frame. | ||
Pash |
I enjoyed reading that, wondering what was going to happen. Glad you got it started. Maybe the previous owner saw it fire up from wherever he is now... | ||
General_ulysses |
Today I took the bike out for the first time. What a hoot! It's a raw ride; loud, brassy and "look at me" all the way. I love it. The bike handles quite well, and I haven't even done a thing to dial in the suspension. It's more nimble and flickable than the Uly. The brakes are great, no complaints at all. In fact, I like them better than my Uly brakes. The ride quality is rather harsh. Even though I have a Corbin seat, it's still not very comfortable. It's bearable, just not like the Uly at all in that department. The bike is a bit small for me. At 6'2" it's a wee bit diminutive for my frame. My right knee kept banging against the carbon fiber air cleaner. I think if I put a flat bar on it, that'll help me stretch out a little bit more, although not buy my knees/legs any more room. Not that big of a deal really though, I don't plan on riding the bike long distances (at least not yet). The power is good on this bike. Not quite up to the juice of the Uly, but definitely still fun levels of torque and power. Although I'm already feeling the itch to add more power. It doesn't have to be a monster, but I'd like to add another 10-20hp or so. From what I've read, adding XB heads, cylinders and pistons along with some semi-juicy cams can bring it to life in a cost effective way. What do you guys think? In the meantime here's some pics of my maintenance events. And hootowl, the pic I posted above does make it look like the isolators are shot due to the weird camera angle...but I can assure you they were in perfectly functional condition. And the Scott Free method didn't work for me at all. The spreader did not have the power to spread the frame far enough to get the isolators to clear the retaining pins mounted in the frame. I even added a C-clamp on the other side to help compress the other side’s isolator and make even more clearance. Even then, the isolator would NOT come out due to interference with the pin and other surrounding obstructions. Those pins are used to keep the isolators locked into position. And they do a very good job of it. I had to disconnect the oil lines from the tank, remove the exhaust and lower the whole shebang until I could finally squeak one out (even then it was tight!). Getting them out using the Scott Free tool wasn't going to happen on my bike. Not sure how you guys got yours to work, unless the locking pin was missing or mashed down. Plus, I don't think the Scott free method is good for the bike either. It stretches the frame open in a way that may be harmful. It really has to be stretched wide open to get them out past the retaining pins. So much so, it could permanently deform or bend the frame. I think this is why the Scott Free guy called it "unauthorized." Anyway, here's some pics of everything... 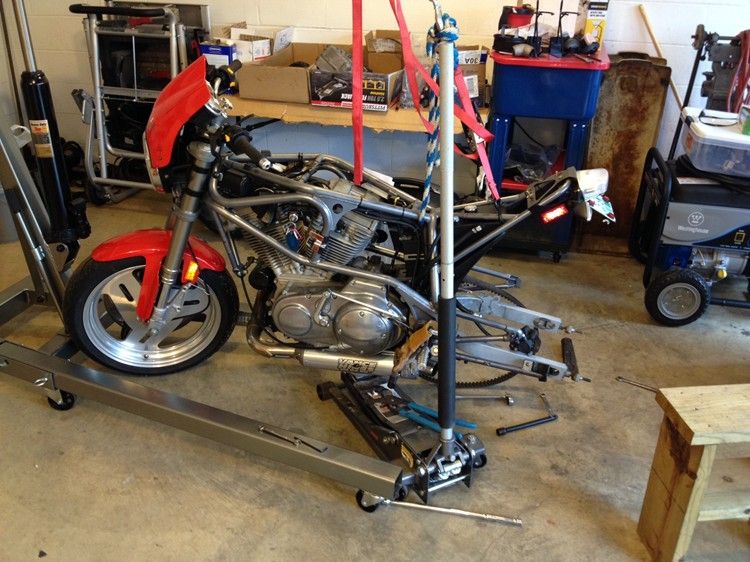 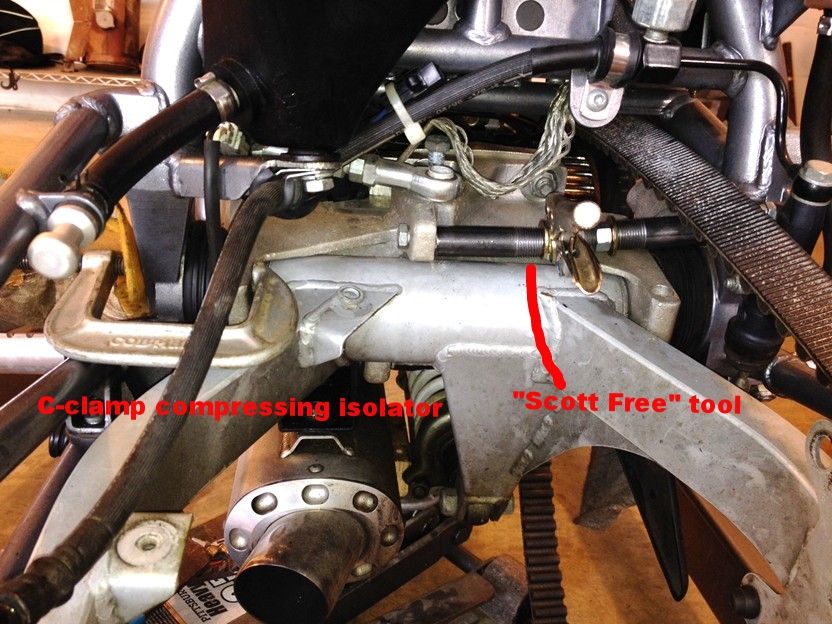 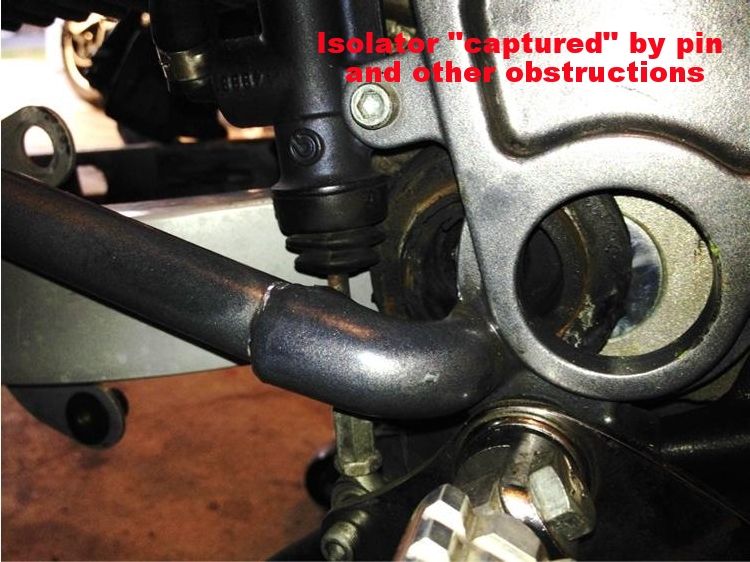 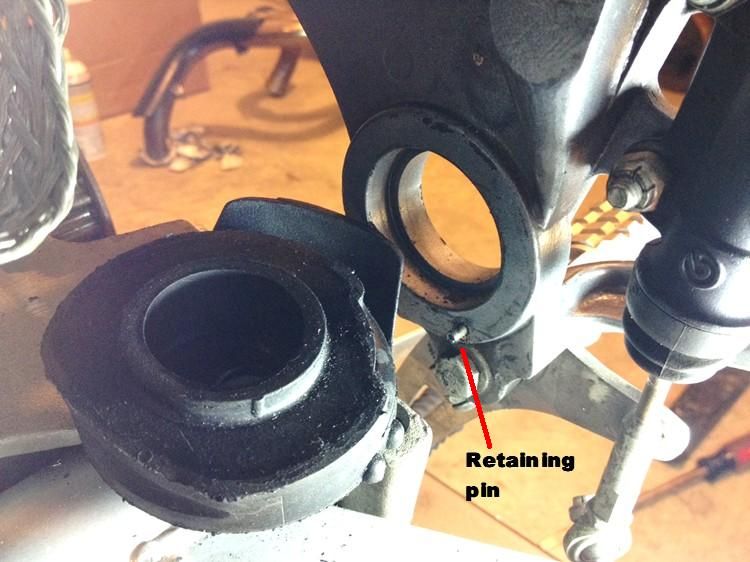 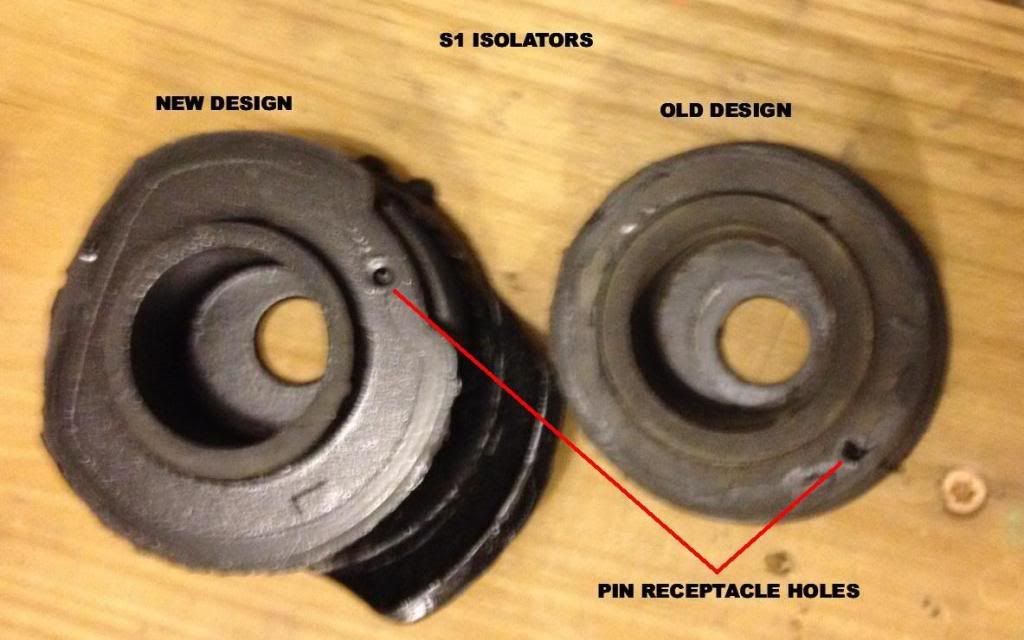 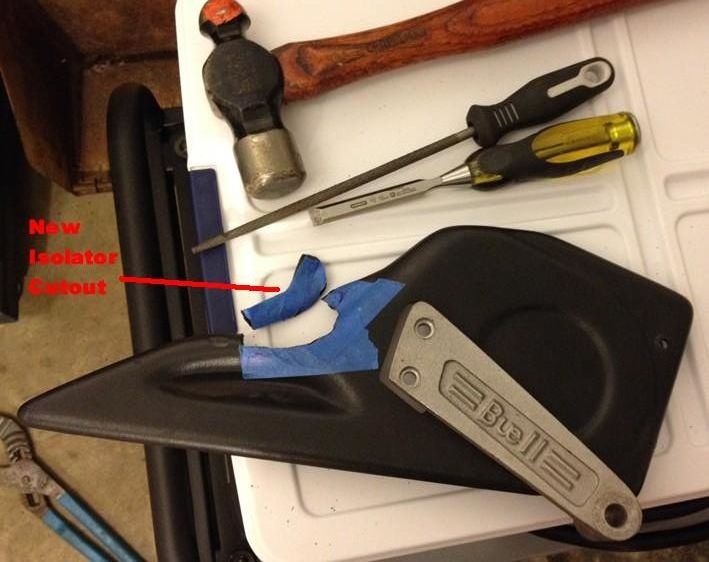 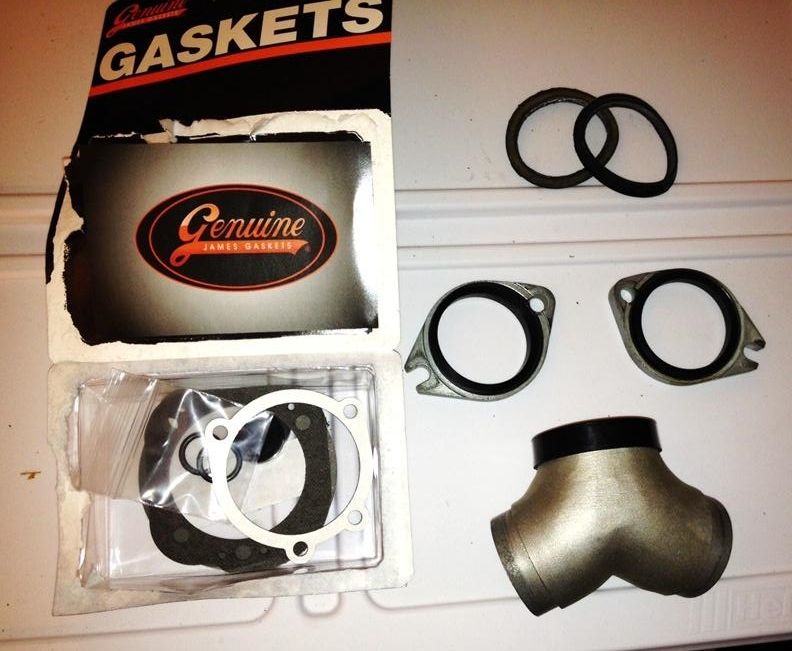 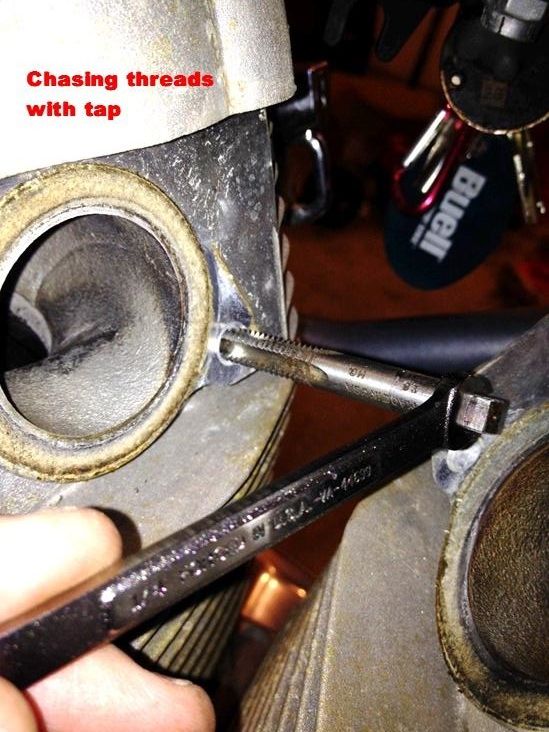 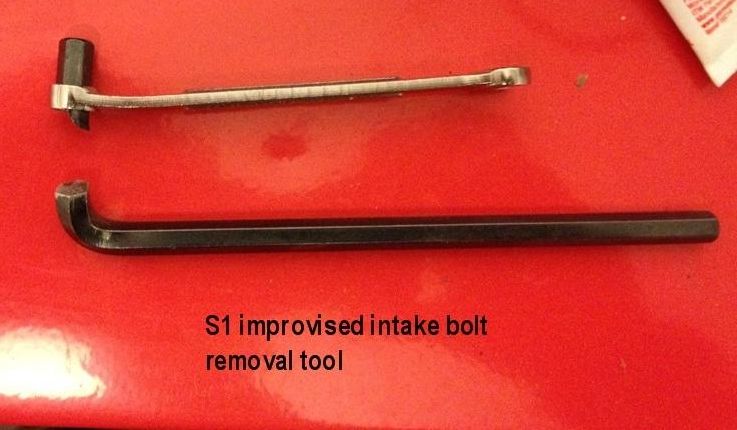 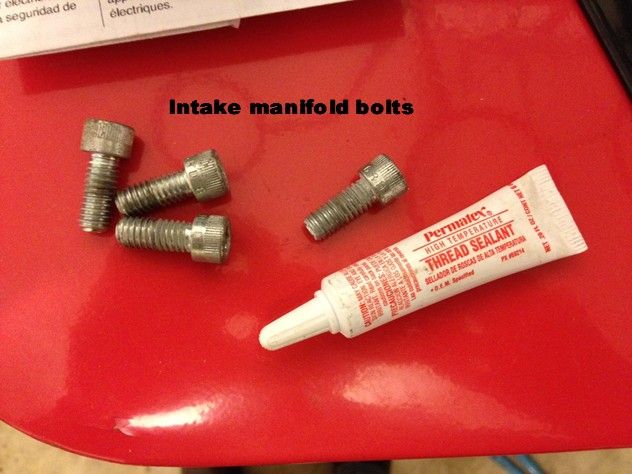 | ||
Lynrd |
I hope you filed that isolator pin down. Per the recall with the isolators, that pin should be no more than .120" long. Great pics though...and I like Red snap... | ||
Pash |
This is my XB top end job... http://www.ukbeg.com/forum/viewtopic.php?p=110849# p110849 | ||
General_ulysses |
Lynrd, unfortunately I didn't file down the pins. Didn't know that was required as a part of the recall. Oh well, I eventually plan on putting an X1 type swingarm on, so hopefully I'll get to it then. I can see if the pin was filed down how the Scott Free method etc would work a whole lot better than my experience. Pash thanks for the link on the XB stuff. Looks pretty complicated and involved doing a swap. Not exactly plug and play. When I have time I'll go through everything you said there and might have some Q's for you later. Thanks for sharing in the meantime. Time to go for a ride now though! | ||
Bluzm2 |
If the "Scott Free" method didn't work and you were spreading the frame, that indicates the iso's were shot. They have hardened with age and were no longer compliant enough. They should compress without too much hassle. The pin thing is important, it's too long in the stock form and will bottom out in the hole in the new isolator. This prevents the iso from seating against the frame. |