| Author | Message | ||
Matrim |
I want to judge interest in another batch of the tuber gas cap fix kits. Seems to me that a fair number of people still want one or two. If this is the case post how many you want. Also, let your fellow Buellers know so they don't end up without one again (and so I don't have 100 too many made.) | ||
Matrim |
Here are the instructions 1.Remove your gas cap and make sure the lock tab is in the closed position (down.) 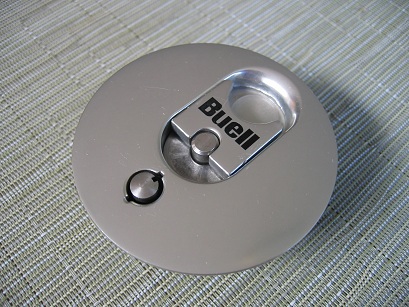 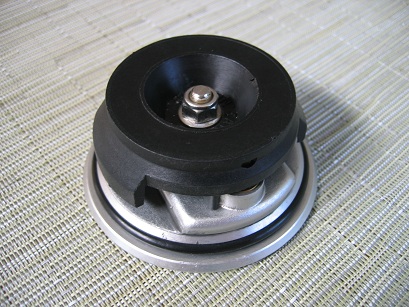 2.Remove the bolt from the bottom of the cap with a 10mm socket, slide the black plastic part off the bolt, and set the rest aside. 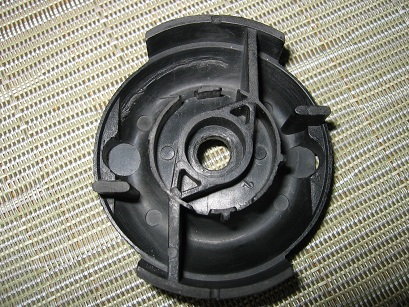 3.Place the black plastic part – as shown in the picture – in a vice or something to keep it stationary. 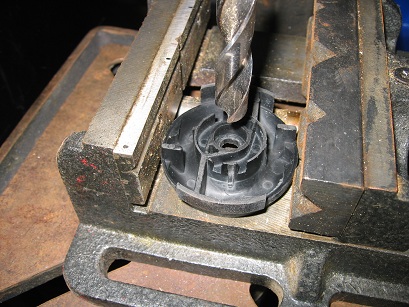 4.Using a ½ inch drill bit, drill through the center of the piece (it will just barely fit.) I used a drill press but I’m sure you can do it with a normal drill if you’re careful. WARNING – This plastic is very soft and the drill bit will grab onto it and tear it up if you aren’t careful so take your time and make sure the piece is secured. 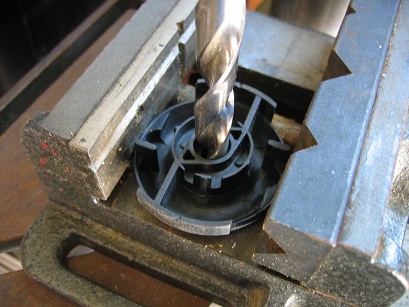 5.When you flip the piece over you’ll see the plastic has kind of folded over to this side from the drilling. Use a chisel, razor blade, sandpaper or whatever works best for you to clean up the hole. 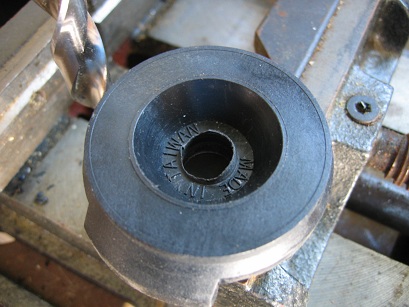 6.You’ll also notice the words “MADE IN TAIWAN” raised in the plastic. I used a chisel to remove the letters so the new part would lay flat against the plastic but again, use whatever works best for you. 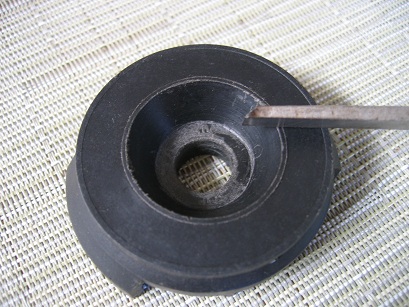 7.Fit check. Place the new part, boss side down, into the black plastic piece to make sure it seats well. Trim plastic parts as needed (even though it was a snug fit pushing it in, I didn’t find it necessary to trim any excess). 8.Assemble the gas cap (without the spring) in the fully latched position (this is very key – see picture). Then insert the new part and install the nut. Note: Assembled in this way, the new part will be held in the correct position as you drill pilot holes. 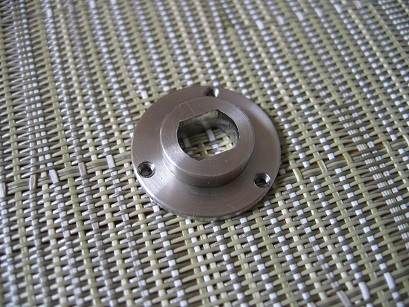 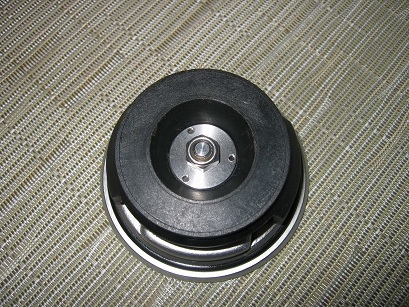 9.Carefully use the 1/16th inch drill bit to make pilot holes in the plastic (be careful to not damage the threads on the new part.) 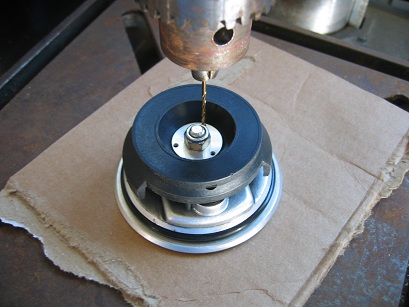 10.Take the gas cap apart again and remove the new part. Now use the 5/64th inch drill bit to enlarge the pilot holes. 11.Put the new part back in place, apply a dab of Loctite to the screws and evenly screw them in place with a 5/64th inch allen. (The Loctite may or may not be necessary.) 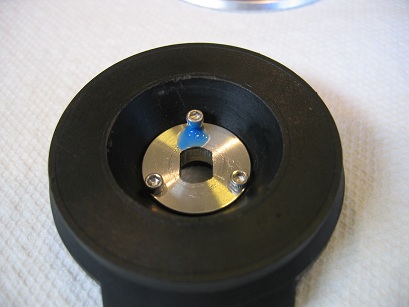 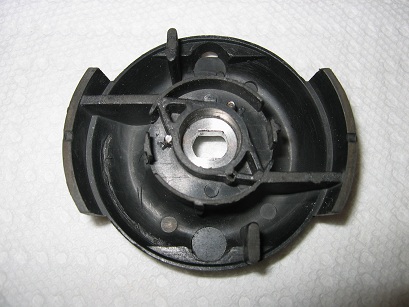 12.Reassemble your gas cap – using the included nut if yours is damaged or worn – and enjoy. 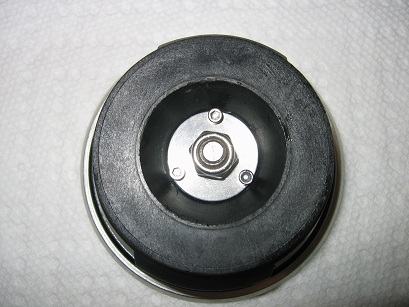 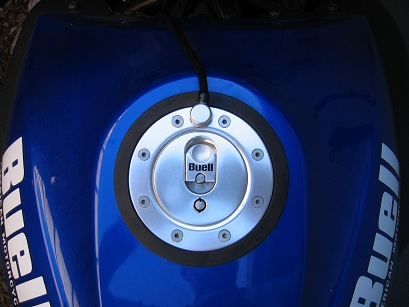 (Message edited by matrim on July 04, 2013) | ||
Hootowl |
I have these installed on both of my tubers. They work perfectly. If you don't have one of these, get one this time around. You won't regret it. | ||
Mcelhaney14 |
I'm in for one, possibly two depending on price. | ||
Purpony |
interested | ||
Matrim |
Kits will be 25 USD shipped anywhere. | ||
Fasted |
i'll bite | ||
Jolly |
I have this installed on my S3t after it failed on my way to work and low on gas.... It works great!! I'm in for 2 Thanks for tooling back up! | ||
Hybridmomentspass |
interested! | ||
Cyclonecharlie |
Did a couple of caps over a year ago... still work great.Quality piece,great instructions and simple to do(with patience and the right tools).I give it a  | ||
Hootowl |
Kevin, you should ask American Sport Bike if they want to get in on this. If they stocked a hundred or so of them, the price may go down quite a bit. | ||
Matrim |
I talked with Al a while back and he was not interested. Thanks for the suggestion tho. | ||
96s2t |
I will take 2 repair kits and pay by Paypal or US cash. | ||
Purpony |
yes- ill take one. paypal? thanks | ||
Possumtrot |
I will buy one, paypal, thanks | ||
Tdukerich |
I'll buy one - PayPal. Thanks! | ||
Ustorque |
I would take one. | ||
Harleyelf |
Thanks for putting the instructions up. Mine has been in my desk drawer for a year waiting to be needed. | ||
Matrim |
Getting close to the minimum. I accept a personal gift payment through paypal. Please remember to send as gift. | ||
S1owner |
I will buy one mine still works but nice to have the fix when I need it! Get me paypal info | ||
Jolly |
I bought the part, had it sitting in the parts bin for when I needed it...and once I needed it...I was out of luck!!! I consider this one simple mod to be preventative MX! I barely salvaged my gas cap once it happened to me! Once it starts going bad, it goes quickly!...I've got a simple bench top drill press so this mod went very easy for me, I'm sure its just as easy with a hand held drill though. | ||
Dammitquikgentry |
I'll take two. Can do Paypal | ||
Jolly |
how close are to making minimum production numbers? or more simply...when do I need to pay  | ||
Wildbuellrider |
I will commit to buying one. T | ||
Blackjoe |
I'm in for one, por favor. | ||
96s2t |
You guys might want to get a spare for your buddy to help this project along. I'm thinking that this is a limited offer. I have 4 buell fuel caps and they all suffer from the same problem. I am thinking its just a matter of time for them to all go the same way. | ||
Jamie04 |
I'll buy one when available. | ||
Primordial |
I'll take one as a preventive maintenance gesture, but can I ask what exactly this does? Is it easier to turn the cap after doing this, or is it in case the original hole strips out or...? | ||
Phaedrus91 |
^^^^^ I was thinking the same thing... I am assuming that the cap fails in some way and leaves the cap stuck on in the lock position maybe??  | ||
Jolly |
EXACTLY!! when the plastic gets worn it allows the locking assembly to freely rotate without turning the lower locking piece and it locks in place. I think that's why so many gas caps have a slight bent edge in one place. someone had to use a screwdriver at one point. if you scroll back through the instructions you can see what happens. the part that you drill through get worn and out of shape allowing the lock mechanism to twist freely without moving the lower assembly. I did this with a small bench top drill press and it worked perfectly. very well designed, clean application and I have not had a single failure or issue since installed. I barely got my gas cap removed when it happened to me, and If I remember correctly I had to remove all screws and pull the entire assembly then attack it from the bottom of the gas cap, if you are low on gas and away from home when it occurs...you are screwed! fortunately mine occurred low on fuel, gas stop 5 miles from home...had enough fuel to get back home and park it and take a different bike to work. |