| Author |
Message |
    
Firemanjim
| | Posted on Monday, February 27, 2012 - 01:23 pm: | 


|
Later swingarm, rearsets look like Banke, exhaust looks like Bubs set up--toss em---the 96 would have had a header with a 2" outlet so check what the cans you are looking at have, though you can use the 98 S-1 ones the White lightning ones had a 2 1/2" outlewt or look for a race header.
Definitely keep the shock and have it redone. |
    
Buell_bert
| | Posted on Monday, February 27, 2012 - 05:59 pm: | 


|
That 4th hole in the carb is NOT a threaded mounting hole it is a vent so don't run a bolt into it. There are only 3 mounting holes for the air cleaner. |
    
Operation_latte_thunder
| | Posted on Monday, February 27, 2012 - 09:11 pm: | 


|
Rich: PM sent.
Deant: S1owner has me covered on the tank bolt I'm pretty sure, but I'll let you know if I need it.
Firemanjim: I think I have the exhaust covered now, buy I had to part with some cash to do so.
Buell bert: Yeah, I knew it was a vent from working on my previous M2. As soon as I took off the air cleaner, I thought to myself, "ahhhhhh sh@t."
Jayvee: Thanks for the breather identification. I'll check with them tomorrow.
ATTENTION PARTS HUNTERS
I picked up my exhaust can at my local HD dealer today that is cleaning out their old stock. I took a bunch of pics, and I'll post them over in the parts for sale. There's some good stuff. |
    
Rich
| | Posted on Tuesday, February 28, 2012 - 07:57 am: | 


|
PM answered. I thought you bought one. |
    
Operation_latte_thunder
| | Posted on Tuesday, February 28, 2012 - 10:18 am: | 


|
Rich: I did pick one up, but it's black. |
    
Operation_latte_thunder
| | Posted on Thursday, March 01, 2012 - 11:03 pm: | 


|
WELCOME TO MY HELL.
Soooooo... the retard that owned my little jem before me managed to break an E-Z Out off in the exhaust stud- correction... BOTH exhaust studs. So, as slick as the stud drilling jig is, it won't help you drill into a carbide E-Z Out.
I decided to call my race car building friend, and he hit me with a great idea... rotate the flange 90 degrees and set new studs in new holes. So I did. Worked really well. The only remaining challenge is going to be access to the underside stud once the header is in place, but I think there will be enough access for a swivel socket. We'll see.
Front head:
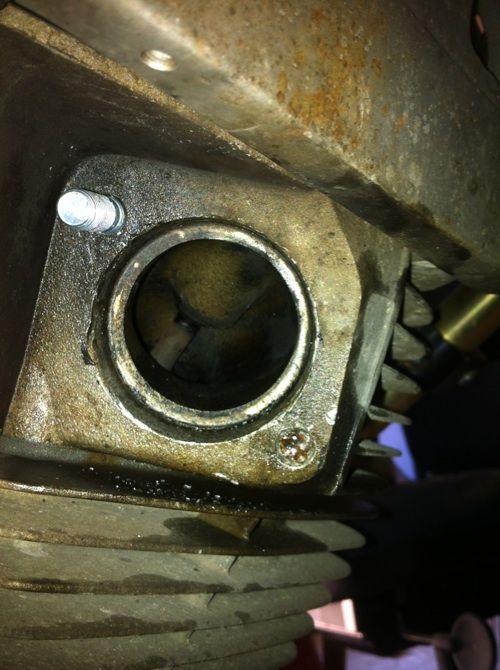
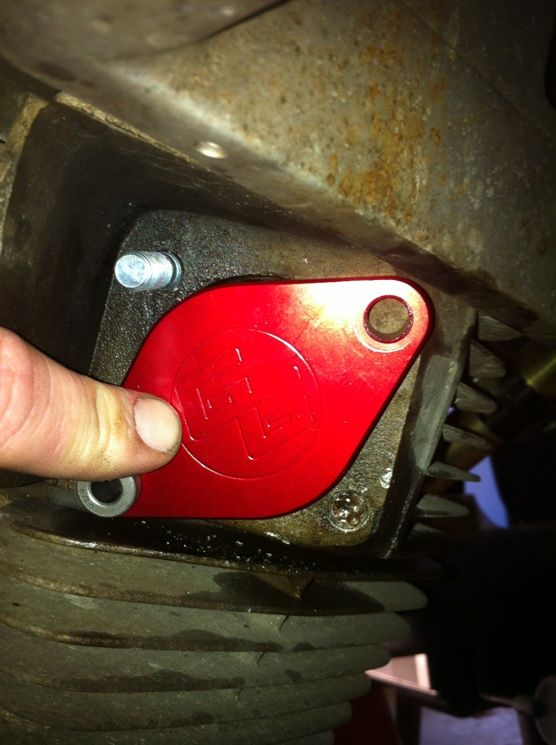

Rear:
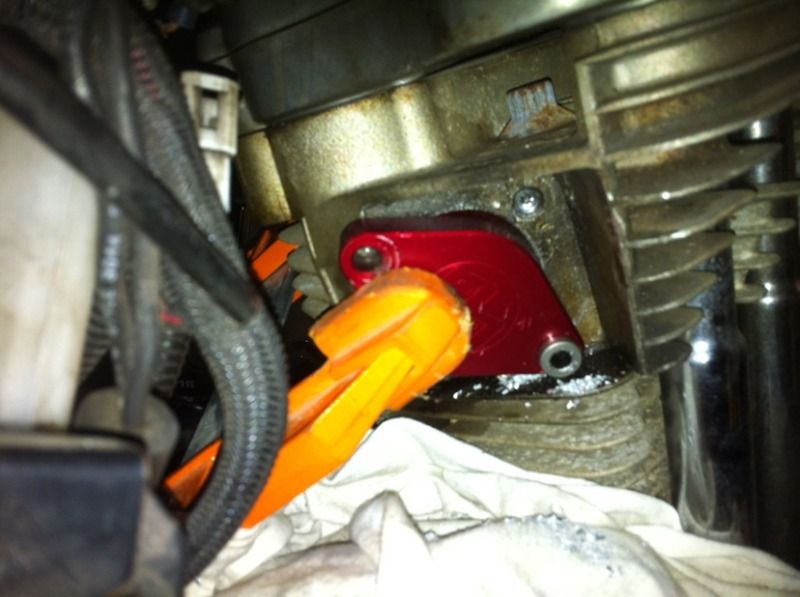
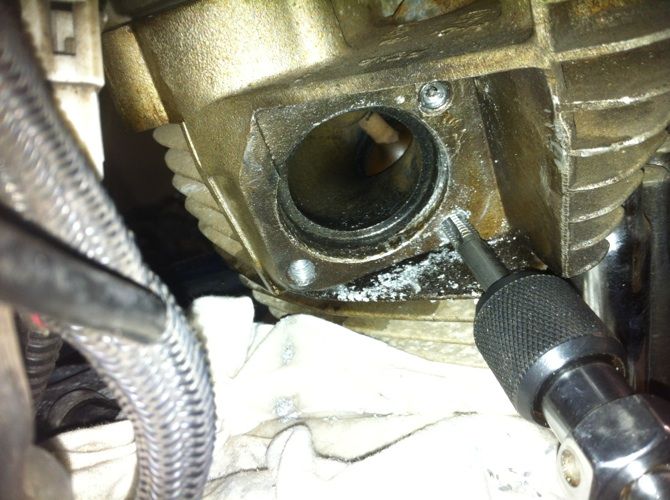

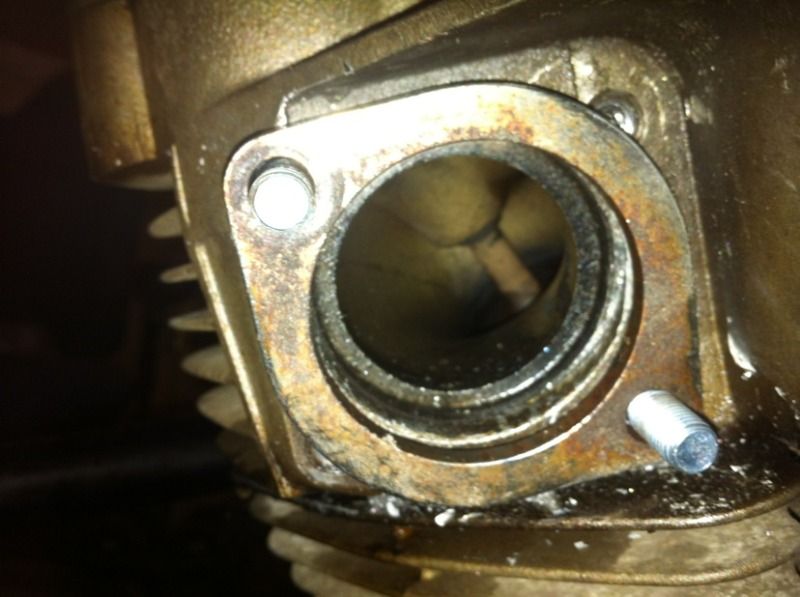
Now... c'mon mail man with the header. |
    
Rich
| | Posted on Friday, March 02, 2012 - 06:05 am: | 


|
Looks good from here! |
    
Operation_latte_thunder
| | Posted on Tuesday, March 06, 2012 - 12:44 am: | 


|
IT LIIIIIIIIIIIIIIVES!!
Threw a jump box on the battery and hit the start button, and no longer than it took to fill the bowel in the carb, it jumped to life! It still had TONS of issues, but it will move under it's own power.
Tomorrow, if the parts show up, shock reservoir mount, rear turn signals, and tank bolt, and I will be on the street, headed for the BMV.
Oh, anybody else have the issue where the choke will not stay at the full out or half out position? The choke functions perfectly, but it has to be held in place. eh? |
    
Charlies_s1
| | Posted on Tuesday, March 06, 2012 - 01:21 am: | 


|
Tighten the deal on the housing, It's the part that the shaft of choke knob runs through. Wish I knew what it was called. Sorry. It's easy. |
    
Rich
| | Posted on Tuesday, March 06, 2012 - 09:33 am: | 


|
It's probably broken. When(if) you replace it, tighten the nut finger tight. |
    
Firstbuell
| | Posted on Tuesday, March 06, 2012 - 01:56 pm: | 


|
it's hard to explain -
how much I value & appreciate your auto-pal's brilliant suggestion to rotate that JIM's tool & create 2 new threaded holes.....
me luvs dis site !! |
    
Operation_latte_thunder
| | Posted on Wednesday, March 07, 2012 - 12:25 am: | 


|
Firstbuell: If you can get your studs out, I recommend doing that. I only drilled new because the previous owner had broken of E-Z Outs in one stud on each head, and a drill won't cut those. If you do have to do what I did, go a little more counter clockwise than I did here on the front head:

It turns out I was extremely close to the vertical head bolt. Also, drill the bottom hole first, so the Jim's can be bolted in solid for drilling the top stud. The top stud ends up right on the beveled edge of the head where it would be impossible to drill accurately:

It seems to be workin out ok for me, but time will tell. I will tell you that if you go this route, the bottom studs are a PAIN IN THE ARSE to get to once the header is in place, but I managed to get it done. You better have a good socket swivel.
-Aaron |
    
S1owner
| | Posted on Wednesday, March 07, 2012 - 09:05 am: | 


|
Did you get the parts |
    
4traxx
| | Posted on Sunday, April 08, 2012 - 10:41 pm: | 


|
How is this repair holding up for you ? I may have to do something like this at some time . |
    
Hybridmomentspass
| | Posted on Sunday, April 08, 2012 - 11:39 pm: | 


|
glad to see this is working out for you.
Tomorrow is the 9th, bike going to be ready for your trip?
Im late to this thread, anything left that youre needing? I dont have a lot of parts laying around, but maybe have something youre in need of.
Just thought that I'd ask. |
    
Operation_latte_thunder
| | Posted on Monday, April 09, 2012 - 01:11 pm: | 


|
4traxx: I've got a few hundred miles on it, and so far so good.
Hybrid: the deadline for my Daytona trip was MARCH 8th, and yeah, I had it done. The bike is currently at HD waiting for me to pick it up. Once I got back from Daytona I took it in for a list of recalls that had never been done.
Thanks again for everyone that got me parts I needed with the quickness last month. |
    
Hybridmomentspass
| | Posted on Monday, April 09, 2012 - 02:10 pm: | 


|
oops, sorry for the mistake on the date.
Have fun? |
    
S1owner
| | Posted on Monday, April 09, 2012 - 10:12 pm: | 


|
Post pics! |
    
4traxx
| | Posted on Thursday, April 12, 2012 - 05:40 pm: | 


|
Did you use the jims tool and drill bit and 3/8s tap ? Bottoming tap ? |
    
Reepicheep
| | Posted on Thursday, April 12, 2012 - 10:32 pm: | 


|
FWIW, you ***can*** get that broken easy out out. DAMHIK. And if IK twice, on two different bikes. 
Get two tungsten carbide bullet shaped dremel bits per broken tap / easy out, take your time, and nibble away down the center. You can occasionally break parts off with a punch or a pick as you work your way down through it.
Wear gloves, it will come out in little micro razor blade slivers.
Figure about an hour per stud, with breaks. Take your time.
It will work, I did it twice (once an easy out, once a tap). |
    
Psykick_machanik
| | Posted on Sunday, April 15, 2012 - 06:24 pm: | 


|
Their is a E-Z out extractor, odd concept yes.
iv never seen them at the tool store, a fellow mechanic had one, so i cant be much help tracking one down.
It has "fingers" that fit down in the hollowed out "flutes" of the EZ out and you can back the broken ez out, out.
he let me use it once and it worked great.
Reepicheep's method works good to. |
    
Buellistic
| | Posted on Sunday, April 15, 2012 - 07:42 pm: | 


|
Anybody know what a reverse flute drill bit is ???
Have 111,208.6 miles on my 1997 S3T as of the last ride and have never broken a OEM exhaust header stud ...
Owe my success to EXHAUST ASSEMBLY Class 101, want a copy just PM me ... |
    
S1owner
| | Posted on Sunday, April 15, 2012 - 07:55 pm: | 


|
Yes have a couple diffrent sizes more of a machinist tool though |
    
S1owner
| | Posted on Sunday, April 15, 2012 - 07:56 pm: | 


|
Yes have a few diffrent sizes more of a machinist tool |
    
Alfau
| | Posted on Sunday, April 15, 2012 - 08:12 pm: | 


|
Left handed cobalt drill bits.
http://drillbitwarehouse.com/index.php?page=shop.p roduct_details&flypage=flypage-ask.tpl&product_id= 780&vmcchk=1&option=com_virtuemart&Itemid=600001 |
    
Reepicheep
| | Posted on Sunday, April 15, 2012 - 08:21 pm: | 


|
My local harbor freight (finally) had a set as well. Not too pricey either. |
|