| Author | Message | ||
Rainman64 |
Hi, I will receive Monday the highway peg kit from Palmer and I have the rider comfort kit on my Ulysses. I'm hoping some one here has already installed the highway pegs and can tell me what I have to do with the larger air intake on the right side. Pictures would be great. Thanks Doug | ||
Cpeg |
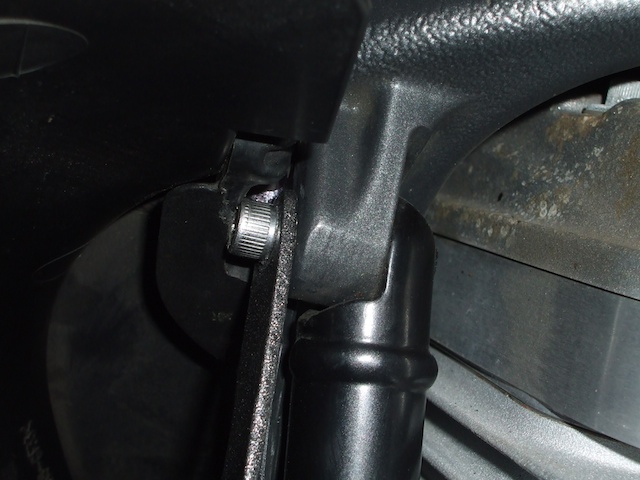
When the sunshines I will take a picture of the surgery I did. I did a semi butcher job of the scoop, but it worked. I am going to redo it after this season, I got in a hurry to go for a ride after 2 months of wrenching. | ||
Chrisrogers3 |
I'm also really interested in this. I haven't bought a comfort kit yet because I am running the highway pegs. I was thinking about modifying the forward bracket so I wouldn't have to hack the scoop. | ||
Cpeg |
Like I said somewhat butchered surgery on the plastic, I used a rat tail file to route out the bottom to fit the brace, it is dissected to where the screw goes. I left the base of the plastic where the screw shoulder lands when tightened. The strut is what is holding the scoop tight to the inside of the scoop. On the top, there was no alternative but to cut the ear piece of plastic on the inside piece, that has the threaded insert, off and then I just zipped tied it around the engine brace. I would have liked to take the time to re-engineer Palmers bracket by cutting the down brace loose from the bottom brace, moving it inboard by about an inch, then shortening the spacer on the top to place the down brace behind the inside piece of the scoop and putting a bend around the bottom of the scoop. But I wanted to ride. I have another clearance issue also. I am using the breather catch can from American Sport Bike that mounts to the side of the cooler, and it is in the way of one of the other braces for the Palmer bracket. So I would be doing that cutting as well.   | ||
Rainman64 |
Thanks for the info and pictures. Supposed to get my kit tomorrow, so let the cutting and cursing began. | ||
Cpeg |
Instead of the zip tie, you can fabricate a small bracket that bolts to the upper Palmer bolt and then run a bolt threw the scoop to the fabbed bracket. should clean that up a little from the zip tie. | ||
Ronmold |
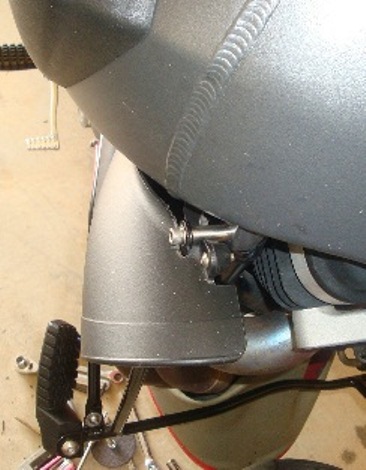
I removed the spacer and did a little Dremmel work. I could've left the threaded insert on the bottom now that I see where everything is positioned but too late, I am also using a ty-wrap.   | ||
Rainman64 |
This is the final product. Could have not cut so much off the bottom.   | ||
Cpeg |
Maybe Iain will see these 3 variations and come up with a re-engineered bracket. | ||
Chazaag |
Here is the way i did this....I made a bracket and extended the downward arm forward. The spacer needs to be trimmed to about 1/3 of its length. I modified a galvanized u bolt flange for the bracket. This way you can use all three scoop attachment bolts. Send me a note if you want more info. | ||
Schwara |
Chazaag ... any chance you could post pics of yours? | ||
Chazaag |
i was able to on the latest post under the big bad and dirty...it is the 7th post down on the main board.. |