| Author | Message | ||
Adsva83 |
Everything is back from powder coat and the wheels are at the shop getting the rubber put back on them. I have the frame on the engine and all bolted down. The swing arm and mounting block are together as well. Today I'll try and get the wiring harness weaved back in its original spot. Is there any specific order I should be putting things back together after that point? I think most of it is common sense, but this is my first time doing this. The front fork and both wheels will go on next so I can get it standing up by itself. 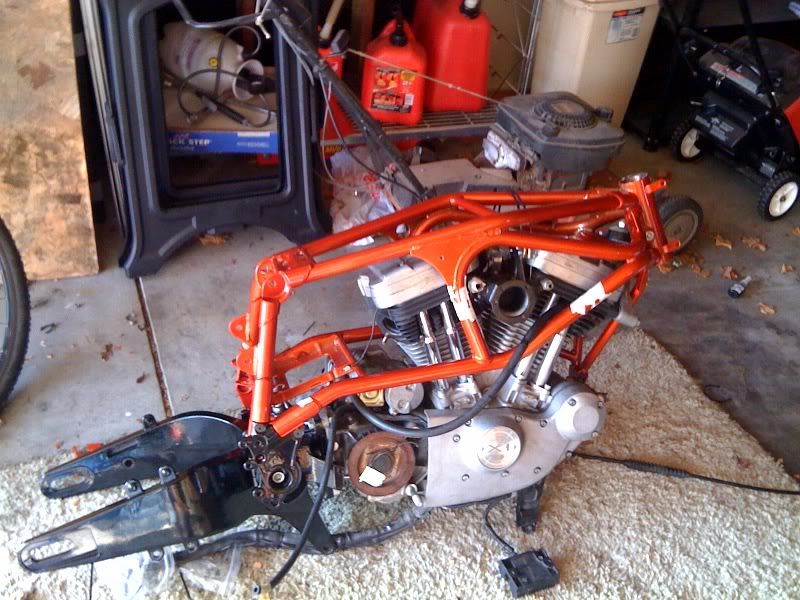 | ||
Adsva83 |
The bolt that is welded on the back part of the battery box for the battery ground cable snapped off. Can I put the battery ground cable on the bolt on the bottom side of the battery box along with the ground strap? | ||
Kyrocket |
What about just drilling through where the original one was and putting a bolt and nut through it? As long as it's clean and use a star washer it should be good to go. By the way it's looking good. You've really bit off a lot for a first time, good luck. | ||
Adsva83 |
I can't put a nut on the inside part of the battery tray to hold a bolt because the battery won't sit in the tray if I do that. The old one is welded in and then ground flush on the inside where it would contact the battery. If the battery just needs a solid ground I was thinking it could go on the same bolt as the braided SST ground strap? I thought many times when I was stripping the bike down that I bit off more than I could chew. But, putting it back together seems to be going much smoother than tearing it apart. I used zip-loc bags and labeled everything very well. Every connector on the wiring harness has a label as well. | ||
Snake_oil |
If just the threads snapped off you could drill and tap the old bolt head and locktite a set screw in to replace the old threads | ||
Oldog |
That red/ orange is going to be eye catching.. | ||
Adsva83 |
I just realized that I forgot to put the belt on before I put the swing arm and rear isos in. Can I just remove the bolts in the frame/isolator connecting plate and slide the belt through? I was going along smoothly until I realized I forgot the belt. | ||
Shadowracerx1 |
Make sure you don't have powdercoat between the swingarm and engine mounting surfaces. It creates a grounding problem. | ||
Adsva83 |
I took all of the mating surfaces between the swing arm and engine down to bare aluminum. The spots for the ground strap are also free of powder coat. | ||
Oldog |
I forgot to put the belt on before I put the swing arm and rear isos in your not alone, probably its one less bolt} | ||
Hootowl |
Yes, you can take out the frame section to change the belt. | ||
Adsva83 |
Does anyone have a picture of where the actuator with the adjustment screw on the shock mounts? I didn't take pictures and can't remember how it mounts once the shock is mounted. | ||
Bandm |
http://www.badweatherbikers.com/buell/messages/384 2/B035A-263582.pdf | ||
Pkforbes87 |
haha.. don't know how many times I've done the same. Once on a buddy's M2 we had been fighting to get things lined up for a couple hours since the engine was still in the frame. Soon as we finished we realized it all had to come out because the belt was missing. (it's a LOT easier to install the swingarm and isos before the engine is in the frame getting in your way) | ||
Adsva83 |
Thanks for the help as always. I need to post a couple more pictures of the progress. I would say I'm about 70% complete, I have about 10 hours of work in it so far and probably have four or five more before I can turn the key and pray. | ||
4cammer |
Nice color selection. Looking forward to more pics. | ||
Adsva83 |
She is finally up and standing on her own two feet. I put the forks on the wrong side the first time, amazing how easy it is the second time you put them back on. I have a second set of plastics to paint black, but I'm actually liking the gray with the orange and black.  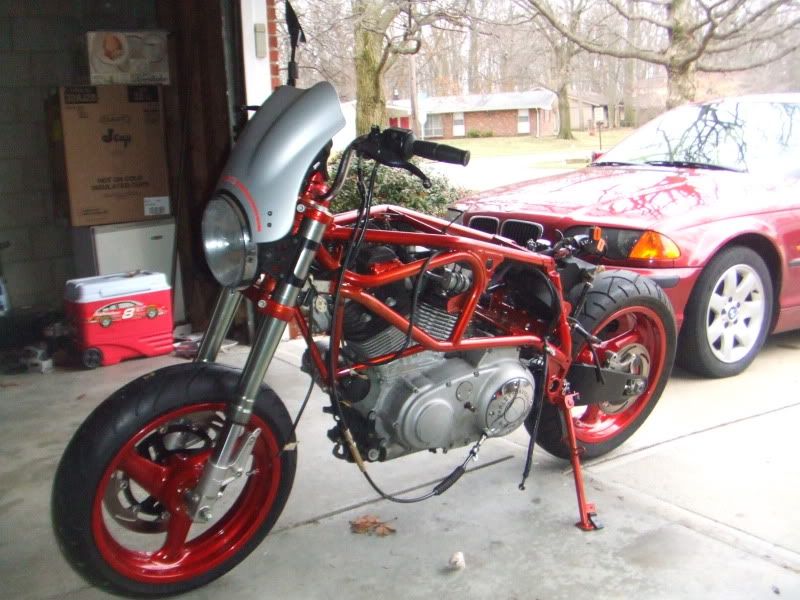 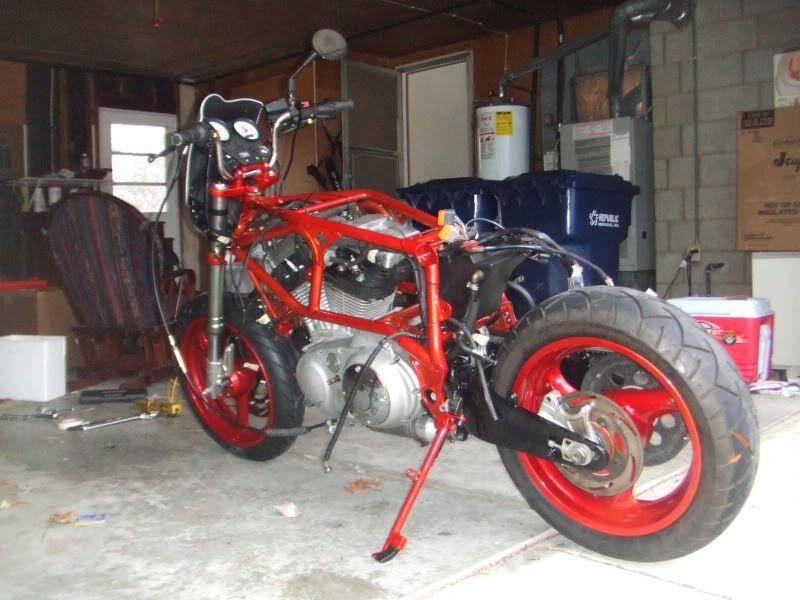 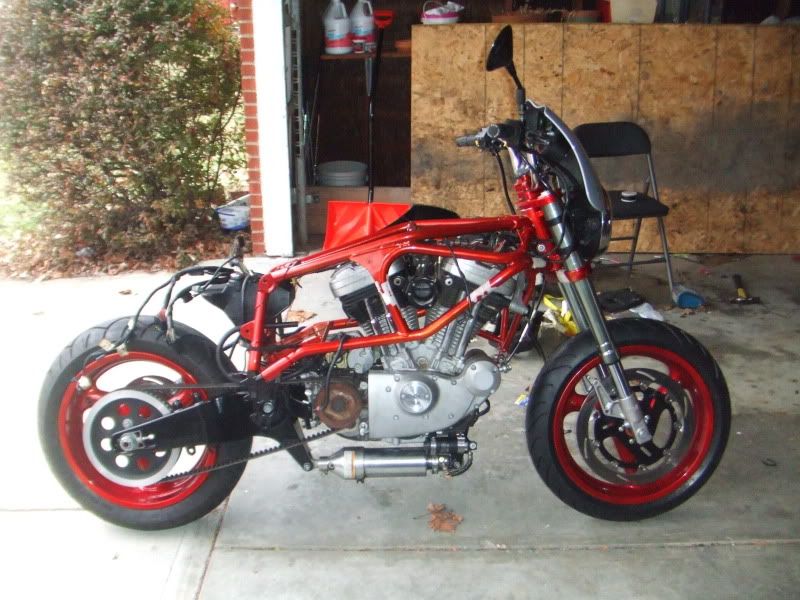 | ||
Littlebuggles |
Color looks great, I really like that frame and wheels, It also looks great how the triple clamp is matched, I always thought the stock casting looked pretty unfinished. Side question, what kind of tire is that up front? It almost appears to be mounted backward due to the tread direction. | ||
Adsva83 |
It's amazing what everyone here notices in just pictures. I didn't notice the tread direction until you mentioned it. The rim didn't have the rotor on when i took it in so it's a good possibility they put it the tire on backwards (it was a metric shop). They're Metzler tires front and back, not sure on the model. | ||
Kilroy |
The Metzler on the front has a weird tread pattern that looks absolutely like it is on backward but it is not (but double check just to be sure). | ||
Adsva83 |
I checked it and the tread seems like it would be going the wrong way, but it is on correct (Message edited by adsVA83 on March 15, 2010) | ||
Littlebuggles |
Ha-ha, that's why I asked the maker on the tire, funny how we get used to tread direction and such. I used to use mountain bike tires that were the same tread front and back, only they told you to mount the front opposite the back, for proper directional control. Glad you won't have to remount that! My brother fought a couple tires on with some wood blocks in his garage, his triumph was short lived when he realized both front and back were backwards. He's been so frustrated with it he left the bike alone for months (he's doing a rebuild on a restricted budget). | ||
Kalali |
The bike looks really sharp with silver/gray against red/orange. What bar are you using? Looks much higher than stock X1. | ||
Adsva83 |
The bars were on there when I bought it so I'm not exactly sure what they are. They look and fit similar to the S3 bars. They're taller and more narrow than the stock ones. | ||
Brother_in_buells |
That,s for sure a nice color combination!  I think this summer there are some beautiful bikes back on the road! (bad times give good inspiration)  | ||
Mmmi_grad |
If I were doing this I would have had to black out the motor. Its more clean with the black and orange not black alum orange etc. If I really wanted to throw money , chrome valve covers and push rods with engraved chrome timing cover. Rest colored. The stock millinium paint would have to go into some kind of black into frame color fade or some design. Can you tell I dont like the silver with these other colors? (Message edited by mmmi_grad on March 15, 2010) | ||
Adsva83 |
I thought about blacking out the engine but I actually like the orange, gray, and black together. I'm not big on chrome though. I like what a lot of guys have done with chrome on their bikes but I'd rather not spend the time keeping it clean. I like the bike but not enough to just pour money in it. It's worth $3500 so spending 30% the value of the bike for parts to make it look better isn't for me. All of the powder coating cost me zero dollars, which is the only reason I did it. | ||
Rjn |
like the color combo of the grey and orange. Maybe an idea to paint the orange logo's on the plastics the same color as the frame. and give the pulley a bit of attention. ( i just remember mine is rusty also ) Keep up the good work ! | ||
Adsva83 |
I couldn't believe how much rust that front pulley has on it. I couldn't get it off, is the reason why it's still the way it is. I don't like the stock cover that goes over it but it's going back on until I decide on something different. I actually have a complete set of different plastics to have painted. I'm going to go with black and an orange racing stripe the same color as the frame. I'm still searching trying to find the best deal on a painter though. | ||
Kyrocket |
I cleaned my pulley up the best I could and hit it with a Rust-o-leum rattle can black. Turned out fairly decent for what I had invested. |