| Author | Message | ||
Gbackus |
I recently purchased a used 2000 X1 with 18xxx miles, put about 180 miles on it on the drive home, and had no issues except for a broken turn signal and voltage regulator bracket. The bike came with meticulous service records, however, the last time it was serviced was near 4 years ago, with only about 1200 miles put on in that time. I didn't have the time to service it myself(still don't, so it will probably sit for 3 weeks until I get some vacation time and can look at it) so I took it the 40 or so miles the next to my closest Buell dealer(Glendale HD/Buell, which came highly recommended to me by the previous owner) to get serviced and the broken parts repaired. I had no issues in the 220 or so miles(80-90% highway) when I dropped the bike off at the dealer. Picked the bike up yesterday, and about 40 miles into the ride my swingarm, tire and belt were covered in primary fluid(at least I'm fairly sure that's what it was). I tracked it down to the vent tube under the seat, cleaned everything as best as I could, headed home(about 70 miles from where I was at the time) and more fluid leaked out. Additionally, I did notice the bike was harder than normal to shift into neutral(the last 130 or so combined miles were about 60/40 highway/street) shortly before I puked fluid, and then afterward shifted into neutral normally. Does anyone have any ideas on what might be causing this? I'm hoping it's something as simple as an overfill, or the breather being improperly routed( I understand there was a service bulletin covering this issue, anyone know what number bulletin that is so I can look it up). But other than that, what should I start looking at? Thanks. | ||
Reepicheep |
Could be an overfill during service, and could also be a leaking crank seal. You are at about the right miles for that to go. Replacing isn't rocket science, but you have to pull the primary cover, then remove the stator / chain / clutch assembly as a unit. The requires a couple of "big freaking sockets". Then you have to get the old seal out (that aluminum is soft as butter, so be careful) and press the new one in (there is a proper tool for this, but I used a machined wooden dowel to space it). Don't seat it too deep, if it rubs on the bearings it'll slice the seal open in 4000 miles (DAMHIK). There is an updated torque spec for the crank nut, its a lot tighter then the figure in the manual. Use the new tighter spec. | ||
Fasted |
crank seal READ ALL knowledge vault entries before you attempt. it never hurts to use the proper tool for a job. the updated driver costs the same as 1/2 hour of labor, removes screwup potential time consuming job, but it gives experience in the primary drive, which seems to be one of the easier areas to maintain without the dealer servicing it | ||
F_skinner |
Plus 1 I think the new torque spec is 240 - 250 ft pounds??? and I think 75 ft pounds for the clutch basket. | ||
Gbackus |
I was afraid that would be the answer. Just in case though I'd like to eliminate the minor factors first. I'll check the fluid level, and adjust as necessary, but if anyone could provide a picture of the proper breather tube routing, that would be very helpful as well, as I'm fairly positive it's still routed the original way(into the seat). What I'm referring to is this snippet from the X1 Files: "HD/Buell sent a tech tip to dealers explaining the reason for excessive oil coming out of the breather tube. It seems the breather hose on late model primaries exits the primary, goes UNDER the brake line, then travels up to the seat and bends over...the part under the brake hose acts as a catch can with oil as it tries to return to the primary..eventually it plugs the hose and the pressure finally blows it out all over your fender. Reroute the hose over the brake line and keep it going up so there is no dip and don't bend it at the end to the right side of the bike..continue on the left side and tie wrap it to the frame." Unfortunately there is no link to the tech-tip bulletin, and I could not find in the service bulletin section either. Again, any help is appreciated. | ||
Buell_bert |
Lets not rush into things untill you check the primary fluid level first. | ||
Buell_bert |
Also make sure the hose goes up a few inches then a bit down. It is kind of like a sink trap so that it breathes but the liquid drains back. It sure sounds like it was overfilled. | ||
Kalali |
I would also bet on the overfill condition simply because it started puking after the dealer put their hands on it... BTW, thanks for that Tech Tip. I'll check mine when I get home. | ||
Gbackus |
Looks like it was an overfill, I pulled about 2 ounces of fluid out, no more puking, but I'm keeping an eye on my oil level just in case. | ||
Gbackus |
I celebrated too soon I guess, vent tube started puking again, this time, I could clearly tell that motor oil had mixed in with the transmission fluid. I drained the primary to confirm, looks like I have to replace the seal. Does anyone have the part number for the hd kent-more installer/tool? | ||
Buellisticx1 |
The "official" seal installer tool part number HD-45206,   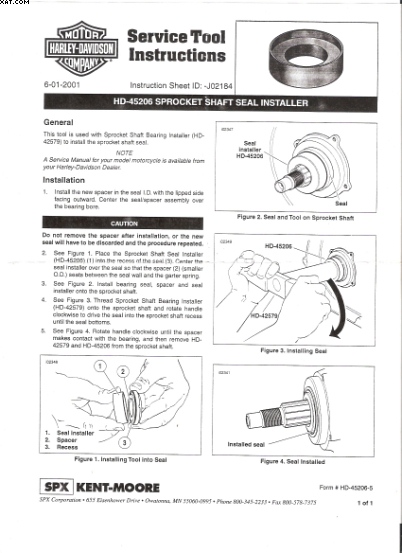 The HD factory system uses a handle with a Nice bearing in it ( P/N HD-42579) so that this doesn't turn on the seal, but you can also to use a PVC piece as a spacer. 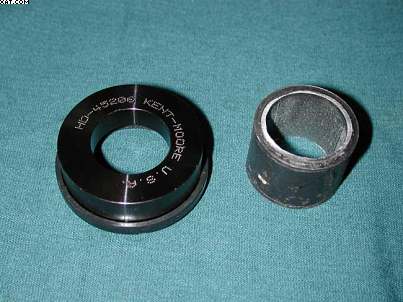 Some folks on here used a green tinker toy for install the new seal. New seals are better than old one (P/N 35151-74A). Remove the spacer and discard it. Always use a new one (P/N 40240-89). Make sure seal puller, screwdriver, fingernail, or whatever you're using to pull the seal is NOT touching the soft, delicate, fragile, aluminum bore. Here there is some links about if you want to look read it: http://www.badweatherbikers.com/cgibin/discus/show.cgi?47623/404148 http://www.badweatherbikers.com/buell/messages/3842/370024.html http://www.badweatherbikers.com/buell/messages/3842/364827.html?1213450988 Keep us informed on your progress. Regards. | ||
Reepicheep |
LOL. The green tinker toy was handy, but any wooden dowel would do... Basically, you just notch one end of the dowel, so you have one largish surface to push on the seal with, and another largish surface that will catch on the aluminum lip and keep the seal from going in too deeply. It'll work if you don't screw up, but of course the seal driver will do much better. | ||
Gbackus |
Not having any luck getting the part(HD-45206) through any local dealers | ||
Buellisticx1 |
I got the official seal installer tool P/N HD-45206 online from LSHD1 a months back for $25.60 Here the link: http://www.lshd1.com/servlet/StoreFront report back to us... Regards | ||
Gbackus |
final update. I got the part from lshd1, you will have to call for it, and it's $25 give or take for shipping. They can also get the Everything is back together now. | ||
89rs1200 |
I found and purchased the 3D printed HD45206 / HD-45206 / 45206 Sprocket Shaft Seal Installer. * Only $16 for two, and yes, it is plastic, but it worked great without deforming! * The taller tool is just the right height as no spacer washers were needed. * It worked! Could not have properly installed the seal without the tool. The seal sits out a bit from flush with the opening. I would have seated the seal too deep without this tool. https://www.thingiverse.com/thing:1784320 This taller one will not need spacers as it is just tall enough to use the stock nut to press the seal in;  Copy of the Harley tool HD45206 / HD-45206 / 45206 Sprocket Shaft Seal Installer; 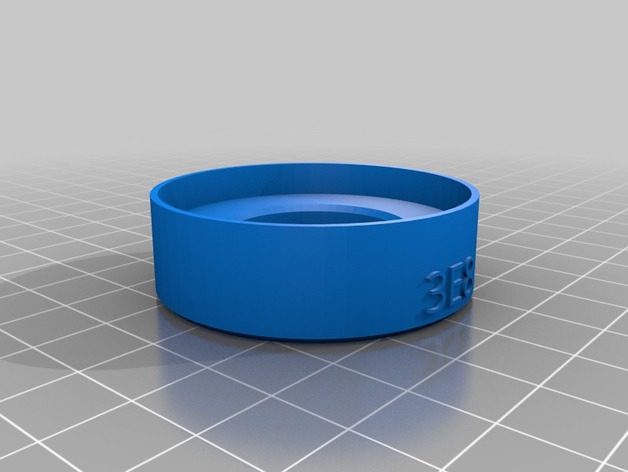 |