| Author | Message | ||
Lens |
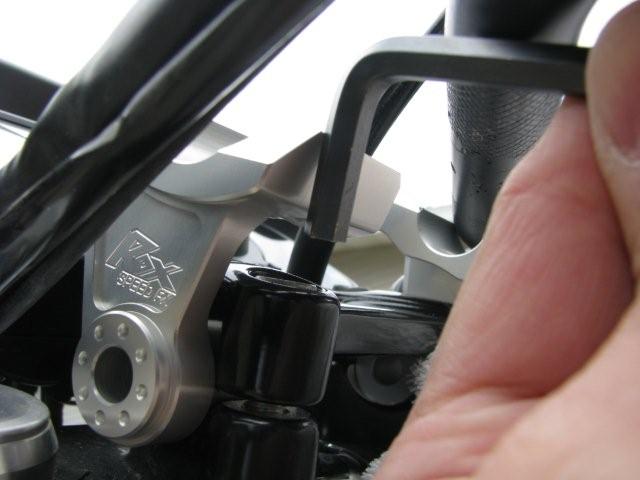
I'm feeling kinda dumb today. Tried to install my new 2" Rox Risers but couldn't figure out how to tighten them down. There doesn't seem to be enough room to get a hex-key in to tighten down the original pinch bolts, and certainly not enough room for a torque-wrench. Do I need to get/make a special hex-wrench to be able to get to the original bolts?  | ||
Andrejs2112 |
LOTS of patience and beer. You need to be creative. You should try to install footpegs...makes the riser install childs play. | ||
Firstbatch |
Have not done this install but two options come to mind. Cut off a section of the allen key and then use a wrench.....or drill an access hole from above. Foot pegs on a Uly are simple , knock off a a c-clip and push out the pin. | ||
Gamdh |
I don't have them... but I vaguely recall someone talking about the install. You had to rotate them forward.. tighten the back screws then rotate them into position and tighten the front ones???? No idea if that right or even why I remembered it?? | ||
Jre |
What Gamgh said is correct, I have these and that's what worked best for me. These make a HUGE difference on the HWY and trail ridding | ||
Rwcfrank |
Get a small hex bit from the auto parts store and use a box end wrench. Or use a bolt with 2 nuts locked together on the threads, put the head of the bolt into the hex and viola.. (Message edited by rwcfrank on July 19, 2009) | ||
Lens |
Thanks for all the encouragement. My Dremel tool with an ablative saw blade converted a spare hex-key into a "stubby" hex-key and I was able to get it to work. Just seems strange that Rox advertises these as "Buell friendly" when they are such a pain to install. | ||
Baydog |
Gotta pic after the complete install? | ||
Nutsosane |
They are that "unfriendly" on all bikes. My BMW has them, same rigamaroll...NUTS | ||
Whoreatio |
I cut off a hex wrench too. After fighting these things on, I thought maybe some spacers in mounting holes and regular old hex head bolts might be the ticket. They DO inprove the ride comfort. | ||
Etennuly |
While you are there, figure out why we need a 1/4 inch more room to re-torque the steering head. Next time my bars are off there will be a little machined half round notch for that. It is kind of dumb to torque it, put the bars back on to do a resistance test, then take them back off if you need to make an adjustment. | ||
Conchop |
Anybody try their rubber mounted risers???? | ||
Rdkingryder |
+2 what gamdh said. Rotate forward, cinch down rear bolts. Rotate rearward and torque to spec. I have them on mine as well. | ||
Scooter808484 |
I don't remember having my normal cussing fit when installing those. Prob'ly did I guess, but I promptly forgot about it because I liked them so much!!! | ||
Lens |
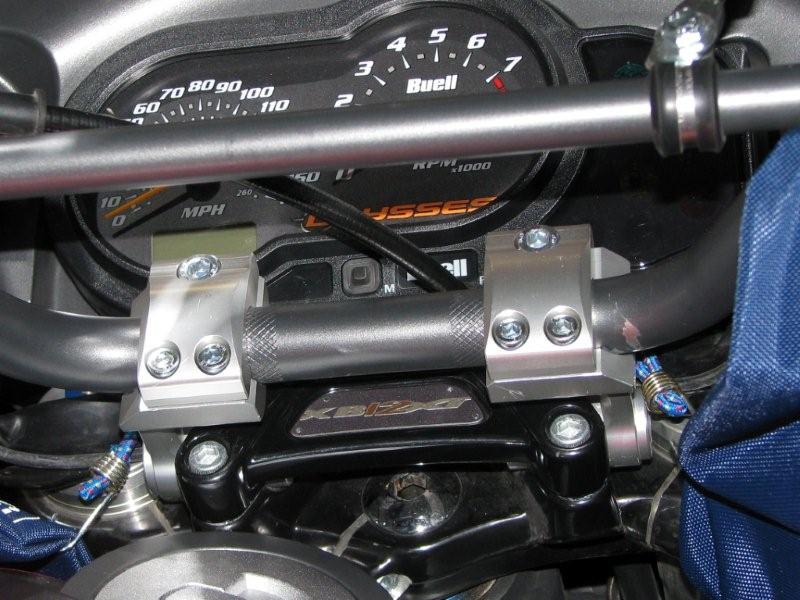
Baydog - Here's the photo of the finished install.  | ||
Ulyranger |
I cut off the tip of an old drive bit that was worn, and used a box end wrench on it. I tried the forward, tighten back bolts, back tighten front but it did not work out for me in the position I liked. Then I had to move it again anyways for the new "tank" bag. Overall, love the Rox's, one of the best farkles for a Uly IMO. | ||
Invisible_monster |
Did you have to adjust cables much to make this work? I just installed the 1" riser on my uly and didn't need to adjust any cables. | ||
Lens |
The only "cable" that needed help was the brake line. It normally has two clips. One that is easily accessible just under the flyscreen. I took it off temporarily during the install. After the install I repositioned the clip on the brake line and re-attached. To get to the second clip I had to take off the windshield, the flyscreen, and the headlight bracket. Following what others have posted here, I just disconnected that clip. All of the other cables had enough slack. |