| Author | Message | ||
Kyrocket |
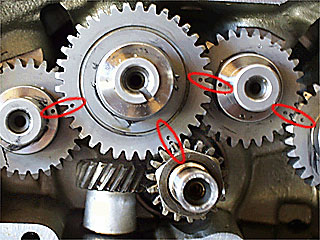
O.K. turn to page 3-44 in your factory service manual. At the top of the page it shows all four cams lined up with the dots and where the color code location should be. Well, going by the pics I took earlier and lining up the dots my number three cam's paint dot is 180 degrees from where it should be. Does anyone know or have experience with this? When is this paint dot put on? Pre-assembly or after the cams are installed? Thanks for the help. | ||
Pkforbes87 |
look for marks etched into the metal. Either small dots, small > signs, or straight lines. I don't think those painted dots are useful for getting the cams installed properly. | ||
Kyrocket |
Yeah, all my dots are lining up but when I went by the book that one dot was making me freak. This is my first total tear down and rebuild so I'm edgy. | ||
Tdman77 |
I am pretty sure the colored dots is for matching the cams to the motor and not alignment of the cams. There should be a marked etched into the end of the cams for alignment. IIRC there was something about certain cams for certain blocks and they used different colors to mark them. | ||
Pkforbes87 |
Michael, I just put the cams back in my project a few days ago and definitly know the edgy feeling  There were some marks on my cams that didn't really make sense. I don't remember if it was the > shaped ones, or the ° ones that I used, but once I got them lined up it all looked right. There were some marks on my cams that didn't really make sense. I don't remember if it was the > shaped ones, or the ° ones that I used, but once I got them lined up it all looked right. There's a good pic here on badweb that shows properly aligned cams and has the alignment marks specifically poijnted out. I'm having trouble finding the pic though. | ||
Kilroy |
Try this  | ||
Oldog |
+2 Kilroy | ||
Kyrocket |
Yup, that's what mine looks like. Had my buddy who has built a lot more than I, heck if he built two it would be more than me, but we pulled the cam cover off and everything looked good. I'm so proud of my cut down cam cover but man that first lick with the cut off wheel was painful. Once you start cutting there's no turning back. Gaskets should be in tomorrow from Al and I "think" that's the only thing I'm waiting on. Time's a tickin' cause we leave the 22nd for a 1500 mile trip. I may be breaking this thing in at two in the morning just to get some miles on it. Thanks again guys! Michael | ||
Buellistic |
BUELLers: OLD SCHOOL hint: Take before a picture of what you are taking apart so you will know what it looks like set up correctly ... MAY THE LONG LASTING BUELL BE WITH YOU !!! | ||
Akbuell |
And one other note. The lifters tend to bleed down after lying on the bench for a while. Don't be surprised if you get a LOT of noise on start up. A careful, gentle lap or two around the block should take care of it. Really scared me when I replaced my oil pump drive gear. And I knew I had the cams in right. Hope this helps, Dave. | ||
Pkforbes87 |
If you have the pushrods out for any reason, I suggest pulling the lifters to inspect them then bathe them in oil until you start putting things back together. I soaked my lifters for a couple days before reassembling and don't hear any valvetrain noise as a result. Well, that may be the result of 10.5:1 compression roaring out of a D&D pipe, but I'm sure the oil bath helped too  | ||
Ratbuell |
+1 on the lifter bath. Any time I build a motor (Buell, 2.2 turbo Dodge, smallblock Mopar, whatever), I cut the top off an oil quart bottle (I'll leave one side attached as a "hinge"), put the lifters in the bottom, fill it to just below my cut line with oil, let the top half hinge back in place to keep crap out, and let soak for at least 24 hours. It only takes one pushrod coming out of an unpumped lifter (or an OHC follower falling out) to get your attention on startup. | ||
Buellistic |
BUELLers: Any body see anything wrong with having the cylinder you are working on on TDC, hand pump up the two tappets, put the rocker arms on and let the two tappets bleed down(like over night) ... Then do the other cylinder the same way ... Now when you crank up the motor, all the tappets will be right on, therefore no tappet noise ... MAY THE LONG LASTING BUELL BE WITH YOU !!! | ||
Sportyeric |
When you cut down the cam cover, do I recall that there is a passage at the bottom (there as a result of boring the oil gallery) that needs to be plugged again? | ||
Littlebuggles |
Nope, that's just where the timing wires run through the cover. I can post a pic if you want (since I just sprayed some nice black paint on my cover and am itching to show off my detail work)  (Message edited by littlebuggles on May 16, 2009) | ||
Kyrocket |
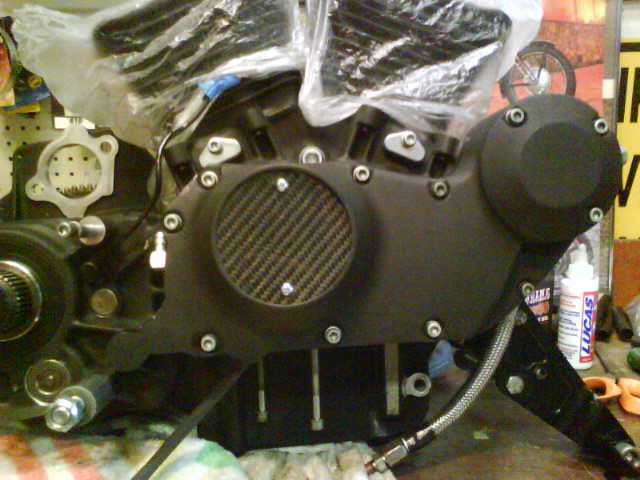
Sporty, this is how it turned out...  It's really easy to do. All you have to do is follow the lines on the back and make sure not to scuff the gasket sealing surface. Some people leave the dowel pin alignment sticking out of the rear of the cover, some cut it off. As you can see I left it and also left the small bump in the bottom for the timing wires to come through. | ||
Littlebuggles |
Looks almost exactly like mine, are you blacking out the oil pump? | ||
Kyrocket |
No, I polished the oil pump for a little contrast since the upper part of the motor will be all black. hopefully I will have the motor back in the frame tonight and have some more pics to post up. |