| Author |
Message |
    
Sekalilgai
| | Posted on Tuesday, July 29, 2008 - 11:09 pm: | 


|
Hey Roostre,
Thanks for clearing it up...have fun! |
    
Roostre
| | Posted on Wednesday, July 30, 2008 - 12:49 am: | 


|
"Etennuly-Corey, What do you expect the trailer's total weight to be? I would guess about forty pounds or so. Why not use the aluminum skin on the floor instead of the plywood?"
Close guess! I weighed the frame and then the wheel and trailing arm assy- together they weighed 32 lbs. I am guessing that it will be around 55lbs when finished. I will try and get a final weight for this report when all is said and done.
The material for the floor is actually a composite alum/plywood/alum sandwich material that is used to side high rise buildings. It is extremely light, stiff and strong. The aluminum is coated on both sides with a very smooth finish. The floor will actually add to the structural integrity of the design. It allowed me to use less/smaller steel for the frame. The material was part of an auction that I won the bid on because no one else wanted that much of the stuff. The skin aluminum came from the same lot. I have used both for several projects now. |
    
Roostre
| | Posted on Wednesday, July 30, 2008 - 12:55 am: | 


|
Spops- " BTW, have you had a chance to chat with Dale yet? He can probably help you with some of your physics, electrical, and suspension questions. Just send him the link to this thread."
I haven't really pursued it with Dale. I feel guilty picking a guys brain when I have no intention of buying anything. I did sign up for his newsletter. I may give him a call to see if he has any Buell specific tail light adapters. (What is the chances that it is the same as the HD?) |
    
Gotj
| | Posted on Wednesday, July 30, 2008 - 12:58 pm: | 


|
"Voltage Regulator went out 2 days befoe end of warrenty. Stranded on
roadside, worst part bike stalled during rush hour on four lane hghway
it was trickey pushing bike to die of road. I now carry a spare VR.}" (Emphasis added.)
A new listing per my earlier observation that a trailer is needed for spares. Maybe the trailer should be a second Uly!  |
    
Roostre
| | Posted on Sunday, August 03, 2008 - 11:16 pm: | 


|
Gotj- please go away. I get it. You don't like Uly's. So why do you come here? Start your own thread about whatever YOU want. Stay outta mine.
It's been a long hot weekend of trailer building. It's taking me many more hours than I originally anticipated. I did get to take it for a 60 mile test ride tonight...stay tuned.
The trailer rode a little close to the bike in version 1, so I needed to add some length and reinforce it. My hand cut speed hole didn't turn out real round! Oh well, it IS homemade! Oh well, it IS homemade!
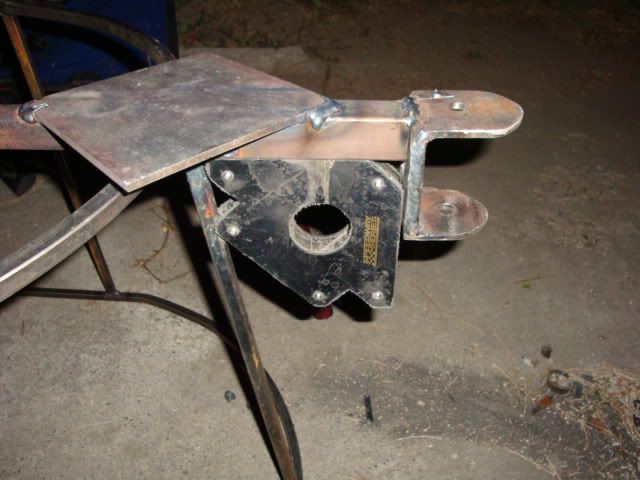
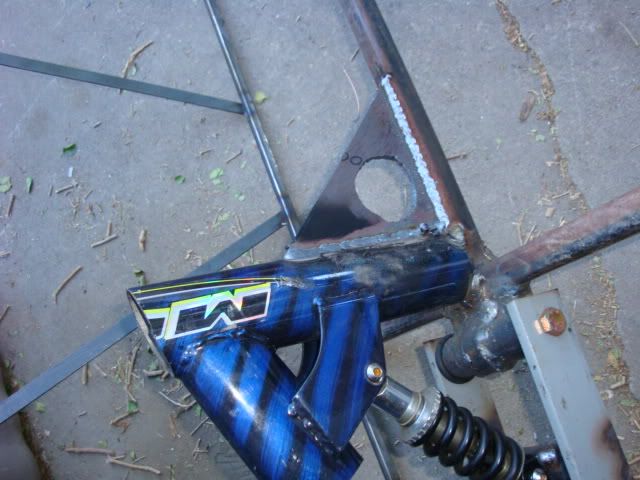
I also gusseted the Mtn Bike suspension:
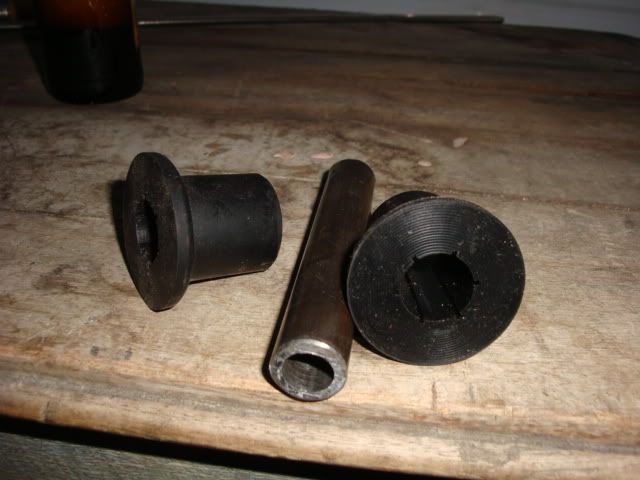
For those with inquiring minds. The bushings and pivots I am using are Jeep leaf spring style poly bushings. They fit 1.25" ID tubing. The small tube is .510 x .240 seamless.
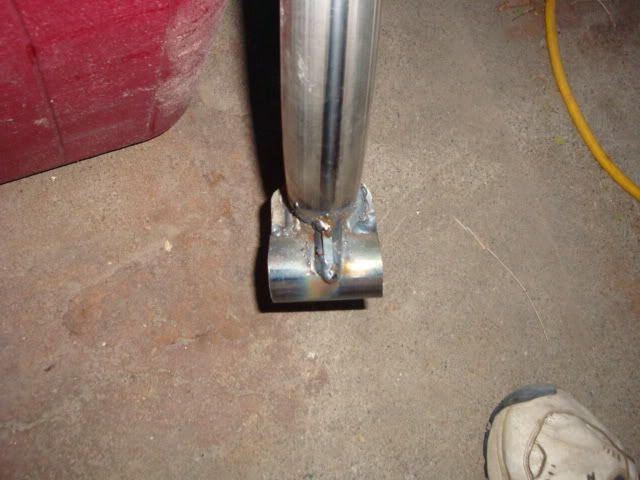
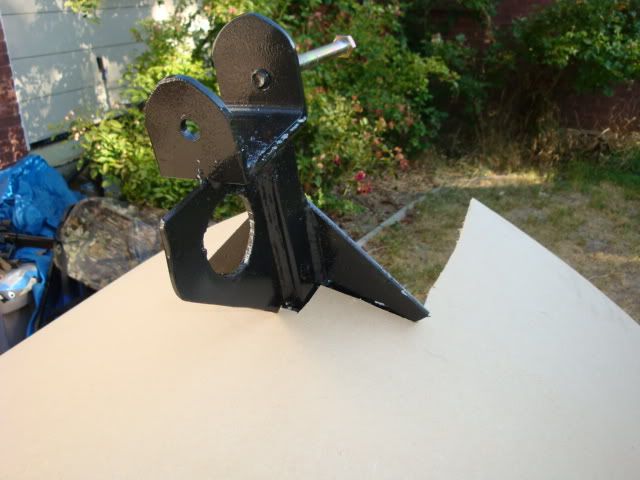
I also beefed up the bike side of the hitch with some gussets. Much smaller to clear all the movement:
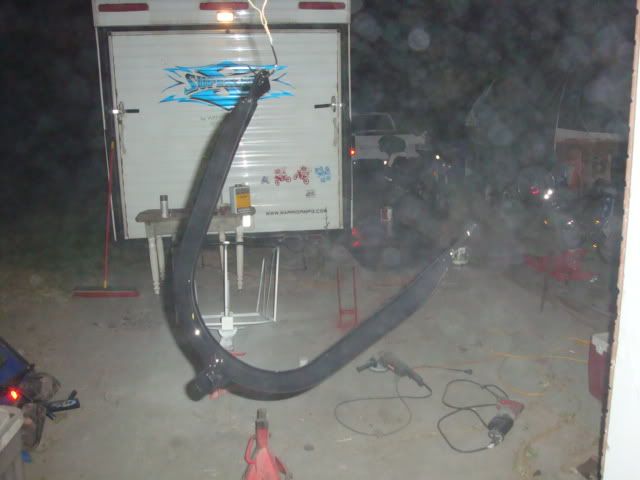
It was time to tear it all apart again and prep, primer and paint. I was so high on fumes I didn't get many pics.
 |
    
Roostre
| | Posted on Sunday, August 03, 2008 - 11:34 pm: | 


|
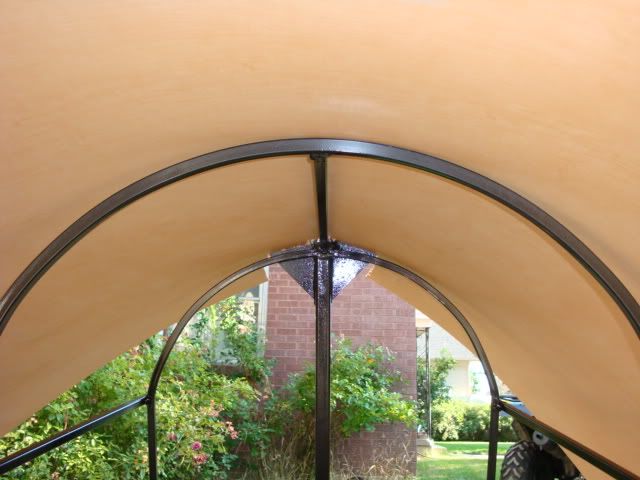
With paint done, it was time to start putting the body together. I used 1/8" honey maple paneled mdf (very light) for the insides to keep that black aluminum oxidation off of the cargo.
I even managed to get the Mrs. to do a little labor!
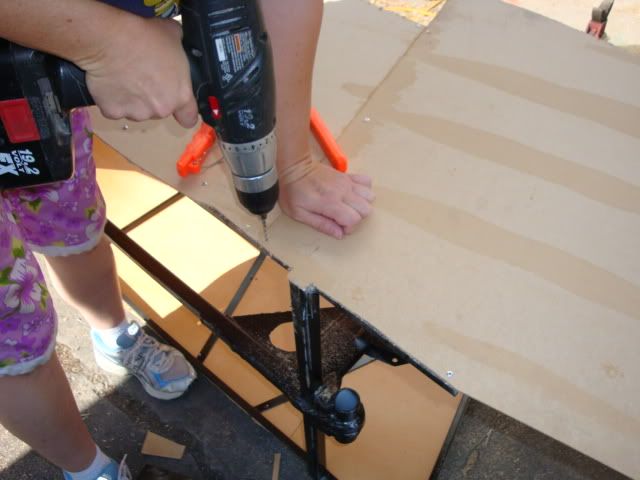
The panel went on easily. I had worried that it would not take the bend without steam/water, but it laid right down.
The floor will be made of alum/wood/alum siding panels. Here is a side shot:
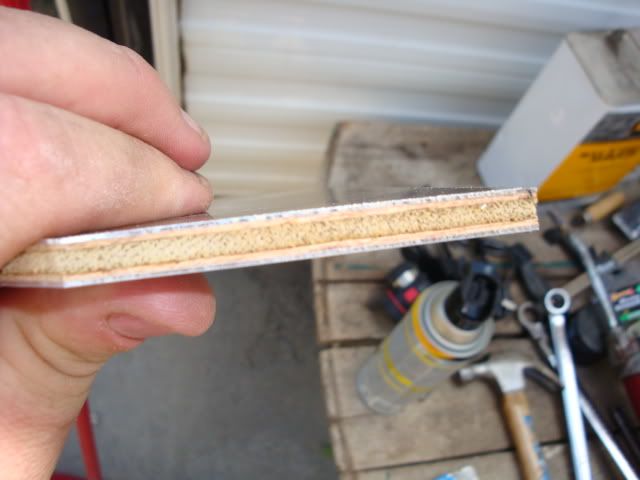
There is a protective coating on each panel that is peeled off later.
The panels cut easily with a jigsaw:
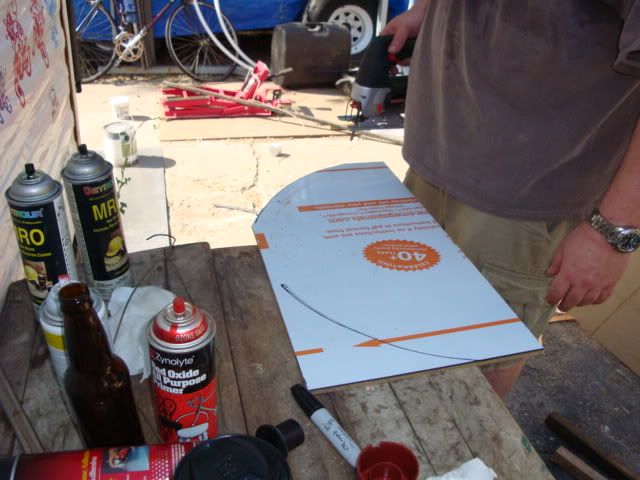
Perfect fit- not quite...like I said earlier. It IS home made!!
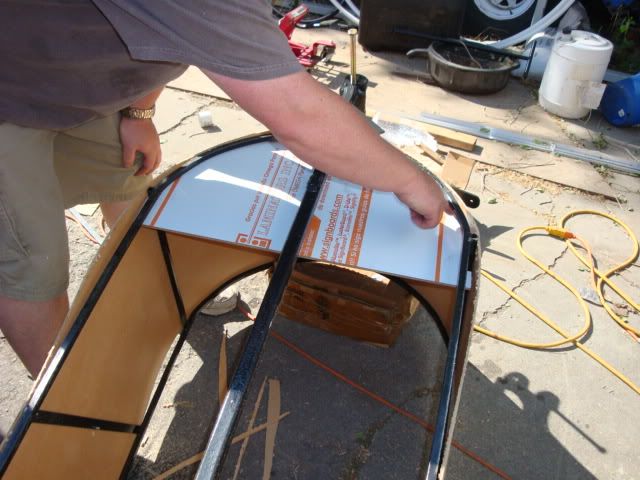
Starting to take shape! Any guesses on how I determined the radius of the nose? The trailer spare and tube are inside the rear spare! Now when I am on a long trip I can tell people I even brought the Sync!
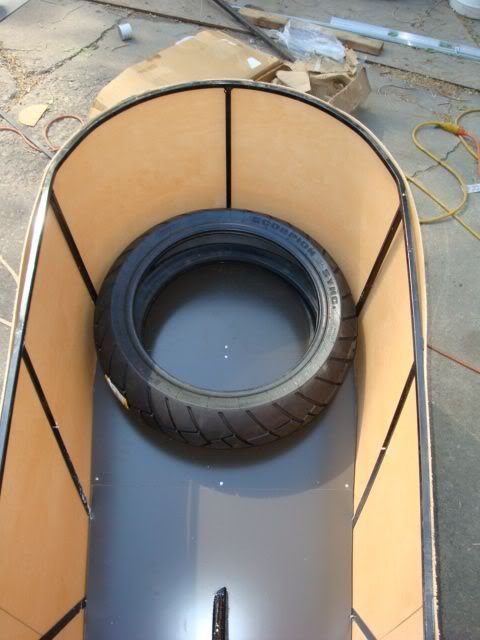
Now I have to tackle the hardest part. How do I deal with the suspension hangin out the rear? I decided to box it in or out as the case may be. I used the same panels as the floor.
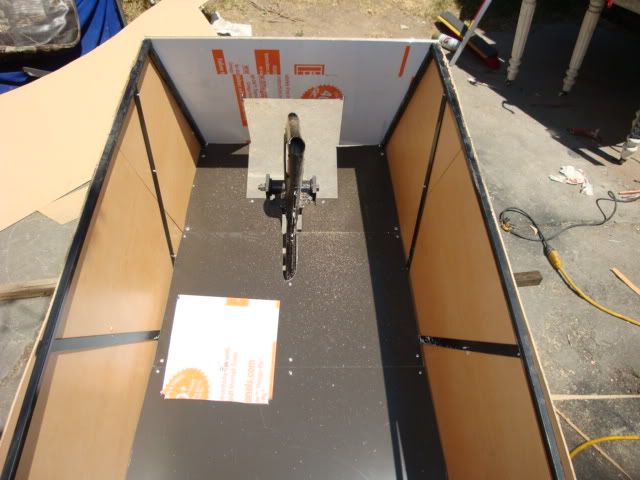
My neighbor wandered over about now and asked me if it was going to float. Hmmm. An amphibious trailer...
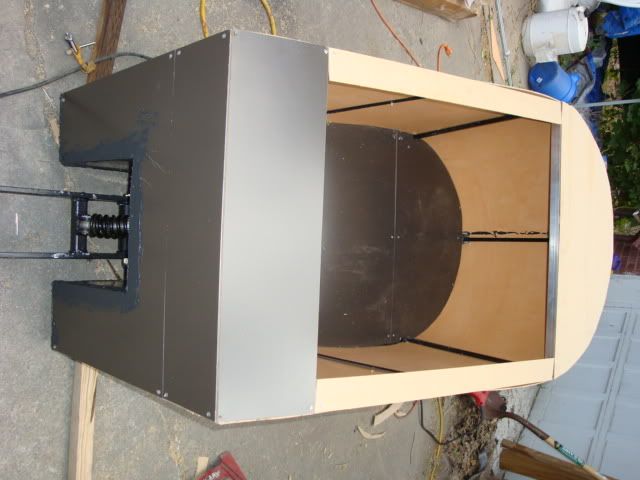 |
    
Roostre
| | Posted on Sunday, August 03, 2008 - 11:56 pm: | 


|
Put the top on and began to seal the water out. I decided to use a high quality brush on non-hardening automotive seam sealer. Messy stuff, but it did dry nicely. I dribbled some down the inside of the nose...doh!
The aluminum skin was the hardest part of this whole build. The sloping front of the trailer made this job very difficult. Lack of help made it worse (hey who wants to stay home on Sat night and help Dad...bueller....bueller). I decided to hang the trailer from my basketball hoop so that I could get an entire 16 ft sheet laid over the thing.
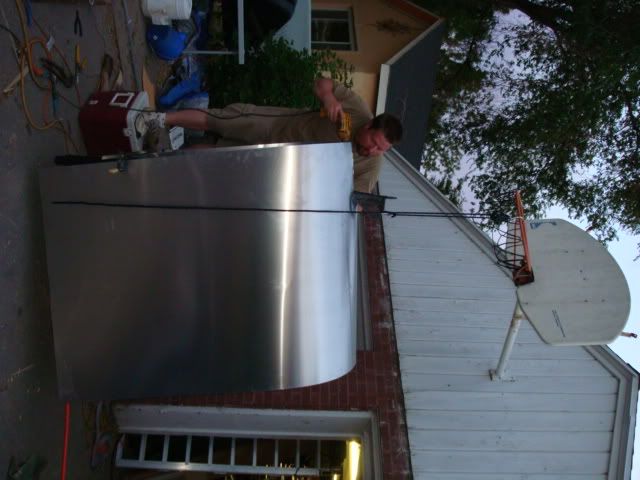
While it was so handy I did a little more seam sealing!
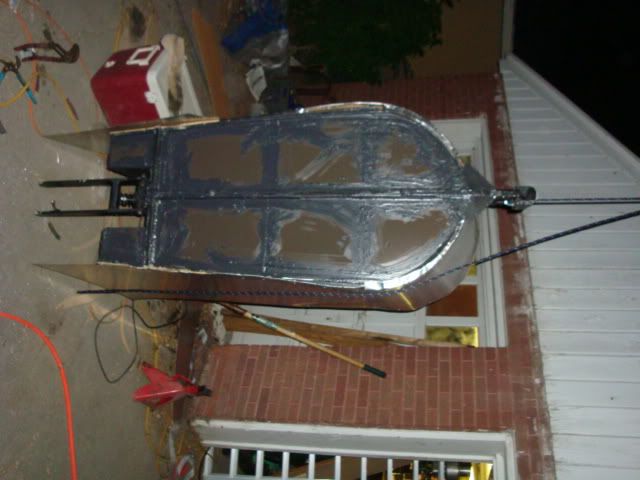
I also sprayed the entire bottom with rubberized undercoating, but did not get a pic.
I spent hours and hours trimming the trailer with 3/4" x 3/4" x 1/8" aluminum angle. It comes hard and unworkable from the hardware store so each piece that has to be bent must be annealed by heating it to 650 F and then letting it cool. I tried several annealing methods.
The first calls for using a candle to soot up the aluminum. You then heat it until the soot cooks off and move on... if you get it too hot it crack and twists and makes a mess of your nice straight angle.
The second calls for heating until you see the propane torch flame turn orange...works indoors only, and the flame was tough to see.
The method that finally won out involved running a sharpie across the angle and heating until the black ink faded. I hope that some poor soul some day finds this info with out reading 900 pages worth of Google drivel...
Where was I? Oh yeah. Trimmed and starting to take shape:
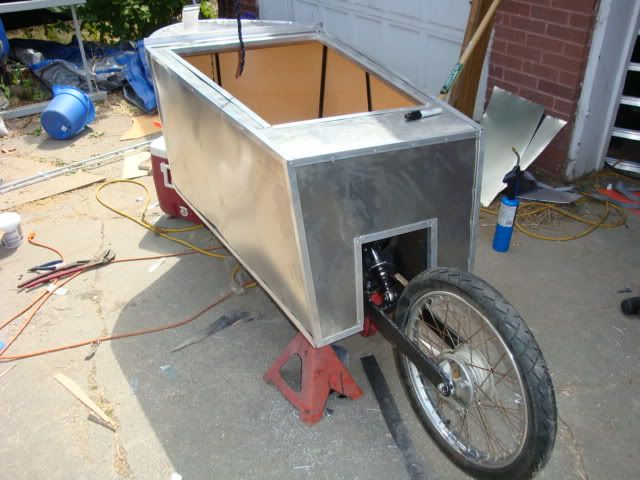
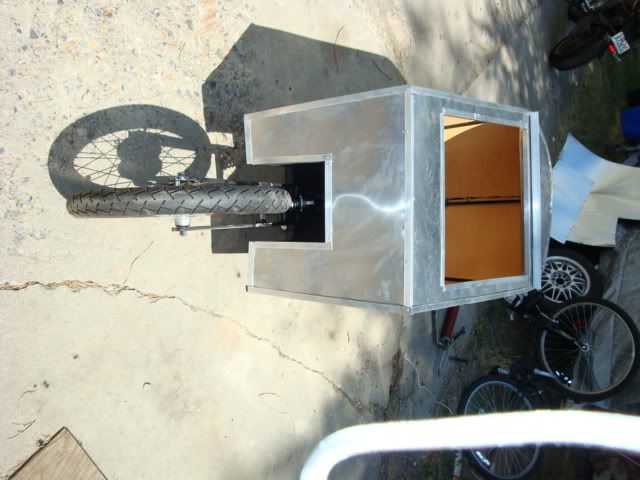
Ready to hitch up for a test ride. Aren't you glad I'm not YOUR neighbor.
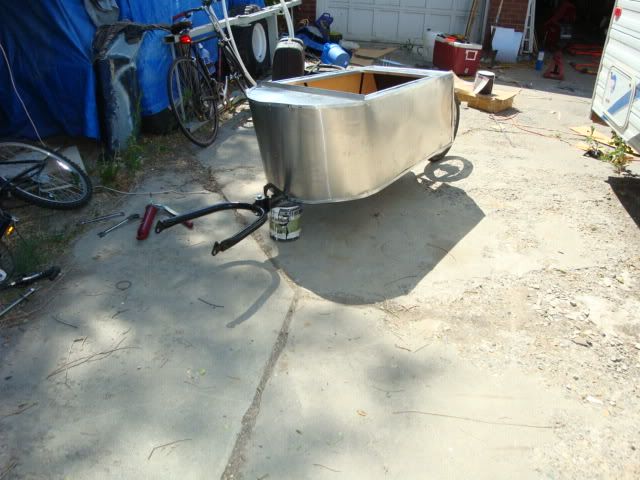
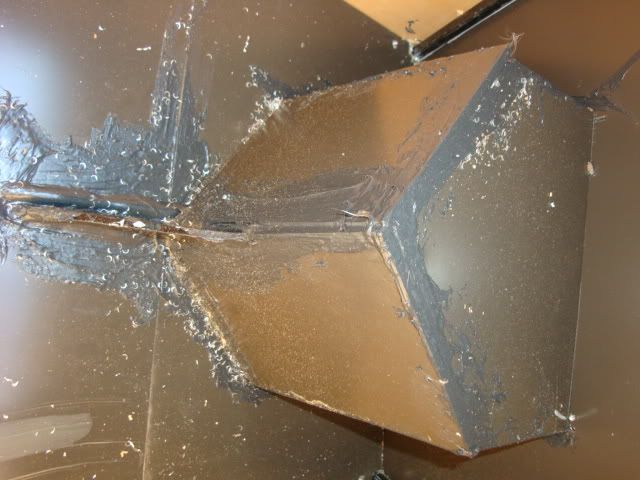
BTW. Here is what the box on the inside looks like. I t doesn't take up too much room. - Those little metal crescents are from my nibbler. I need to clean it out still.
 |
    
Roostre
| | Posted on Monday, August 04, 2008 - 12:29 am: | 


|
The first test ride went well. I must mention that the trailer is far from finished. I still need to build the hatch, seal the trim and interior, build a rear fender, and install/wire tail lights. I soloed with only the tires and some tools for the first 5 miles or so. It is hard to tell it is even back there when lightly loaded like this. Bumps seem normal and I am getting no sway or other bad indications. I hit 60 mph. All in all a good result so far.
I parked out front upon returning from solo test #1. After going inside to get a drink I came out to find these two up to no good:
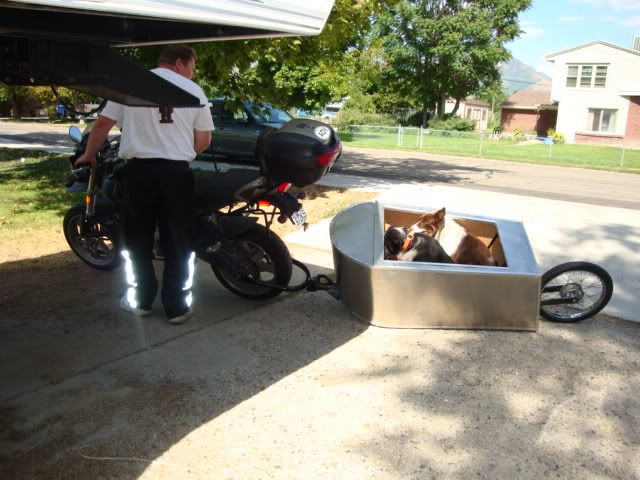
They weigh about 80 lbs together and were maxing out the suspension! A few turns on the adjustable rear shock spring and all was good again!
The temperature was approaching 103F, so the wife convinced me to take her and the girls up the canyon for a well earned reprieve. We put a blanket down in the bottom and threw on a cargo net to keep the dogs in. They loved it and were unwitting stunt trailer test dogs for the day. (I wouldn't have taken them if I was worried at ALL about there safety.)
Up the canyon:
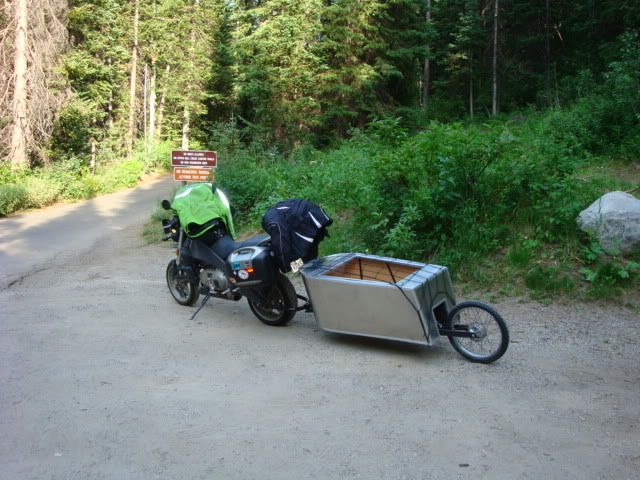
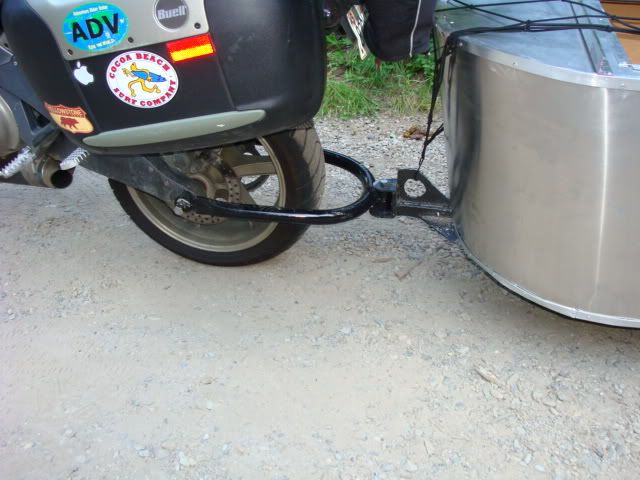
I wanted to get some video but I forgot the memory card for my camera. I will try again at some point. Here are a few detail pics taken during our ride:
The dogs give the new trailer two paws up!

Of course they love anything that gets them to their favorite hiking trails!
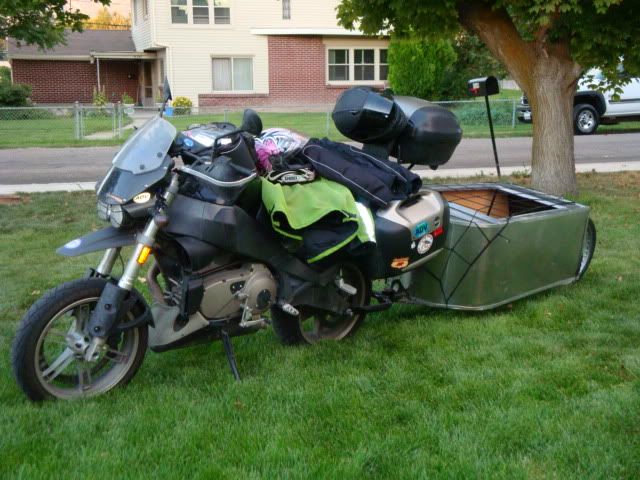
This shot shows how the trailer is narrower than the saddlebags:
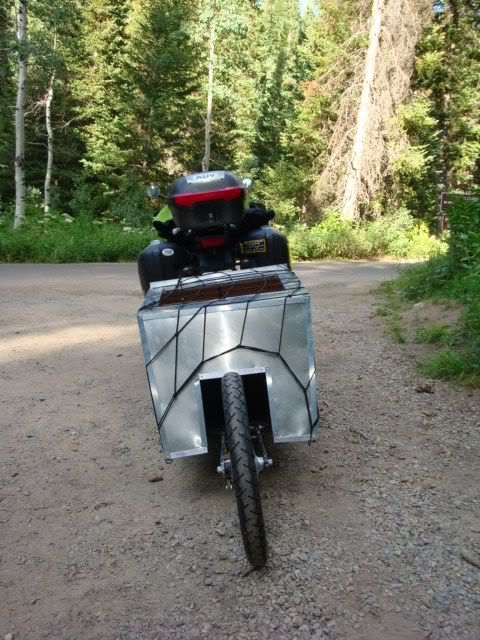
From the front you almost cannot see the trailer at all:
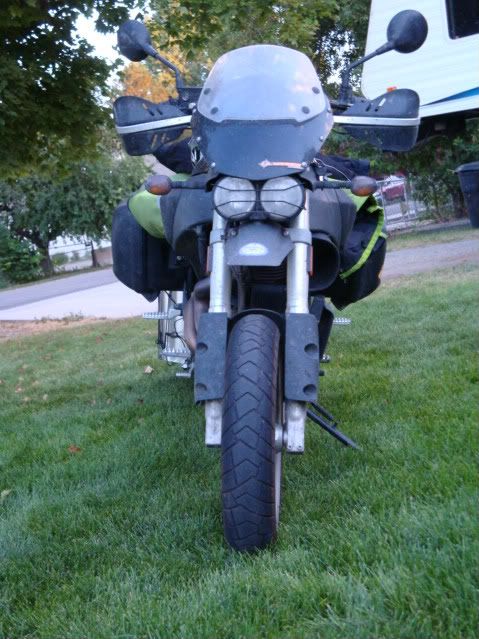
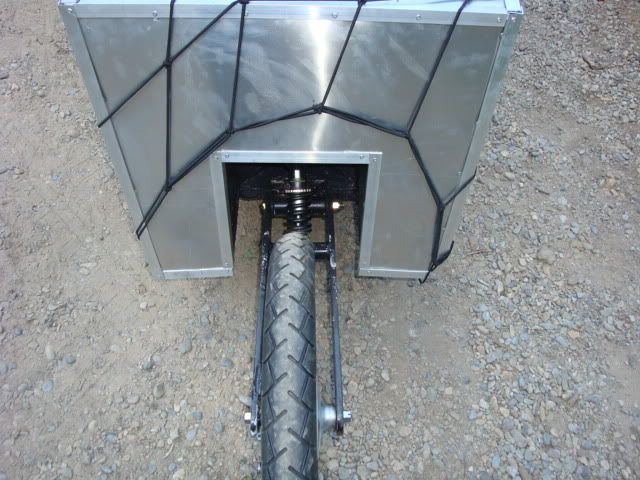
The trailer does make the steering feel heavier going into the corners. I hate to put it this way, but it makes my Uly feel and handle quite like a Road King. Nothing bad, just different and not what you are used to. I could tell when the dogs moved around if we were going under 30 mph. Above that it was rock solid. Our trip went up and down three of our local canyons. They included Millcreek, Emigration and to the peak of East Canyon. Lots of variation from 20 mph hairpins to long straights. Some very steep parts. I purposely hit every pothole and bump I could. I rode on the grooves just to see if it had any bad input. The bike and trailer surely feel different than a solo rider on the same road, but after I became accustomed to the new 'feel' it was still a joy to be riding. All-in-all we did about 65 miles, including some city traffic. The smiles on peoples faces when they saw us tooling down the road with dogs in tow was priceless. Kids waved at us, old folks waved, a couple of guys that looked like Hellraisers kids gave us big grins and thumbs up. A full dressed HD caught up to ask us where we bought the trailer. They wanted to take their pups up the canyon too! The build was worth every minute of time just to see everyone's reactions. I am not an attention •••••, but it was like being in our own little parade!! |
    
Ulywife
| | Posted on Monday, August 04, 2008 - 12:55 am: | 


|
Love the story with the dogs and people's reactions. It's been fun following your progress on the Uly trailer. Can't wait to see the final polish! |
    
Nevrenuf
| | Posted on Monday, August 04, 2008 - 07:21 am: | 


|
roostre, cool thing you got going on. when the wife and i went out to sturgis back in 01 we were towing a timeout tent trailer behind her trike(although different, it's not that big of a difference) we don't have the tent's anymore but we still have the cargo trailer of which we haven't used but my buddy has. the single wheel is a good idea for a sport bike but the only bad thing is the tongue weight that you can play with on a two wheel trailer. with the two wheel, you can get a swivel hitch for the trailer to compensate for the turning angle of a sport bike. the one advantage you have is the adjustable suspension on the uly. nice job though and i hope it does work good for you.
p.s. how does your receiver bracket work on the axle. cause i have wondered also how i can use the cargo trailer with the uly. i'm really interested to see how it works for you not to mention the handling and what effect it has on the bike with the swing arm. |
    
Darthane
| | Posted on Monday, August 04, 2008 - 08:34 am: | 


|
Roostre - that is truly awesome and you have plenty of reason to be proud of yourself!
It'll never cease to amaze me what people can do when they put their brains and backs into it. I'm looking forward to seeing your opinions on the project after a nice long 'real' ride with it. |
    
Gotj
| | Posted on Monday, August 04, 2008 - 08:54 am: | 


|
Ooops, sorry. I guess my sense of humor would be gone too if I were in the middle of a project like yours. I'm totally impressed with your ingenuity and perseverance. Thanks for sharing. |
    
Reepicheep
| | Posted on Monday, August 04, 2008 - 09:13 am: | 


|
LOL. I have the frame and entire rear end from a KLR-250 out in the garage right now... That could make a pretty neat adventure trailer! |
    
Electraglider_1997
| | Posted on Monday, August 04, 2008 - 09:25 am: | 


|


  |
    
Aeholton
| | Posted on Monday, August 04, 2008 - 10:41 am: | 


|
Very cool project Roostre! I look forward to seeing the final result. I showed your pictures to my 2 dogs and they are now wanting me to get them one.  |
    
Desert_bird
| | Posted on Monday, August 04, 2008 - 11:23 am: | 


|
Very very nice indeed.
Few questions:
Brakes: How well do they work with the trailer loaded? Will you be putting something a bit more grabby on the rear end given what the Uly's current rear brake provides, or even fit it with a gravity/auxiliary brake?
Carrying capacity: What is it?
Rock on! |
    
Roostre
| | Posted on Tuesday, August 05, 2008 - 12:04 am: | 


|
Gotj- Its hard to tell if a post is trying to be humorous sometimes. The way I read them you were being a bit of a troll. Its all good. 
Thanks for the great feedback everyone. It is fun to slip in some non-moto dog pictures now and then!
Desert- The brakes seem to do a good job. We did some high speed (70mph) stops coming down the canyons just to see how well it would stop. It stopped the train surprisingly quickly. I'll be keeping an eye on the pads and the clutch. XB9 primary gearing would help all around. The trailer hub has brakes in it. It would be possible to rig a cable back to the rear of the trailer, but where would you mount it on the bike? A Prodigy style controller rigged to an electric brake on the back might just be the ticket. Hmmm... A lock up might be very bad, so it would take some work.
Carrying capacity. My preference is to keep the load in the trailer under 100 lbs. Any more than this and I should just take the car anyways. 100 lbs is a lot of groceries!
Aeholton- I apologize for being a bad influence on your dogs. |
    
Fastmag
| | Posted on Tuesday, August 05, 2008 - 01:32 am: | 


|
Roostre that thing looks good. For brakes on the trailer some stunt bike riders have a smaller set of hand brakes that they can operate front and rear with one hand while sitting on the tank. Maybe something to look at for operating the trailer brake. Double lever on left side. With practice may be usable.
Keep up the inventive work. |
    
Nevrenuf
| | Posted on Tuesday, August 05, 2008 - 06:37 am: | 


|
there is an electronic brake set up for motorcycle trailers roostre.
how about better picks as to how you mount your receiver up to your swingarm.

|
    
Roostre
| | Posted on Thursday, August 07, 2008 - 02:38 pm: | 


|
how about better picks as to how you mount your receiver up to your swingarm.
Coming soon.
I have actually thought of a way to double the strength and make the hitch much safer...look for version 2 pics soon. |
    
Nevrenuf
| | Posted on Thursday, August 07, 2008 - 04:29 pm: | 


|
be looking forward to them roostre. |
    
Roostre
| | Posted on Wednesday, August 27, 2008 - 02:50 am: | 


|
Teaser photo: We made it to Washington with no trailer issues....

I will post some more pics and a video as soon as I have some free time!
Short summary: The rig worked flawlessly. Much better than expected in all conditions. 3 days of rain, 90mph interstate, gusty winds off of the Pacific coast and even did some lane splitting going into San Francisco and again on the Bay Bridge heading out!! Close to 3000 miles on the tug now. |
    
Roostre
| | Posted on Saturday, August 30, 2008 - 03:10 pm: | 


|
I must apologize, as our trip departure approached I took less and less pictures.
I made the top out of 1/4" plywood, then covered it with aluminum skin on the outside. 1/4"" aluminum edging from the local hardware store was added to protect the edges. I finished the wood side with "waterlox" which is an oil tung based product to waterproof the wood. (I had a can leftover from another project) I purchased some folding table legs at the local trailer supply house. I cut them down to 22.5". They work really well for securing other items to trailer.


The table proved quite handy during our trip. It's always nice to have a level surface to set things down on when you're in the boonies! It only added about $35 to the cost with very little weight penalty. The hinges are standard HD industrial stainless door hinges. A single locking latch keeps the honest people honest. I didn't worry too much about making it a safe...if a bad guy really wants in he will pry it open or tear it apart anyways.
 |
    
Roostre
| | Posted on Saturday, August 30, 2008 - 03:21 pm: | 


|
A few more for fun...


 |
    
Roostre
| | Posted on Saturday, August 30, 2008 - 03:26 pm: | 


|
Here is the best action shot I have right now!

Our group will be getting together soon to swap photos from the trip... I am hoping that they got a few good ones. I know that one of the gals took video of a series of tight twisties on Hwy 1. They told me that I had dragged the side of the trailer when we stopped. I never even felt it, but the evidence is on the left slide rail. I can't wait to see the video. The corner in question was a tiiight hairpin marked 15 mph...we were probably doubling that or more! |
    
Froggy
| | Posted on Saturday, August 30, 2008 - 03:41 pm: | 


|
Your nucking futs man. It looks great, i hope they come out with one from the factory soon  |