| Author | Message | ||
Ft_bstrd |
I found and ordered a voltage meter that's pretty cool: http://www.customdynamics.com/LED_battery_gauge.ht m#LED_Battery_Gauge_with_Remote_Flush_Panel_Mount_ LED I like it because it's compact. (Message edited by ft bstrd on March 29, 2020) | ||
Fastmag |
I put one on from the Aerostich catalog. Kind of nice to know what your charging system is doing. I did learn from a friend of mines bike that fuel injection does not like low voltage. It is surprising how much a set of driving lights will pull at idle. | ||
Reepicheep |
You mean voltage monitor, not regulator, but you are right, thats a great little setup! Thats what I should have done... Al Lighton has a nice monitor as well. It's LED, and you can clearly read it, in bight sunlight, from about 1/8th of a mile behind Henriks S2, while you are carving your way up the dragon  I cobbled together a $15 unit that is meant for trolling motors, got it a WalMart. It has 4 LED's, and a XX.X LCD display. I mounted it behind the translucid plastics. I would not recommend it unless you enjoy electronics repackaging hobbies. | ||
Maximum |
FB: I bought the same one a few weeks ago, but have not had my bike out of the shop long enough to install it. Where are you going to mount yours?  | ||
Ft_bstrd |
Yep, meter/monitor. | ||
Ft_bstrd |
I think I am going to mount it in the right side of the fairing next to the gauges. There is enough room behind that area to mount the LED. I already have a hot lead coming into the front area to run the HIDs. I'm gonna tap into that. It seemed simple enough to be unobtrusive yet provided a good bit of information. | ||
Maximum |
Hey FB...Do you think that it is possible to install the LED in the unused warning light space directly inside the instrument module (under the fuel low light)? I'd have to take it apart to see, but it might be possible. | ||
Flynuly |
I installed a Datel meter on a piece of scrap with some velcro and zip tie. 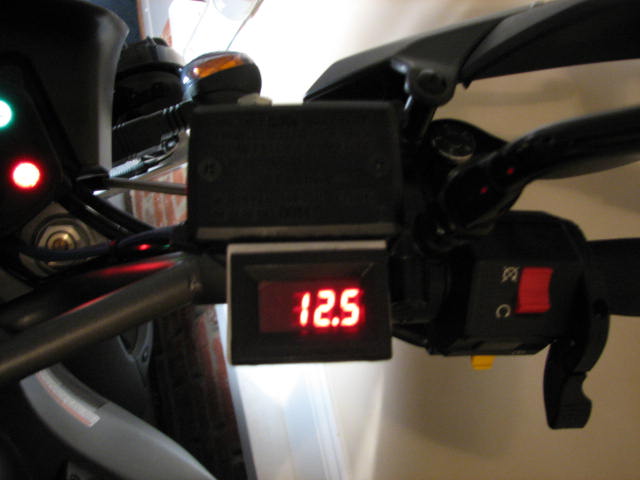 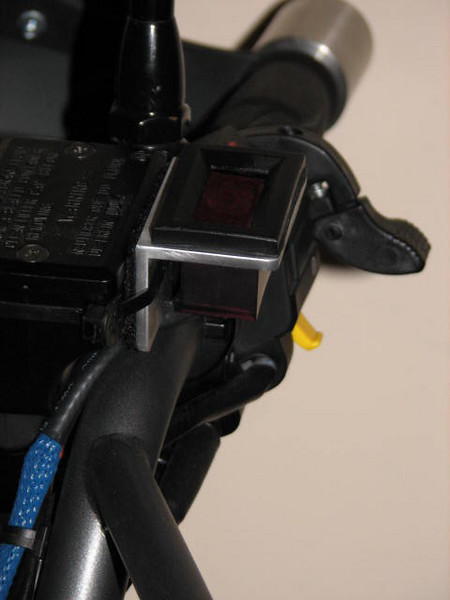 It washes out in direct sunlight but a quick shadow with my hand fixes that. Any brighter and it would be to much at night. 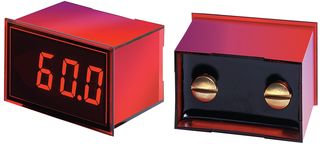 | ||
Ft_bstrd |
Steve, I had thought of that. The only issue I can see is that the capsule that holds the LED is larger than what would fit. I'm going to install a new face plate in the gauge cluster. I will look to see if I can work it in. If I can, I'll probably do the same. I KNOW that I can put it in the front fairing. We'll see. I just like the simplicity of it. I only need to know that everything is ok. I don't really need to know what the actual voltage is. Steady green? It's all good. Flashing green? Voltage regulator is toast Amber? Voltage regulator/Stator beginning to fail. Flashing Red? You are screwed. Better be at the dealer or at home or you're walking. | ||
Ratbuell |
Reep - details on the Wally World special? I used to do component level repairs and still like to burn my finger with a soldering iron from time to time  | ||
Midnightrider |
I was stuck in traffic yesterday in my monthly Syacuse to Bethesda commute and started playing with the settings for my Lowrance iWay 500 GPS. I use the GPS interchangeably between the truck and bike. Son-of-a-gun I found a whole display menu I had never seen before ( I try never to read the owner's manuals) Anyway, I can use the touch screen to click a little box and BAM! - now I have a voltage meter read-out right in the GPS display screen. How cool is that? | ||
Natexlh1000 |
I like the wallbastard option too. I hadn't even thought that trolling motor users would like to know how long they have before paddling. looks like I have to go there to see. | ||
Ratbuell |
I'm gonna check too. I need a spring scale anyway so I can set the neck bearing tension on my S2 tonight... | ||
Reepicheep |
Boy that was a pain to find! Here is the thread (with pictures!) http://www.badweatherbikers.com/cgibin/discus/show .cgi?tpc=3842&post=914837#POST914837 | ||
Ft_bstrd |
It came in today. VERY COOL. It's just like the picture. The controller box is much smaller than I though. It's about the size of a small match box. I haven't decided where to install it yet. I will be installing a PDGMoto faceplate this week. I will see if there is space to install it in the open spaces in the gauge cluster. It runs through a test cycle when you turn the power on and then settles on the indicated voltage indication. All in all, I'll be very excited to get it installed on the bike. | ||
Maximum |
FB: Don't forget to take pictures of the install. I am eager to learn from your mistakes...I mean successes! | ||
Ft_bstrd |
What mistakes? I got my new in helmet speakers as well. Thus far, I am REALLY impressed with them. With the Boostaroo, they are LOUD. I wouldn't be able to turn them all the way up while wearing the helmet. I plan to wear ear plugs with them to knock out the wind noise yet still be able to hear the music. The problem is that the industrial strength ear plugs I got from ChadHargis knock out ALL sound. I will have to find a set that knocks out most of the sound but not as much as the others. | ||
Maximum |
I like the plain ole' yellow foam (EAR Brand) ear plugs. I have also seen ear plugs at music stores that supposedly attenuate frequencies evenly, so you don't lose too much high end. Not sure how well they work, or how much the cost...just an idea.  | ||
Ft_bstrd |
I got it in. Pictures to follow. Stay tuned.......... | ||
Ft_bstrd |
Ok. Here we go.. Here's what the guts of the gauge package looks like. There are 7 screws to get the case open. There are two that hold the internal components inside the case. Note Bitchin' new face plate! 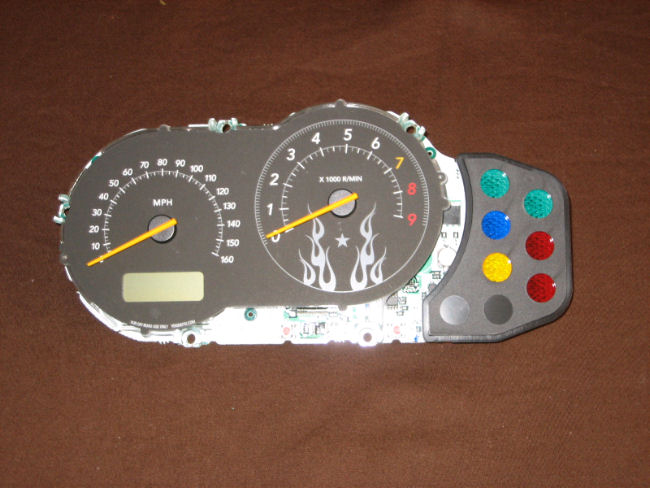 The black plastic surround is simply an overlay. Here's what it looks like out of the cluster: 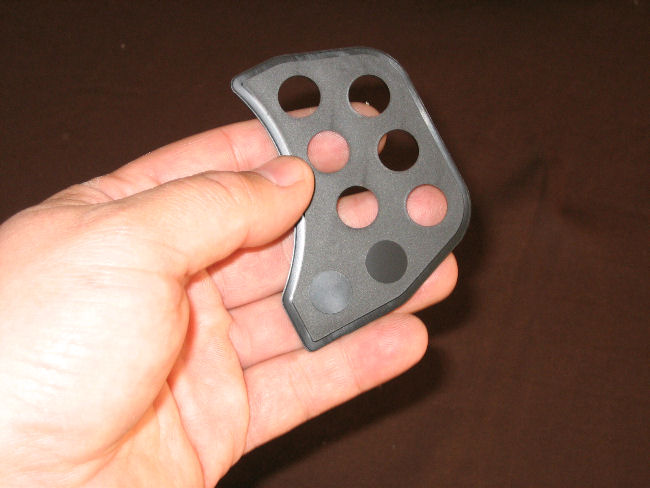 Here's the back: 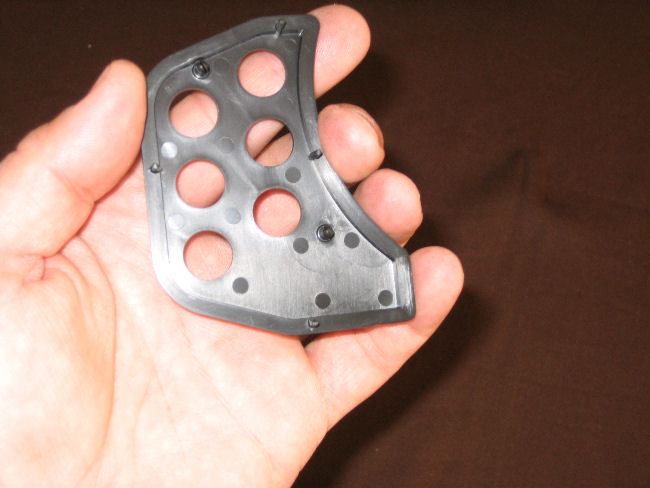 Here's what the cluster looks like without the overlay: 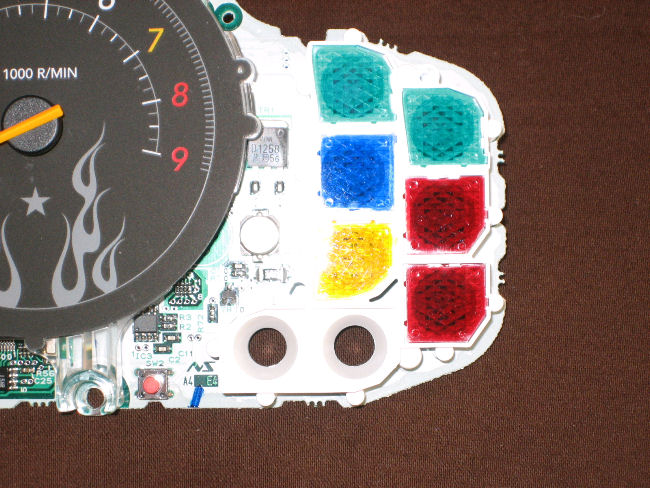 Here's the back side of the cluster. I forgot to take a picture, but each of the open spaces has a spot for a micor wedge to screw into it. I drilled them out before I got to take a picture: 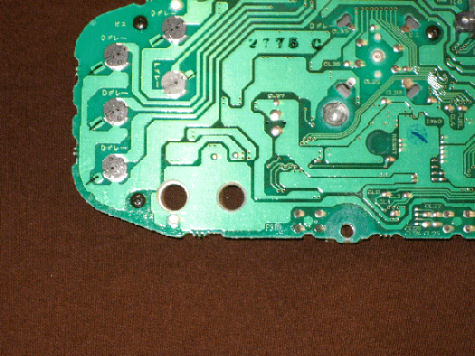 What I noticed was that there was a port with a knockout plate on the back: 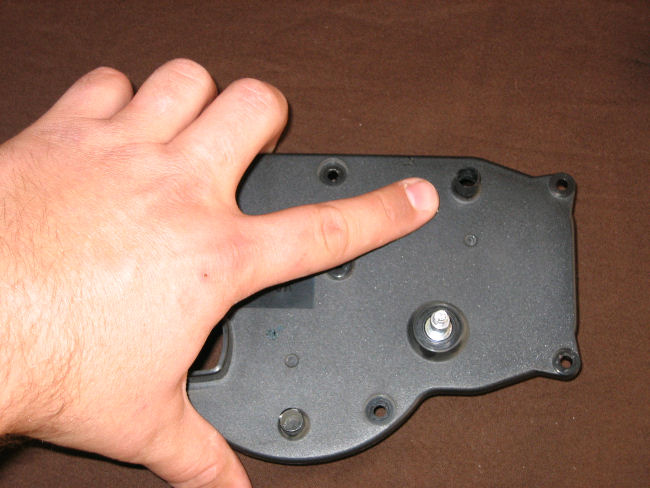 So I drilled it out: 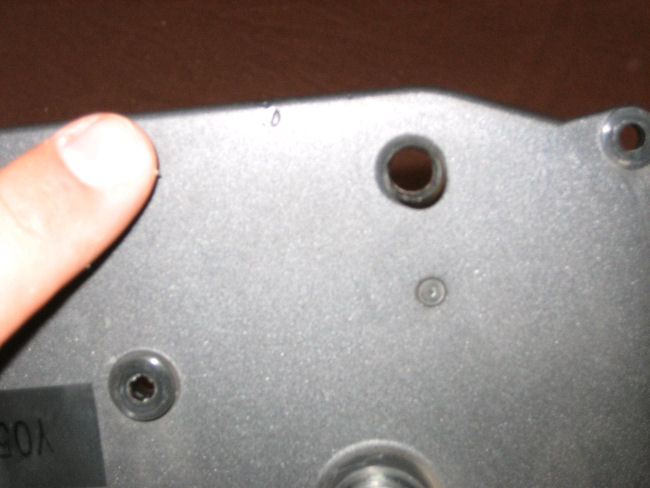 Here is what the LED from the kit looks like: 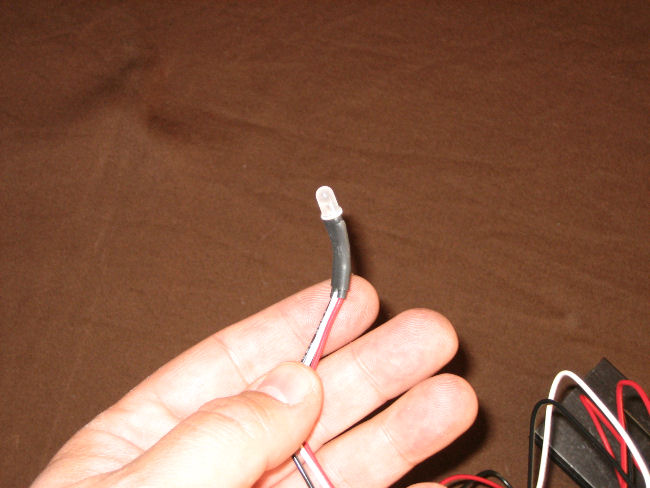 Here is what the rest of the monitor/meter unit looks like: 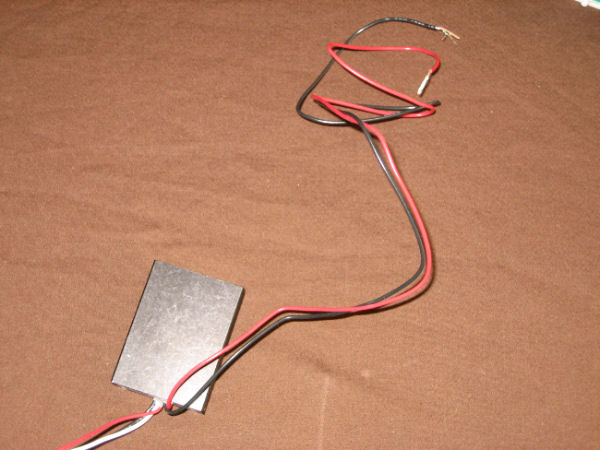 I decided to mount the LED in the blank in the faceplate closest to the knockout hole: 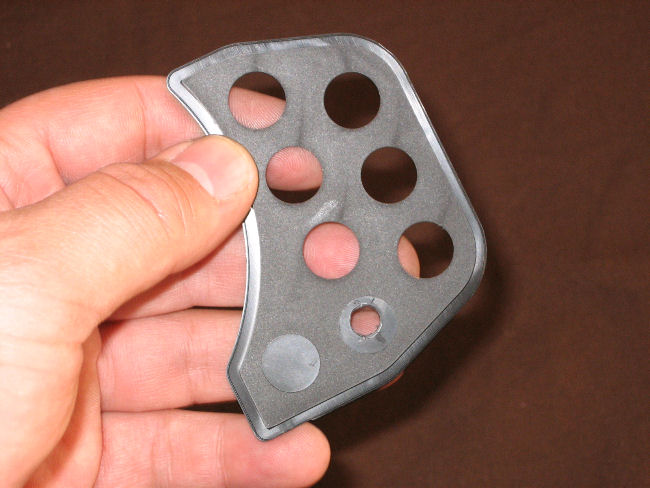 The meter kit comes with an LED mounting plug: 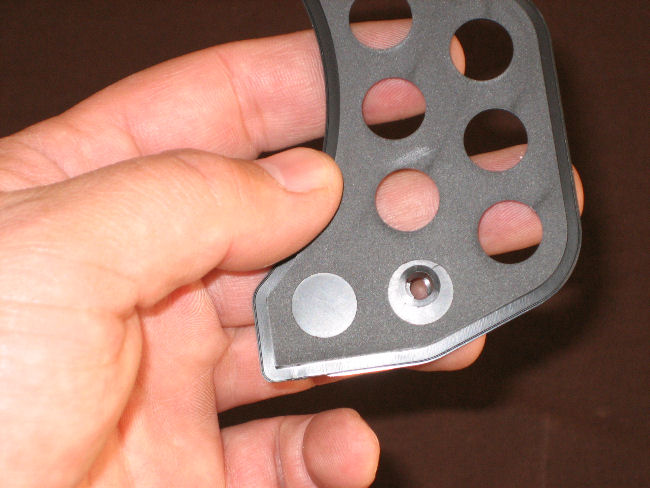 The LED simply snaps right into the mounting plug: 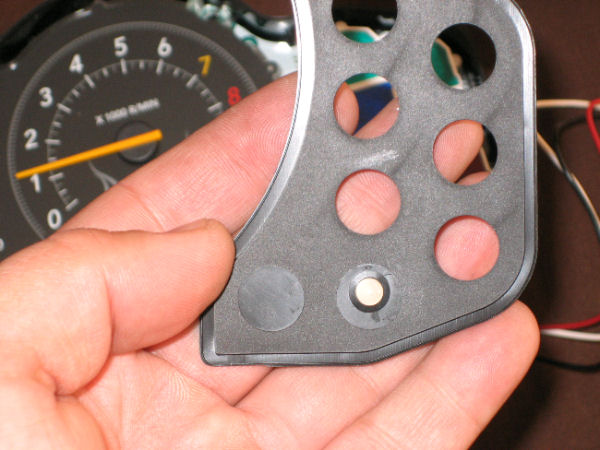 From the side: 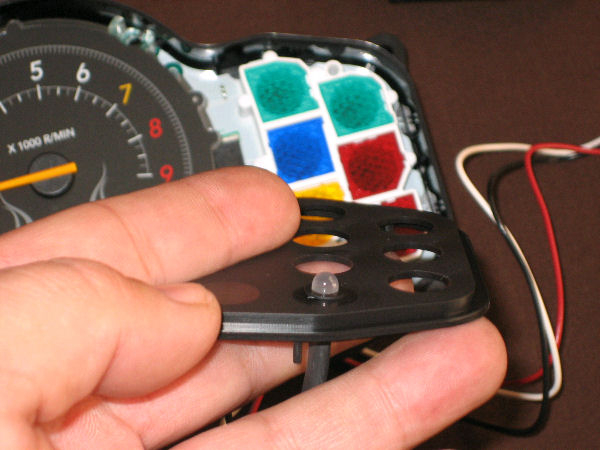 Here it is with the cluster back inside the instrument case: 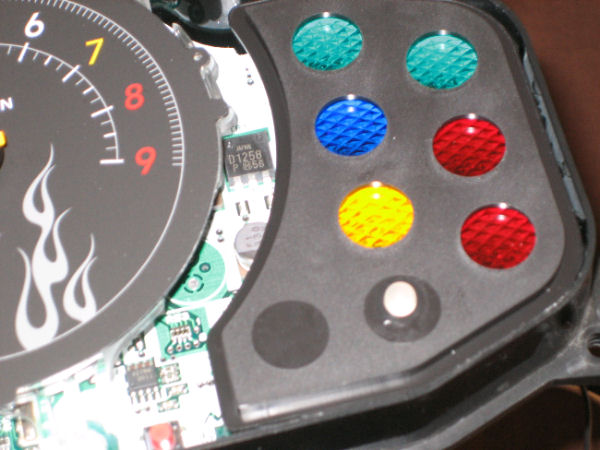 Back of the instrument case: 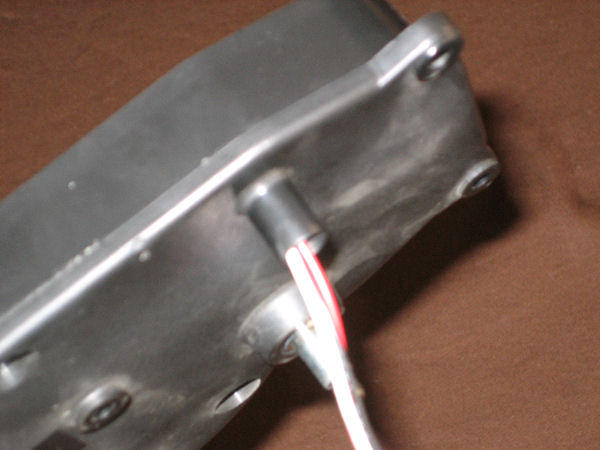 Using the double sided tape in the kit, I mounted the controller box to the back of the instrument cluster: 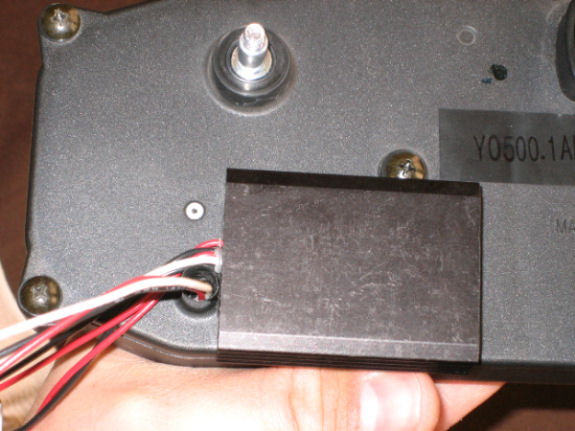 A zip tie: 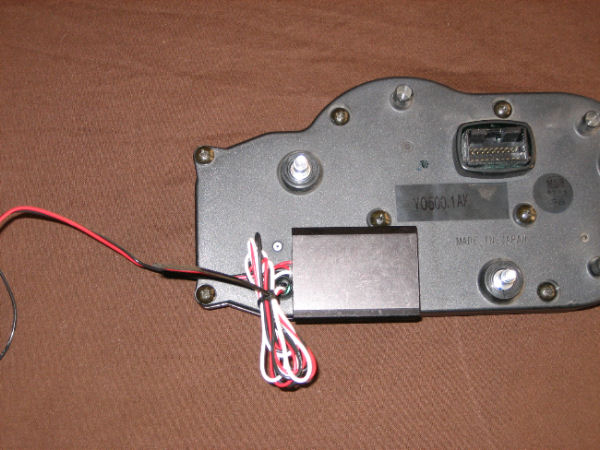 Here's what it looks like working: 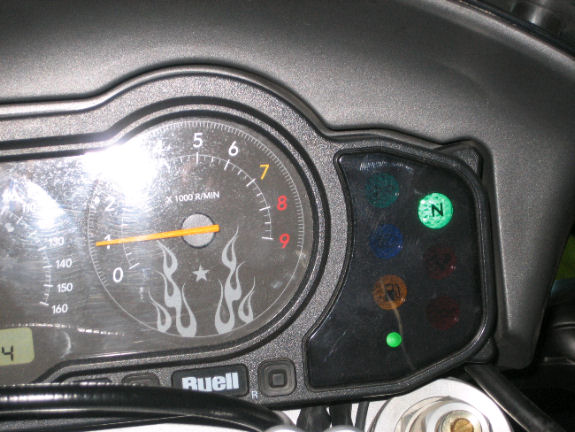 And again: 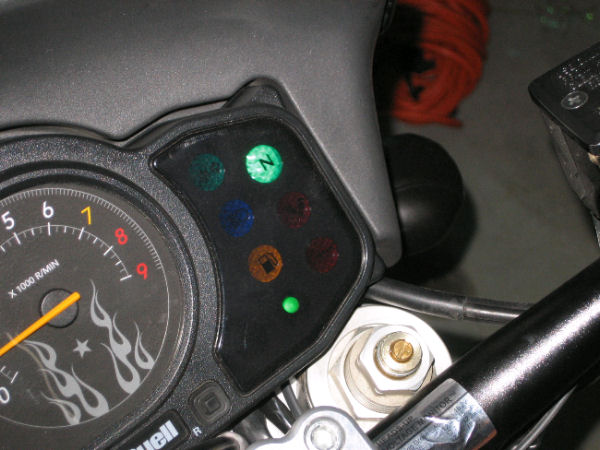 It works great. What's cool is that it has an auto dim feature so that it's less bright at night. I really like it. | ||
Etennuly |
So it is on when things are good? Or does it turn red if failure is noted? I like the flaming cover, it'll match the back of your jacket......smooth! | ||
Ft_bstrd |
I fubed up the sticker so you can't see it, but it cycles through several colors depending on what's going on with the charging system: Flashing Green--Voltage above 15.2 volts(Overcharging) Steady Green--Voltage between 12.9-15.1 Volts(Normal) Steady Amber--Voltage between 12.7-12.8 Volts Steady Red--Voltage between 12.1-12.6 Volts(Reduce Load) Flashing Red--Voltage Below 12 Volts(Charge System Failure) It allows me to know at a glance that the charging system is functioning normally. If it starts flashing green, my voltage regulator is taking a dump and allowing too much power to the system. Once, when I pulled over, it flickered to amber for just a second when the idle dropped below 1050. If it goes to red, I better be ready to push, it's gonna die soon. I definitely shouldn't turn the bike off. | ||
Jackbequick |
If it ever goes amber on you and you want to try to limp home on the remaining voltage, you can pull the fuses for the headlights to save a major current draw. I did that once on my M2. The voltage regulator had died, it had enough voltage to click the solenoid but not crank over. So I pulled the fuses and did a run and bump start. Actually did a real easy run bump start because I had stopped at the top of a pretty steep hill. I used third gear and just kind of pumped on the foot pegs as I released the clutch and it fired right up and made the 40 miles home easy. Jack | ||
Ft_bstrd |
You wanna see something comical, watch two thick neck dude in full riding gear and helmet trying to push start a Uly in Helen, GA. I thought I was going to need CPR. You ain't bump starting a Uly. | ||
Maximum |
That's awesome FB, I'm glad you had the guts to try it...now I can break open mine! Thanks!! | ||
Ft_bstrd |
It was actually a lot easier than I thought it would be. It took me about 30 minutes. I drilled three holes (four if you count accidentally routing out the wrong hole in the gauge blank). You will need to rout out the center of the back knock out because the shrink tape around the LED is wider than the LED. It didn't take much, but you will have to work with it a little. Overall, I'm very pleased with the results. It wasn't too bright at night (the tinted gauge plastic toned it down in addition to the auto-dimmer). It was plenty bright in direct sunlight. Hopefully it will blaze green it's entire life and I will never see the other colors for any substantial period of time. | ||
Jackbequick |
Were you trying to do the push start in 2nd or 3rd gear? And did you roll it backward in gear against compression to get a running start on top dead center? Those are desperate times, I'd hate to be in the middle of no where with a bike you can't push start. I have one of the earlier, simpler, models of that battery monitor on my Dyna. It has three colors (green, amber, red) but no blinking. The electronics are less than an inch in width and just encased in heat shrink tubing. I drilled a 1/4" hole above the ignition key and popped the mounting bezel and LED in there. I slipped the electronic module down into one of the down tubes. The battery and all is right there so it made for short wiring runs. I get a warm fuzzy feeling seeing it is in the green before startup and at shutdown. Jack | ||
Xbimmer |
Nice job Ft_b, thanks for the pics! I wonder what the reason for the open spots is? | ||
Az_m2 |
Great job!  | ||
Treadmarks |
great job fatty. Mine is ordered. When it comes in I get to do the Fatty's Battery Status Mod |