| Author | Message | ||
The4ork |
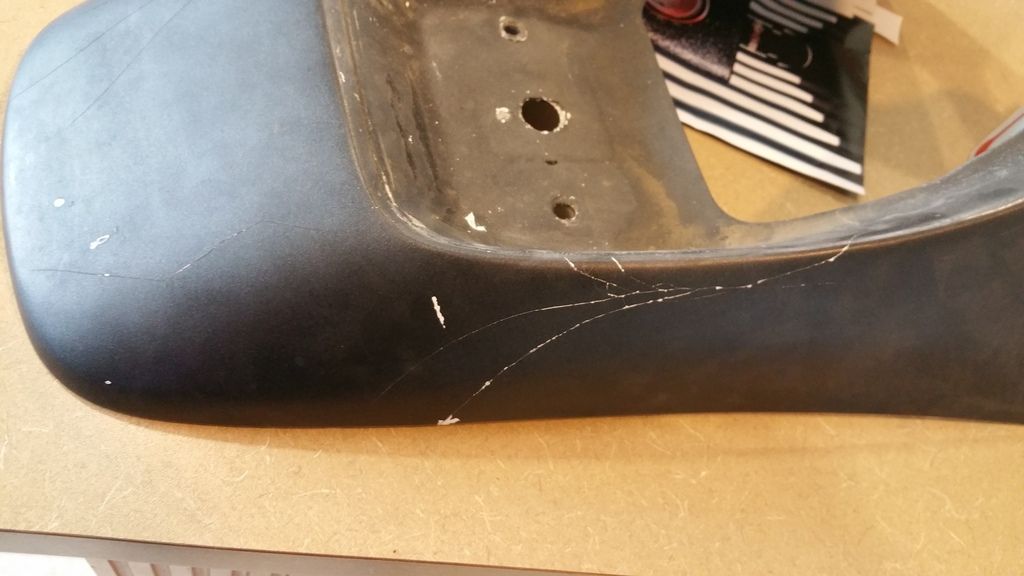
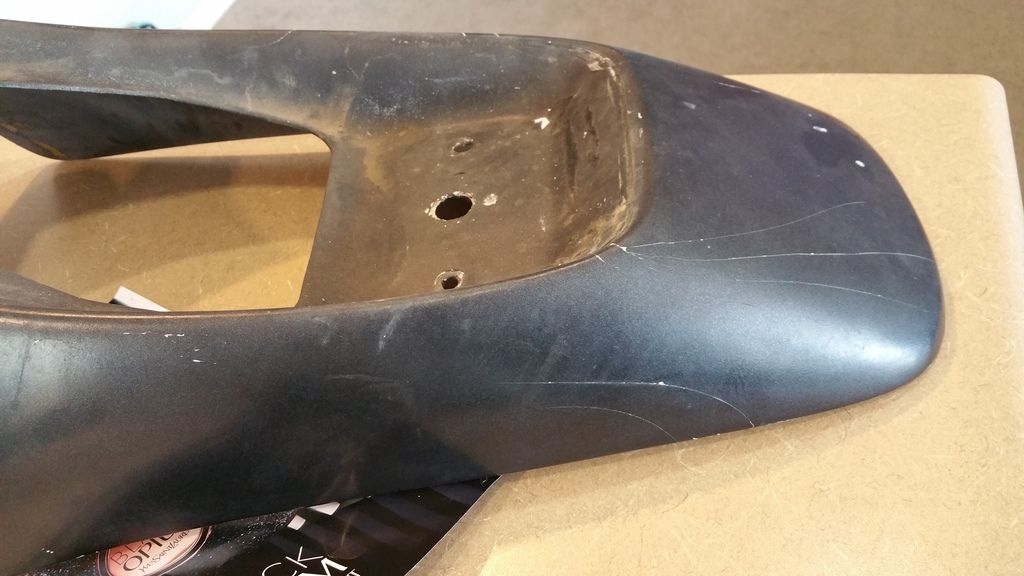
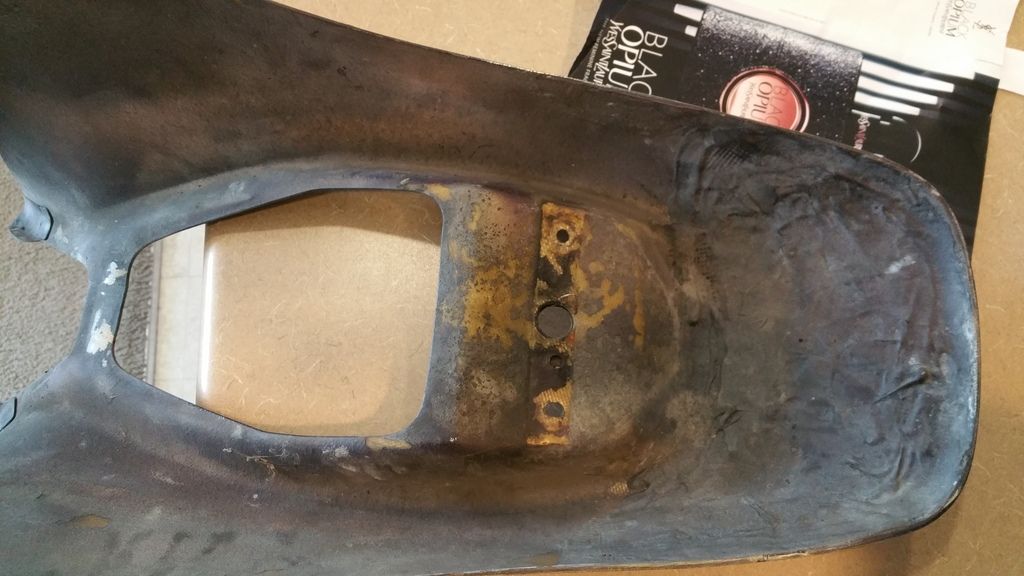
Is this something i should attempt to repair or replace? I was thinking some kind of repair to the underside for added streangth and then maybe something like a sand the outside, brush on some resin, then prep + paint? | ||
Jim2 |
I repaired my tail section by applying light weight fiberglass cloth strips across the crack on the underside. I used a 45 minute epoxy like you can get at model airplane hobby shops. First I superglue any piece that's completely broken through together so it maintains rigidity for the next step. Only use the good medium or thick superglue like you get at the model plane hobby shop. Then I lay the cloth, cut in strips to size, down on wax paper (the wax side) and fully wet them by brushing on the epoxy till the cloth is saturated and then scrape the excess off with credit card so is not drippy. Then pick up the wax paper with the wetted cloth and lay it over the crack on the inside if the tail piece. Work it in so you don't trap air and carefully remove the wax paper. Let it dry over night. Don't try to do too much at one time. When dry lightly sand down any cloth hairs. They are very sharp and must be removed or they will poke you at some time. Careful not to get finger print glue on your good paint or anywhere else, it will never come out. I cant tell you how to pretty up the cracks on the outside, or how to paint. My side bag covers mine up. Its held up good as new for a couple of years now. | ||
Robertl |
Is the S1 tail fiberglass or plastic? I repaired my M2 tail (plastic) with a soldering iron and melted legos. There are some youtube videos on plastic welding. Legos are cheap and can be found on ebay by the pound. Melt with acetone, apply the paste to the prepped area, allow to dry, and then should be able to sand/paint. My garage door grabbed the license plate holder and cracked the fairing under the seat so I wasn't too concerned about finishing the surface as it cannot be seen with the seat in place. At first I thought I might need to reinforce underneath but it looks to be as strong as original. Robert | ||
The4ork |
   | ||
Robertl |
That looks to be fiberglass instead of the plastic used on the M2. Also looks like it was repaired before. I am no pro on fiberglass repairs but if it is sound structurally, then you can probably just sand, fill, sand, repeat until reaching the desired result. If it is weak and flexing bad, then I would recommend using the method above, adding fiberglass matting to reinforce the gel. Fiberglass and sunlight don't play nice over time leaving the glass to become brittle. Ask anyone that owns an old vette. Maybe someone else will chime in with some more info. Hope that helps, Robert. | ||
General_ulysses |
I have a brand new unused NOS tail section for my S1 and I think it's a resin type, not fiberglass. I could be wrong. I know that Airtech makes a fiberglass replacement rear end for the S1. That might be what you have there, in fact. For the amount of effort you'll have to put into that one to revive it, I would just find a good used one on ebay or here, or buy a new Airtech for $159. Be a lot easier and take a lot less time than trying to whip that one into shape, IMO. http://www.airtech-streamlining.com/buell/S11996-9 8.htm#price  (Message edited by General_ulysses on August 09, 2015) |