| Author |
Message |
    
Steveford
| | Posted on Saturday, May 30, 2015 - 05:04 pm: | 


|
The new front isolators are kind of weird - they take a smaller diameter bolt which leaves slop in the front mount unless you make up a spacer or drill out the isolator.
If you just stick the small bolt in the big hole it will deform the hole in the monster washer over time which should tell you something about the design.
I posted that a while ago and everyone got all up in arms about it for whatever reason.
I thought that perhaps you'd replaced the front one.
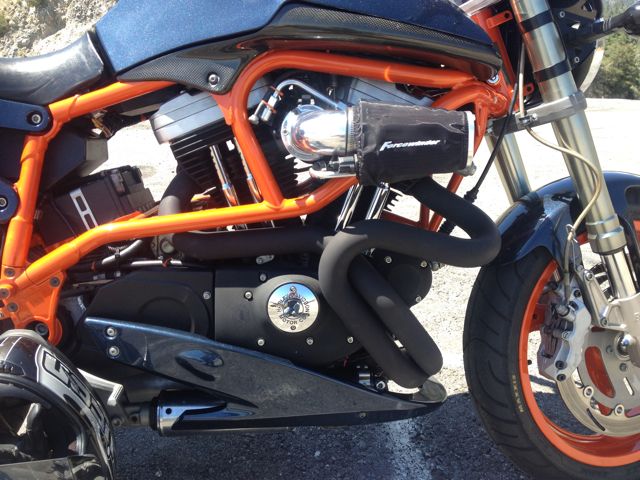
What exhaust is on it? I put on a V&H for a few miles and it made it vibrate like crazy. I pulled that off and reinstalled the Wileyco canister and it's really smooth running (all things considered).
It ran smooth with that ridiculously loud D&D canister, too. It sure hated the V&H, though.
(Message edited by SteveFord on May 30, 2015) |
    
Blks1l
| | Posted on Sunday, May 31, 2015 - 03:28 pm: | 


|
Steveford interesting about the muffler, I have an S2 I have just recently got back on the road and it has somes vibes that make the bike uncomfortable to ride, right around the 3000-3500 rpm range, may be I will look into that. |
    
Steveford
| | Posted on Sunday, May 31, 2015 - 04:47 pm: | 


|
I have to quit being so lazy and swap out the V&H for a Wileyco on the S2 and see if that doesn't cure it. My S2 has a 98 S3 motor in it with the 98 exhaust system (same thing as the S1W).
A good project for next weekend; right now I'm really screwed up with a bad sinus infection. Off to the EN&T specialist on Friday and I'm hoping that no surgery is in my future. |
    
Jolly
| | Posted on Monday, June 01, 2015 - 03:18 pm: | 


|
Youve really done a nice job on this bike!!
looks FANTASTIC!!
the colors really work well together, Lots of minute details, and every little thing covered, of course it had to be because every little thing was bombed with the pink paint...its just a perfectly executed rescue/recovery and build!!!
WELL DONE INDEED!!
 |
    
Newmans3
| | Posted on Monday, June 01, 2015 - 03:39 pm: | 


|
I agree, fantastic job.  |
    
Hootowl
| | Posted on Monday, June 01, 2015 - 04:01 pm: | 


|
"If you just stick the small bolt in the big hole it will deform the hole in the monster washer over time "
What monster washer? The one that supposed to go underneath the isolator to keep the rubber from bouncing off the sharp edge of the mount? Do you have it in upside down? Not being snarky...I've seen it before. |
    
Two_seasons
| | Posted on Monday, June 01, 2015 - 06:17 pm: | 


|
Nice job and fantastic finish.
If that were my bike, I'd frame the before and after and hang that in your man cave.
 |
    
Steveford
| | Posted on Monday, June 01, 2015 - 06:28 pm: | 


|
Yes, the snubber washer.
If you have the latest front isolator kit, try pulling the bolt out and see if it isn't hanging up on something.
I had a thin metal bushing made to take up the slop which is what should have come with the kit in the first place.
Ideally, they would have made the part as it was originally designed. |
    
Mcelhaney14
| | Posted on Monday, July 20, 2015 - 11:09 pm: | 


|
I finally got the exhaust swapped out this past weekend. It helped with the vibes and sounds much better, to me at least. I'll have to get some pics posted soon. Now all I really have left is getting a seat re-upholstered and putting some miles on it. :-) |
    
Mcelhaney14
| | Posted on Thursday, July 23, 2015 - 10:52 pm: | 


|
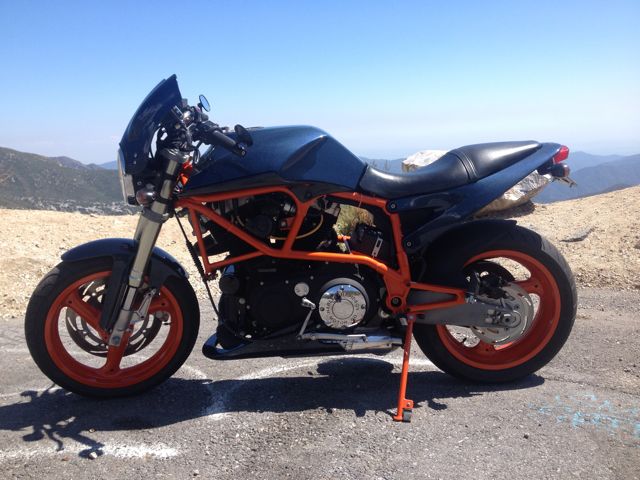
Took this girl out for her first long distance away from home ride today. About a 190 miles today with 80 of them in the mountains.  It did pretty well with only a few squawks. I think I've got the timing too retarded, a small oil leak out of one of the lines and the neutral light flashes at me randomly even when it's in gear. Overall I'm happy with how it going. I think Newcomb's Ranch on Angeles Crest Hwy will be the next stop for this weekend. It did pretty well with only a few squawks. I think I've got the timing too retarded, a small oil leak out of one of the lines and the neutral light flashes at me randomly even when it's in gear. Overall I'm happy with how it going. I think Newcomb's Ranch on Angeles Crest Hwy will be the next stop for this weekend.
Up at the top of CA Hwy 39 north of Azusa CA


Painted stock header and chin faring finally in place.

|
    
Falloutnl
| | Posted on Friday, July 24, 2015 - 08:41 am: | 


|
I'm messing around with the timing on my X1 as well. It was knocking/pinging quite badly before. I've got that solved now (retarded the timing). But I suspect that messed with the new mapping that was put in earlier. It doesn't pick up nicely from idle. Seems to kinda choke on something.
Holy shit though, you did an excellent job on your bike. I love the new color combination. Great to see an X1 being brought back from the brink.
(Message edited by falloutnl on July 24, 2015) |
    
Littlebuggles
| | Posted on Friday, July 31, 2015 - 05:59 am: | 


|
Looks really great! |
    
Tq_freak
| | Posted on Friday, July 31, 2015 - 09:29 am: | 


|
Holy shit though, you did an excellent job on your bike. I love the new color combination. Great to see an X1 being brought back from the PINK
there, I fixed it for you |
    
Mmmi_grad
| | Posted on Saturday, August 01, 2015 - 08:36 pm: | 


|
The Right plugs are important in getting rid of pinging. dcpr8eix These are great. I am still on the stock Race ecm. Did that after talking to the guy who actually was on the team making the ecms in IN. He was the guy who got to run the bikes down the airport runway too. EPA was hard on the stock ECM. No one should be using the Stock ECM on their Buell. With intake seals, sensors adjusted, FI cleaned and flowed my engine could not be happier.
If you read your Factory Service Manual, the TIMING MARK goes in the center of the timing plug hole ...
"IF" you have a OEM "STOCK ENGINE" you can set the timing mark JUST COMING INTO THE TIMING PLUG HOLE which will make it run better(either your electronic module or timing plate will have to a "LED" on it) ...
If you have a MODIFIED ENGINE set the timing on a "DYNO" !!!
JS
Timing setting per FSM [ CONDENSED ]
1. Set front cylinder to TDC on compression stroke, (a mark is visible in the plugged hole right side base of cylinders) to align for tdc be sure that it is the front cylinder
2. remove rivited cover, loosen pickup mount plate to allow movement
3. connect volt meter to pins 3(+) or 7(-) on the grey plug, while still mated to ecm
(from back)
4. move the timing plate until the reading changes to + 5 volts from about 0~1 volt
this happens when the timing cup edge passes the sensor switching point
5. when set, snug screws then re assemble.
This is the static timing set, }
thanks olddog
There's been discussion lately about the ability to adjust static timing without the need to hook the bike up to the Digital Technician. It can be done, and it's really quite a simple process. Here's how to do it on an XB -- not sure how similar the other models are in terms of wire colors, etc. but the process should be the same.
1. Rear up on stand.
2. Remove seat.
3. Remove timing mark inspection plug.
4. Gently pry back the silicon rubber seal to gain access to the terminals of the gray connector on the ECM. You'll need to stab your DMM leads in from the back, and this makes it easier.
5. Set DMM to read DCV, 20V range. Insert black DMM probe into pin 7 (black wire with white tracer) and red DMM probe into pin 3 (if I racall correctly -- anyway, it's the green wire with the white tracer)
6. Sidestand up, key on, ignition switch on, transmission in 5th gear. You should hear fuel pump come on and then time out.
7. Looking through the timing mark inspecion hole, turn the rear wheel in a forward direction until the timing mark is visible at the left edge of the hole. You should see zero (or close to it) volts on the DMM. If you see +5V, then you're at TDC for the rear cylinder -- rotate the wheel until you see the mark again.
8. The meter should change from 0 to +5V just as the timing mark passes the center of the hole. As a bonus, the fuel pump comes on at the same instant, providing audible feedback as well. Turn the wheel slowly, and if you overshoot the mark, back it up until the mark is again at the left edge, and then go forward. Don't try to check/adjust it while turning the wheel backwards.
9. If the timing is advanced (transition occurs before center), nudge timing plate CCW. If the timing is retarded (transition occurs after the mark passes center), nudge the plate CW.
If, as the other thread suggested, somebody wanted to connect an LED to monitor this transition, you could easily hook it up as follows:
Connect a 330 ohm dropping resistor to the anode side of an LED. Hook the other end of the resistor to the green/white wire of the CMP sensor(pin 3, gray connector at the ECM). Hook the cathode of the LED to the black/white wire of the CMP sensor (pin 7, gray connector at the ECM). Using the above instructions, the LED would be off with the timing mark at the left edge of the hole with the front cylinder before TDC. It should then transition to ON just as the timing mark passes the center of the hole.
Additionally, both techniques can be employed by making your connections at the CMP sensor connector. I chose to probe the ECM connector because there you don't need to remove any trim pieces or cut any wire ties to access the proper wires. |
    
Mmmi_grad
| | Posted on Saturday, August 01, 2015 - 08:41 pm: | 


|
Really Sweet job on the bike. I love that 2007 Streetglide Pearl Black too. So much better than the now boring gun metal color. |
|