| Author |
Message |
    
Tipsymcstagger
| | Posted on Wednesday, June 17, 2009 - 08:48 pm: | 


|
quote:Race, did you do the low beam always on conversion using the euro wire at the headlight connector?
I have my low beam HID relay switched by the Euro light lead. I don't know if that's contributed to the problem or not (assuming the problem I'm having is, in fact, a bad ignition switch). But who knows?
I'd be inclined to think it's not making a difference one way or the other since it seems not everyone who has this problem is using the Euro lead to power the low beam (or low beam relay).
Tipsy |
    
Ronmold
| | Posted on Thursday, June 18, 2009 - 01:20 am: | 


|
If you can open up an old switch and clean it, why could you not open up a NEW switch at the same time and quickly swap the new electrical parts over to the old switch before it notices? Is that too simple or am I missing something? |
    
Rays
| | Posted on Thursday, June 18, 2009 - 08:49 am: | 


|
I had to travel interstate for work today so I haven't had a chance to dig into this further. I'm going to look at pulling the switch apart this week-end and clean the contacts so I'll keep you posted on how that goes.
BTW - my parts book shows the electrical switch as a separate part (C0152.1AD BODY, electrical, ignition switch) - item 18 on page 92. I will also drop into my dealer on Saturday and check on price and availability.
On the subject of using the Euro light lead, I don't think that is the issue with Tipsy's switch as that contact is the one that is working - it is the other contact that is suspect (but not actually proven guilty yet of course). |
    
Rays
| | Posted on Friday, June 19, 2009 - 03:03 am: | 


|
OK, I took Al's advice and pulled the switch this afternoon. Unless you want to get brutal the tamper-proof T45 Torx is a 'must have' tool. Some fine bladed screwdrivers are very useful for actually popping the snap-in fittings on the electrical switch as well
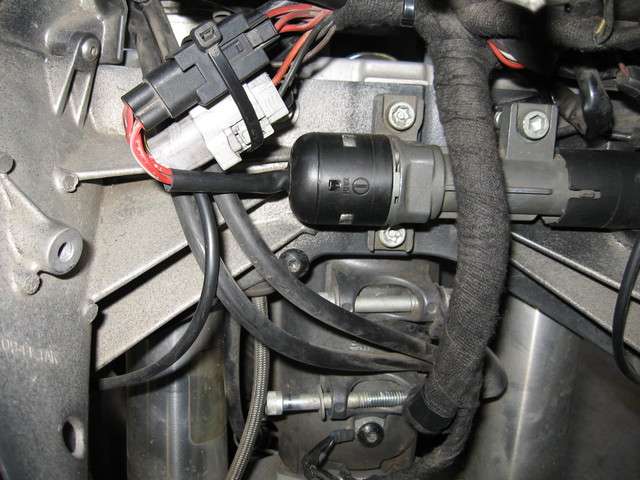
This shot shows the three mounting locations for the ignition switch / steering lock. The wiring loom needs to be lifted slightly to remove the switch assembly - I have removed the lower bolt on the loom guide to allow it to swing up.

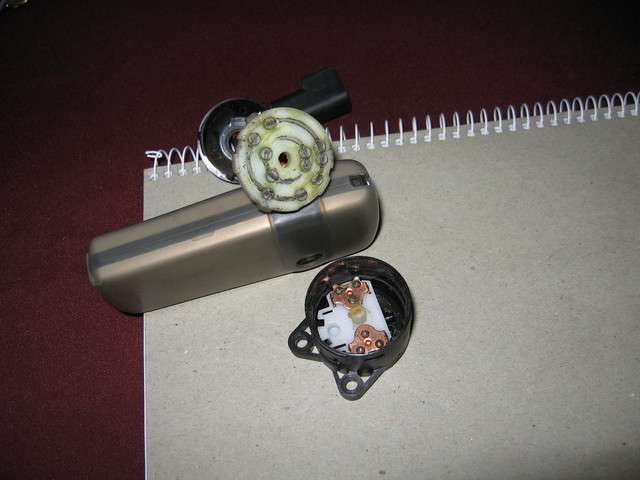
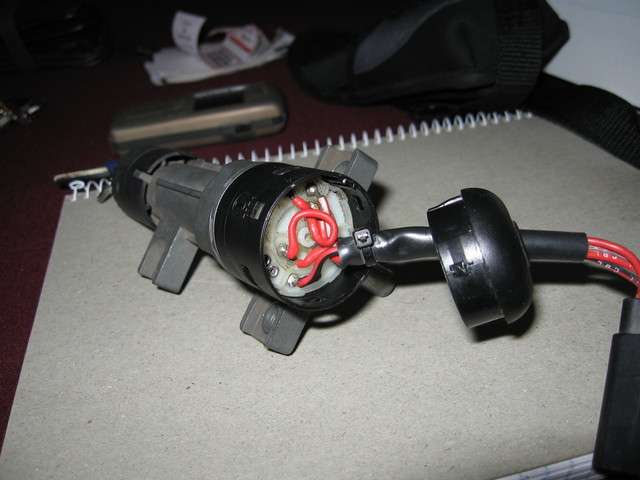
When you have the switch assembly out the electrical contact section is readily removed by 2 Phillips screws on the under side. I had already pulled the rear cover off in this shot - curiosity got the better of me.

When I pulled the switch apart the bad contact problem was immediately obvious. It isn't that obvious in the reduced photo but if you look at the two copper contacts you can see them both grotty but the upper one has a little green corrosion as well.

This looks complicated with eleven individual contacts but not all of them are used in this application as you can see from this shot,

This is a really straight-forward operation if you are confident pulling small fiddly things apart and re-assembling them. Just take care to note the orientation of the pieces involved - the contacts are sprung but assembled in such a way that you can pull the moving contact assembly out without springs and bearings and bits going in all directions.
I cleaned the dirty old grease off all pieces and cleaned all contacts very carefully with a fine brass brush. A final clean with methylated spirits and assembled with marine silicon grease.
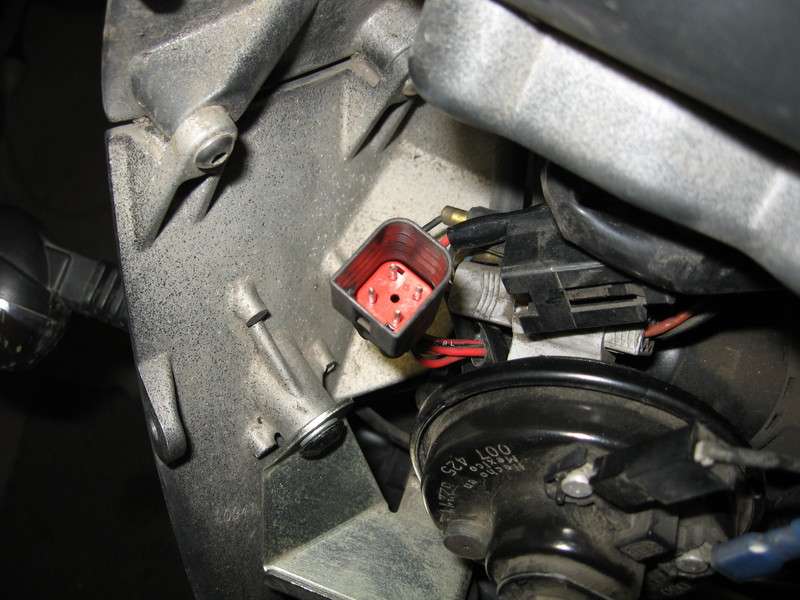
When assembled you can test your handiwork with a multimeter. Referring to the photo below there should be very low resistance between the two pins at 12 o'clock and 9 o'clock and between the two pins at 3 o'clock and 6 o'clock in the ON position. In the PARK position there should be very low resistance between the pins at 12 o'clock and 3 o'clock,

My ignition switch is now working perfectly so the exercise was totally worthwhile and this is another part of my Uly that is no longer a mystery. |
    
Raceautobody
| | Posted on Friday, June 19, 2009 - 09:04 am: | 


|
Ray, I am glad to see that helped.
Al |
|