| Author | Message | ||
Captains1 |
Hi Guys, Long story short. I bought a wrecked Buell S1 around 7 years ago, bought some spares from American Sport Bike parked it in the shed and then life happened. Anyway its taken a global pandemic to get me to pull my finger out and start work on it. So bike is stripped, replaced oil pump drive gear, primary tensioner and onto the next job. Was hoping to get your help. 1. I have the upgraded front engine mount bolts as spares. Is it worth preventatively replacing the originals or do I run the risk of snapping the original bolts when trying to remove them (if it aint broke?). 2. Also I know there are lots of related posts but I have the new 79D front isolator as a spare too and have just noticed the 7/8 bolt. I know a few people have drilled it out to accommodate the Ĺ bolt. Has anyone run the 79D with the 7/8 bolt and a machined sleeve where it passes through the engine mount? Surely if it was a buell OEM replacement part the 7/8 bolt is strong enough to accommodate the weight of the engine? Anyway I would appreciate any recommendations from experienced buellers. Thanks (Message edited by Captains1 on May 11, 2020) | ||
Upthemaiden |
#2: that's exactly what I did. I went on ebay and bought a 1/2-7/16 sleeve to fit in my front engine mount. Plenty of people stick the new bolt in the bigger hole under the assumption that Harley/Buell knew what they were doing, and I haven't heard a single person have a problem with it, but I like knowing the bolt isn't moving around in that hole at all. https://www.ebay.com/itm/1-2-to-7-16-REDUCER-INSER T-SPACER-HEIMS-HEIM-JOINTS/370935106918?hash=item5 65d748d66:g:txwAAOSw3fNdGiI- Drilling the new isolators out makes me a little uneasy. Again, plenty of people do and I haven't heard of anyone having a problem, but still. | ||
Upthemaiden |
and while you're at it.... take some pictures and document the rebuild for us! this board has been a little slow lately, be great to get to see someone doing some work, and pictures of an S1 are always a good thing. | ||
Falloutnl |
I'll double check what I did re: the front isolator with my dad. I think I ended up using the new isolator as well as the new bolt combined with a sleeve. Pay special attention to making sure you have all the washers in the correct positions. After our first 'attempt' we mucked that up, causing the entire setup to flex and come into contact with frame (causing some front end weirdness). It's all good now though. On question 1: I would replace the bolts only if you're removing them (to replace the mount?). Don't think there's any need otherwise. | ||
Williamscottrobertson |
I just install it per the directions. No spacer or anything. I figured there was a method to the Buell engineers madness. Iíve installed 5, no Iíll effects so far. | ||
Williamscottrobertson |
Oh and if the isolator to head bolts installed do not have f911 stamped into the head, I would swap them out with those. Use the torque in a late model repair manual, I donít remember what it is off the top of my head but it is not the torque from the 95-98 manuals. | ||
Captains1 |
Hey, thanks for the feedback. @Upthemaiden, thanks for the link, ill either see if i can buy something local or see if i can get something machined up. Ill also update with some pictures but cant promise they will come regularly. @Williamscottrobertson & @Falloutnl, the current bolts have f911 already so i might take your advice and leave them. thanks for the help im sure ill have more questions when resembling. Currently swapping the swing arm for an X1 model. Hopefully that doesent cause me too many issues. | ||
Falloutnl |
Currently swapping the swing arm for an X1 model. Hopefully that doesn't cause me too many issues. Definitely let us know how that goes. Doing that too sometime in the next few weeks/months :P | ||
Upthemaiden |
Swapping swingarms is pretty straight forward. The hardest part that I remember was figuring out the proper angles to get wrenches on the bolts holding the swingarm mounting block. They weren't the easiest to reach, but I was able to get them eventually. Some people just leave the regular block and grind it down a little. I also remember making the tool to compress the left isolator. I used when I had around and the threaded rod wasn't thick enough and started to bend. I got some thicker rod and it worked great. | ||
Falloutnl |
The hardest part that I remember was figuring out the proper angles to get wrenches on the bolts holding the swingarm mounting block. Lol, yeah. That's often how we spend most of our time whenever we tear into one of the bikes. I took the easy(ier?) way out with the swing arm, got an X1 mounting block off of Ebay from Germany (and an X1 rear fender). Should be everything I need. Now it's just a matter of getting that thing polished. | ||
Captains1 |
Hey Guys, ive hit my next road block. Hoping for some help. I've swapped out the rear mounting block and swingarm for a X1 version i have fitted all new isolators front and rear and am installing the frame over the engine. Ive got the front isolator bolt in but no tie rods attached and am having an alignment issue at the rear. Its pretty far out and does seems to be more than just a bit of play. Its very difficult to shift around as the rear isolatrs are a tight fit. Was very difficult to get to this position. Hoping for any advice. Thanks 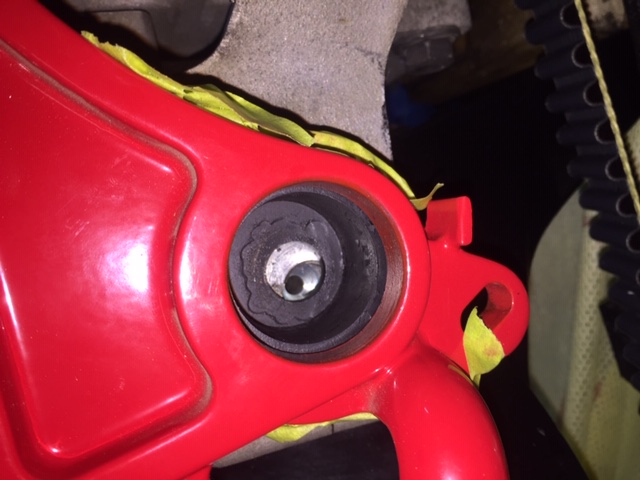 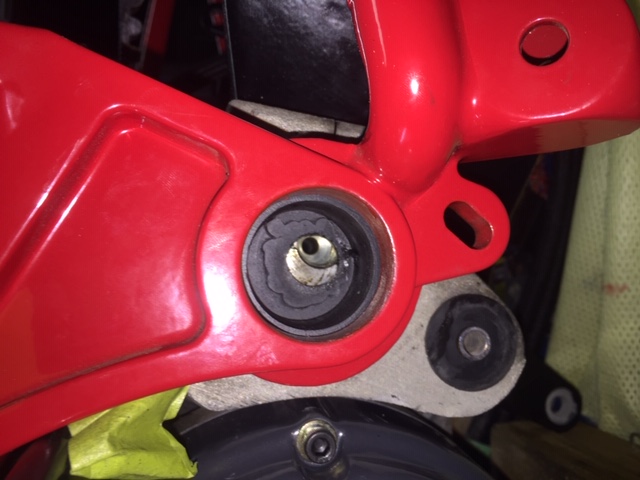 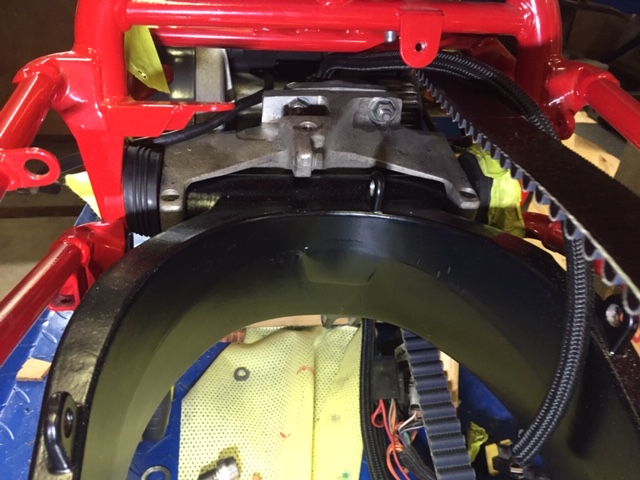 | ||
Captainkirk |
Are you using an isolator installation tool? (frame spreader) | ||
89rs1200 |
First, stop and get rid of the old style rear isolators! They will fail! Back in the day, I replaced four on three different Buells! Have not had any failures on the new style isolators. They have a metal "Wing" which faces forward and down. If the isolator was to fail, this "Wing" catches the frame. As to alignment for installation, yes it is difficult. Sounds like you have a tight fit. GOOD! They are designed to fit tight. If they are not tight, the fix is to use fender washers between the isolator and mount block to take up the space. Use a tap to clean up those threads. This will save you from possible/likely cross threading the bolt, (happens a lot). I use an old bolt with several cuts filed across the threads. Works well to clean Locktite out of the threads. I also use this bolt on a long Allen wrench for final alignment. Then remove it and install the new bolt. Work on installing the bolt one side first. Once the first bolt is installed, move to installing the other. Once closely lined up, I use the largest screwdriver into the hole and lever to line up the isolator with the frame. Being very careful to not damage the threads. Since the engine is blocked in place, gently moving the tail of the frame up or down helps. (Message edited by 89rs1200 on June 16, 2020) | ||
Upthemaiden |
Mine was the same way. I got the new isolators in and the holes just weren't lined up. I had to loosen up the front isolator and just yank the frame around until I got it lined it. It definitely took a little convincing. I also really regret no cleaning out the threads before I installed the new mounting block and swingarm. I bought a tap and managed to clean up the threads with it all together, but it wasn't easy, and would've only taken 2 minutes had I done it before they were on the bike. The job was also made more difficult by the new style bolts. The head slightly rubbed on the inside wall of the isolator making it a lot harder to gently start threading it in. | ||
Captains1 |
Hi Guys, Thanks for the advice. I finally got it all aligned.It was a lot of work. I had to make a frame spreader out of a threaded rod and then hammer the islolators sideways to get them to shift slightly. It was also good advice to clean out the threads i used a small pic which seemed to help. I also used the old S1 swingarm pivot with this swap and it seems to have not caused a problem. Anyway thanks for your help, ill continue assembling and am sure i will have more questions as the pictures i took upon disassembly are not as clear as i would have hoped. 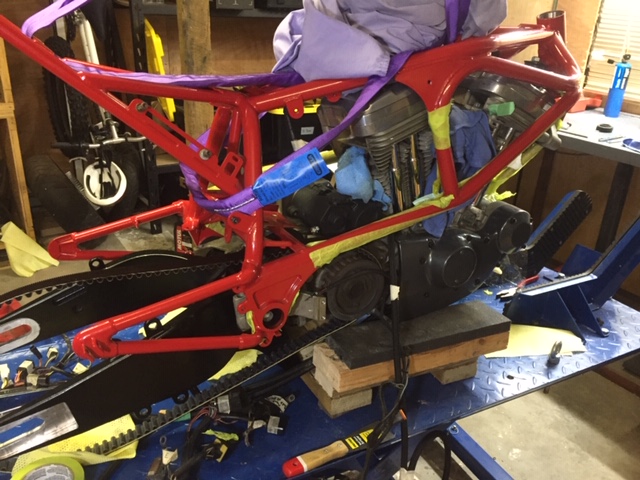 | ||
Upthemaiden |
You can absolutely use the old swingarm mounting block. The only difference between the two is a notch out of the new one that gives clearance for the newer style swingarm. If you don't file it down it would limit the travel of the swingarm. | ||
Brother_in_buells |
Looking good so far! Like the frame colour with the black parts to  | ||
Blake |
"the pictures i took upon disassembly are not as clear as i would have hoped." Ain't that always the case? Looking great so far. | ||
Captains1 |
Hi Guys, I'm slowly making progress, its looking a lot more like a bike. Quick question I was hoping someone might be able to tell me by looking at their Buell. The crank case vent that is at the back of the engine near the starter. Is there meant to be a pipe connected to this? If so does it just vent to atmosphere and where does the pipe route. Thanks 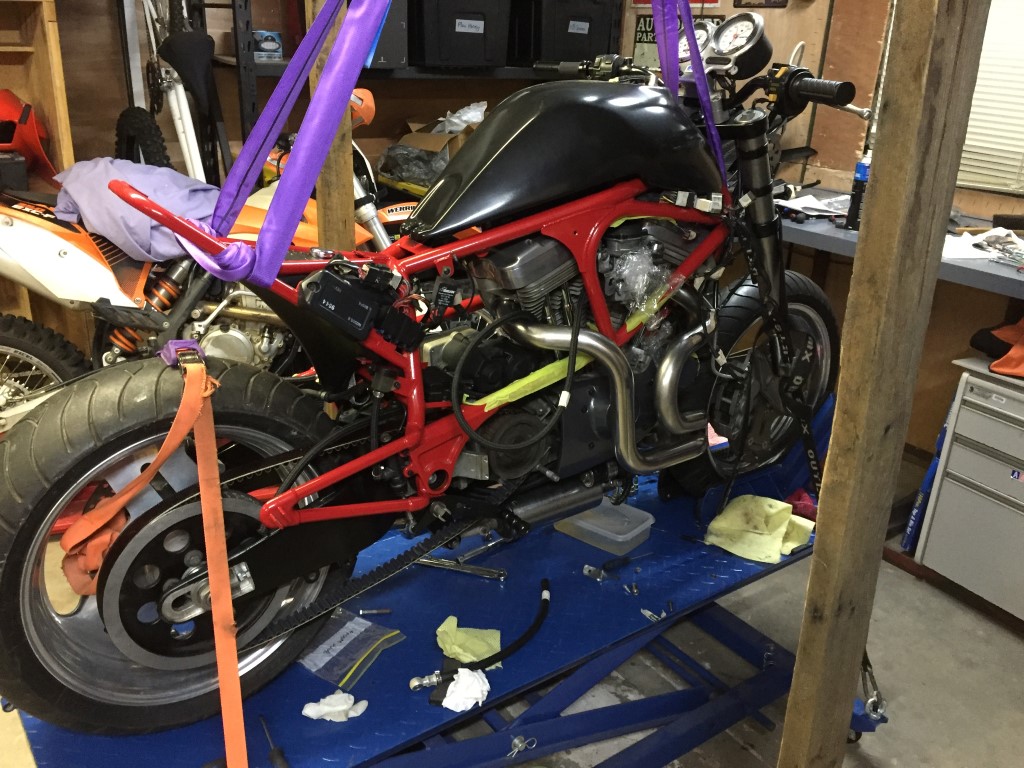 | ||
89rs1200 |
Yes there must be a hose on that so that dirt does not get in it. Routing should be straight back, under the battery tray, to the Left of the battery tray, then, on the California models, up to a tee and then to the emissions canister. Otherwise, as long as it is pointing down, it could end below the mounting block between the block and the swingarm, to keep out dirt and water. On my S3s it runs straight back, under the battery tray, to the left of the battery tray, then up and over the battery to end, pointed down on the Right side of the battery. | ||
34nineteen |
I wound up finding a piece of hose at an auto parts store that had a bunch of bends and I was able to get a "J" shape out of it. I connected that to the trans breather and it runs down the hole between the engine and transmission. Pretty sure thats how it was done on my Sportster too. | ||
Hawgford |
On all HDs that are crank case breathers[pre 92 on BT, not sure of the year of change over on XL to head breather]these hoses are connected to the backin plate of the airbox,whatever the type of box.On my shovels,I "tee" it into the oil tank vent line for a cleaner look plus ease of access and no chance of oil on the rear tire.Theres options on what can be done on the open end. I've seen catch cans,just the open hose and the most common a small breather filter installed so a damn wasp doesn't clog it[ aka dirt dauber,a southern USA thing.]If you have to install a catch can,you have a bigger problem as a bike may "sump" during a fire up after months of disuse but it should not be frequent. A related problem I have seen a lot of is the rocker box gaskets weepin and this is caused on a head breather motor by the use of that chrome crossover tube when changin the air box. Run 2 separate pieces of thick wall big as possible fuel line to the new filter backin plate, if a second fitting is needed, drill and fit,but I have seen plenty of backin plates with the hole there just no fitting. Doin this will also help with sumping problem as well. |