| Author | Message | ||
S1owner |
ohhhh dimascuse would be cool! would not match anything but really cool maybe turning then black over it not sure I will keep it in mind for small winter upgrades | ||
S1owner |
Alright gents Got to put in some good time on her today! Brakes full and bled but think I need to do a little more fine tunning on them. Oil in Trans fluid in Battery in Worked on the tank but did not want to install until I tested things. But guess what she lives!!!!! Check out this lame vid http://youtu.be/JjzUPhrhBjM But I have some work no nuetral light a couple small oil line leaks etc. | ||
M2owner |
your video comes up as private.  maybe just me but if not can you un-privatize it? good progress - been waiting for the update. maybe just me but if not can you un-privatize it? good progress - been waiting for the update. | ||
S1owner |
First time for me putting a vid on youtube http://youtu.be/JjzUPhrhBjM (Message edited by S1owner on August 30, 2015) | ||
M2owner |
vid isn't lame - socks with sandals is lame  looks and sounds great. tail and turn signals look good too. looks and sounds great. tail and turn signals look good too. | ||
D_adams |
Yep, sounds like it's supposed to. | ||
D_adams |
Except for the part where it ran out of fuel.  | ||
S1owner |
Sounds awesome Socks with sandles my kid! | ||
S1owner |
Well gentleman it is a great day!!! Went to a diffrent DMV and with the letter from KMBuell i have my plates and title is on its way!!! Could still get hung up in auditing but these ladies are awesome they said they did not need a copy of the letter title will be good!!!!! This gives me a little kick in the butt also  | ||
Hughlysses |
 | ||
Bluzm2 |
Ken, When I built the S1 for my neighbor all I had was a letter from Fireman Jim, we had no issues. Cool stuff! | ||
S1owner |
I had issues but most was Elk River DMV!!!! | ||
M2owner |
Happy Labor Day. Please tell us that you have it on the street and it goes really good. On my M2 today. Very therapeutic. | ||
Newmans3 |
Hey Ken, when you reinstalled your engine, did you adjust your tie bars? I just replaced a torn front isolator and my rear cylinder exhaust pipe is against the section of frame it is parallel to. Looks like you have a bunch of room there. Thanks. Mike | ||
S1owner |
Newman I did not have to adjust them with the S1 reistall or when I swapped the M2 frame onto it. But when I put the X1 frame on I did need to adjust the front tie barslightly. If it is the same motor on the same frame you should not have to adjust by chance did you mix them up? There is a science behind the balance of the tie bars compared to alignment. Larry Unfortunately my hopes of test riding are on hold. I have mostly everything done.One of the rear oil lines has pin holes in the brazing which I need to repair. And once I had the fuel tank on it so very nicely showed me it is leaking. I have to go out of town for work this week but hopefully I will get all the parts into a welder Friday. other then that all I need to do is the seat and seat pan but that will be a winter project I will run a temp seat for now. Believe me it is really overwhelmingly frustrating!!!!! | ||
Newmans3 |
Ken, the only thing I did was replace the front isolator, didn't touch the tie bars. The old one was torn, which may have been like that since I got it, because before I had room to wrap the header, now it is tight against the frame. | ||
S1owner |
Michael Something is wrong. Maybe the front iso was an issue before you owned it and the tie bar was adjusted to compensate for the issue. There is some tie bar threads showing how to figure out alignment and adjustment. | ||
Newmans3 |
Okay, I thought something was up, maybe a previous owner adjusted the tie bar(s). I'll have to search out those threads and do that. How many tie bars are there? Assume I need to do all of them together? Thanks for the help, don't want to ride it the way it is. | ||
Brother_in_buells |
Newmans3 Don't know if it's helpful ,but i have a set of four tie bars that came from a 2000 s3 I can measure the lengths so you can compare that with what's on your buell. | ||
Newmans3 |
BinB, That would be great! I know all the frames are not exactly the same dimensionally, but that would be an excellent place to start. Thank you for the help on this, I really appreciate it. Also, it appears I unintentionally hijacked this thread. Sorry about that Ken and all. (Message edited by newmans3 on September 08, 2015) | ||
Hootowl |
Michael, Make sure you've installed the isolator the correct side up. Putting it in upside down may change the height of the engine in relationship to the frame, which could bring the header and frame into contact. Just a thought, since all you did was change the isolator. | ||
Newmans3 |
Hootowl, I have checked that and it is installed correctly according to the Buell Instruction Sheet that came with it. Brother_in_buells, I don't usually get PMs, please email me at michaelweis99(at)gmail(dot)com All, I have a thread over in the Knowledge Vault-Chassis-Suspension-"Front Isolator on 99 S3" but don't know how to create a link for that. If anyone wants to help, please go over to that thread and post, I don't want to keep hijacking this awesome build thread. I apologize again Ken. | ||
Brother_in_buells |
Here is the link to the isolator thread http://www.badweatherbikers.com/buell/messages/384 2/769580.html?1441667916 Michael I'm gonna measure and take some pics of the iso links for you and send them to your email address. Maybe its also a good thing to post them in your thread. (Message edited by Brother in buells on September 08, 2015) | ||
S1owner |
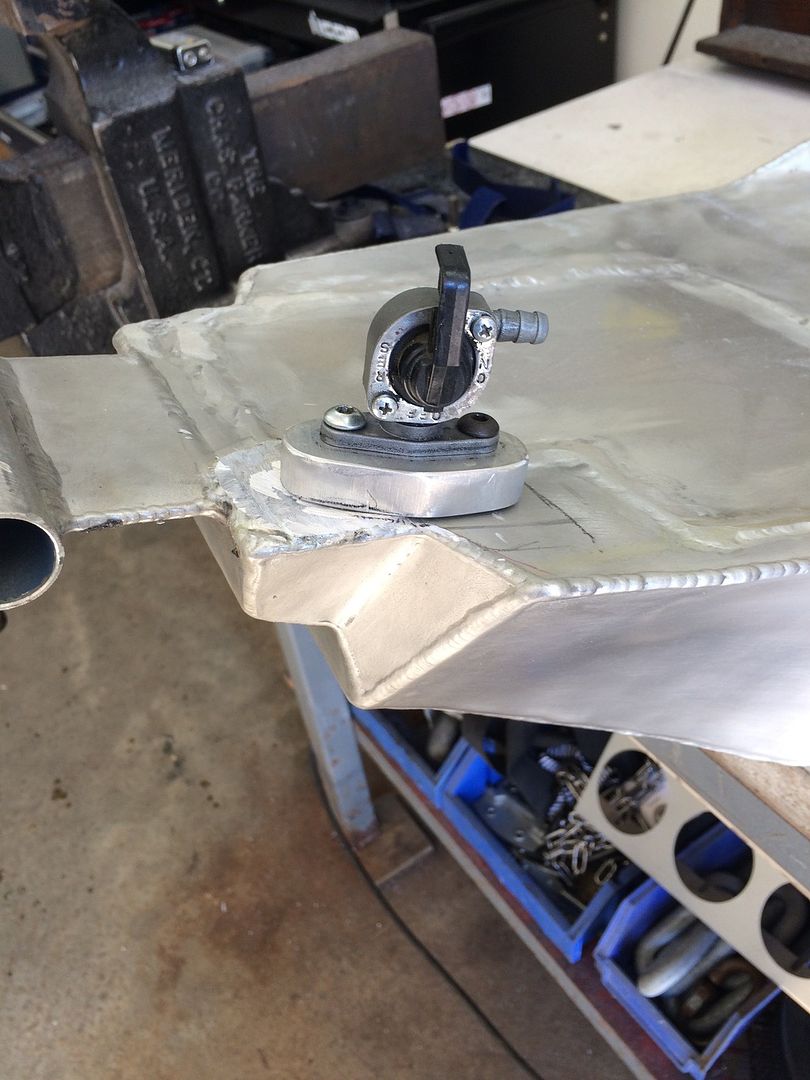
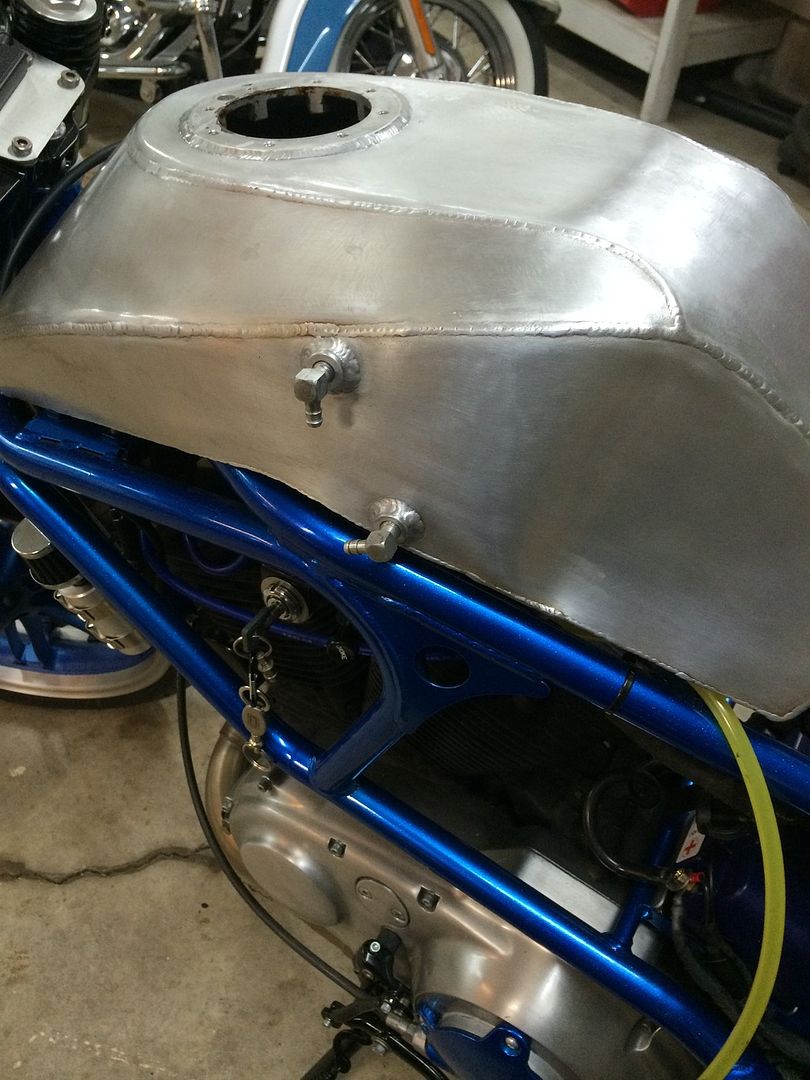
Since I am bring the tank in to get boiled, welded and pressure tested I decided to do a few other things I wanted on the tank. Fabed up a petcock mount so I could use a stock style petcock, and some sight fittings so I can see my fuel level and a piece for the front of the tank mount. Also finishing up the seat pan.    | ||
Hootowl |
What's the triangular bit for? | ||
S1owner |
Not pictured but the hook on the front of the tank actually bolts in place with a plate on top that piece will give more birf to the threads. | ||
Hootowl |
Gotcha. | ||
S1owner |
Tank at the shop getting boiled then down to the welder tomorrow! Started on the seat shaping and hopefully we will be good to go shortly. Still enty of cleanup to do through the winter but as long as I can test ridexand fine tune it this year we will be ripping next spring!!!!! | ||
S1owner |
tank was dropped of at the welder today should be back end of next week or beggining of the following. Put the oil lines back together and modified my tuber rear stand so it will work with the XB swingarm had ti widen it by 2". Seat is almost ready to be covered have to get some metal tomorrow and try to finish it up Sat. I leave for San Fran for 4 days sunday morning. | ||
S1owner |
Got the tank back from the welder wow awesome job and expensive but I have never had to pay a welder before but done right and ready to rock. Also talked to the seat guy also and he is two weeks out but i will set something up to test ride with. Hopefully sunday itvwill be ready for a test ride     |