| Author | Message | ||
Mikethediabetic |
Ok guys here is a write up on my X1 Seat Cowl that you are asking about. This project was cheap and fairly easy if you are mechanically inclined. I will also add that i will no way be held responsible if you somehow ruin your seat. Do this project at your own risk. With that being said,here we go. Items you will need for this project: Your seat that you are making the cowl for Masking Tape Metal Ducting Tape Vaseline Fiberglass Resin Fiberglass Clothe Bondo Finishing Bondo Dremel or cut off wheel Sand paper Primer and Paint "L" brackets from Home Depot Felt Fabric Spray adhesive Ok first thing to do is take your seat and prep it for the fiberglass. I removed the strap off my seat to make it easier and to have a nicer shape. Then cover the whole seat with masking / painters tape to protect it. Then on top of the masking tape, put a layer of metal ducting tape. Then on top of the metal tape, smear a very generous amount of Vaseline. the tape protects the seat and the Vaseline acts as a release agent for the fiberglass. 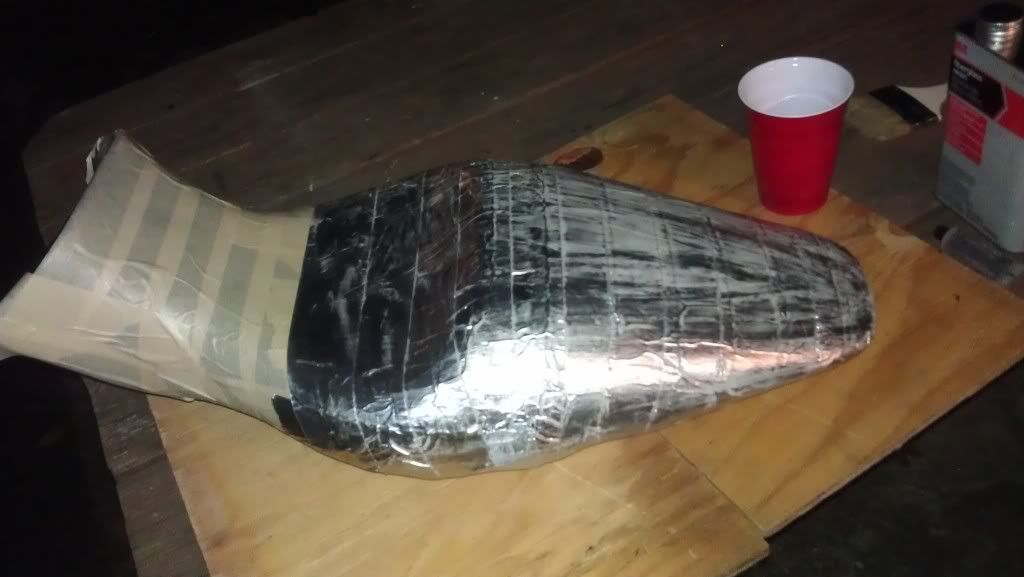 Next pre cut some strips of the fiberglass clothe in various shapes that you think will cover the seat. Trust me, trying to cut this stuff while your racing against the clock of the resin hardening is not fun. Next mix your resin, follow the directions on the container for the proper mixing ratios. I used about a solo cup and a half for the seat. You want to lay the fiberglass bigger then the finished design o you have room to trim and shape. The sides are tricky, i just let everything hang off like curtains and then trimmed when it was hard. In the end i put about 4-5 layers of resin and fiberglass down. ends up being about 1/16"- 1/8" thick. 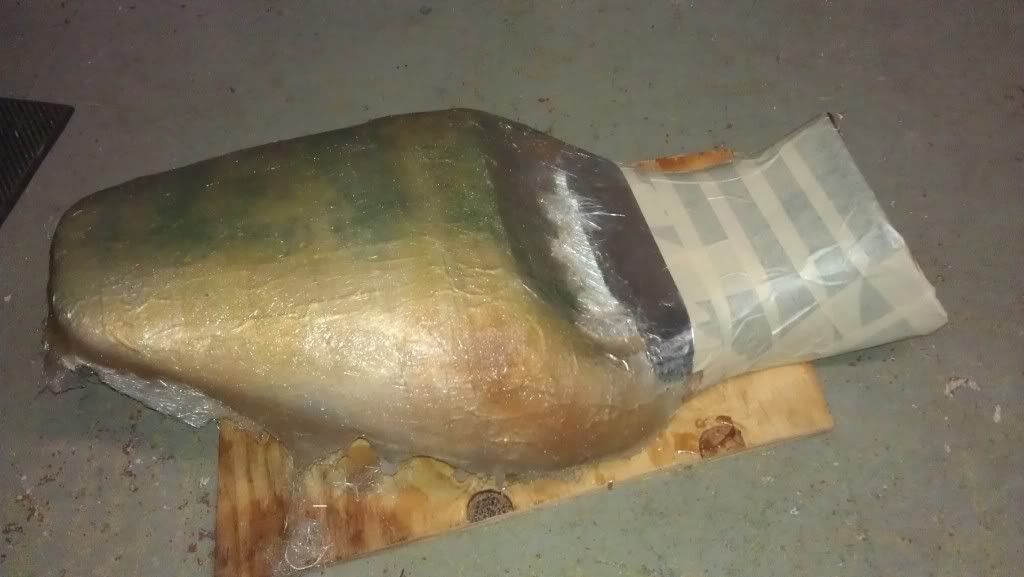 Once its hard, trim the edges with a dremel or cut off wheel in roughly the shape that you want. 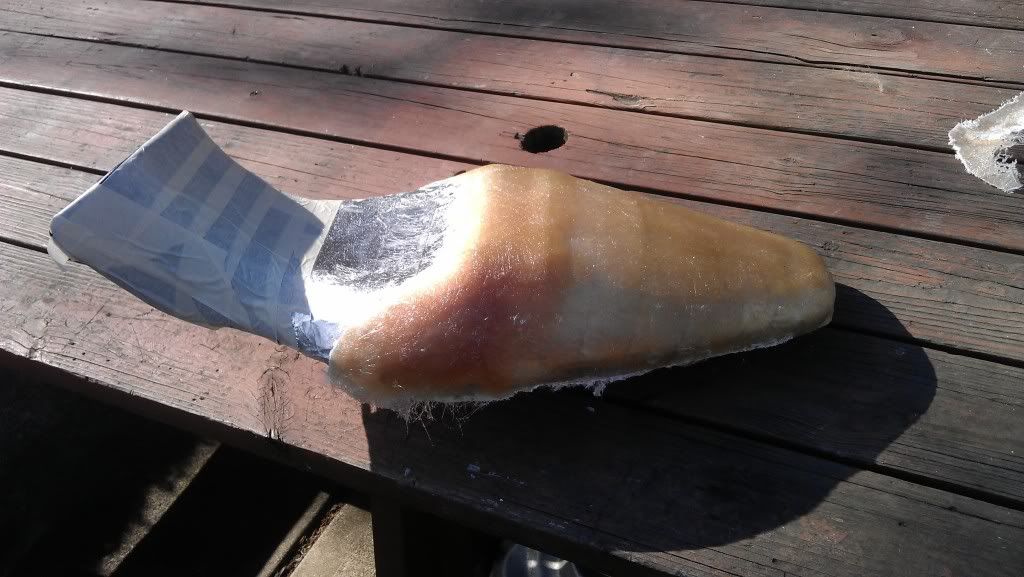 Then separate the fiberglass from your seat and see ho it looks. 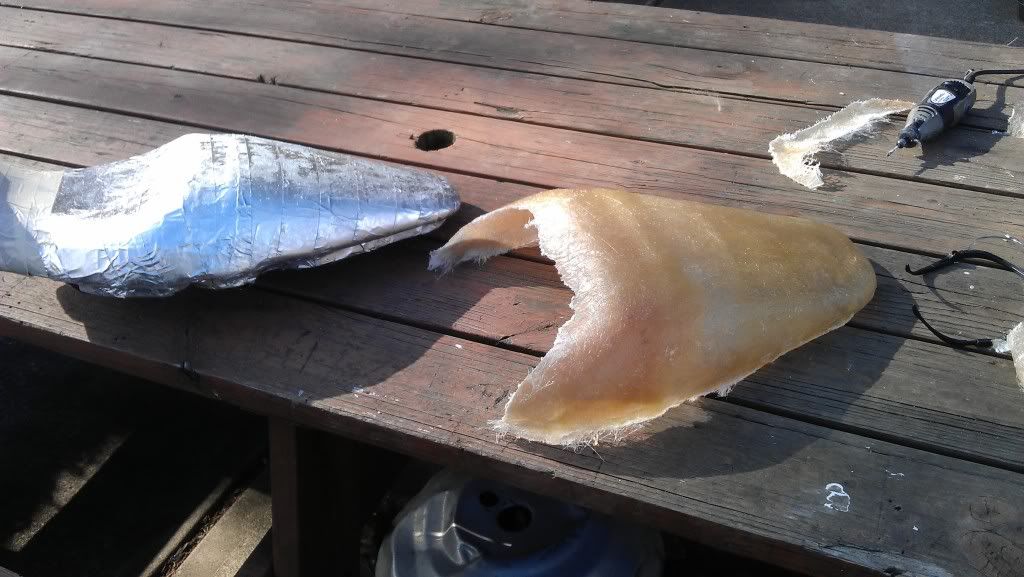 Now take your dremel / grinders and shape the cowl into the final design that you are after. 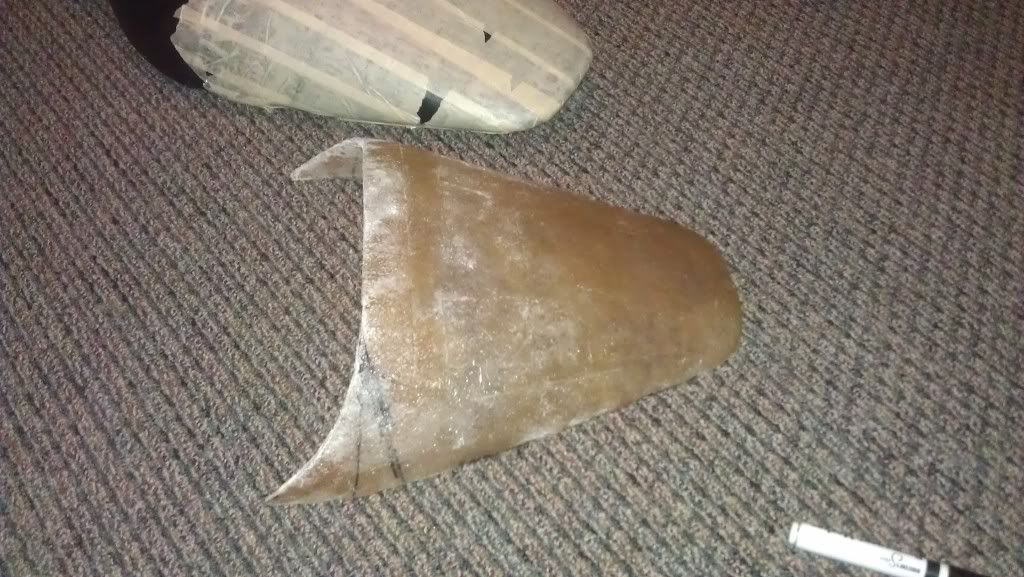 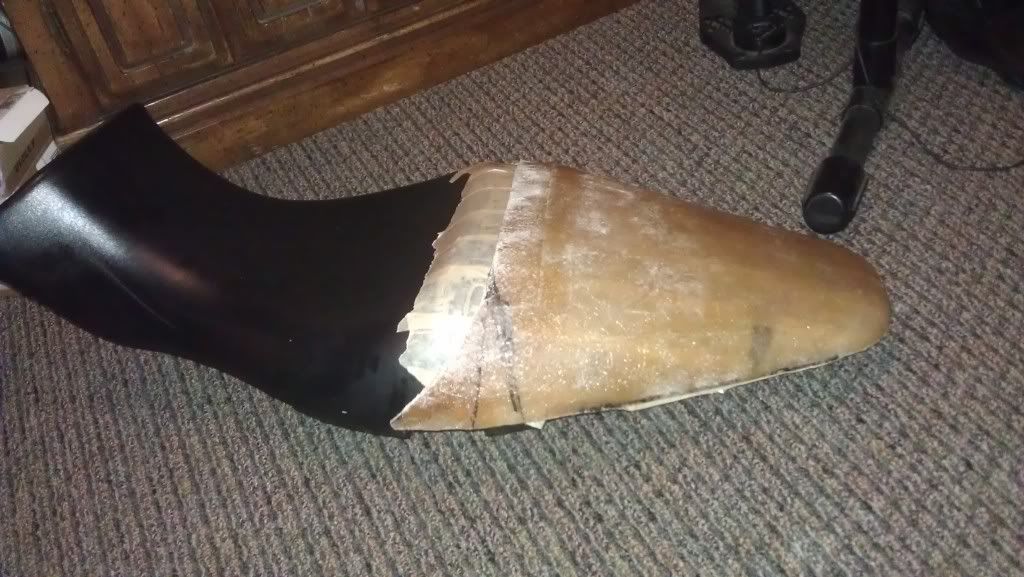 After the shaping is done, now come the bondo. I scuffed up the fiberglass a little so the bondo had a good surface to cling to. Try to use as little bondo a possible. just take your time on this step because if you take short cuts and laziness here, you will notice it in the end. trust me. 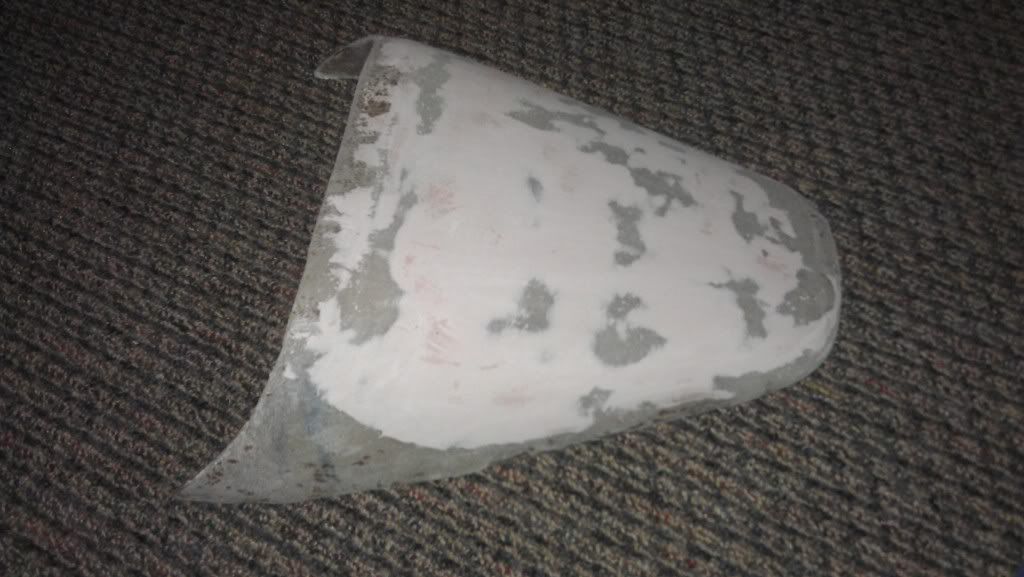 Once your done bondoing and sanding then put some coats of primer on it. Now you will really see how it looks and other areas that you need to sand. Also the primer lets you see the little pin holes that bondo leaves behind sometimes. This is where the finishing bondo come in. Its a lot more fine of a paste and really fill those nooks and crannies. 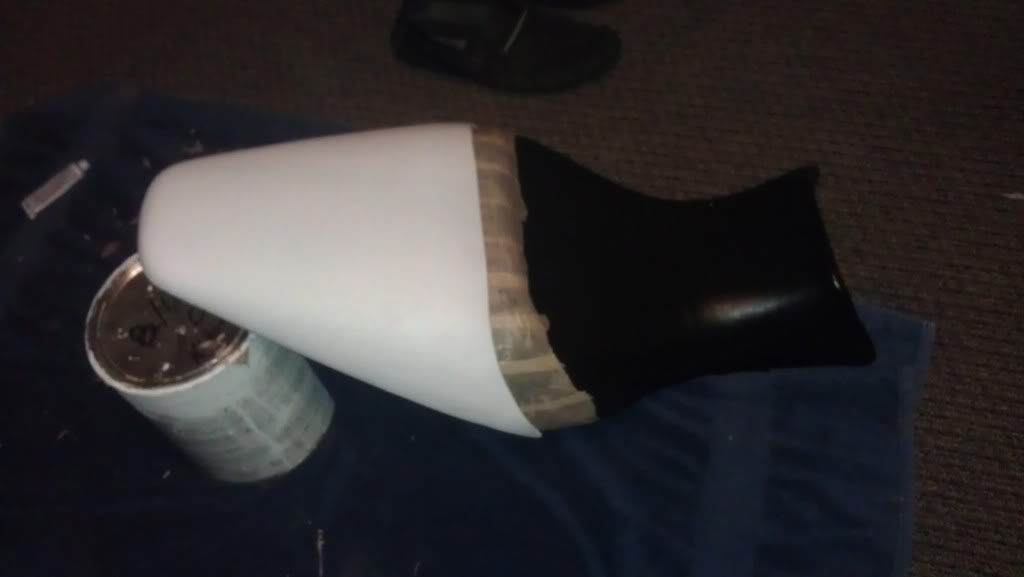 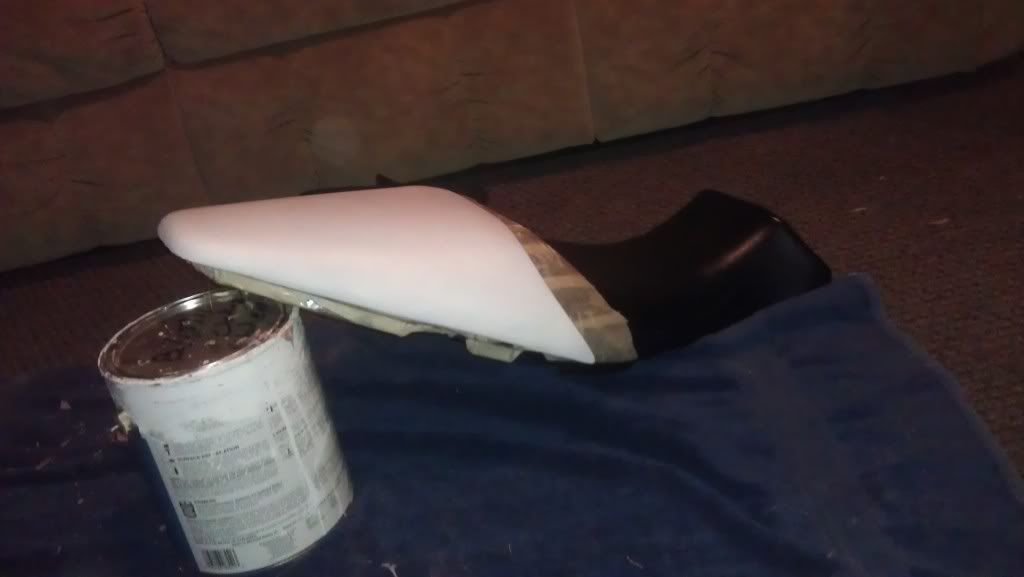 After its all primered and smoothed now comes time for the mounting. My picture shows my doing it after i painted, i would recommend doing it before. I used little "L" brackets from home depot. i bent one arm to contour the inside of the cowl and the other arm wraps under the lip of the seat so you can attach it. i held these in place with more resin and a piece of fiberglass over the top. it really secures them in there. 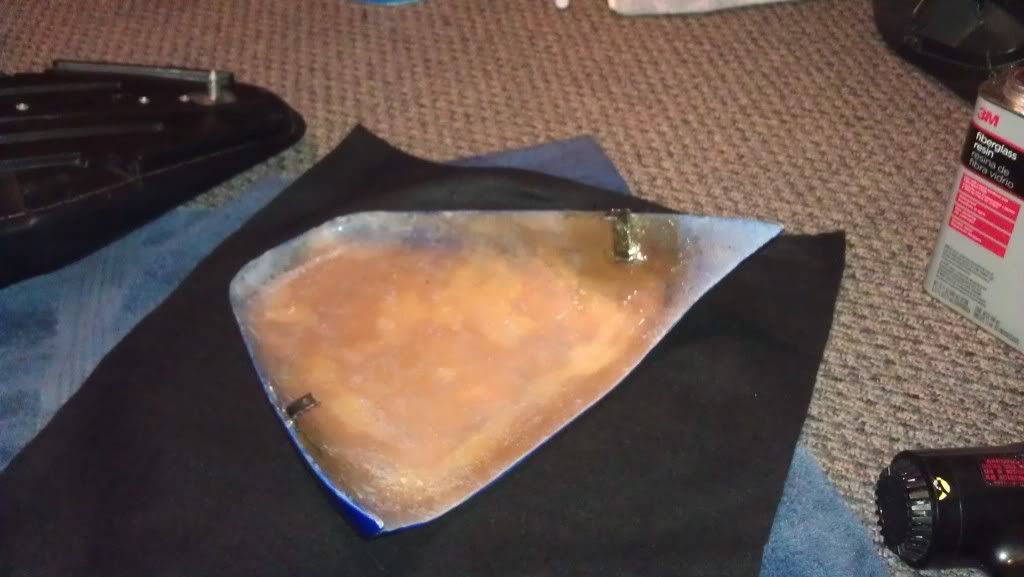 Now this next step is optional but i do recommend it. I used 3M Super 77 spray adhesive to glue a layer of felt to the inside of the cowl. This will protect the seat from anything on the cowl rubbing against it and damaging anything. Sorry but i don't have a picture of that right now. Finally you paint the cowl whatever color you wish and put several coats of clear coat on. then buff and wax and your all done. I tried matching the the factory blue with mine. i came close enough for me to be happy with it. up close you can tell a little but if you stand more than 5 feet away the color blends very nicely. So anyway here is the final product. 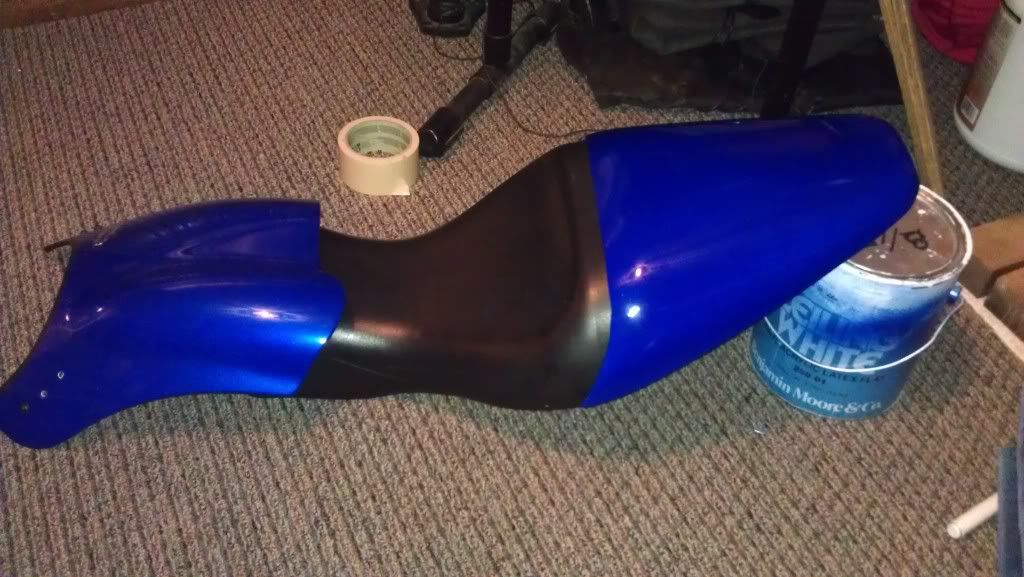 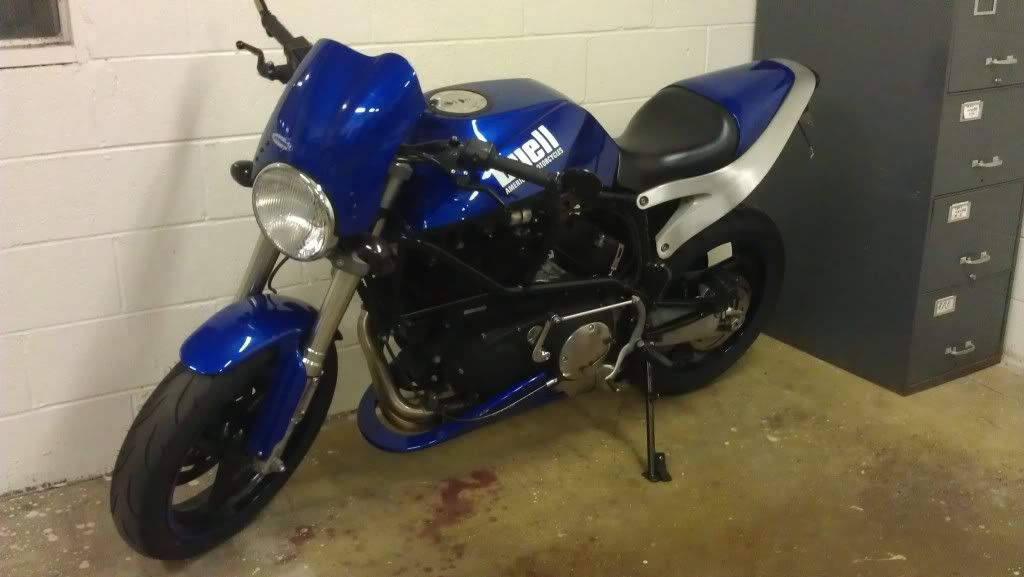 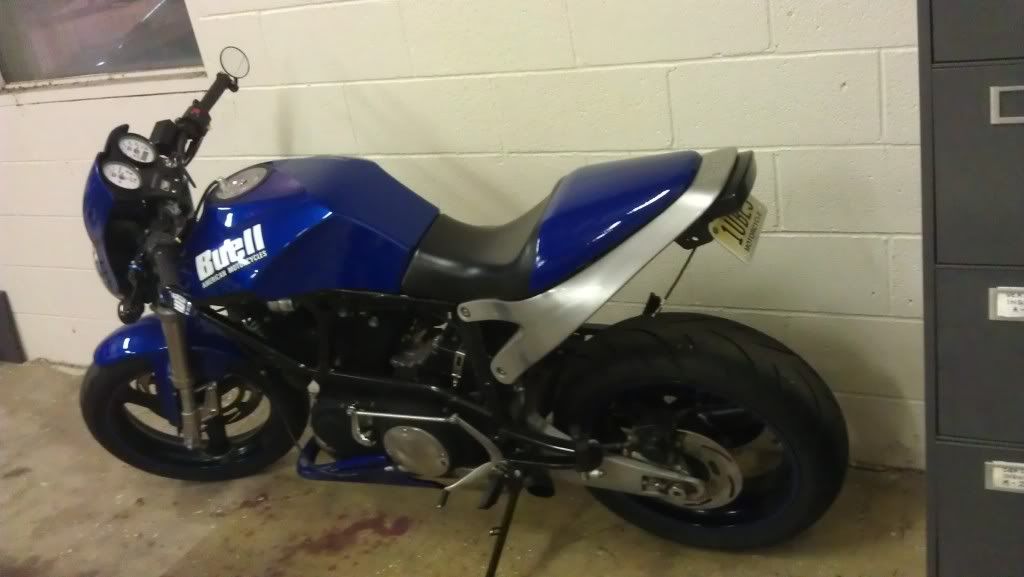 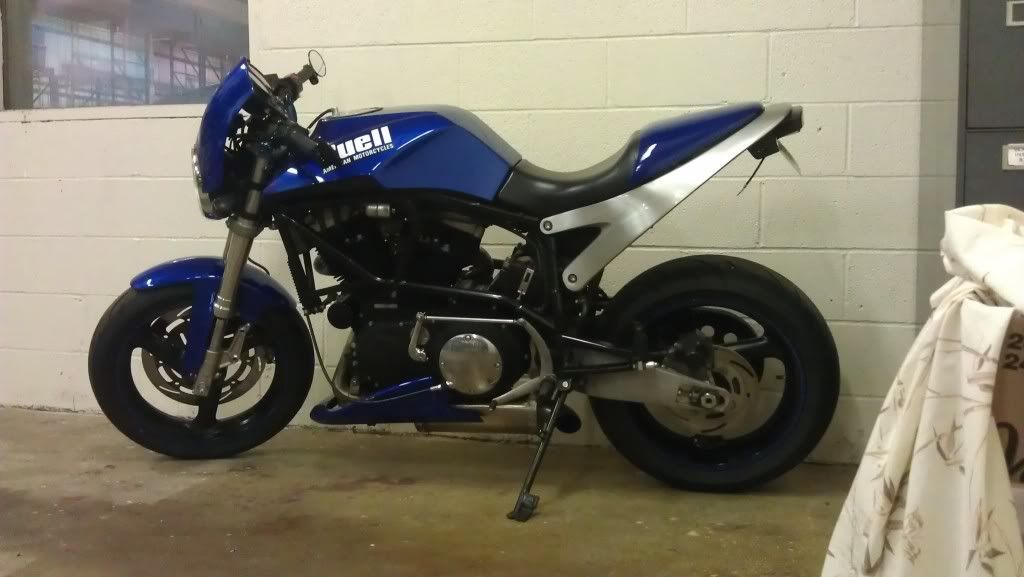 Im happy with how it came out and it was a lot of fun. at the end of the day it cost me about $35-$40 to complete and thats including the felt liner and paint. so if anyone else tries this i would love to see how yours turns out. You could also play around with some expandable foam on top of the seat and get a bigger and different shape out of it. Hmmmm maybe i will make a version 2. | ||
Skntpig |
Bravo...I bet you could sell those. | ||
Road_thing |
Wow--nice work. Wish I'd known that vaseline trick when I built this back in '03: 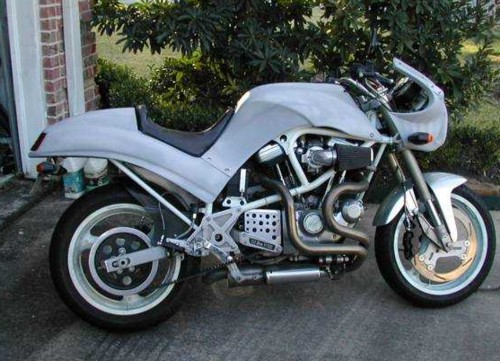 rt | ||
Bluzm2 |
Tom you DOG!! I have a set of S2 bodywork I'm going to do the same thing! I'm going to eliminate the tank cover/tail seam though. Did you make a plug? | ||
Bluzm2 |
BTW, Mike really nice job. I think the X1 looks much better with the tail piece installed. Well done! | ||
Mikethediabetic |
im glad everyone likes it. i encourage people to give it a try. i am going to experiment with other materials to see if i can make something to sell. i will keep everyone updated | ||
Hogluvr |
Well done, nice job!!  | ||
Dannybuell |
Excellent presentation | ||
Road_thing |
Brad: I made a buck out of styrofoam, then cut it out and dissolved the residue with acetone after I was done with the 'glass. If I had it to do over again, I'd do it the way Mike has done, just put a cowl over the back of the stock seat. MUCH easier, same visual effect. FWIW, I found my solo seat to be much less comfortable then the stocker, because the reduced length of the seating area didn't let move around. The boys got kinda cramped...I eventually gave it away to Buellerthanyou in Austin. I don't know if he's using it or not. Do you remember this bike? 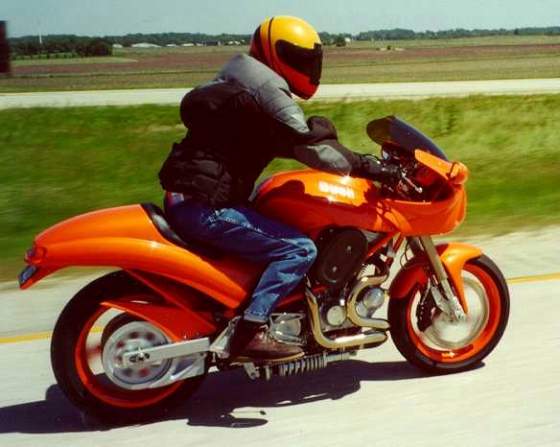 rt | ||
Bluzm2 |
Yes! That's the one that gave me the inspiration to do mine. That's one of Rickys bikes. He did another one like it in a different color. I've seen that one in person, there is MUCH more to it than first appears. Mirrors, windscreen, etc.. | ||
Road_thing |
Ricky gave me some helpful tips when I was doing mine. I think he still posts here from time to time. He sent me this pic of one of his bikes in progress: 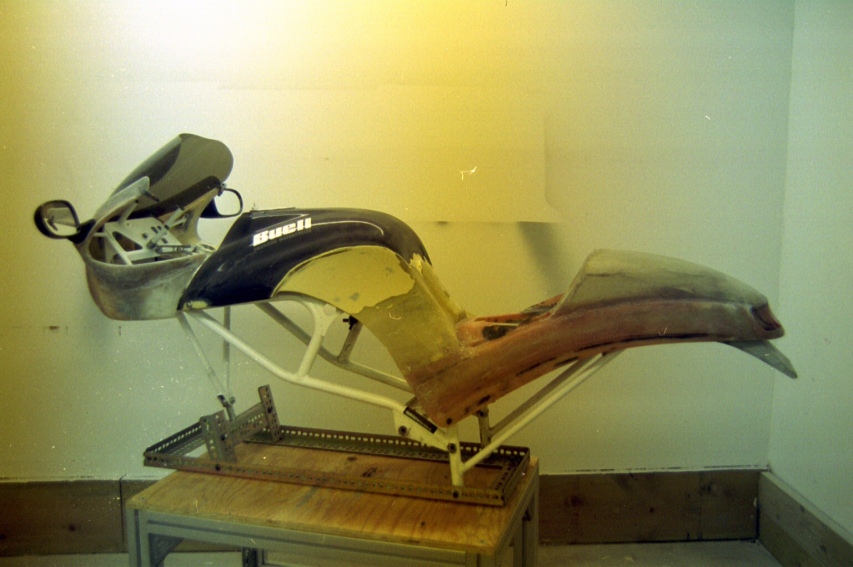 This is probably the other one you're thinking of: 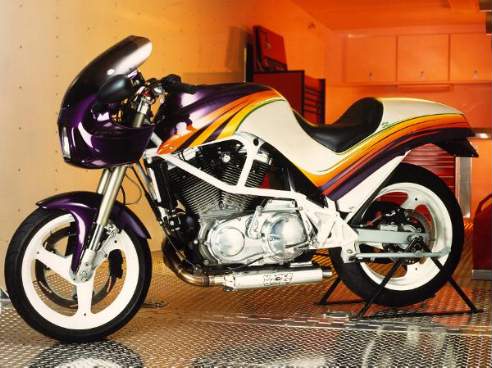 If I remember right, Ricky told me he didn't just eliminate the seams and build the cowls, he actually sectioned the tail piece and re-shaped the entire back of the bikes. Awesome, and way beyond my ability (or ambition)! rt | ||
Outdoors |
Great demo post. What I have always thought would be cool and functional would be to have an M2 seat modified with a single seat area with a covered storage compartment made into the passenger area. If incorporated into a seat pan then when riding single you would have a nice streamlined profile with a bit of extra storage but when you are taking a passenger, then a quick change of seats would allow that as well. My idea has never made it past my head as but time and talent are lacking! | ||
Qzpm150 |
Awesome I was waiting to see this. I'm going to start mine tonight! I like the idea of adding the foam to get some extra height... maybe ill play around with that. | ||
Coxster |
Great work, and thanks for the photos. This came with my bike, it's now being used as a dust collector in the garage. Looks like it was made from the factory seat. I got a factory one thanks to a badwebber finding me one on CL( the previous owner was 5'5" and didn't use much padding, I'm 6' and don't mind the extra reach to the ground 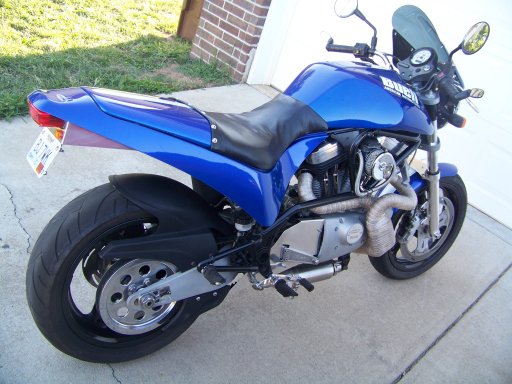 | ||
Bluzm2 |
Jim, you interested in parting with the "dust collector"? Brad | ||
Buellfighter |
Nice work Mike! | ||
Qzpm150 |
So i did start mine the other day. I added foam to raise it up a but. Its all fiber glassed just needs to be trimmed sanded and painted. | ||
Mikethediabetic |
Qzpm150, Lets see a pic!!!! | ||
Qzpm150 |
Here is a pic before I got the glass on 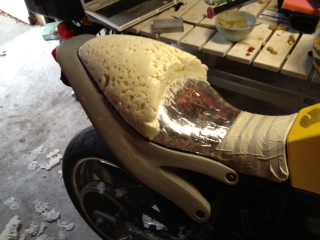 | ||
Nwrider |
Great write up! Got thinking how I want to do mine now! | ||
Mikethediabetic |
that looks cool. i like it alot. i might have to do a version 2 lol. you better post progress pics! | ||
Gowindward |
Mike, Nice work! Here is another way to skin the cat. 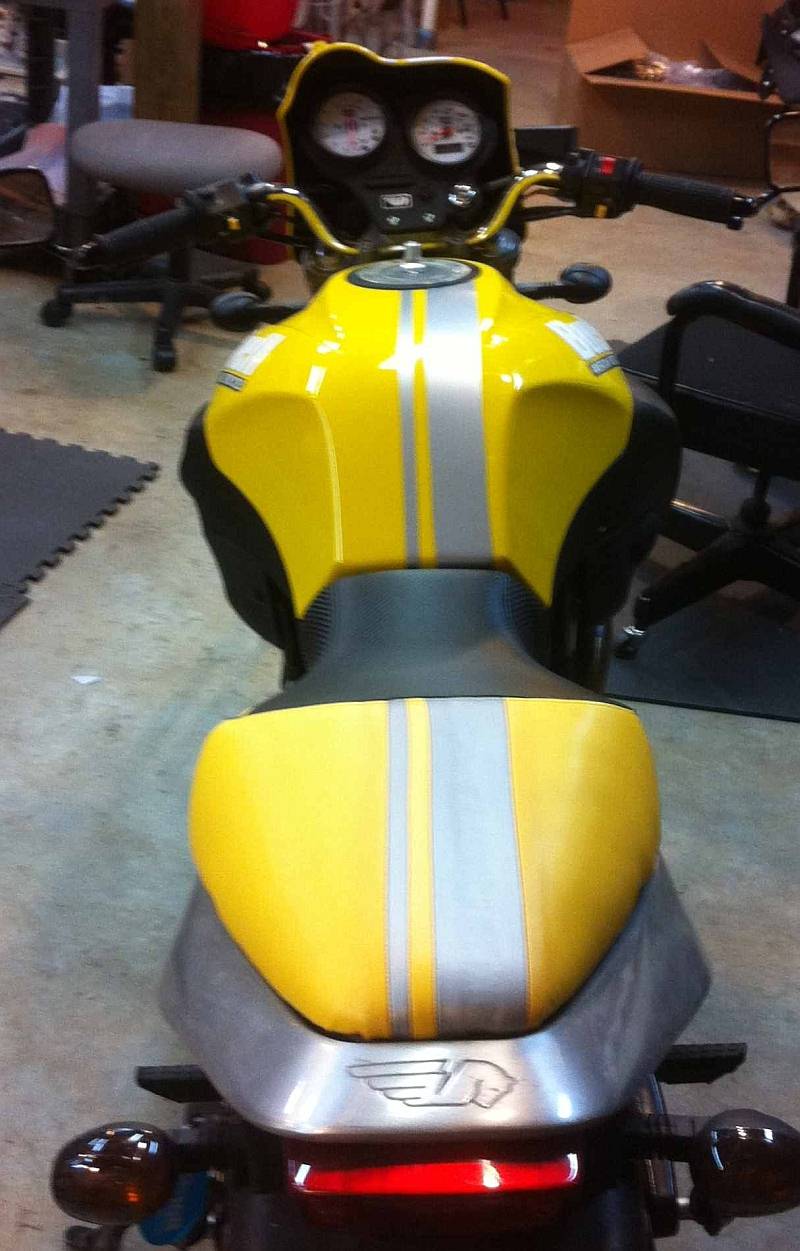 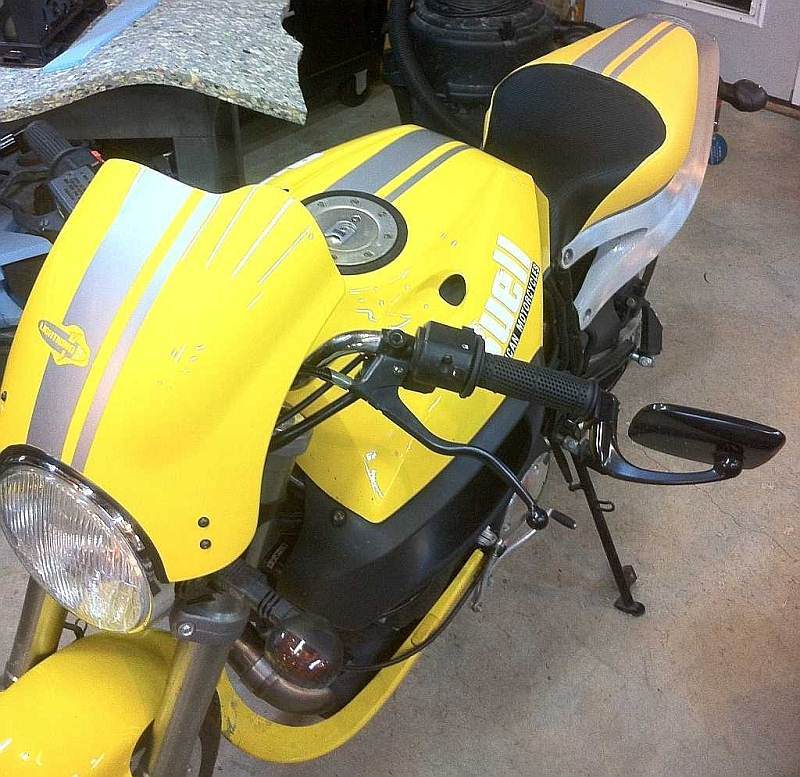 | ||
Mikethediabetic |
hmmm thats interesting, didnt think of that before. i like it tho. definitly another option. but still expensive-ish | ||
Qzpm150 |
That's crazy I wanted to paint my bike just like that, with black stripes | ||
Oldog |
What A Seat! |