| Author | Message | ||
Jcs64 |
This is kinda my intro post as well. Names Jeff and im in Amsterdam NY (Feel free to contact me if your in the area). So far Im loving the info here and its given me a ton to look into for my latest toy, A 2000 X1. I hate the fuel injection stuff (kinda of a old school low tech kinda guy)but this bike is FUN and Ive always wanted one. So to get on topic,I couldnt hit neutral and fought with second a few times. I read about the "engineered to fail" clip and decided to tear into it. 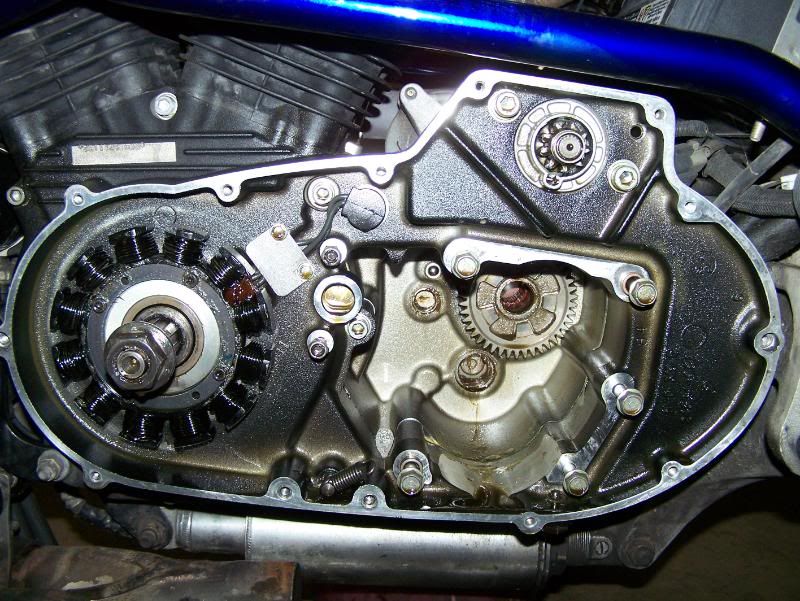 may as well check everything while im in there 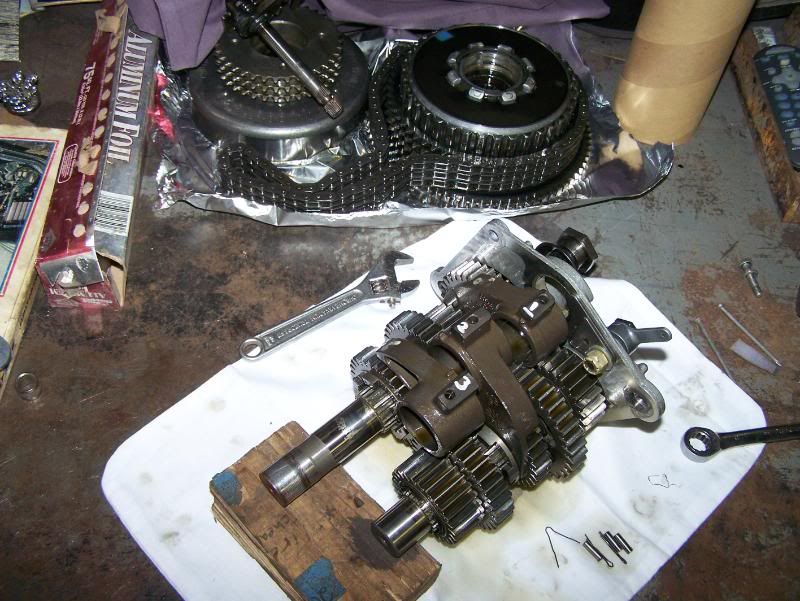 Low and behold, the clip was in the bottom and busted in two. Since Im a Machinist I new there had to be a better way. 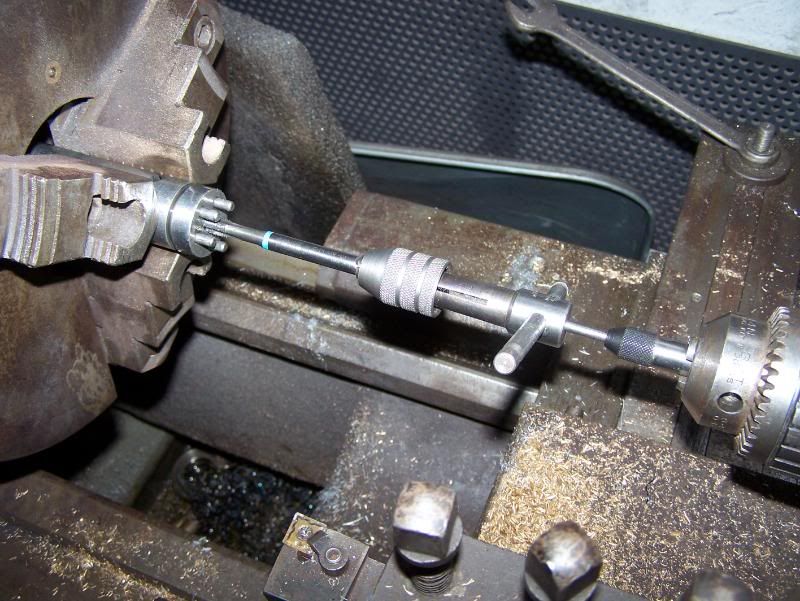 Keep in mind the shifter drum is hardend and you will need a carbide drill. First I used a .375" carbide center drill to get the old mounting pin off and put a large chamfer for the tap(this helps to get through the hardnes). Next drill and tap 5/16-24 my tap wasnt carbide but was a good quality and go SLOW! Tap it buy hand ,"a little clockwise and a little back" till you hit bottom, I went about 5/8" deep. 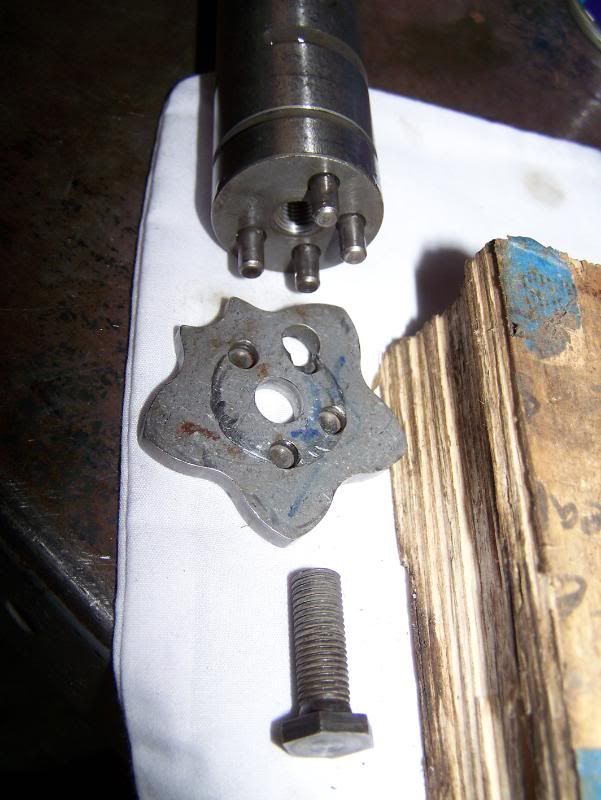 You can see my detent plate was just spinning over the tops of the pins. Using this method, the pins will stay seated also. Use locktight Too. yeah, the detent plate was getting chewed up by the clutch basket. I also shortend the hex head but I dont know if that was needed. 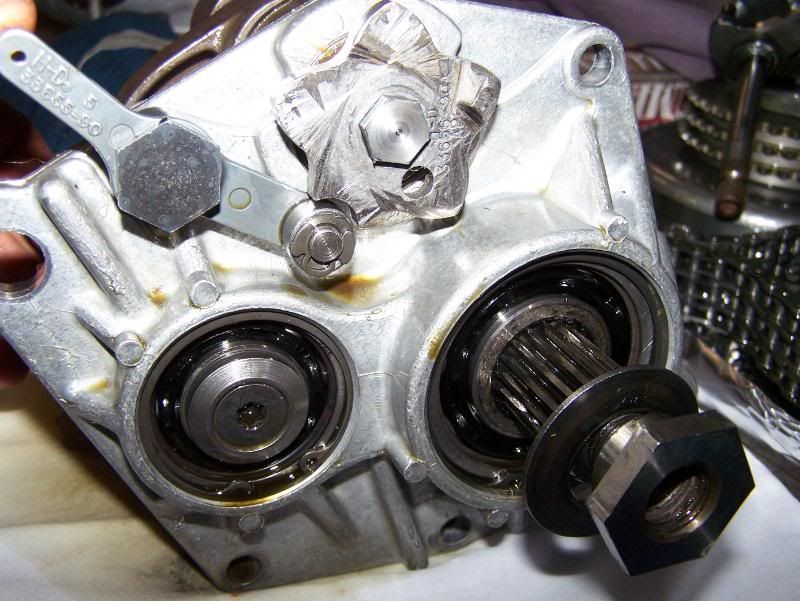 And the next pic is of how too set the clearance and time the shifter pawl (pics always help me) w/ a no.32 drill 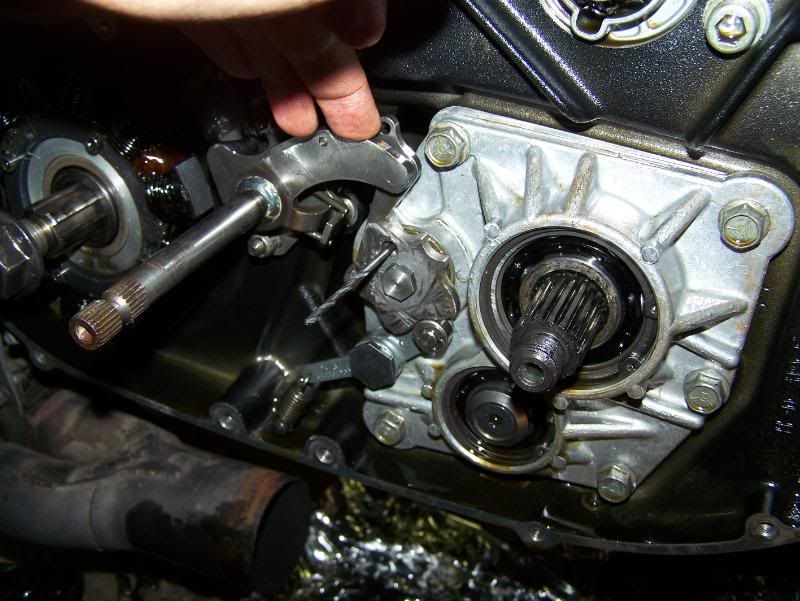 Neutral still is not super easy to find but 100 percent better, and now I know its fixed for good. Heres where Im at w/ the X1 now. 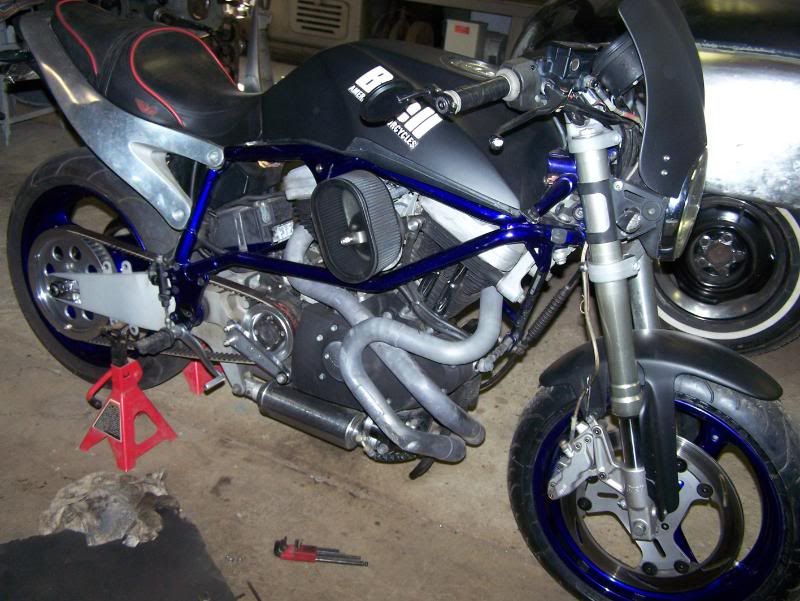 Anyone local want to come buy and show me ecmspy? (the cable is on santas list) later, jeff | ||
Xl1200r |
Welcome Jeff - I live over in Albany so not too far... How good of a machinist are you? I might have some work for you if you're interested, see here: http://www.badweatherbikers.com/buell/messages/476 23/659027.html?1322953977 You're product improved plate looks good - I think there are others who have done a similar fix. If N is still hard to get, make sure your primary chain is adjusted correctly, make a world of difference. | ||
Jramsey |
I've done several and I found small stub in the center to be soft as butter,the way I did it was knock off the c-clip groove and drill and tap for a 10-32 and stuck a button head in it. 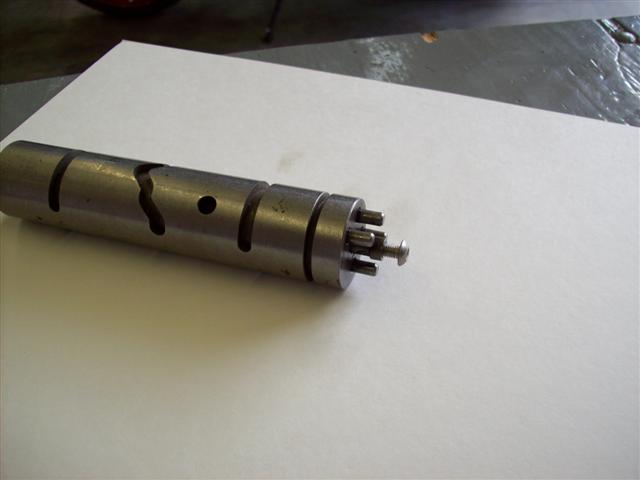 BTW Welcome to the forum.  | ||
Phelan |
It's a shame that beautiful Kooks pipe is dinged up. | ||
Zenbiker |
Nice write up Jeff, welcome to the BadWeb! Neil | ||
Two_seasons |
Welcome Jeff and thanks for a good pictorial and write up. As was mentioned, make sure you adjust your primary chain. It makes a real difference. Adjust it at the tight spot, so you'll have to click it into 5th gear and raise the rear wheel or just around the garage/driveway to get it spun around a couple of times. Make sure you have about 1/2 inch (IIRC) at the tight spot. And there may be more than one tight spot during the primary chain rotation. | ||
Someday |
You might find it shifts better if you set the clearance using a .125" drill, mine did. (info from Buellistic) | ||
Langperf |
Thanks Jcs64. Having not having had to repair mine yet I never could grasp what HD was talking about in the service manual of having to time or clearance the shift pawl to the shift drum pins. With the help of your pics and descriptions I now see what they are trying to accomplish and why it is done. Good circlip fix also, Jramsey too. | ||
Jcs64 |
XL1200R- Ive seen your post but I dont think id want to tackle that for someone else (id hate to bugger it up more for you if I had a problem). phelan- the dinged up kooks is next on the todo list to fix, the dents will be pulled out and the stainless will be emery clothed or polished. As for the primary chain adjustment, The previous owner put in a hayden or york spring loaded adjuster. Id MUCH rather have a stock setup in there but I have what I have. later, jeff | ||
Jcs64 |
Langperf- thats why I posted the pics, to me, It makes any job less intimidating If I can see how its done. Jeff | ||
Jvv |
Jeff.....Welcome.........VERY nice "how to"...nice camera work! Ride safe.....Jack | ||
Dfbutler |
Jeff, if you're new to Buell, it is way too easy to over tighten the drive belt. Just based on the picture, it looks like yours is too tight. As most will tell you, unless it is jumping teeth, it isn't too loose. Buellistic has a good primer | ||
Jcs64 |
Dfbutler- Thanks for the belt tip, I have read about that and loosened it to the point where it hits the bottom of the swing arm w/out me on it. "Buellistic has a good primer" Not sure what that means? Jeff | ||
Buellistic |
DRIVE BELT CLASS 101, just PM me for a copy ... | ||
Jcs64 |
Buellistic- thanks, I sent you a PM w/ my email address, I look forward to checking it out. Jeff | ||
Captainkirk |
Nice fix for a PITA problem (I've replaced my C-clip twice now) and next time I'm in there will do "the fix". Oh, welcome to BW! |