| Author | Message | ||
Littlebuggles |
So I decided that since my bike was 11 years old, and just sitting there while I had the forks rebuilt, I'd finally use the rebuild kits for the front and rear calipers I got from American Sport Bike a few years ago. Rebuild was very easy using the instructions from the manual, but then I ran into some problems, of my creation, and of Buell Co. Problem #1 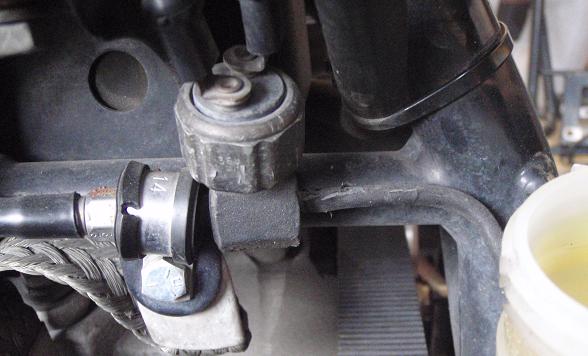 The bends in the line and the placement of the brake light pressure switch at the high point in the line. The way this is it tends to hold air bubbles and makes bleeding on the bike a real pain. Problem #2 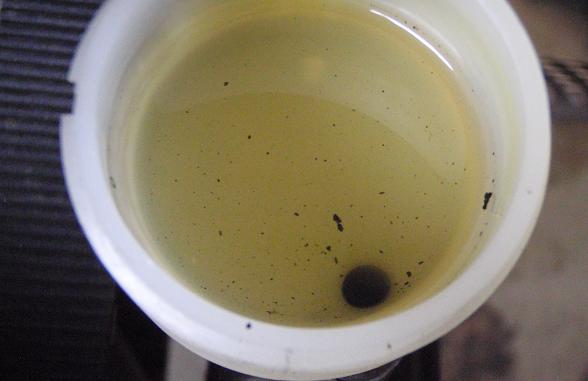 I had congratulated myself on saving some money and getting better brake feel back in 2003. A local hose specialty shop made a stainless line for me, total cost was around $65, so a fair bit less that the $100 or so from aftermarket sources. Unfortunately they used a grade of line that was not up to the DOT4 fluid. Pic shows little bits of rubber from the hose lining, I back flushed the system when I rebuilt the caliper, the line must have been fairly bad inside for all this debris to push into the reservoir, I drew out all the old fluid with a big syringe before starting the bleeding. Anyway the line wasn't sheathed either, so I put some black heat shrink over it to keep it from gouging up my swingarm and c.f. fender.  | ||
Littlebuggles |
So I called Al up to order that super expensive rear hose and he talked me out of it. Sold be something better, and less expensive in fact. He told me with the stock line I would not be able to properly bleed the system with it on the bike. The remedy then was a plain line, like the XB's use, and to replace the brake light switch with an XB part as well. He took his measurements, and I took mine then ordered the parts. Since these are built to order by Spiegler it takes a while to get them, but then they are built to order. 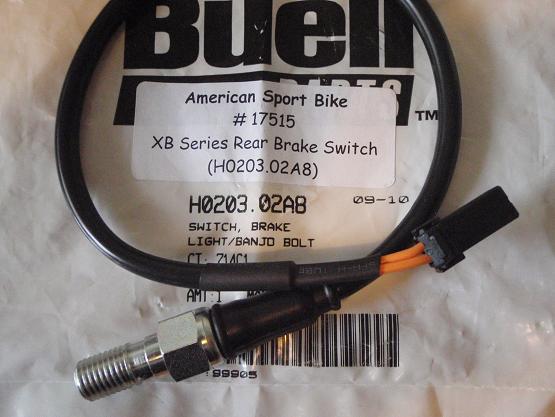 I ordered my rear line to match my front since I'd gotten one of those from Al last year... red hose with black ends and black banjo bolts. I had pictured kind of a clear red sheathing in my minds eye when I ordered it, but didn't ask for that, only red... so what I got wasn't exactly as I had envisioned but it is a pretty good match for the red rim stripes and "American Motorcycles" decals on my tank. Anyway the new switch has a plug on it, and the old one just two spade plugs, so I decided to splice a plug on the end of the two (turned out to be three) wires on the bike and put a matching plug on the switch. 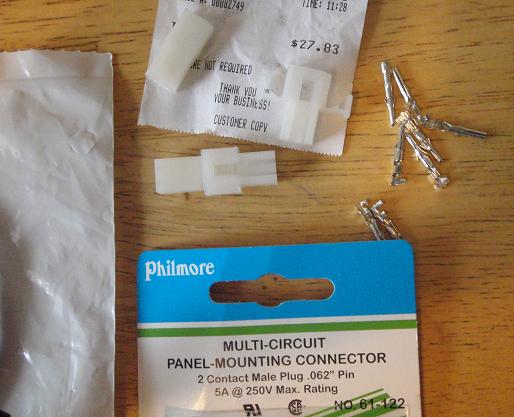  The majority of the cost for the plug part of the project came from the $25 crimping tool I got to do those neat little round pins, but now I can speed up the work if I build another data cable for a Buell. 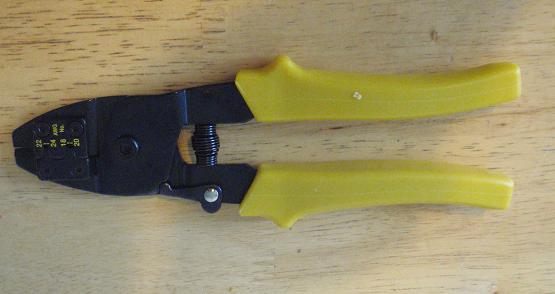 | ||
Purpony |
sounds good. I am using a stock XB rear line with my brembo caliper and brembo rear master with the banjo bolt switch. All works well.... | ||
Littlebuggles |
So when I pulled the tail section off and unwound the wires from the brake switch I found the red/orange wire was actually two. I didn't want to just use a crimp splice connector, so I cut one of the wires a little short and stripped back some insulation from the other, then just soldered them together and put some heat shrink over the whole thing to close it all off from the elements. 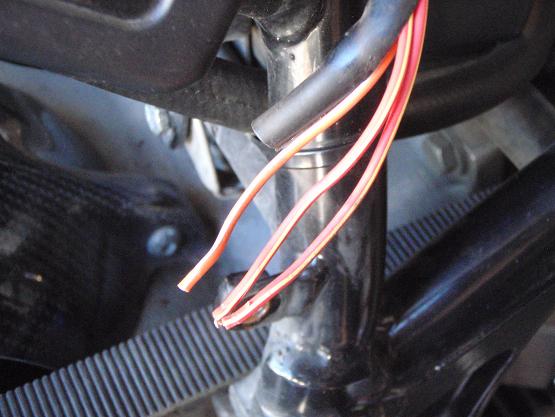 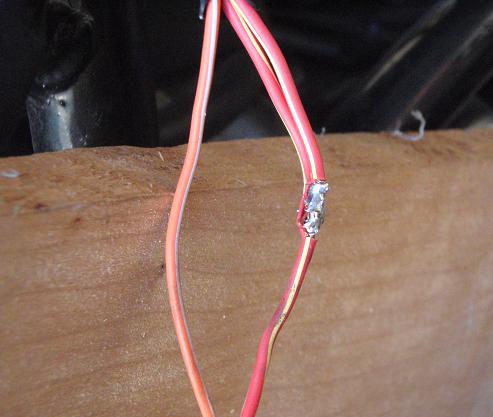 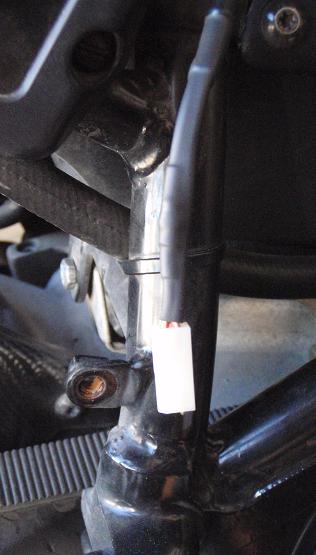 Pin orientation didn't matter a bit since the switch just had two orange wires (see post above for that pic). (Message edited by littlebuggles on August 11, 2011) | ||
Littlebuggles |
Finally got the master cylinder rebuilt (surprisingly easy), figured out the best way to route my cable, and got it all reassmbled. I even put the old hose guide back on there. 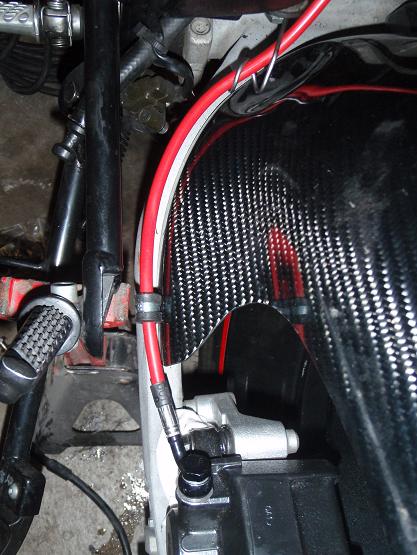 That photo above, incidentally, is the wrong way. Sorry! I know I shouldn't put that up there, it will really thow off the dudes that use pics for reference (I'm one of them). It just looked so good I wanted to put it up. Colors look great in my opinion. But the deal is that without the switch in line, the line could/should actually be about two inches shorter that the original part. So I ran it under the oil res, and the hose guide keeps the hose from rubbing against the frame, so it worked out okay. 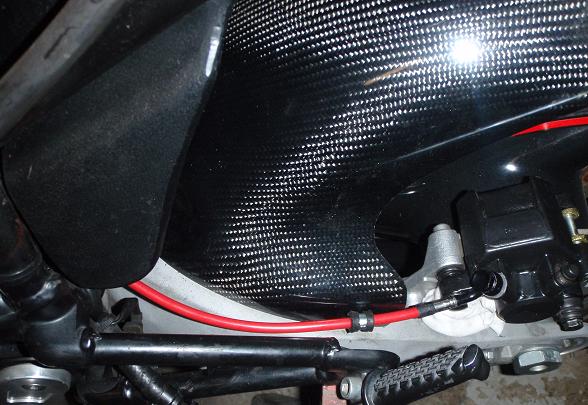 Since I had a new line and rebuilt the master I just pushed the fluid through the caliper again, this time confident the bubbles would not get held up in-line thanks to Al's fix. I did have to fiddle a bit with pumping the pedal (traditional bleeding) and pushing the fluid back through. Getting the system done though, once I was done messing with routing and wiring and such only took a few minutes. Got a couple smaller rubber lined [zinc] clamps at the local hardware store and I was done. Now I can get my bike down for inspection and get it registered again. I'm stoked since I've not been riding this thing for over a year. I'm digging the new gold pads on the back of the bike too, a little better than stock, feel is improved over stock compound pads as well. (The stainless line improved things over stock as well, but I've been running that long enough that I can't give an adequate comparison, just "better"). My XB is nice, but I really missed the personality of this tuber. What a kick in the pants it is riding these tubers! Thanks Al, I appreciate your advice and the parts you stock! I've got more pictures from the project, these seemed most pertinent. I can post up others if it would be a help to anyone, just ask. I had previously posted up asking for advice on bleeding the brakes(after I swapped the front line) on the front and back, this is kind of to address that as well. | ||
Kalali |
I have determined that every time I fiddle with the rear brake I make it worse... Last time I tried to bleed the system I made it almost useless but strangely enough it got better and better with use. I guess repeated use somehow "pushed" all the air out. I'll never know... | ||
Littlebuggles |
Ha-ha, I was afraid I'd really bunged things up when I had no pressure at the pedal, or at the lever. Bubbles trapped all over in the front and rear systems. Purpony, how does the XB line compare in length to the stock tuber line? I'm sure it is more functional, being braided... and it looks sharp too, with the clear covering over the line. I wonder if that would be a good "off the shelf" upgrade to the stock system? While I do use my rear brake (I taught the MSF classes for a while and know I brake best with front and rear combined), so I want it functional I'm not prepared to spend the $$ to upgrade to the dual piston rear Brembo. | ||
Jayvee |
May be slow, but what 'XB' line are you using? Is the red line an 'XB' part? Where is the brake light switch now? I changed the back line to regular Goodrich from Am Sport Bike, so basically stock as far as bleeding problems go. But I want to take it apart soon to replace the back fitting with a straight on, so I'll have to do all bleedin' bleeding again. Put on a PM caliper on the back, and now the line attaches at an unattractive angle. I prolly shoulda spent the money for a black one, that's really cool. Is there some kind of shrink wrap or something I can color my rear line with? It's the Goodridge stainless, with a clear coating. I didn't know they could be colors, now I want a yellow one. | ||
Littlebuggles |
The red line is not an XB specific part, it was a custom line ordered from Speigler to length and with the 45 degree angle fittings on the end. That's why I was curious if Purpony knew the length of the XB line, as long as the fittings work it probably works as an off the shelf upgrade along with the switch. The XB switch is also the [banjo] bolt holding the line to the top of the rear master cylinder, it's the middle line. Here it is installed, with the reservoir moved out of the way: 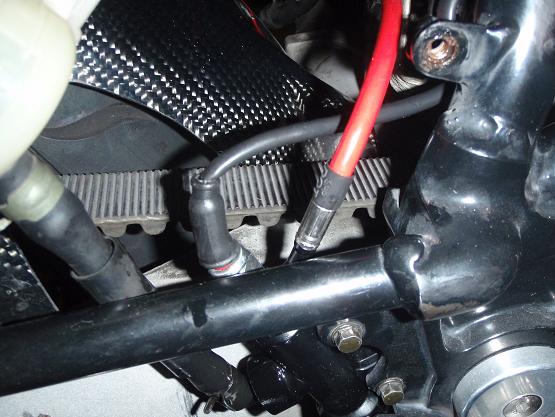 Regarding the colored sheathing, it's available to order in many colors. I know my local electronics specialty shop (not radio shack) stocks multi-colored heat shrink that remains very flexible after it's been shrunk. That's the stuff I used on my splice, just in black. I'll bet you could find yellow, just take the line with you so you find as close a size as possible to clear the banjo fittings. | ||
R850r |
Nice job and great write up/pics! I was planning something similar while I have my rear caliper off for a rebuild. I think this will be a better improvement over the stock set up. | ||
Jayvee |
OK, got it, thanks! | ||
Mmesa005 |
Just found this thread and as I am going through a brake pad replacement on my 02 X1W and I am unhappy with the results of the rear brake. I am using the gold pads that I purchased from American Sport Bike. I have bled the heck out of the rear caliper using a brake bleeder vacuum and a syringe pushing fluid from the caliper to the master cylinder. Either way produces the same result. I have contacted American Sport Bike for a quote on the XB line and switch and will go ahead and rebuild the master cylinder as well. Any updates as to how your rear brake is performing with this mod? (Message edited by mmesa005 on August 19, 2011) | ||
Littlebuggles |
It's working great... ...for a tube framed Buell's back brake... when I took a riding class shortly after buying my bike in the spring of '01 (1200 miles on the bike) they wanted us to lock up the rear brake for one of the exercises. I had to stand on the pedal to get it to happen (completely stock system). Many have stated here that the brake is designed to be weak, but I like mine to be more functional than that. Anyway... more than power, it improves feel and feedback. The gold pads I replaced the stock compound with are also playing into the equation, I liked them better up front but kept the stockers on the back 'til they were all used up. I wouldn't necessarily rebuild the master unless you have reason to believe it's got bad seals or is binding. But putting a better brake line on it will make the systems general performance better, just realize it probably won't be bells ringing and angels singing, but it will be better. Alternately, just working with what you've got, if you unhook the brake line and master from the bike, and raise them up a bit to help the bubbles move up and out of the line, you should be able to back bleed them out pushing fluid from the caliper side of things. | ||
Mmesa005 |
Littlebuggles, Thank you for the update the bleeding tip. I did try filling a syringe with brake fluid and reverse bleeding. Seems I had to open the bleeder screw more than 1/4 - 1/2 turn just to get the fluid to go upstream. The pedal did not feel solid using that approach. I think that I may have the wrong technique? What steps are you following to reverse bleed the brakes? Thanks! | ||
Littlebuggles |
That's pretty much what I did, then used the pedal to bleed towards the caliper, traditional style to complete the process. I replaced the bleeder valve since it was kinda mushed up from my previous attempts, and it was corroded too. Use some teflon tape to carefully wrap the lower 1/4" of threads on the valve that way you get a good seal, and don't let air get into the system via loose thread fit. About 1/4 turn is all I needed with the new valve. | ||
Mmesa005 |
I will try bleeding the system again as you described! Thanks! | ||
Littlebuggles |
Well hopefully that does it for you. Update, brake works, function depends on degree of pressure. Still a bit "wooden" meaning not a ton of feedback. I'll try a 'nuther compound next time I replace the pads and see how it works out. I think I still have a little air in my front system. There was a lot trapped in the master, I pushed it in there and it stayed trapped due to my Crossroads bars being the seven degree version. I unbolted the master from the bar and played with it a bit, changing the level and angle and pumping the brake lever, eventually the relief valve let a bunch of air out and I was able to bleed the front in the traditional manner to get bubbles out of the caliper too. You'd it wouldn't be such a pain, ahh well, I still got 50+ miles in today, makes me wonder why I got an XB, as much fun as this bike is to ride.  |