| Author |
Message |
    
Buellish
| | Posted on Sunday, November 27, 2011 - 02:55 pm: | 


|
If your talking about painting the spacers,I've had good luck with regular enamel. |
    
Deant
| | Posted on Monday, November 28, 2011 - 09:49 am: | 


|
Ive done the spacers on a softail to contrast the chrome upper and lower covers. I powder coated them.
I am doing my buell now the upper and lower covers I am going to powder coat black and the middle will match the frame and wheels (olive drab). Going to do the outer covers black and maybe the tubes. Leaving the rest the silver.
Yours is coming out great.
When you get one apart you soon realize its a big pile of parts to clean and paint or ?
How are you doing the swing arm i am trying to decide on powder coat black or silver. |
    
Rjn
| | Posted on Monday, November 28, 2011 - 01:28 pm: | 


|
i'm trying to polish it.
already got the silver coating of and made a start with polishing but need to find some really fine sandpaper to do the last bit.
was first thinking about using wrinkle for the whole swing arm, but think then there will be too much black on the bike.
idea now is to polish the outside, and use the wrinkle on the inner side and where the spacers will come.
think this will give a nice contrast!
(Message edited by RJN on November 28, 2011) |
    
Deant
| | Posted on Monday, November 28, 2011 - 01:38 pm: | 


|
yeah the inner part on mine is rough! I wanted to polish mine but dont think I have the energy. Hats off to you. I want mostly black and green on mine. only shine will be the billet parts. And a few grey items. |
    
Rjn
| | Posted on Monday, November 28, 2011 - 01:57 pm: | 


|
to be honest, that's why i'll black out the inner part also.
will take too long to polish it out.
and when the rear wheel is in, it's hidden for the most part anyway!! |
    
Rjn
| | Posted on Saturday, March 10, 2012 - 11:34 am: | 


|
winter is over, temperature in my garage is going up. time to start rebuilding the bike. |
    
Hogluvr
| | Posted on Saturday, March 10, 2012 - 09:50 pm: | 


|
Let's see some pics! 
Get anything else done? |
    
S1owner
| | Posted on Sunday, March 11, 2012 - 08:25 am: | 


|
I cheated on my swing arm I had them powder coat it in the color polished aluminum !!!!! |
    
S1owner
| | Posted on Sunday, March 11, 2012 - 08:27 am: | 


|
Oops double post
(Message edited by S1owner on March 11, 2012) |
    
Rjn
| | Posted on Sunday, March 11, 2012 - 01:58 pm: | 


|
got the engine on the stand.
cleaned some bolts and stuff.
connected the new style swingarm to the engine.
cleaned / re-greased the bearings, got the isolator rubbers on.
moved the frame over the engine.
who has some great tips to get the frame in its proper position moving it over the isolators?
checked the manual but haven't seen anything about this.
on the upside, the wrinkle black engine in the glossy black frame and some bare aluminium and the paint job is looking great.
no pictures yet, just couldn't resist putting some extra parts on it  |
    
Road_thing
| | Posted on Monday, March 12, 2012 - 10:13 am: | 


|
Rjn: You might want to put some tape over the freshly painted surfaces of your frame before you try to shimmy it down over the motor. Saves a bunch of touch-up painting later on.
rt |
    
Littlebuggles
| | Posted on Monday, March 12, 2012 - 03:08 pm: | 


|
Google the Daniel C Starr method, or maybe it's just the Daniel Star method.
It's been posted here a few times and seems to be one of the easier options for installing fresh iso's
Buellistic and I have both posted it before, unfortunately we're both on new 'puters since then so I don't have the link saved. |
    
Rjn
| | Posted on Monday, March 12, 2012 - 04:36 pm: | 


|
@littlebuggles; it's Daniel C Starr method.
great tip!!! time to build that special tool and try it out. |
    
Jim2
| | Posted on Monday, March 12, 2012 - 04:52 pm: | 


|
Make sure that you protect the frame from the compressor tool. The tool will scratch your frame.
A patch of leather between the frame and tool should work.
(Message edited by jim2 on March 12, 2012) |
    
S1owner
| | Posted on Monday, March 12, 2012 - 07:41 pm: | 


|
I just installed mine last night I put the isolators on the frame put a little vasoline on them and with a little effort pushed the frame on from above worked really nice used a rubber mallet on the isolator to fine tune it into place for the bolt! |
    
S1owner
| | Posted on Monday, March 12, 2012 - 07:44 pm: | 


|
Sounds like we are doing similar builds just powder coated everything gloss black powder coated the swing arm and front rotor mount polished aluminum and the engine I will have back next week with wrinkle black we will have to compare pics! |
    
Deant
| | Posted on Tuesday, March 13, 2012 - 07:57 am: | 


|
I should have some photos of progress soon. Frame wheels and swing arm should be back from powder coating soon.(frame and wheels olive drab, swing arm black) I have been powdercoating parts for a few months now. Gonna start cleaning up the motor this week. got to make an engine stand 1st. |
    
Rjn
| | Posted on Tuesday, March 13, 2012 - 11:25 am: | 


|
still want to powdercoat / polish my rims. but that can wait for now.
first get it back together.
i'll make some pictures with the some parts on it.
first have to finish the baby room before i can continue with the Buell.
mid May my second boy is coming so the "Boss" is getting my priorities straight |
    
Rjn
| | Posted on Monday, March 26, 2012 - 02:09 pm: | 


|
didn't have time to go to the shop to buy parts for that special tool, so tried the method of S1owner.
gently pulled the frame up, inserted the rubbers and used 160 pounds of special tool to get the frame in the proper position
but the engine and frame are back together.
it takes forever, but getting there. |
    
S1owner
| | Posted on Monday, March 26, 2012 - 06:48 pm: | 


|
Mine did not take that much force but I did forget to tell you to use a thin piece of sheet metal between them to get it started! |
    
Rjn
| | Posted on Saturday, March 31, 2012 - 08:24 am: | 


|
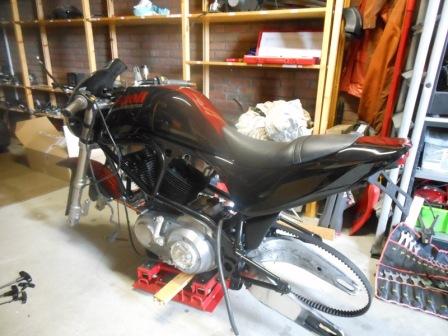
small progress |
    
Deant
| | Posted on Sunday, April 01, 2012 - 08:00 am: | 


|
very nice!!! got to get busy this week and catch up. Lost yesterday looking at an x1 for my son. Gas tank and some motor cleaning are the biggest things until} it can go back together totaly.
Dean |
    
S1owner
| | Posted on Sunday, April 01, 2012 - 12:31 pm: | 


|
Lookin good i like the black and dark red color combo! I better have my motor forks and wheels back early this week and i can get crackin 80 her today time to ride! |
    
Buellathebuzzer
| | Posted on Sunday, April 01, 2012 - 01:50 pm: | 


|
I like that black and red combo so much I might try to rip it off. But mix it up a bit too. |
    
Rjn
| | Posted on Sunday, March 31, 2013 - 12:07 pm: | 


|
Hopefully she'll be driveable within a few weeks. Took forever but had to set priorities. No pic's yet, when she's finiished i'll post some. Weather here: it still snows. |
    
Rjn
| | Posted on Friday, July 21, 2023 - 05:11 am: | 


|
time to kick this thread back to live.
it has been years and my bike hasn't changed since then.
i was thinking about selling the old girl, took some test drives on the new state of the art bikes, but those wheren't as much fun as the Buell.
So instead of selling the bike and spending money on a new one, i'm putting some money in the current bike.
current status:
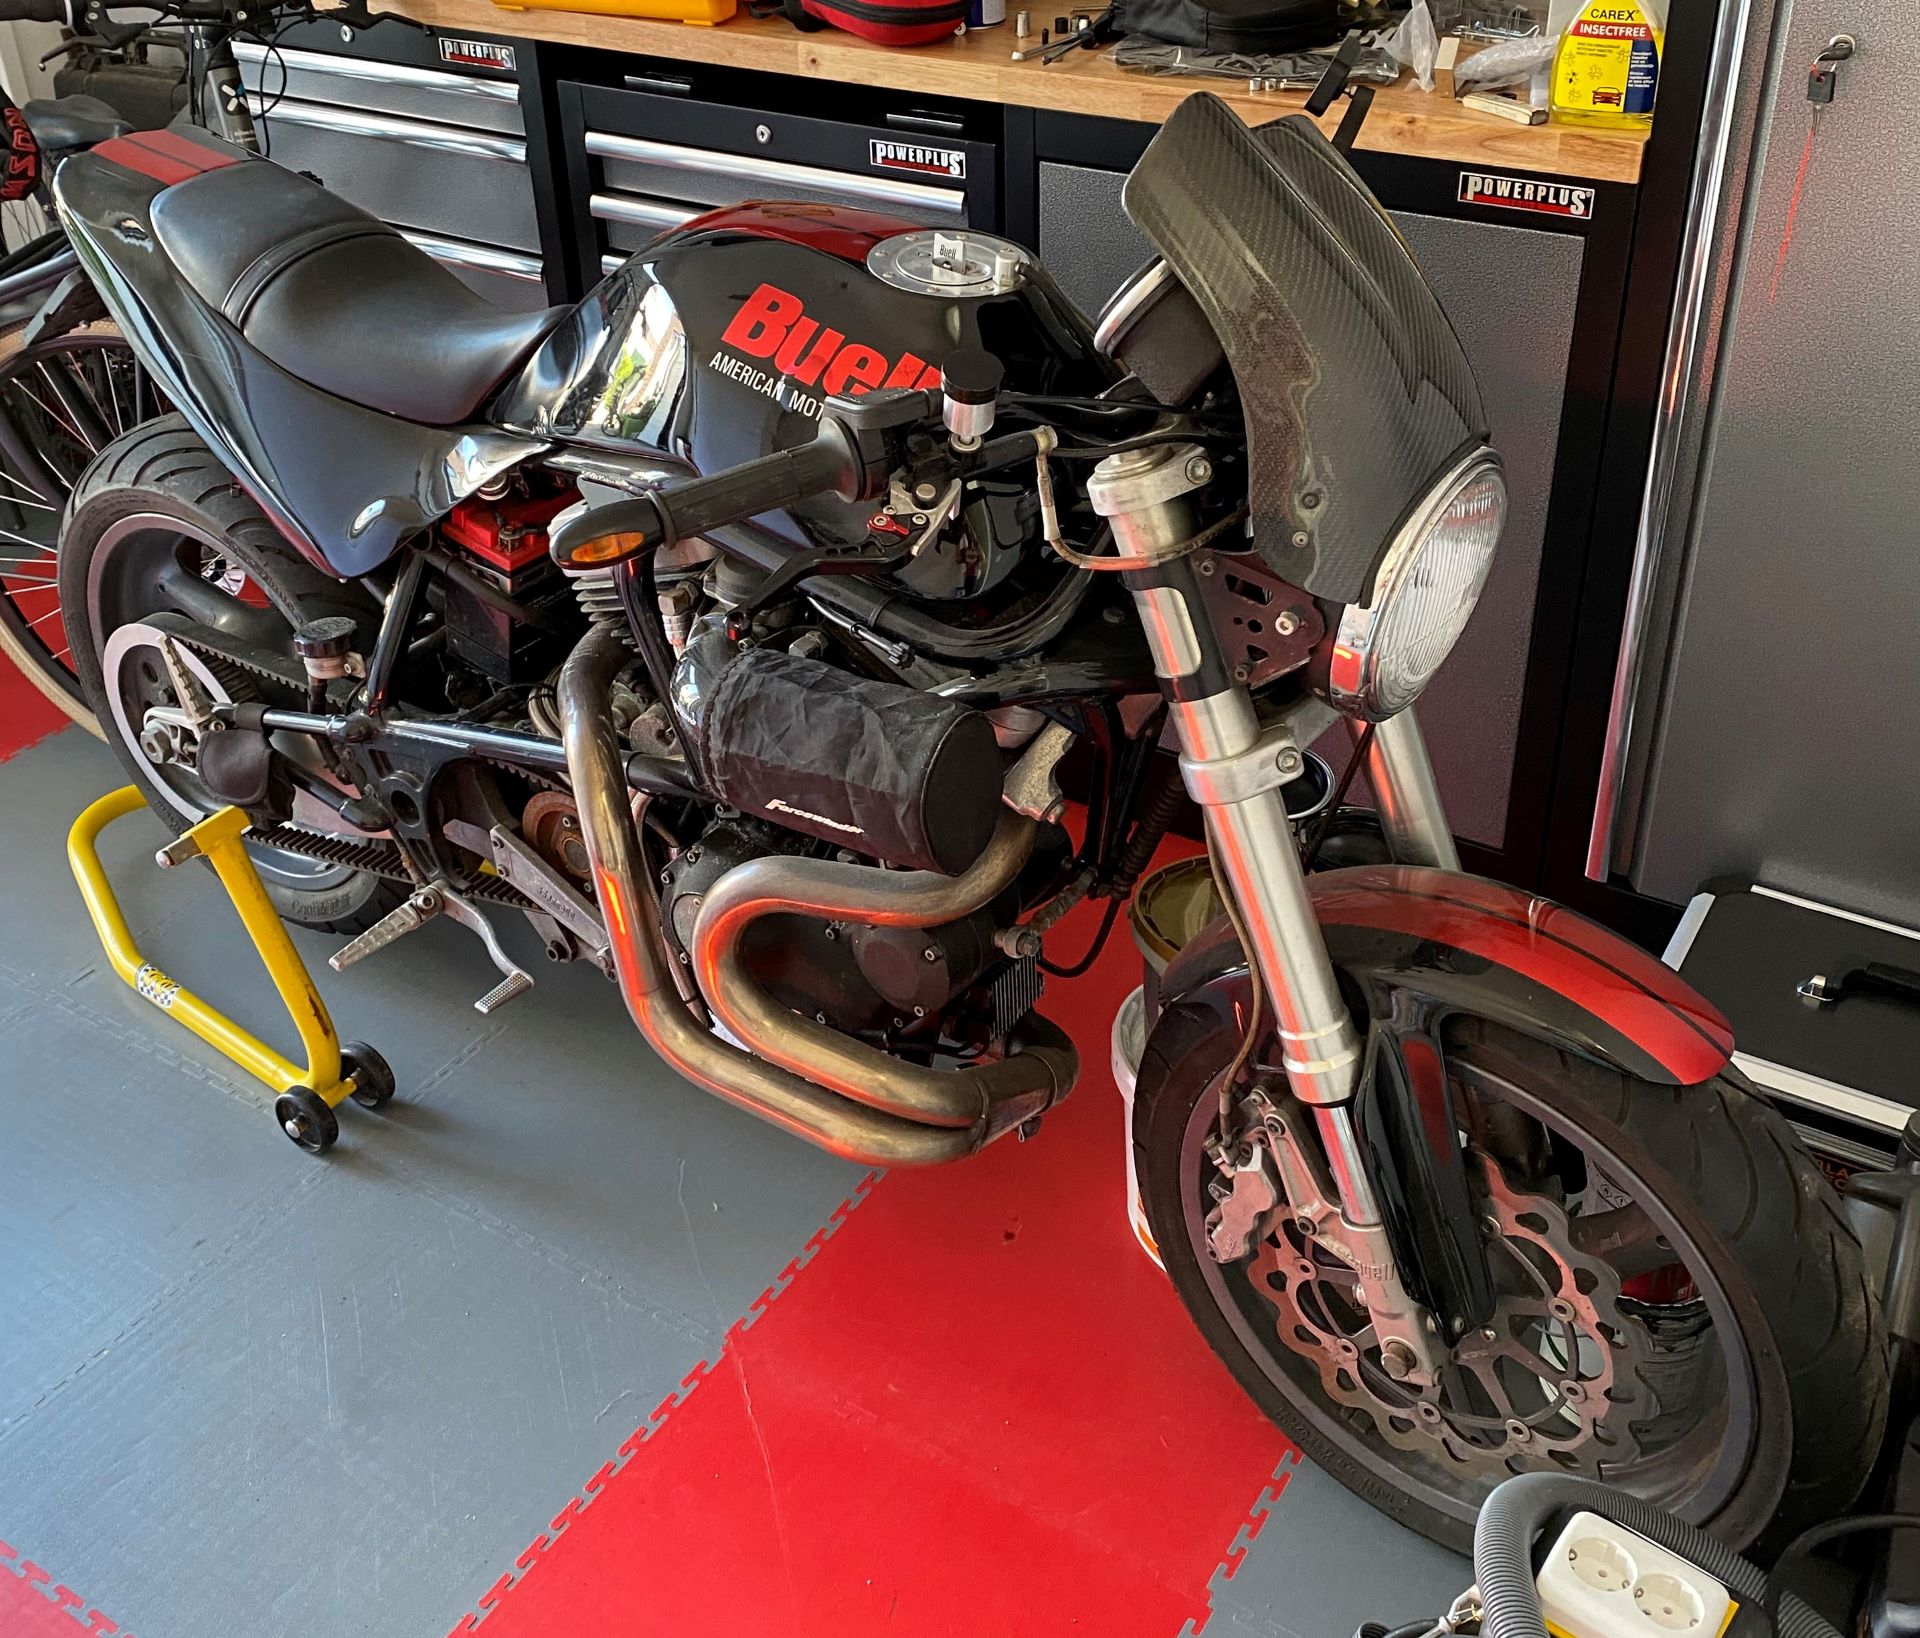
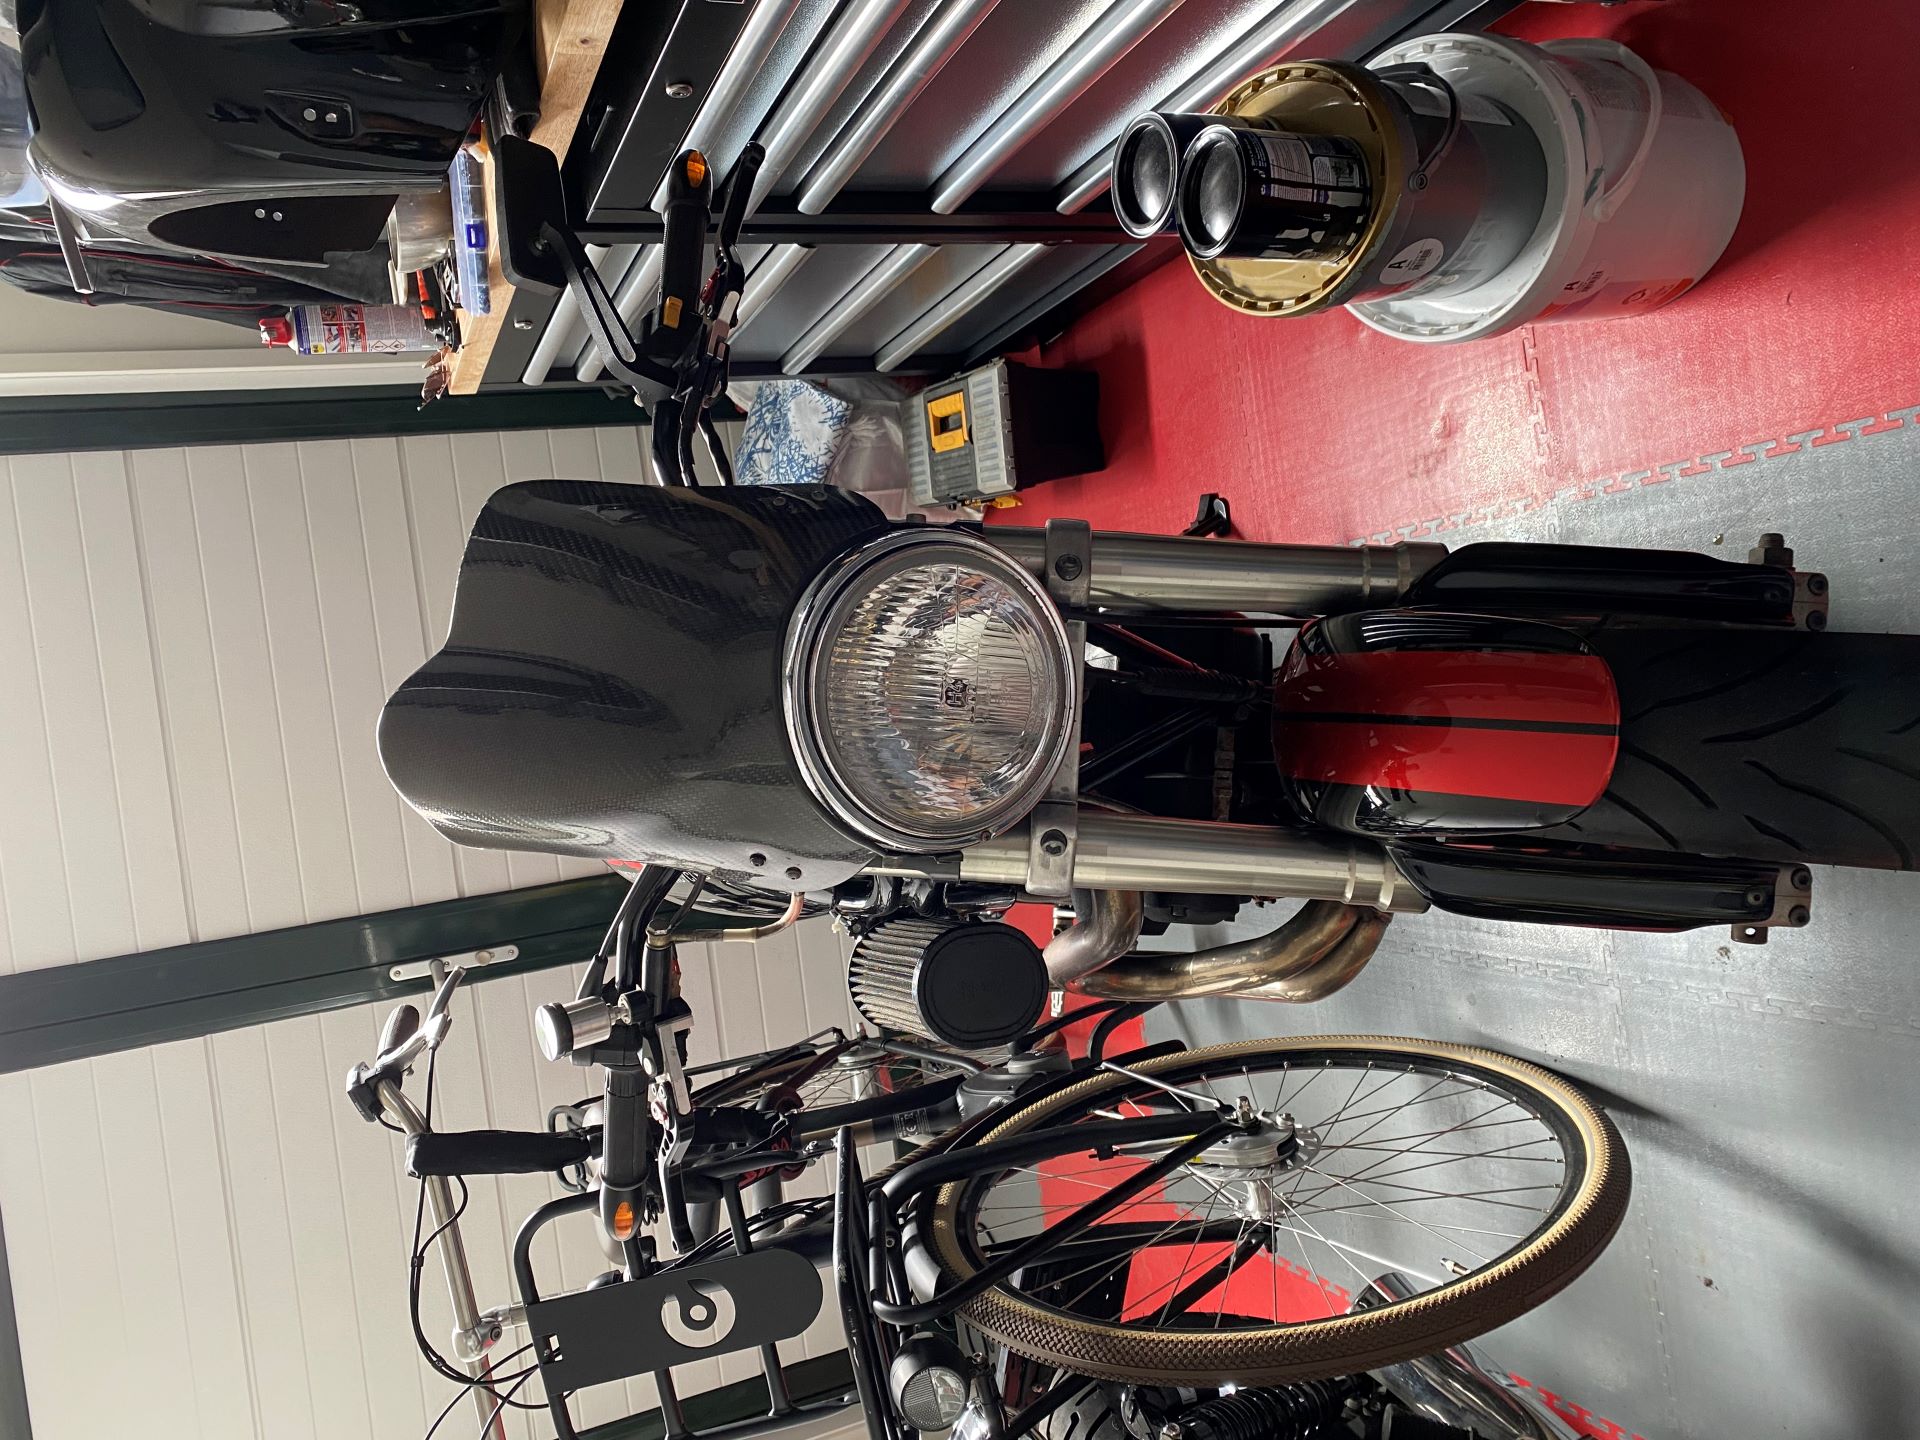
i've an blown out shock, so it's a pogo stick. time to invest in a new rear shock
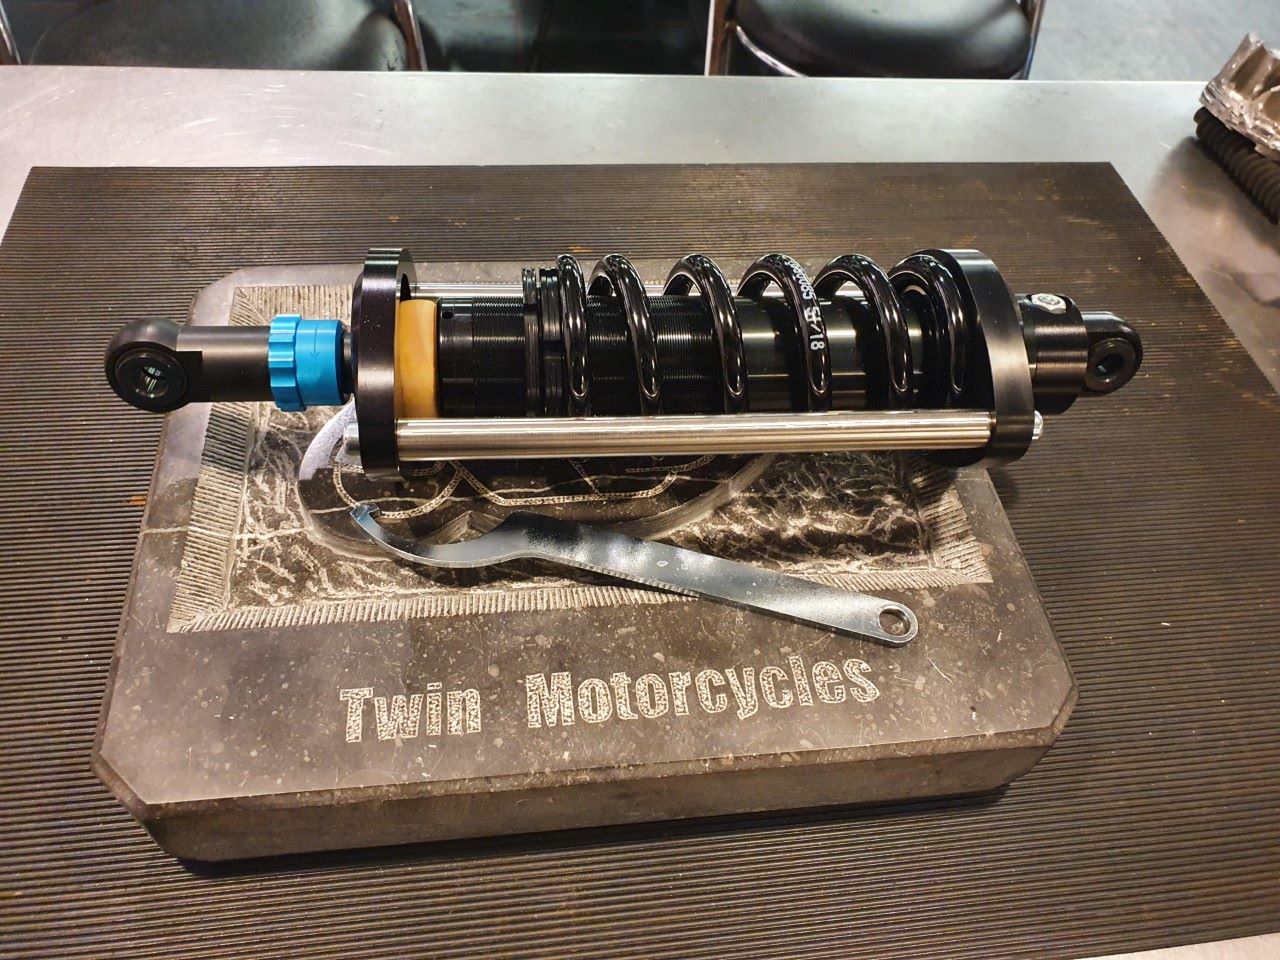
Should be here in a couple of weeks.
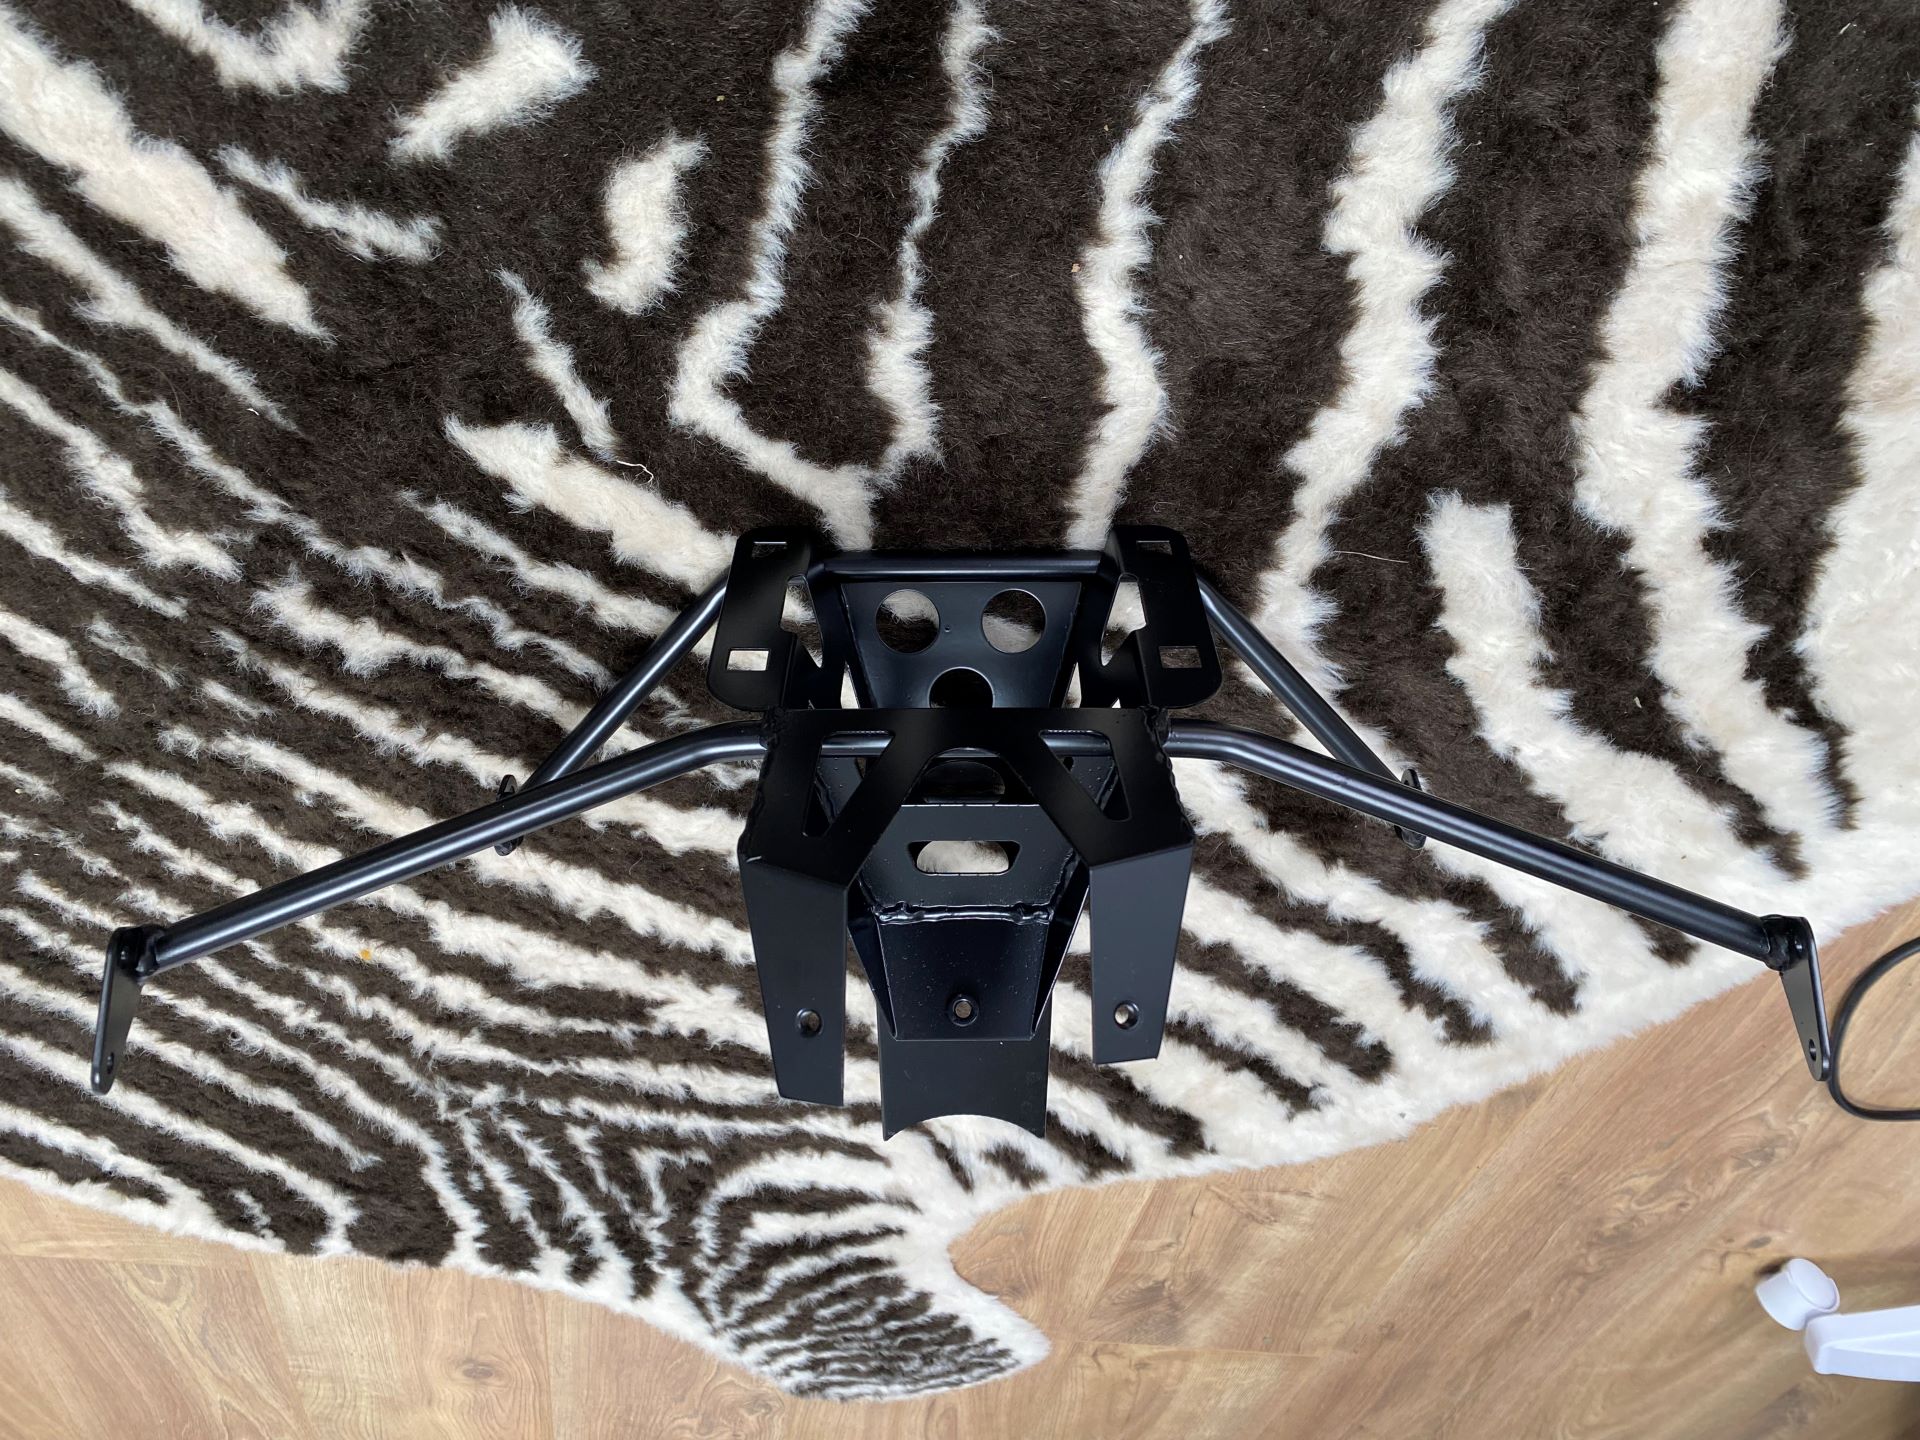
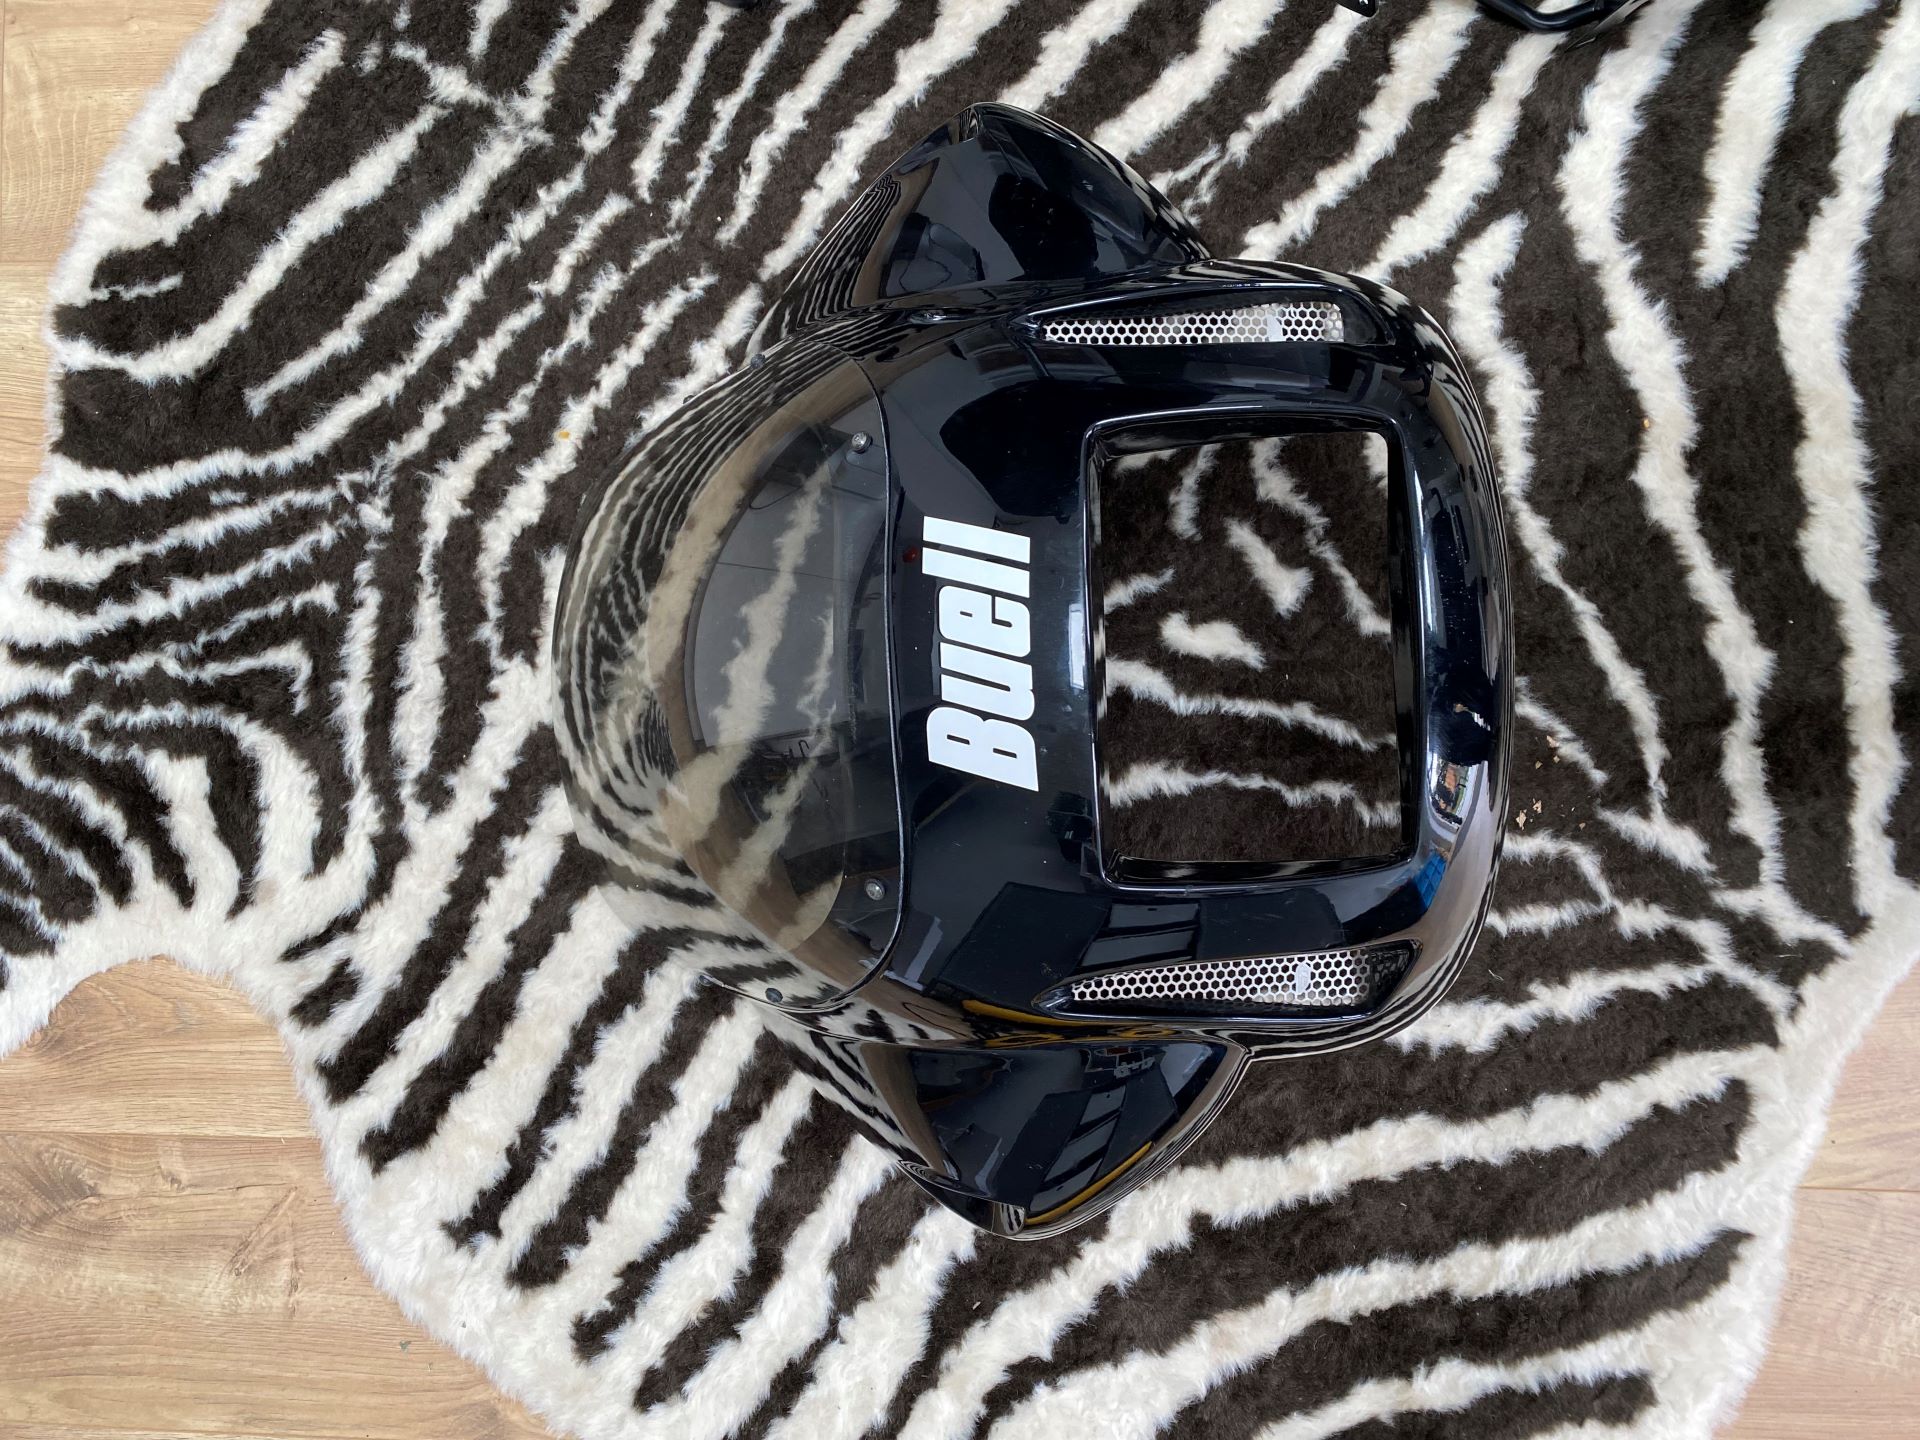
further upgrade i wanted to make was a new fairing to reduce the wind. i always liked the fairing of the S2/S3 Buell and since i already have a FrankenBuell composed out of M2, X1 and S1 components the S3 is an welcome addition.
So the search was on.
Found the NOS bracket in the Netherlands;
the S3 Fairing in Germany;
and a new LED headlight;
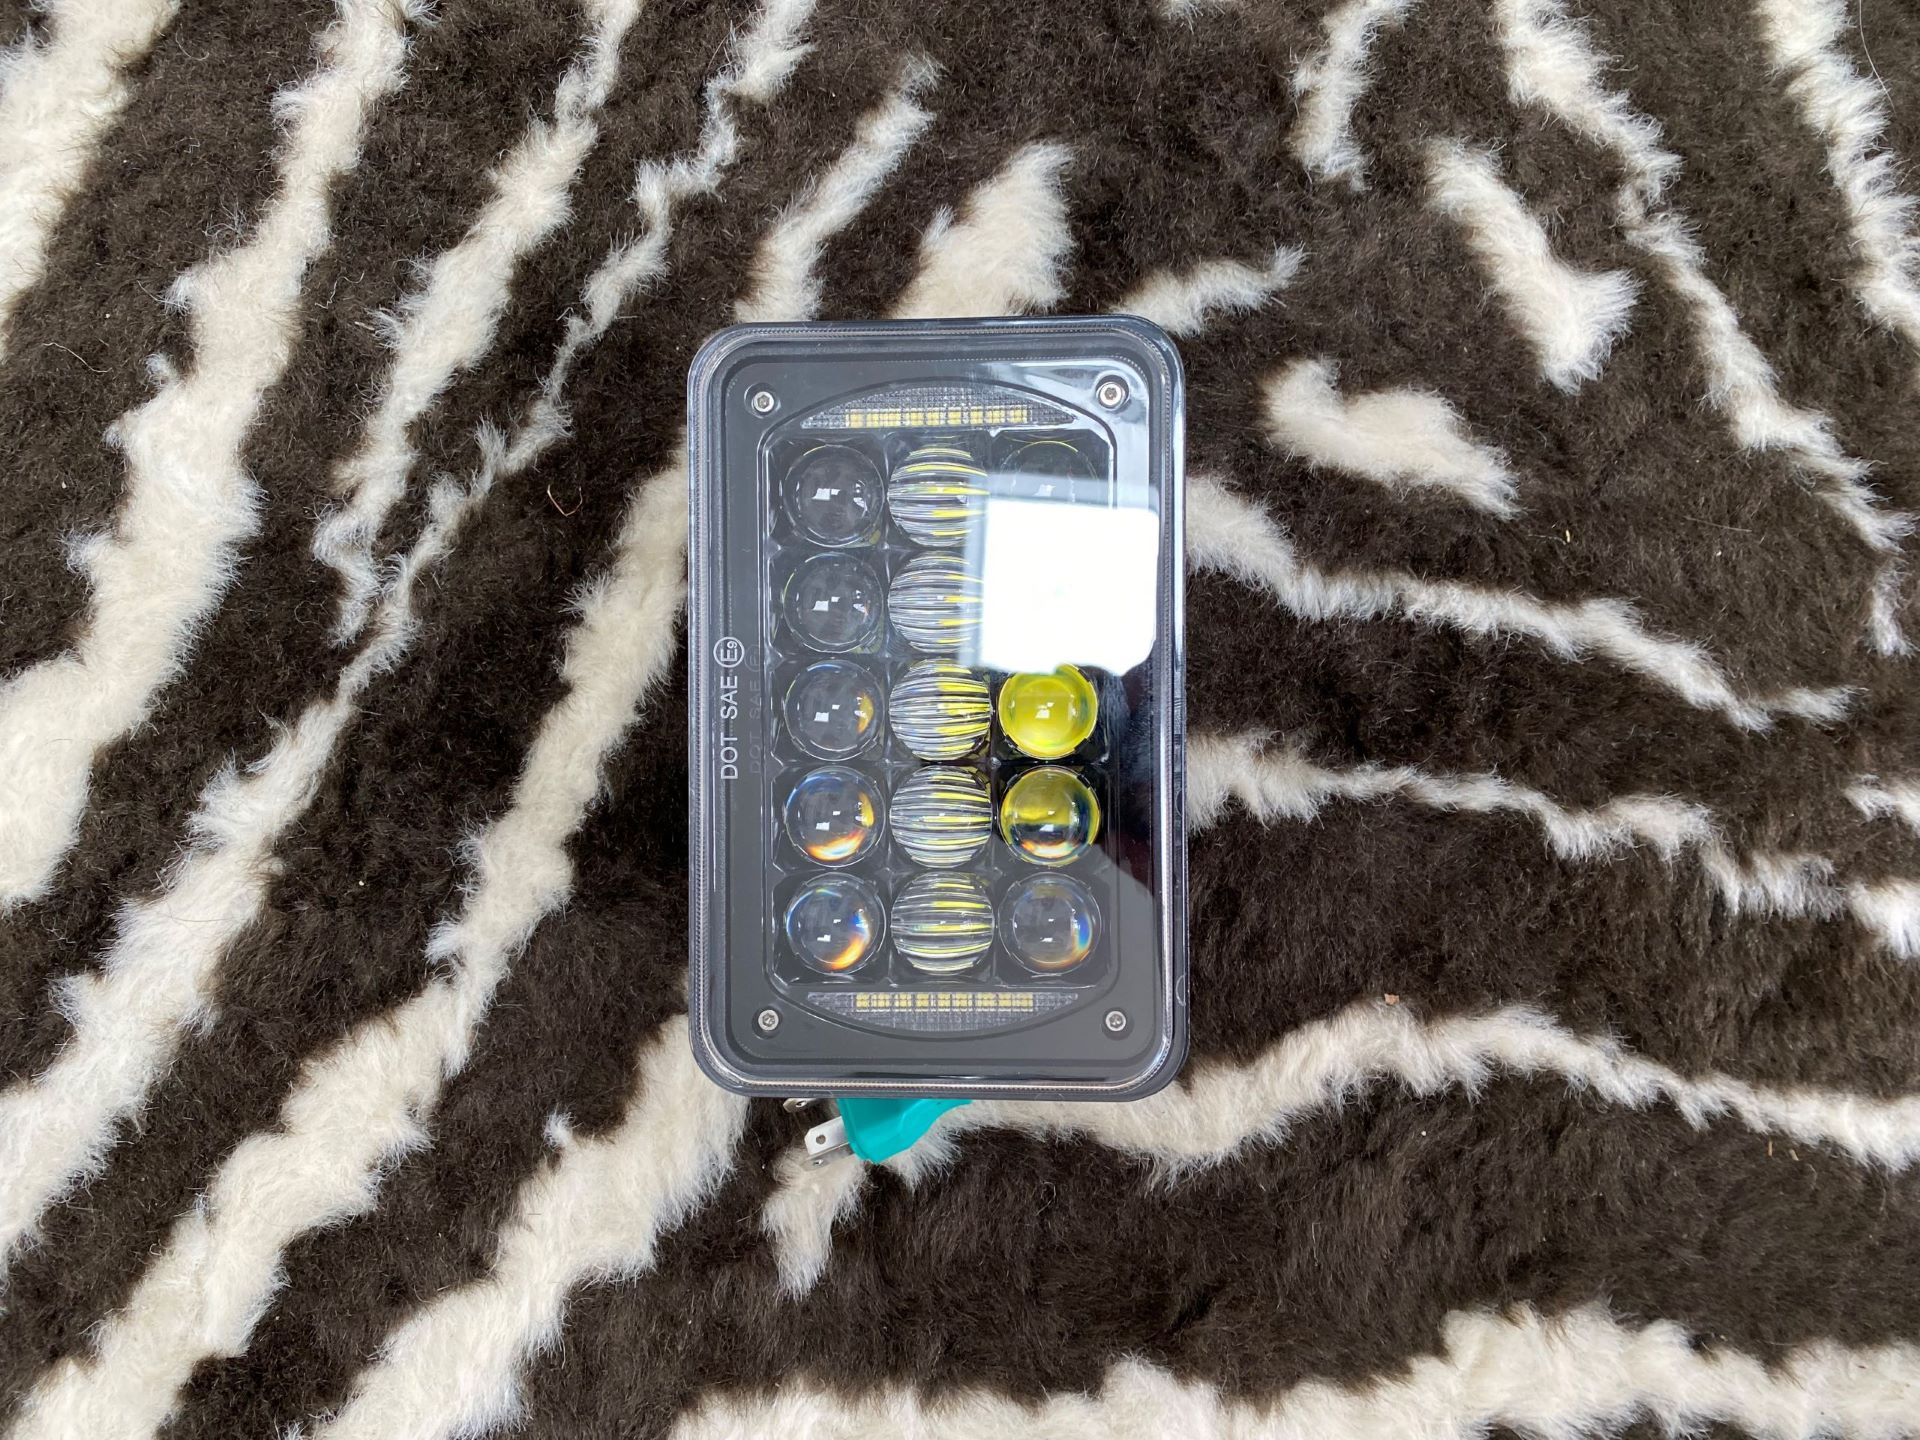
the bracket and fairing should be straight forward for installing. The headlight will take some finding out. |
    
Jhbuell
| | Posted on Friday, July 21, 2023 - 09:14 am: | 


|
Bike looks great! looking forward to the pictures when it is finished. |