| Author | Message | ||
Henrik |
Bolt sizes are different on mine as well. One takes a 5/8" socket, the other a 9/16" socket. Henrik | ||
Hoser |
And I thought I was a fairly observant guy ?? , after looking in my 96 S2 parts book to discover two different part numbers for those bolts. Sorry to appear panicked and confused | ||
Henrik |
Hoser - no worries  I didn't realize either until you asked and made me go look. I didn't realize either until you asked and made me go look. Henrik | ||
Rick_A |
There is yet another method...the simplest which comes with new isloators...using a special frame spreading tool. I made my own outa some hardware...the dealer had no idea what I was talking about. | ||
Henrik |
Rick; I seem to remember there being some concern about the frame spreading way back when ... no? Henrik | ||
Hoser |
I have tried "the frame spreader" tool too , the old factory one , it seemed like a barbaric thing to do a perfectly good frame. The good thing is the tool is busted now and can't be used , apparently they released an updated version of that tool a while back , but I wouldn't use it on my own frame or anyone elses for that matter . There are methods to install isolators that are easier than using that tool. The next time I do an isolator replacement or belt replacement I'll try to remember to snap a few photos. I simply compress the isolator a bit using 1/2" bolts/nuts and large washers , compress them only enough to start the frame over the swing arm mounting block , once the frame has been started the compressing bolts/washers can be removed so the frame can be pulled all the way into position.This is how I have been doing this for seven years now. | ||
Rick_A |
The only thing I know against the "spreader" technique is that there was a limit to how far the frame can be "tweaked". Hoser...Your method sounds interesting. | ||
Libnosis |
Thanks for the info Jose and Blake. I've got a motorcycle jack for the bottom but that doesn't do me any good when it comes to lifting the frame. Looks like I'll have to hit one of my buds up for a flavor. lib | ||
Jmartz |
Lib: To lift the frame all you need is a ceiling joist and a ratcheted tie down. There is hardly any weight to lift and you only need to go 4 inches or so. Take the exhaust off and with the bike on a swingarm stand teeter it sideways until you have the motor over wood. Because it isn't flat you will need several supports. Make sure you set up a front biased teeter so when you remove the swingarm stand the weight transfers to the front wheel. Tape the frame with duct around the carb area or you'll be sorry you didn't. The rest is just a lot of disassembly. | ||
Josh_ |
Well the RaceTech joke continues. To summarize: I sent in my forks for revalving. I asked that they check the old oil level and measure the old springs. I also requested that they install .85 springs and to call me while they were looking at it. They only called to get my CC #, didn't check the old oil level, didn't measure the old springs and installed .95 springs. After several phone calls (you never speak to the same person twice other than the operator and they transfer you as much as possible) they paid to have them shipped back. UPS reports the forks were signed for over a week ago. I have heard nothing. The one person who's name I got when I shipped them back is out for a week. No one else seems to know anything. No one who supposedly might know is avail. and no one is returning messages. Sheesh. If I weren't aware of their name in the industry I'd be wondering if I'd ever see my forks again. | ||
Jst |
Okay, Now I'm officially pissed!  The tool that did the Isolator update on my bike (in addition to stripping out the bearing adjustment blocks and causing me to miss all of Biketoberfest)put the original Isolator bolts back in! If I hadn't reread a copy of Battle 2win, I never would have known. Anyone know the reason the old bolts are superceded by the buttonhead version? How dangerous is this? I re-read the service bulletin and it doesn't give the P/N for the newer bolts. Anyone have any idea what the part number for these is and how much they are? The tool that did the Isolator update on my bike (in addition to stripping out the bearing adjustment blocks and causing me to miss all of Biketoberfest)put the original Isolator bolts back in! If I hadn't reread a copy of Battle 2win, I never would have known. Anyone know the reason the old bolts are superceded by the buttonhead version? How dangerous is this? I re-read the service bulletin and it doesn't give the P/N for the newer bolts. Anyone have any idea what the part number for these is and how much they are? A dealer will never touch my bike again!  JT | ||
Josh_ |
Hoser, pics would be greatly appreciated as I plan on trying it on my S1. JsT, I heard the old bolts sometimes tore the isolators when 2-up/overloaded. I dunno but I have new ones on order (no p/n - I just asked for 'em by name). Josh | ||
Hoser |
Be patient my friend , I don't have a digital camera so when I snap a few pics ( soon ) it may take a few days to get them developed/scanned and posted. | ||
Josh_ |
The new isolators are on order so no hurry... | ||
Blake |
JST, I don't know. I'm sure the new bolts are required for a very good reason though. Please report the dealer that provided such poor service in the Knowledge Vault - Dealers... section. | ||
Oz666 |
Are the factory default rear shock settings for the interim replacement shock listed somewhere? Besides the preload listed above. I have a 1st generation replacement shock. BCS says my bike does not qualify for the replacement (aluminum) swing arm, probably because it requires the new replacement shock. I canít set the compression damping to 2.5 turns out because the adjustment range is 2 turns total.  Oz Oz | ||
Blake |
Oz, There is/was no "replacement" aluminum swingarm. The swingarm recall replaced the original steel swingarms with NEW steel swingarms. I think the damping question for your 1st round recall shock has been answered here before. Try searching the archives? I'll give a look later to see if I can find the answer for you, but basically, adjust the damping to suit your riding and weight. More damping for more aggressive riding, heavier loads, less damping for easier more cruiserlike riding and lighter loads. It is a compromise between ride and handling. Too much damping will yield a harsh ride, too little will make the bike handle poorly, wallowing through turns such. There is more, but that is a starting point.  | ||
Josh_ |
Anyone know the factory settings for the original WP shock on S2s? WP suggested I try that for the RS. Preload adj would be nice too as the RS manual leaves it waaay too soft. Thanks | ||
Phillyblast |
Josh, I'll check my manual when I get home - it has the original settings listed AFAIK - I know it has an insert for adjusting the recall shock. | ||
Josh_ |
Cool. Thanks. | ||
Hoser |
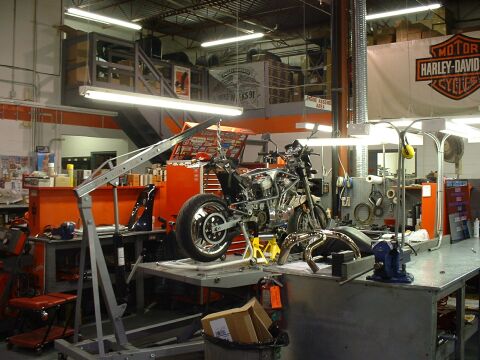
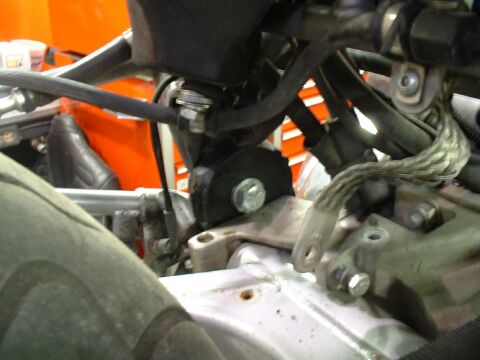
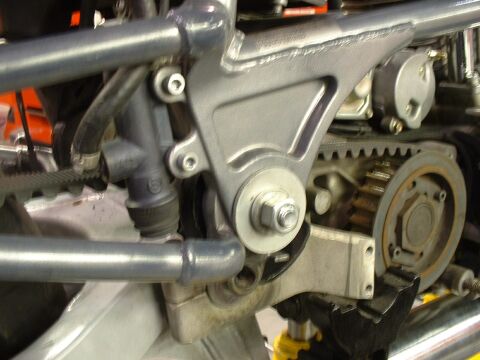
Josh and others ................ Here's some pics (as promised), of a BP5 product improvement in progress ( just one of the jobs I tackled today).  The bolts used are 1/2"-13 x 2 1/2" The large washers are 2" OD x 1/8" thick x 3/4" ID   Jst: The low profile Torx head bolts you asked about are # AA1006.10FKZB , The original washers can be reused as per BP7 ( see bulletin ) , the torque on these bolts is revised from the original hex bolts from 105 ft/lbs down to 63 - 70 ft/lbs. A handy tool to have on hand when removing / replacing the Isolator bolts is a 5/8"-18 tap , it is used to chase and clean the guck from the threads and to correct any Buffoonery that may have taken place . | ||
Blake |
Josh, Preload should be set to give you a sag of between 1/4 and 1/3 of the total suspension travel. I set mine towards the minimum to avoid bottoming the suspension which I see as worse than the effects of minimal rebound travel. | ||
Josh_ |
Blake, will I need to support the frame to measure full suspension? Hoser, so how do I get the bolts out? (That's compressing the new isolator, right?) So where are you located?  | ||
Hoser |
Josh: I assume you mean the bolts in the pics above ? , they don't have to be very tight at all to compress the new isolators , once they have been compressed enough to start mating the frame to the swing arm block you can easily remove them from the inside , then continue lowering the frame while aligning the holes with the swing arm pivots . Be gentle , little force is needed , and make sure to securly block up the powertrain/swing arm assy.. The pics are from today , I found a Digital cam and emailed the pics home , what is missing is the custom powertrain cradle I built for this type of work , very similar to what is (was) used at the factory for assembly. I'm using it at home right now but does make the job go more smoothly with no chance of jiggling the powertrain off it's supports.Today I used what I had lying around , two small jackstands and a bottle jack to support the engine , wood blocking works too , you may see a picture of 2 x 4's supporting an engine in the service manual. Oh ya , I'm in Calgary , see profile , and yes we are still doing product improvement campaigns , shocks too , a simple phone call to the right person , a few moments later approval received , all done politely , no fuss , no arguing , I'm impressed with the way this whole program has happened , there has never been any need to bullshit anyone or make up phony excuses like I read about here all the time , some of the dealers down there sound real lame !!!. Here customers leave with a grin , it makes me feel good | ||
Ccryder |
Josh, Preload squat(loaded-unloaded) should be 0.5-1.5 in Rear shock rebound-Position#4..Rear shock compression- position#6 All from S-2 service manual Mark | ||
Josh_ |
How many positions are there for the adjustments? Does it list the front ones too? How did the S2's wp shock adj preload? The RS has a remote hydralic unit. Thanks, Josh | ||
Phillyblast |
Josh, The manual shows 2 preload adjusting nuts - big italics warning to apply the same amount of turns to both. They're on the rods connecting the end plates, on the rear. Rebound was adjusted using the dial on the "remote nitrogen reservoir" It doesn't list how many clicks in my manual. | ||
Josh_ |
Thought so, the RS has the same nuts, but you only need to adjust them if the hydralic doesn't get you all you need. It also has the rebound on the nitrogen res. and comp. at the tail end of the shock. | ||
Fire604 |
I am a newbie here so bear with me. I am considering swapping out the factory springs with variable rate ones. How difficult is this for an average Joe to do or should I just let a shop do it? - Jeff | ||
Hoser |
Jeff: Fork springs ? , what would you consider your skill level to be on a scale of 1 to 10 , ten being - you could , using a sunnen hone fit a set of connecting rod bearings to .0002" and then balance , assemble & true the crankshaft. One would be very basic stuff , like a 500 mile service or easier. Are you equipped for this type of task ? |