| Author | Message | ||
Henrik |
From what I can tell from the manual and the parts book, if I remove a side plate and the isolator, I should be looking at the swingarm bearing seal - right? If so, I then pop off the bearing seal, grease the bearing, install a new seal and re-install isolator and side plate - right? Are there any specifics to the isolator/isolator bolt installation I should keep in mind? Thanks Henrik | ||
Bluzm2 |
No Henrik, A little more to it than that. I've got a spare swing arm at home, I'll take some pic's for you and post them. I may not be able to get to it until tomorrow though.. The Readers Digest version: There is a swing arm bearing "preload" slug/bolt that is between the isolator and the bearing. They screw into the swing arm spacer. The isolators screw into the slugs. The slugs are clamped by the swing arm carrier. The pictures will make it very clear. I'll try to get them up tonight but it won't be until late. Brad | ||
Henrik |
Excellent, thanks Brad. I took another look at the parts manual and I can see what you're talking about. A few pictures would be great. Of course, from your description and the parts manual diagrams I can see that when I remove the slugs I'll need to re-torque the bearings and such. I was hoping to avoid that - naive of me, I know  But now's the time to do it with wheels, suspension etc. off. Btw. I sent the footpeg bracket out to Bomber today. Henrik | ||
Bluzm2 |
Henrik, Mucho thanks for sending the dealieo to Bomber. I really appreciate it. In order to replace the bearings, you really need to remove the swing arm. No reason not to as you are almost all the way there anyway. Here's the pictures. If you need more, let me know. This is a shot of the seal and bearing in one side of the swing arm. The bearing is actually 2 pieces, the outer race and the inner bearing assembly. Just like steering head bearings. In fact, they are the same bearing. The darker outer ring is the seal. 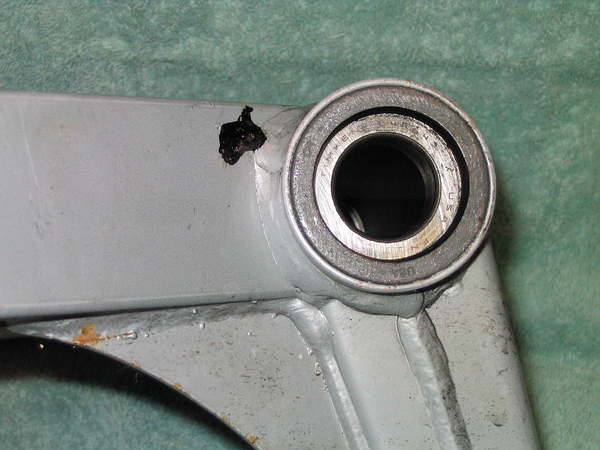 This is the "stack" I'm missing the allen head bolt on the left side. I use new ones when I replace isolators anyway. 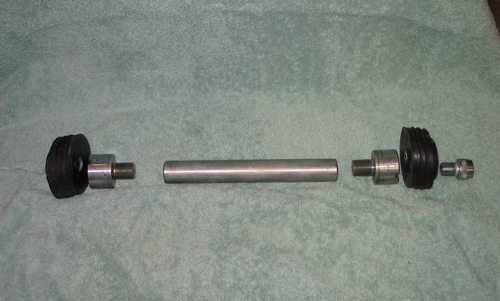 This is all the parts assembled into the swing arm. The left side isolator is off due to the missing bolt. But you get the idea. 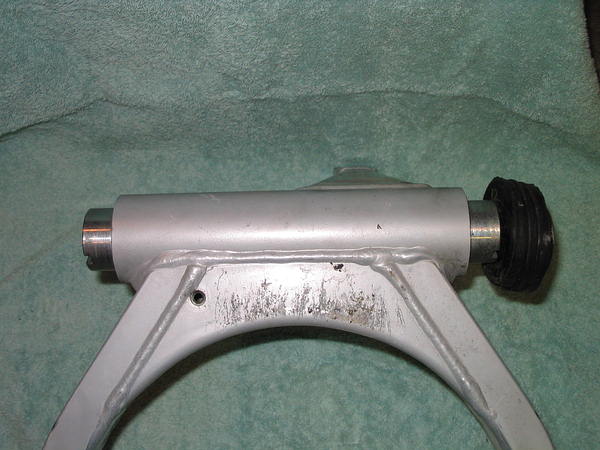 This shot has the swing arm carrier held up to the swing arm to kind of show the complete assembly. 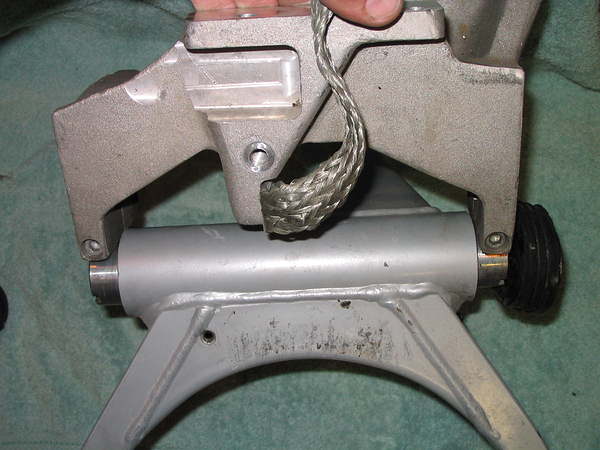 This last shot is another of the swing arm and carrier. This one shows the "holes" the slugs fit into and the pinch bolts to keep them with the proper preload. 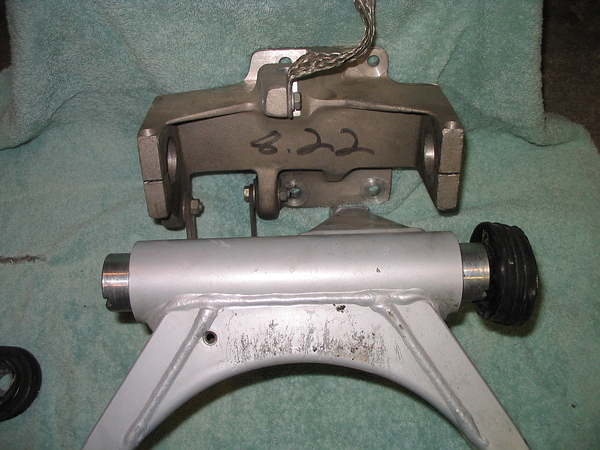 Henrik, I know you know how it fits together but I figured I'd "over kill it" a bit for newbies that want to learn. Hope this helps! Brad | ||
Bluzm2 |
Henrik, One more thing. Torquing the bearings isn't that beg a deal. The slugs have a slot for a LARGE screw driver. I use a chunk of 1" wide 1/8" thick hunk of bar stock. You really don't have to put that much tension on them. Brad | ||
Henrik |
Great pictures and description Brad. Thank you. I was hoping I wouldn't have to replace the bearings - only 16,500 miles on them - but just go in and grease them. But it doesn't look like I can even get in to grease without pulling the swingarm. I was thinking of doing one side at a time and remove side plate, isolator, slug - but it look like the carrier would still be in the way of removing the outer race. Oh well, enough bitchin' - I just need to get to work  Henrik |