| Author | Message | ||
Ericz |
I have been working on a lot of little things to get my XB going soon. I am just waiting on some custom CP pistons to show up this week before I can finish the engine assembly and be ready to make some power! I finally finished redoing the head work that NRHS did a sub-par job on. I installed 1.9" Intake valves and 1.63" exhaust valves with a nice Manley valve spring and titanium retainer set. The weight lost by switching to titanium retainers was gained with the larger valves, but at least the valvetrain won't have to work any harder. The chambers came out really nice and ended up right at 70.5cc each. I also indexed the NGK DCPR9-EIX plugs that I will run this time around. They are one heat range colder than the stock H-D 10R12A plugs that I was using and they are iridium so they should still work well under light throttle/cruise and idle conditions. 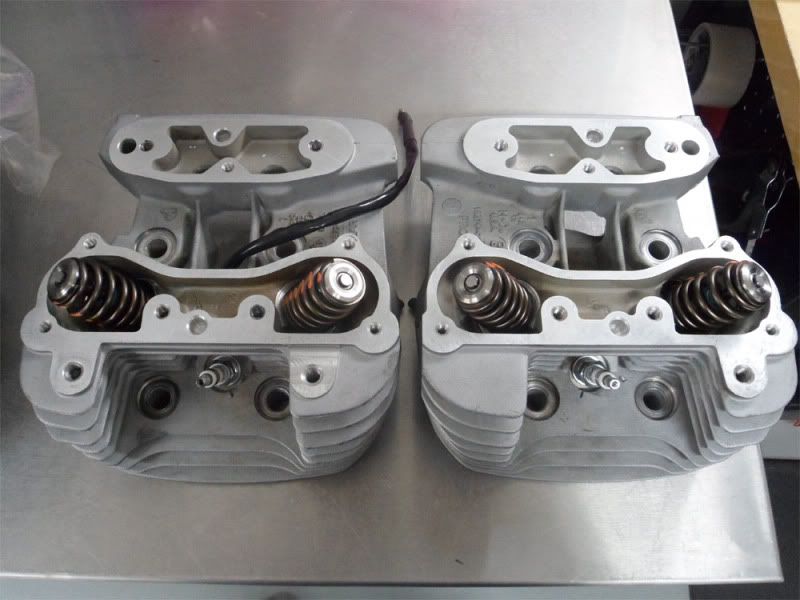 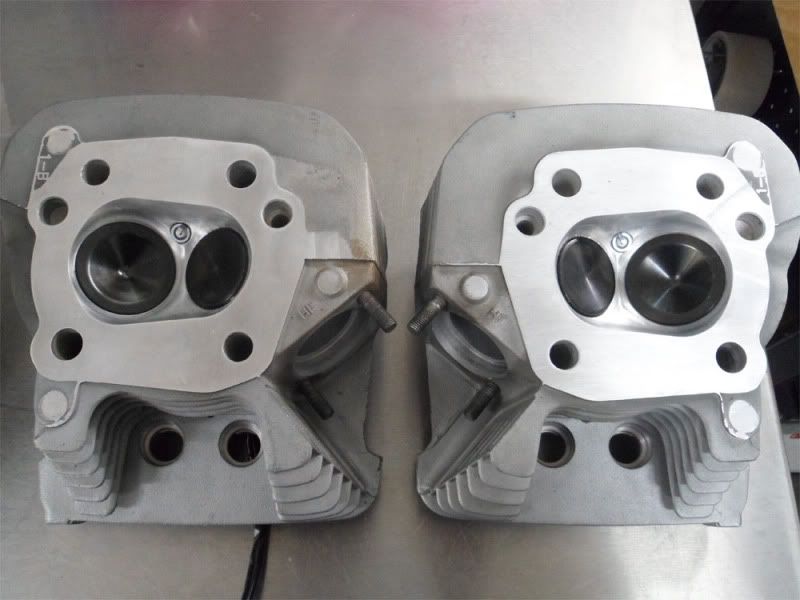 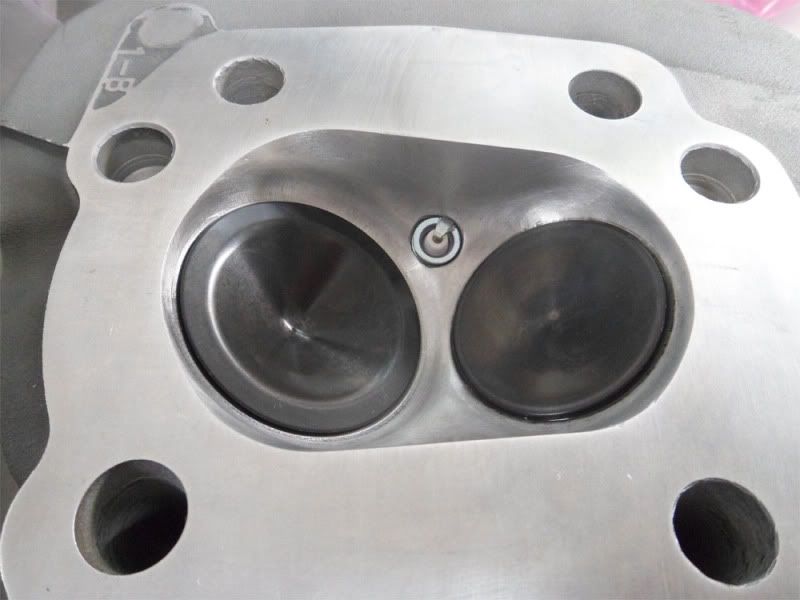 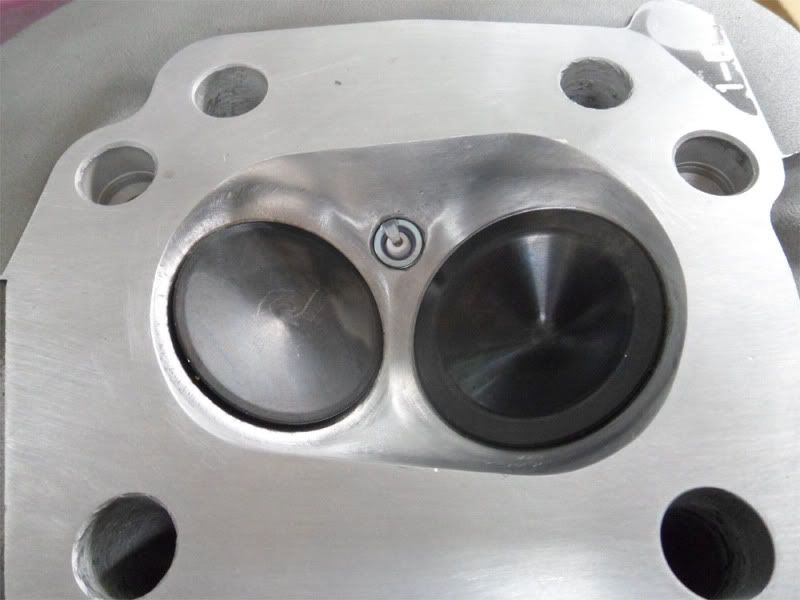 I stumbled across a really nice 10-row Setrab oil cooler I bought when I first began the turbo project in 2006 and never used. As soon as I saw it I knew I needed to get it on the bike this go around! I hacked apart the stock oil cooler to steal the nice mounting brackets and welded them to the Setrab cooler, making the new, much larger cooler install and appear just like the stock cooler. I still have to do some thinking on how I want to finish the scoop mounting. It bolts on just like the stock cooler, but I need to seal it off top and bottom to ensure as much air is forced through the cooler as possible. I may just end up taking a mold of the stock scoop and laying up a slightly modified fiberglass replacement. 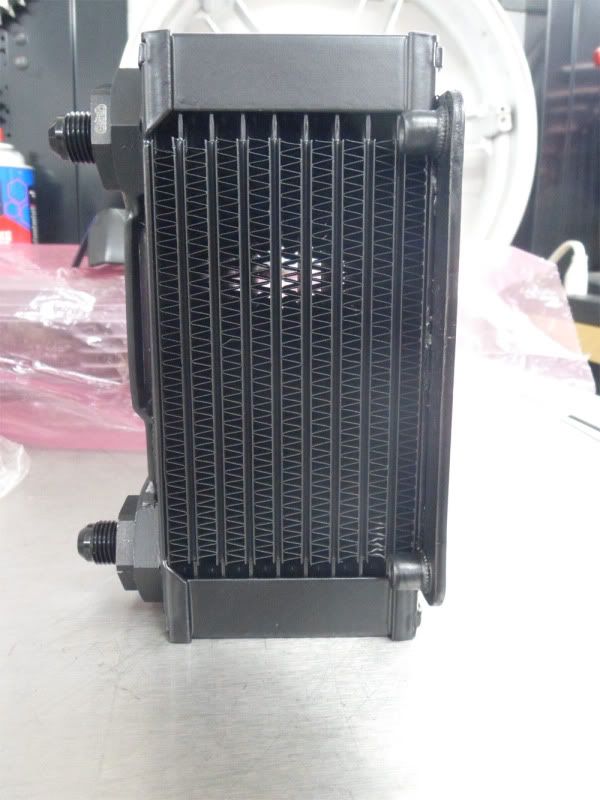 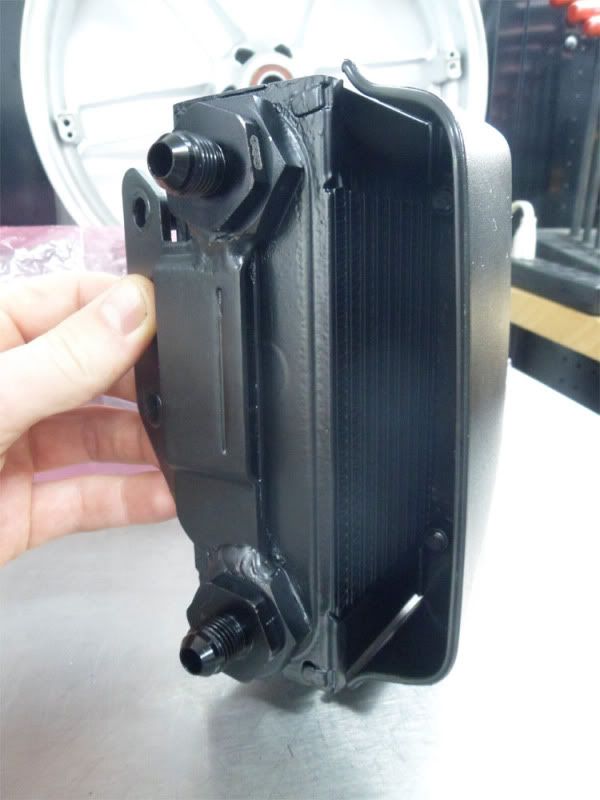 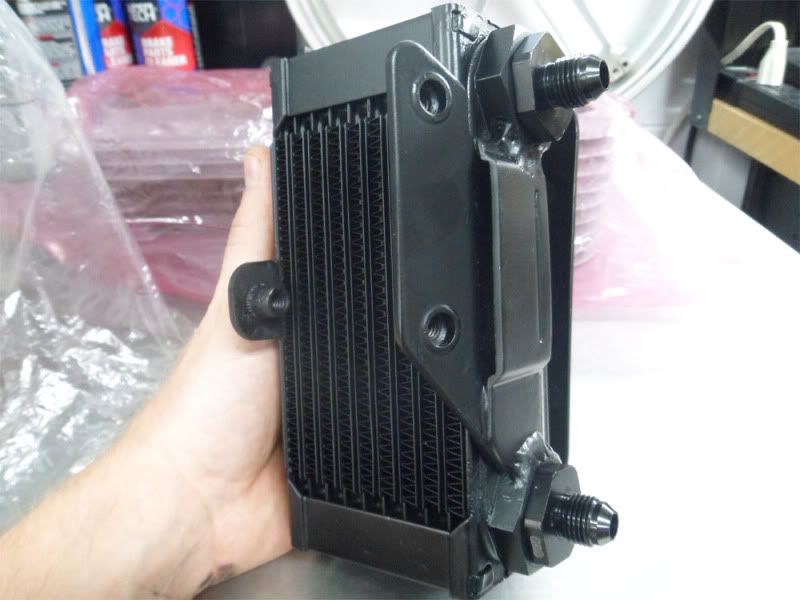 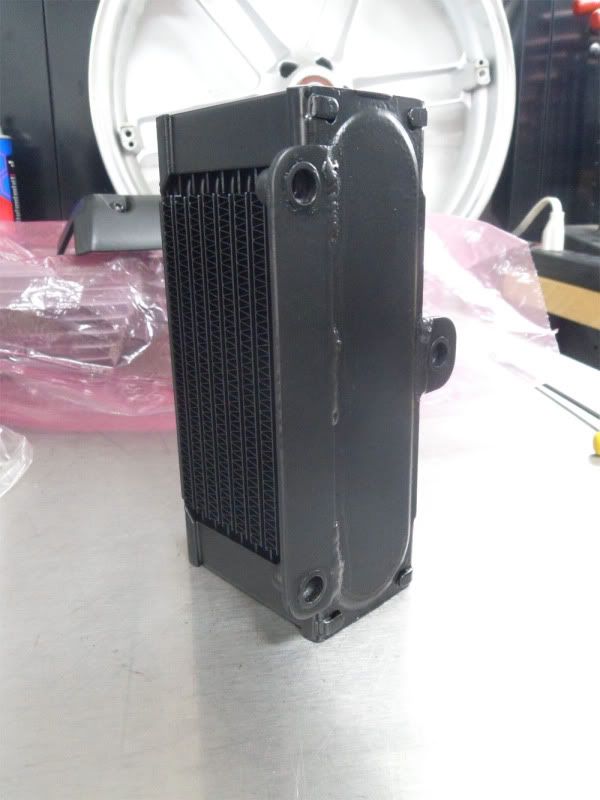 | ||
Ericz |
Here is the engine as it makes its way to completion. I am sending off the Evolution Industries clutch hub to swap for their latest improved design hub, and that will finish off the primary assembly. I also made the bracket for the wastegate actuator to rotate the cam position sensor for a on-boost proportional timing retard. It will extend through a hole in the cam cover and connect to a bearing supported CPS mounting assembly. 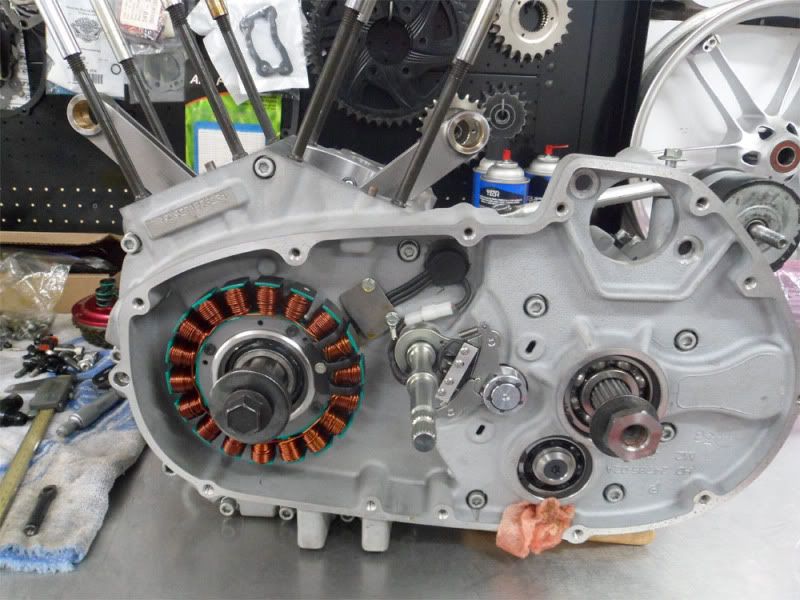 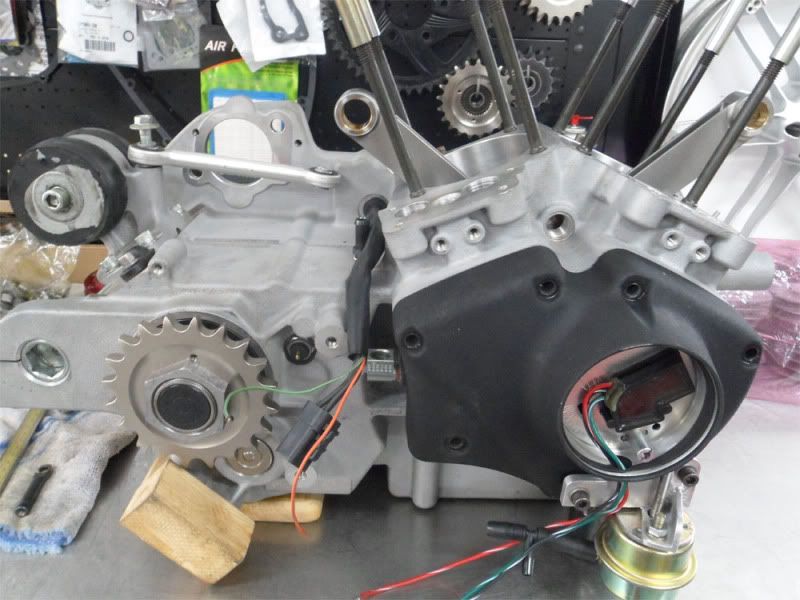 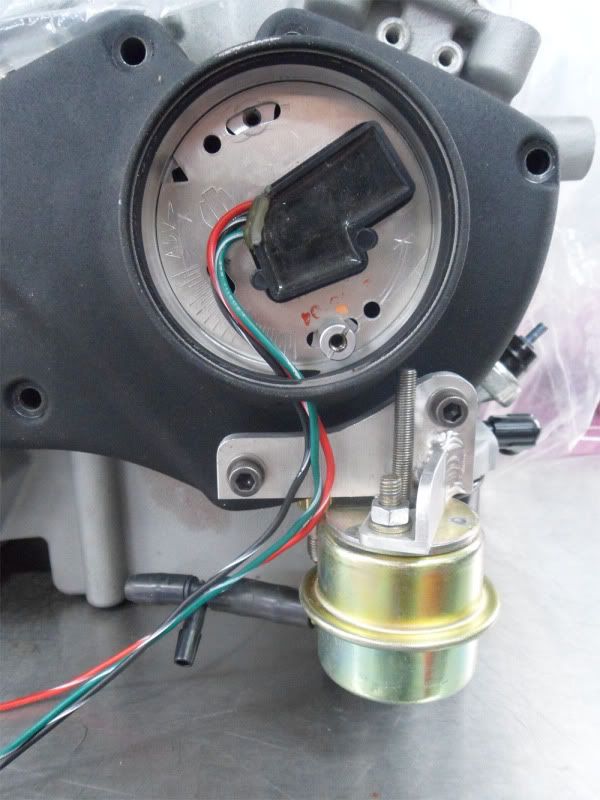 | ||
Djohnk |
Looks nice, can't wait to see some dyno runs. | ||
Greg_e |
What was sub-par on the headwork? Pretty happy with the stock size valve job and valves they put in my heads. Will you need to machine deeper pockets in the pistons for the valves you are using? The timing retard is neat, but what are you going to do with the oil filter? | ||
Ericz |
Chamber volume was cut larger than I asked for, valve seats for stock valves were poorly cut, the gasket surface was not cut flat, and the heads were sent back to me with lapping compound still in the ports. I went with the larger and shorter Twin Cam valves to correct the valve stem height and gain some flow. I had the valve job done locally and finished the chamber work myself. The CP pistons I had made have plenty of valve pocket for these valves. The timing retard setup sits outside of the oil filter area so I won't have to relocate it. | ||
Greg_e |
How do you fix a volume too large issue? Weld and grind? I will say my heads came back looking great and everything was clean with a light coating of oil. I did have a couple issues with the cylinders, but nothing that would prevent me from working with them again. | ||
Foximus |
Why do all that work and not go with a proper squish band? That would do sooo much for keeping the motor run cooler, and most likely end up making you more power.... | ||
Ericz |
My original plan was to use a set of 1250 flat top CP pistons from NRHS, but with the chamber volume what it was, the compression ratio was going to be lower than I wanted. I also checked the bore on the 1250 cylinders and they were tapered from .002" clearance up top to .0005" at the bottom, and I was able to return them to NRHS for a refund. So, I decided to finish the heads and see where the chamber volume ended up. I removed as little as possible, and was really happy with the result. I then ordered a custom set of CP pistons with a 2cc dome volume that would put the compression ratio right where I wanted to be at 9:1. Foximus, I'm not sure why you think that the squish band is not proper. The bathtub chamber only has squish on either side of the chamber, and the squish is set with head gasket thickness. | ||
Greg_e |
I checked the taper on my 1050 kit, but not with a tool precise enough to see that level of change, I think I'm just going to remain in ignorant bliss since mine engine is a lot lower performance than you are trying to build. I guess you will need to go to rev-perf. for the big bore kit. | ||
Ericz |
I've decided to use new stock cylinders with the stock bore size. I checked the factory bore on them with torque plates and they were both within 0.0008". I'll still be honing them to the final size after the pistons show up since I'll be running ~0.003" piston to wall clearance. | ||
Greg_e |
I need to buy or make a set of torque plates one of these days. | ||
Foximus |
Im sorry, it was late and I didn't really dictate what I meant. A domed squish as opposed to a flat top squish. | ||
Ericz |
I see  While the new pistons have a dome, the dome fits within the existing bathtub chamber so it does not affect the squish band. While the new pistons have a dome, the dome fits within the existing bathtub chamber so it does not affect the squish band. | ||
Foximus |
So why didn't you go with a domed squish? They are far more effiecient. | ||
Fast1075 |
Come the day when/if Jezebel needs attention to the cylinders (currently at less than 4% leakdown and uses absolutely no oil), My cylinders will be worked over by Wes and Pammy at CycleRama. They do fantastic machine work. | ||
Ericz |
Foximus, With the compression ratio I need, an angled squish band and corresponding piston would significantly reduce the total squish in the chamber. If I was shooting for a higher compression ratio, I would think about an angled squish. Fast- I have talked to Wes and have heard only good things about CycleRama. They seem like great people. | ||
Ericz |
And I forgot a pic of my dash painted and gauges/leds installed: 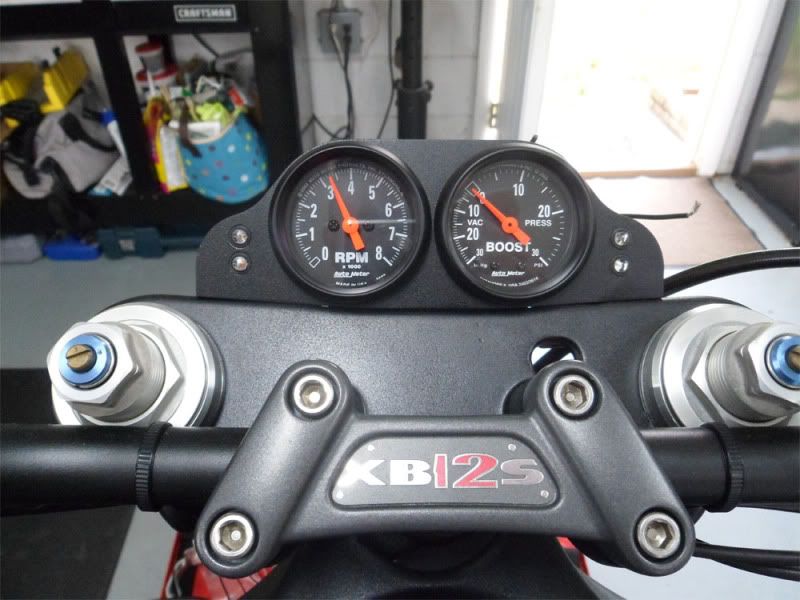 | ||
Mr_keys |
Amazing job! Ed | ||
Kdogshirow |
Ericz , I would like to know where you got your wallet machined for such great cash flow !! LOL ! Just kidding , I cant wait to see it on the Dyno , it should be amazing ! You always do fantastic work .  | ||
Ericz |
Thanks! I work on other motorcycles at the house to supplement my income and pay for my hobby. |