| Author | Message | ||
Ericz |
I am getting really close to assembling the motor. I am waiting on a new Andrews transmission assembly prepared by R&D Motorsports. They are annealing and re-hardening the gears to around ~RC56 from the ~RC66 that Andrews hardens them to. This will allow the gears to engage a bit easier with the high loads I will be putting through them. They are also back cutting the dogs and cryo-treating and micro polishing the gears and shafts. All of this should show up on Tuesday. Here are some shots of the Evo. Ind. clutch hub assembly I bought. It fits a 2004- Sportster clutch basket, which I will use in place of the XB basket. You can see the assembly uses 6 coil springs instead of the single diaphragm spring. It has an aluminum pressure plate that uses a steel drive plate (thicker than the rest of the pack) to mate with the first friction plate. It has a total of 9 Kevlar friction plates. You can also see the difference in surface area between the stock XB friction plate and the Evo. Ind. plate. 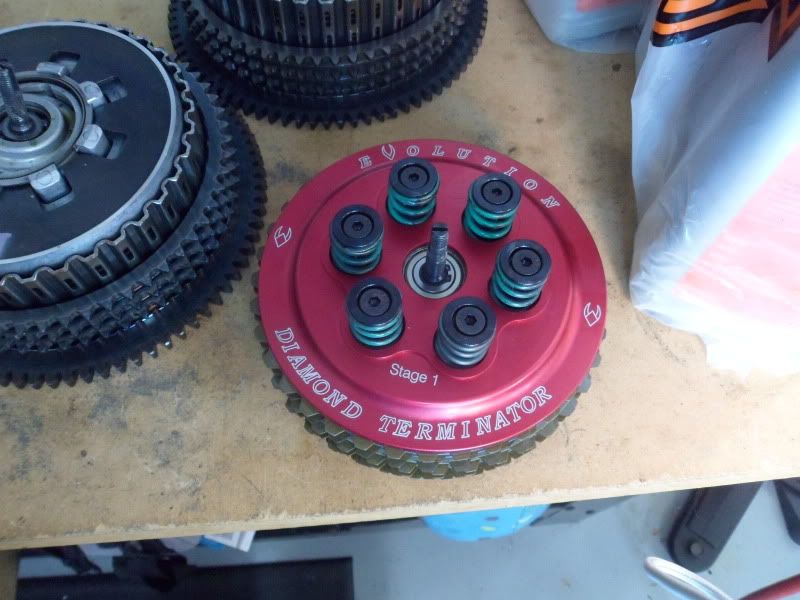 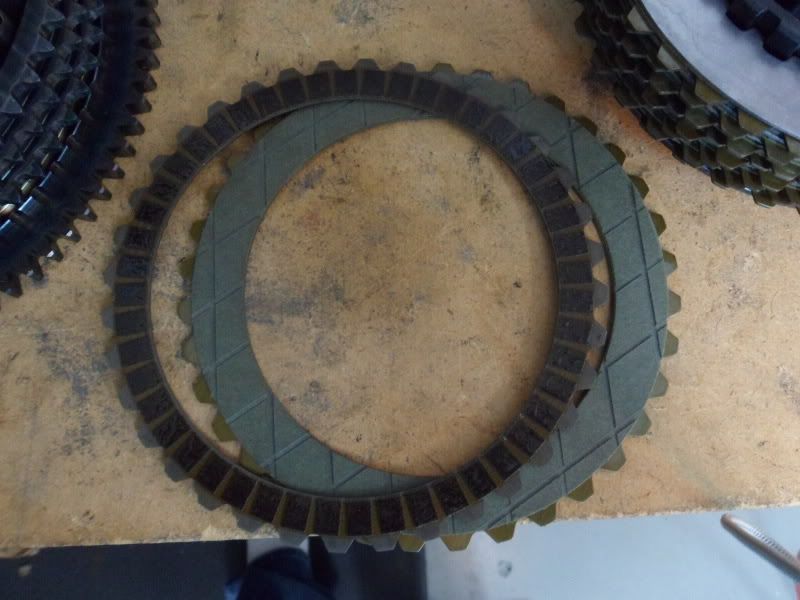 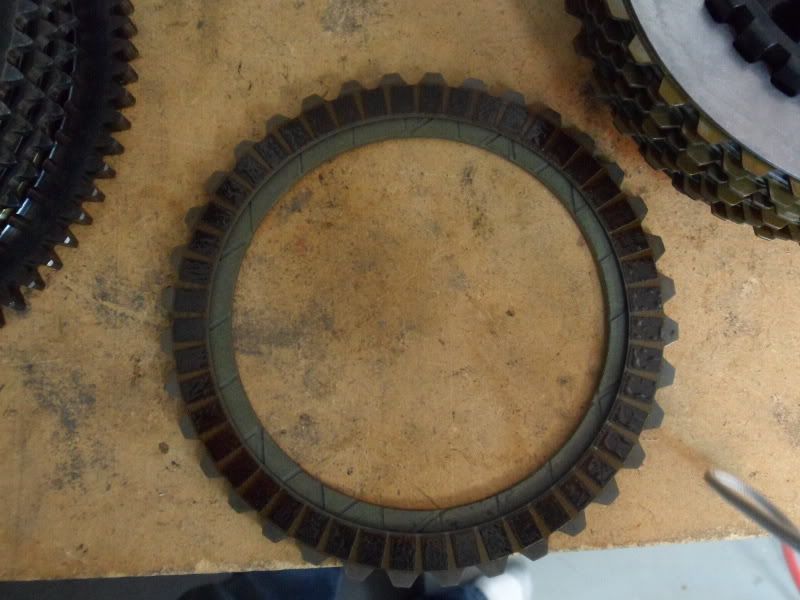 Here are some comparison shots of the stock XB cylinder next to the NRHS Performance 1250cc iron-lined cylinder. You can see that the iron lining is much thicker on the NRHS cylinder and that the cooling fin surface area is smaller and silver powder-coated finish is smoother. While the fins are smaller on the NRHS cylinders, they are thicker and make the cylinder much stronger. 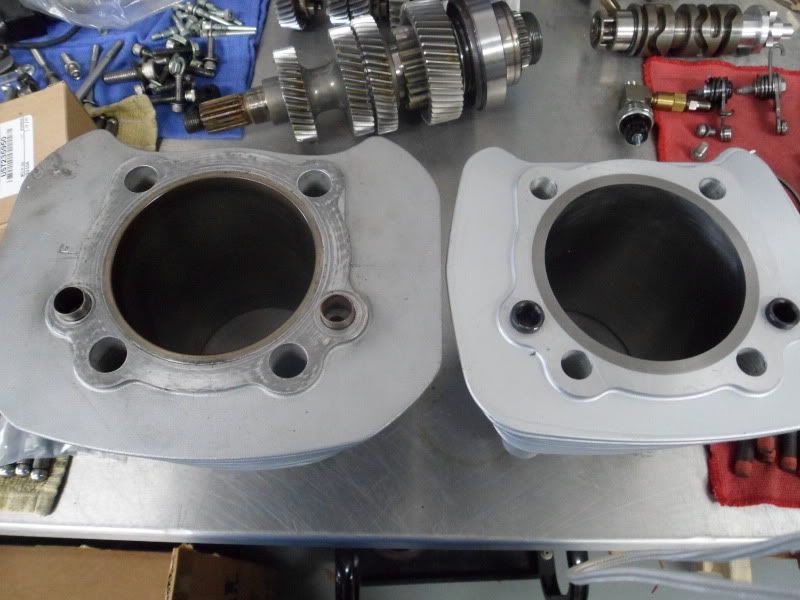 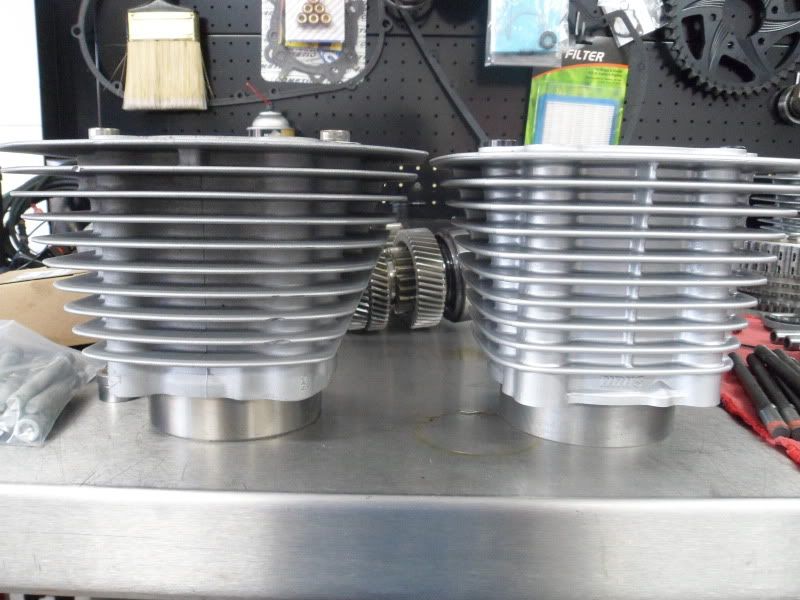 Here are the new coated CP pistons. They are the same style I used before, just made for the larger bore. 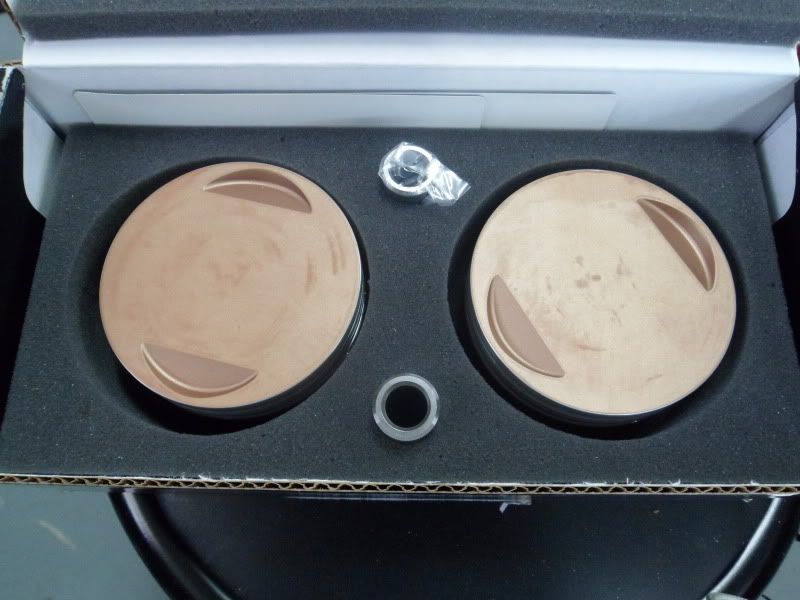 These are the 80lb/hr fuel injectors. They are made by Siemens Deka, and share the same body as both the stock XB injectors and the 60lb/hr injectors I last used. The 80lb/hr size can supply up to about 260hp, so they should be big enough to fuel whatever power level I try for. There is also a shot comparing the 80lb/hr to the 60lb/hr nozzles. They have the same design, but you can see the holes are larger on the 80lb/hr on the left. 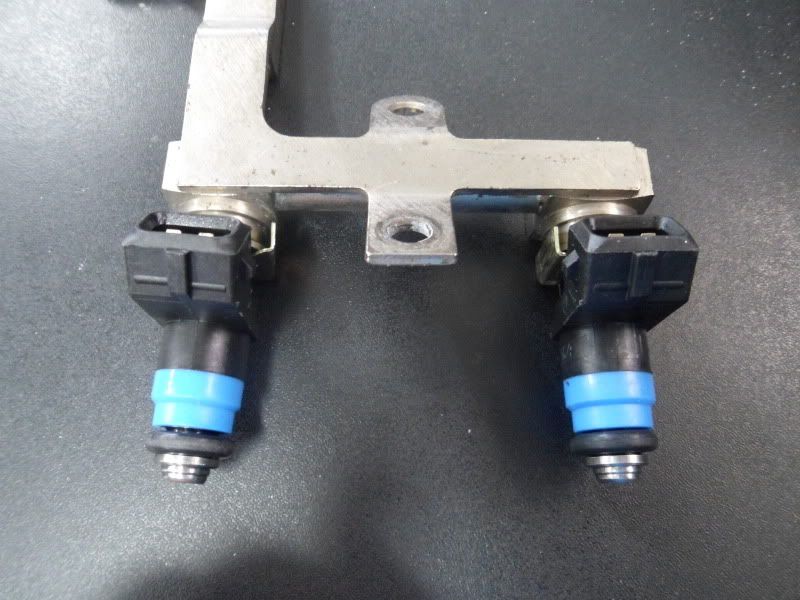 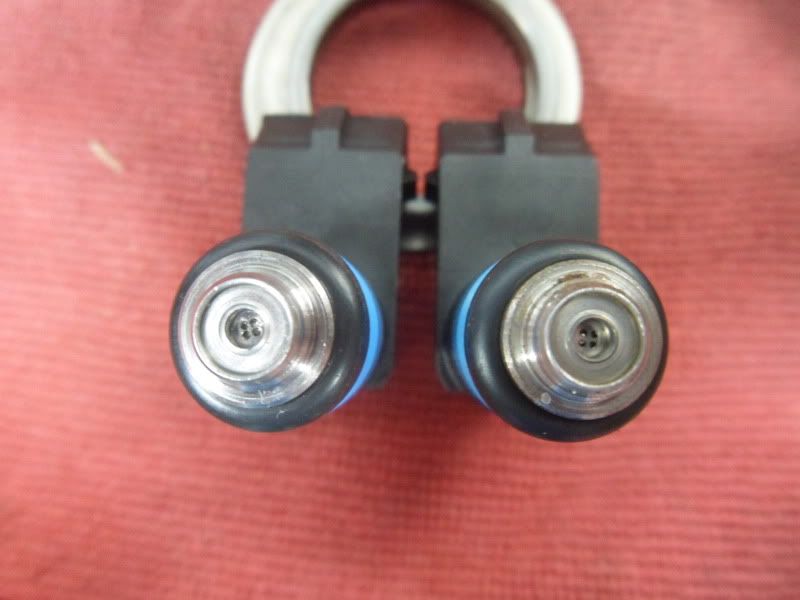 | ||
Ericz |
Here is a cool little setup I made to tell the electronic boost controller what gear the transmission is in. The setup uses two micro switches on the gear shift shaft that ground two separate circuits to the Turbosmart e-Boost 2. Grounding one circuit tells the controller to switch up to the next boost map; grounding the other circuit tells the controller to switch down to a lower boost map. I can program each individual boost map to suit each gear. I also wired the down shift switch into the neutral light circuit as a fail safe setup, so that the neutral light will flash in between each down shift, and if it does not, I know the micro switch has failed. That way I am not getting surprised by a high boost map in a low gear! The location of the micro switches actuate them only after a complete gear change, preventing any false shifts from sending a signal to the controller. I still have to fab and mount a thin plate that prevents the switches from rotating on the mounting screws. The second shot is the wiring exiting through the stator grommet. 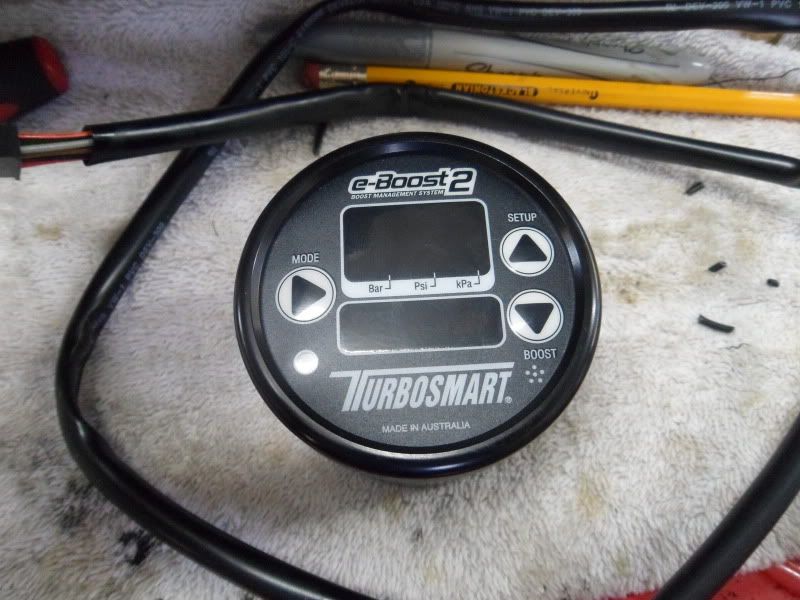 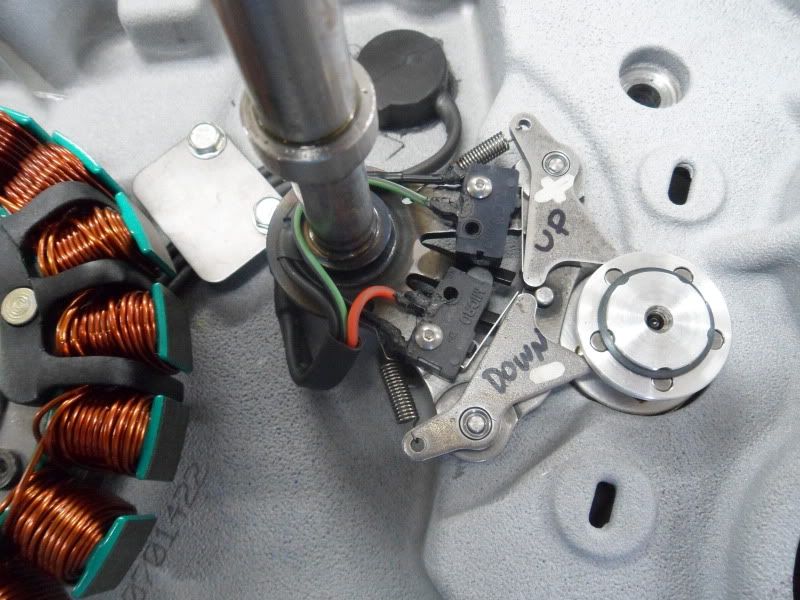 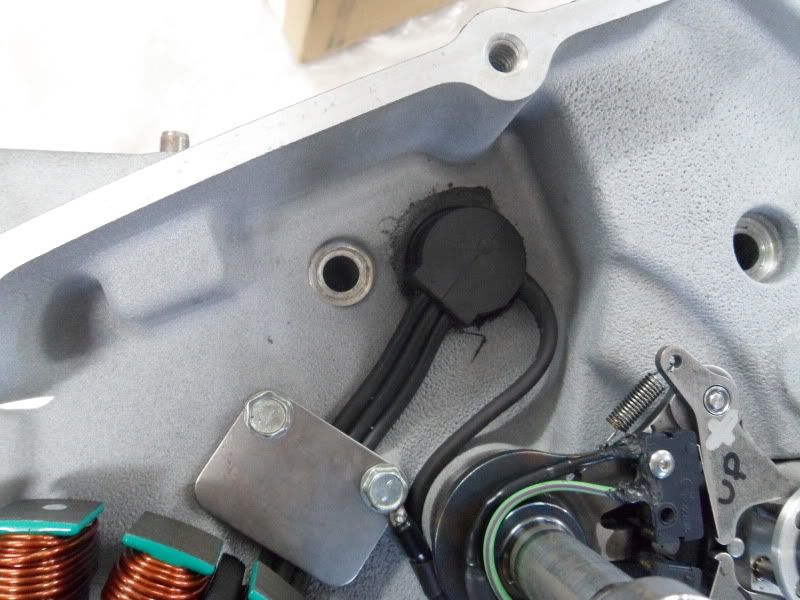 I am also going to be using a wastegate actuator to control the position of the cam position sensor. I am still finalizing the design, but when finished, it will hold the CPS at a home position until there is positive manifold pressure, then it will rotate the CPS to retard the timing proportional to boost level. The CPS will rotate on a ball bearing and I will have adjustable stops, allowing me to set the total allowable ignition timing retard. This is a solution to the issue that arises when I try to push really high boost pressures. My old method of ignition mapping set up the map for max boost, and the timing would only be a be a bit retarded under full throttle and less than full boost conditions. The amount of timing retard I will need at 20+psi will be too much to have optimized at all boost levels, especially now that I will have gear-based boost mapping. 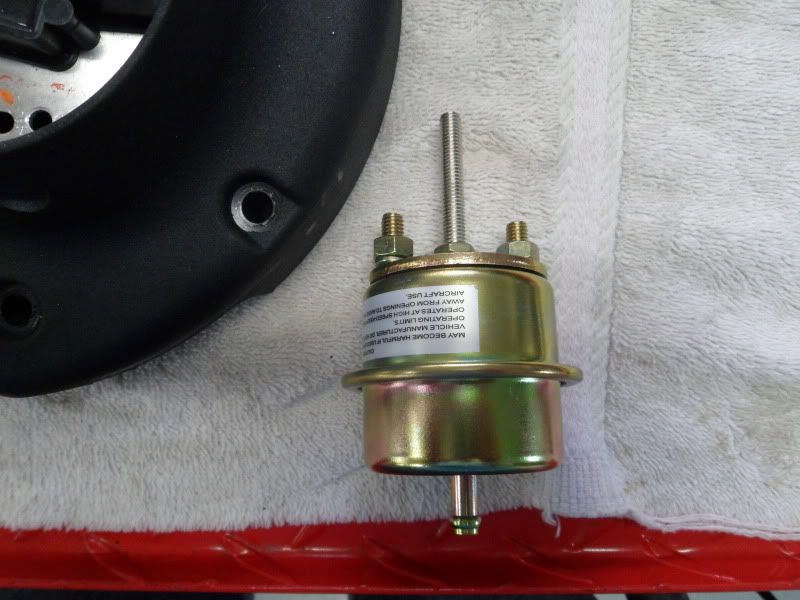 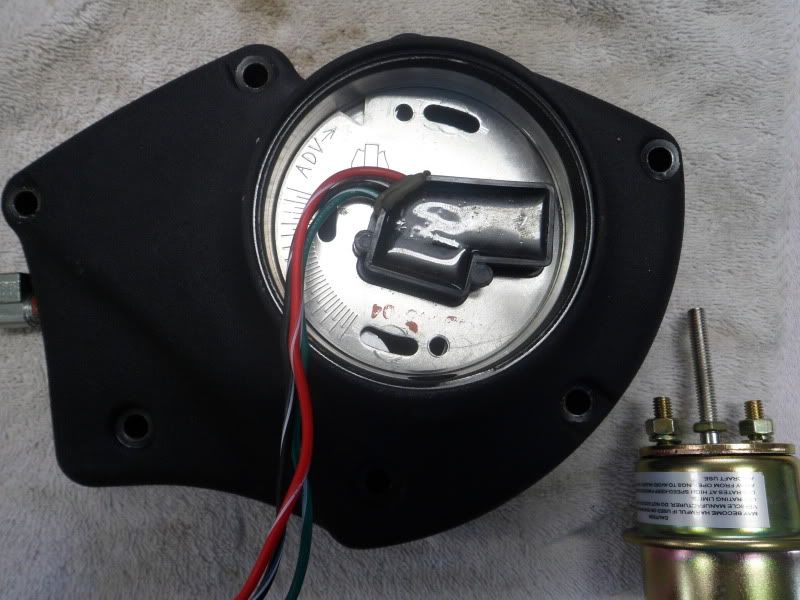 | ||
Ericz |
I also have my website up and running, but it is far from complete. Check it out from time to time, as I will be updating it as I have time. The latest info, however, I will still post here. www.streetfighterperformance.com | ||
No_rice |
I really need to make a trip back to Florida again... but maybe I should wait till its in one piece so I can try it out  lol lol Your going all out on this build and coming up with some good ideas as always! | ||
Greg_e |
Have you set the head gaskets in place on those cylinders yet? Just wondering how well the holes line up. | ||
Ericz |
It should be soon, Tim, so come on down! The head gaskets fit right on and just right. The XB share the same head bolt pattern as the Sportys so gaskets fit real well on the top end. | ||
No_rice |
damn you! you just HAD to say that... lol i cant remember, what was the old configuration putting down on the dyno? i know it was up there, and was MUCH higher when the boost adjuster got accidentally cranked way up before it let go. | ||
Ericz |
It hit 187hp and 149ft/lbs before it blew. I am wondering about the torque, though, because if the clutch was slipping at that power level, the dyno numbers would read less than it was actually putting out. At one point, I hit ~140hp and ~110ft/lbs, then realized my clutch was slipping, installed a stiffer clutch spring, and put it back on the dyno to hit ~160hp and ~130 ft/lbs without changing anything on the motor. | ||
Greg_e |
I wonder what the deal was with my jugs then, ended up sanding the hole for the cylinder bore for clearance and getting the damn head bolts down on the studs requires the patience of a saint. The damn location pins are way off providing all the grief. | ||
Ducxl |
WOW!! seems to be a very robust build. GREAT work.As a machinist,i've built a few |