| Author | Message | |||
Corporatemonkey |
Today a bunch of parts arrived for my "secret project" I was hoping to post a review this evening but I have run into a snafu. I need to wire up a 12v cigarette type outlet. I wired mine up earlier under the seat, thought all was well until I tried to put the seat back. It didn't fit. So now I am back to square one... I know a few of you have done this so any help would be much appreciated. Photo are encouraged. Here is a photo of my outlet, and what needs to be plugged in.  If this won't work, does anyone have an idea how to wire a usb power jack? I need mini usb into my device. (Message edited by CorporateMonkey on February 22, 2007) | |||
Bigblock |
Aerostich has all kinds of neat wiring stuff, like sae and usb connecters, etc. They should have just what you need, get rid of that giant cig lighter. | |||
Ft_bstrd |
ChadHargis wired a nice BMW plug port in the tail of his ULY. He had to drill out a hole in the tail section. You would have to do the same, though if it's for an item you will want in the front it'll be in the wrong place. Have you tried a BMW plug in the front faring? It's fairly small and can be fit with a spring loaded flap cover. | |||
Corporatemonkey |
I like the powerlet stuff (BMW plug), but I really have to have USB power. For that I have only ever found cigarette plugs. I thought about putting it under the tail, but judging by how much grime my rear tire throws up there, it might be a bad idea. | |||
Rich |
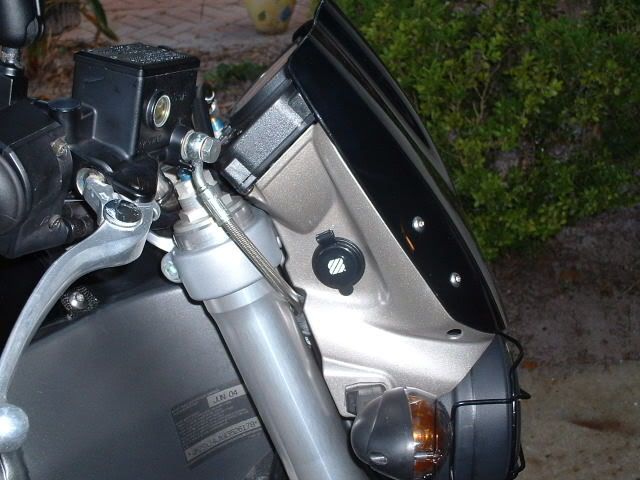
Here's mine-  | |||
147db |
This could be a good location too:  | |||
Dbird29 |
A solder iron could be your friend to make the BMW powerlet work with the USB cable. There are only 2 wires involved! | |||
Hellonwheels |
Garmin plug kinda gives away some of your secret.... I bought a GPS cradle for the car and it came with a cig. style plug that you could plug a usb cable into and get the power that way.... I have seen them on ebay and other website...or Like DBird said you could always cut and solder your own... | |||
Reepicheep |
Thats brilliant! USB would be cool power jack to adopt. Lots of stuff would work right out of the box with no tweaking. You could charge up cell phones, GPSs, your PDA, cameras, whatever while you are on the road. Cables are everywhere and dirt cheap. All you need is +5v and ground, that's easy, and a USB "socket". That should not be hard to find either. I also thought about using RJ45 connectors (Ethernet connectors). I already have a connector crimp tool, and got a bag of 100 solder sockets for $1 at a local surplus shop. They snap on and off easily. Cables are cheap as dirt. Its a small wire, so can't carry a lot of current, but you have 8 conductors in there, so you could do 4 power and 4 ground. | |||
Hellonwheels |
Yeah I used the plug in the car all the time to charge phone and camera while using the gps...( just got a multi hub) I will be doing it on the buell when i get the mounts in... | |||
Fulgur |
I put mine underneath the relay box. Its great for running the GPS. ....Fulgur. | |||
Toona |
I tapped into the 12v behind the flyscreen that is only "hot" while the ignition is in the "on" position so I didn't have to worry about draining the battery by accident. I can get pics/more info on what colors and where if you are interested. I only had to run a ground (while redundant, but I didn't want to ground thru the steering bearings) back to under the A/B cover. | |||
Beachbuell |
I was wondering the same thing. I have a 04 XB12R Firebolt and would like to install a 12v source outlet on my ride. Has anyone done this to their Bolt? If so what was the final placement of the outlet and did you have to do a bunch of wiring or are there wires in place on the stock harness for this purpose? Thanks! | |||
Littlefield |
I use SAE connectors for that. They're the smallest connectors you can get, cheap, and are readily available at auto parts and trailer places. Only draw back is that the attachment to the bike is not really solid, the wire just kind of hang there. | |||
Jackbequick |
Jamie, I sent you photos earlier today of the thing you asked me about. You could put a mini-USB cable on the 5V outlet side of the thing like I made and I'd think it would work for you. That should be pretty easy to mount in an out of the way place. The mini-USB connectors have five contacts in them instead of the four in regular USB. Note the somewhat confusing details there on the Mini-A and Mini-B plugs and receptacles as they are nearly identical at a glance but easily identified by the interior color. The receptacles are color coded too plus there is also a MINI-AB receptacle that will take either Mini-A or Mini-B plugs and is gray in color. Not too confusing is it? Most or all of the devices I have (Garmin GPSRs for the most part) have Mini-AB receptacles on them. I notice the GXM 30 XM receiver for the zumo 550 connects to the zumo via a Mini-USB cable and that cable is used to provide power the receiver and it also serves as the data link to the zumo of course. Jack | |||
Corporatemonkey |
You guys are just great.  I think I have decided to go the USB route. Could this be the worlds first USB Buell???  But before I do this I have to ask Rich how he did his? It just looks so clean. I thought about doing something similar, but I have way too much crap under the fly screen. Did you you remove the horn? I asked jack in a PM about how to weatherize a circuit board. I have seen epoxy used, but I have never done it myself. Any ideas how. (Message edited by CorporateMonkey on February 22, 2007) | |||
Ft_bstrd |
You WILL become infinitely familiar with one of these, my son!  | |||
Rok |
Need some help on how to upload pics(Never did this before) but here is where mine is located.
| |||
Corporatemonkey |
Rok, the easiest way to upload larger pic is to use a photo service like photobucket www.photobucket.com its free to upload photos. It will provide a nice easy /IMG link that you copy/paste into your post. Easy as pie. | |||
Rich |
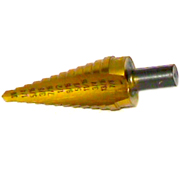
It ended up opposite of the keyswitch, it is tight in there.  I bought the socket, eyeballed it to center in the bracket, center punched it, closed my eyes, and started drilling! Really, once you look at it, there's only one good place for it. | |||
Rich |
Wow! sorry about the huge pic. | |||
Ft_bstrd |
Wow! sorry about the huge pic. Yeah, well.........your floor needs painting! | |||
Metalstorm |
I think for this purpose a huge pic is preferred. That's awesome Rich. Very factory looking. | |||
Reepicheep |
I got a spray can of that "plasti-dip" stuff. That will do a decent job of weatherproofing, but it takes a lot of coats. I spray it with maybe 5 coats (they dry quick), then wrap it tight with electrical tape, then put some cable ties around that, then spray *that* with maybe 5 more coats. I think Jack was talking about using Hot Melt glue, which I was considering as well. Altoids cans with hot melt glue would make curiously cheap enclosures as well  | |||
Buelet |
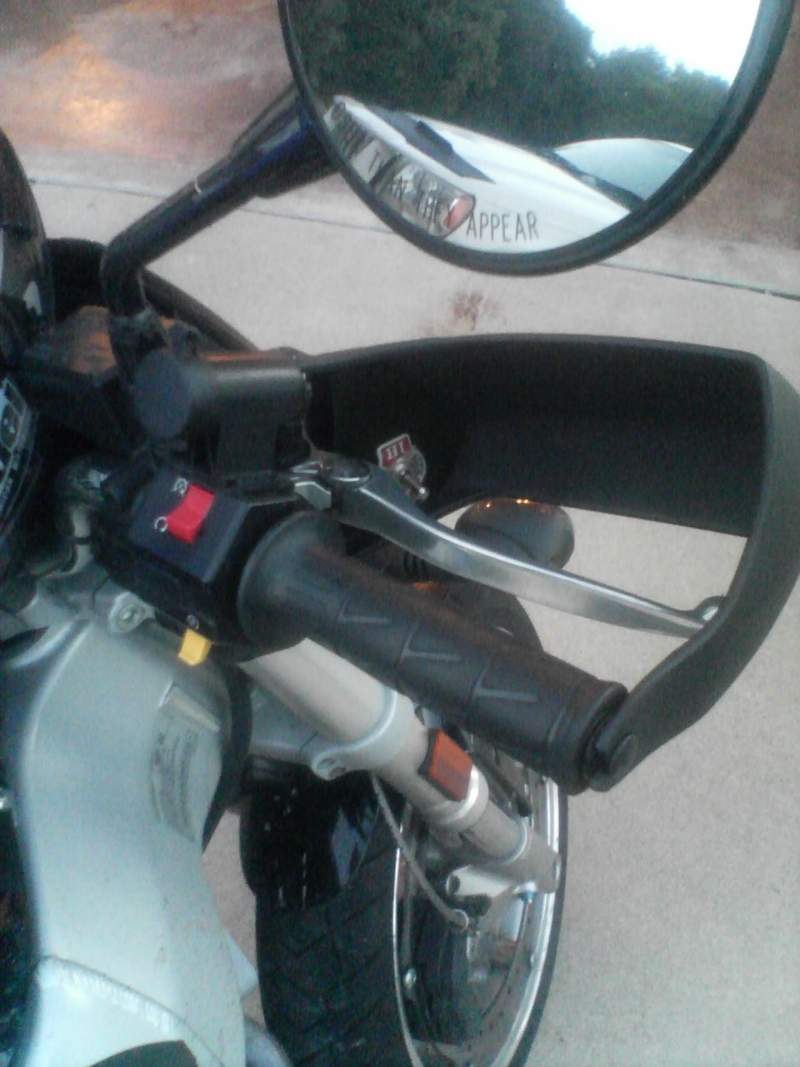
FWIW, here's my solution. More examples = Better future ideas! I got this outlet from AutoZone and used 3M double-sided trim tape to attach it. It's super solid w/ easy access.  | |||
Metalstorm |
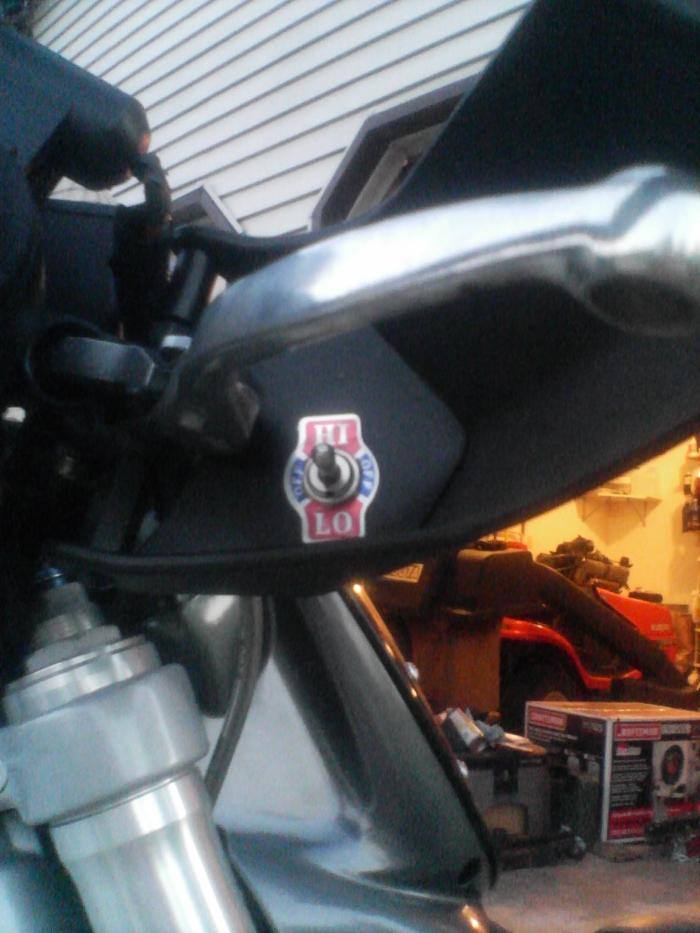
Buelet, That is brilliant! Does that switch actually fit inside that little nook or did you have to remove part of the hand guard on the other side of it to make room? | |||
Buelet |
Thanks man! I have a template laying around out in the garage somewhere. There isn't enough material in the "webbing" for the switch to mount, so I made a template out of some card stock. I used that to make a metal (aerospace scrap so it doesn't rust) overlay. The hole for the switch still is 100% in the plastic webbing on the guard, but the metal overlay provides much more area for a solid install and the switch holds it all together. I like it because it's as hidden as it can be while still being literally within reach of your finger tips, without having to lift a hand and it looks like it's all one piece. Here's another view...  | |||
Metalstorm |
Ahhh, I see That's very clever.  Would you be upset if I shamelessly copy that someday? That's the best place for a switch I've ever seen.  | |||
Corporatemonkey |
I feel like shooting myself right now... My project failed  Last night I was working on a usb circuit board when I realized I was out of color coded wire. Well I figure the same color wouldn't hurt as long as I labeled which was +/-. Of course somewhere along the way to the garage the label fell off. So of course I hooked everything up backwards. Frying the circuit, and blowing the parking light fuse on the bike. Sometimes life sucks... So tomorrow I get to try again with new parts.  | |||
Metalstorm |
Ouch, that sucks. On the bright side, the project did not fail because it hasn't been actually tried yet. T'is just a slight stumble but it looks like you've picked yourself up, dusted yourself off and are charging back down the path at full speed. I'll be checking in here the next few days to see how it all goes. You have my curiosity peaked.  | |||
Reepicheep |
Been there, done that. My sympathies  Hope the GPS and regulators all came out OK. I saw one of JackBQuick's 'ebay regulators'. Its a sweet little device, metal packaging, 10 watt, light and small switching regulator (5v). He got them *well* below cost... one would probably work really well for your USB bus voltage rail project. | |||
Dbird29 |
Corporatemonkey Just use a sharpie to mark the negative wire. No labels to fall off. You can do this! | |||
Corporatemonkey |
WOOT, it is all done. I now have a mini usb power source on the bike. This also mean the "secrete project" is all done (- one part, but that will come later) I will post a full report later tonight. Thanks to all who have helped. |