| Author | Message | ||
Wesbronco |
Has anyone put the SH847 voltage regulator in the stock position, or is behind the license plate/by the radiator, the two popular places to put it? I tried looking up the operating temps on this, but came up empty. | ||
Araignee |
I put the SH847 in the stock position on my 2009 1125R. Use the google search on the forum website, and you'll likely find a brief summary of what I did. I've got about 1K miles on the machine since I made the modification, and it never gets beyond warm even in hard riding on 90 degree days. Feels ambient most of the time. Takes a bit of finesse to ensure clearances and airflow and proper heatsink/ground connections, but nearly invisible when complete and trouble free. Roadstercycle.com is a great source of parts and advice. I have never understood why an electrical component should be mounted where it is subject to vibration, rain and rock spray, and is poorly grounded and/or heatsinked. (Message edited by araignee on July 26, 2017) | ||
Jmoreno88 |
Put mine in the stock location on my CR, removed the original mounting plate. Tight fit but have had no problems with it and gets plenty of airflow | ||
Wesbronco |
I don't think there are any operating temp specs on this site, at least none that I've found. I searched Shindengen's site and googled for datasheets and found none. Closest I found gave a thermal shutdown temp of 150 degC. Just be nice to know before I put it there. It fits perfectly by the license plate, and its not like I'm doing wheelies any time soon, but I don't see how that is a very safe area for such an important device. Though you can get to it super easy. | ||
Wesbronco |
I had to alter the plastic splash guard casing to get it to fit. 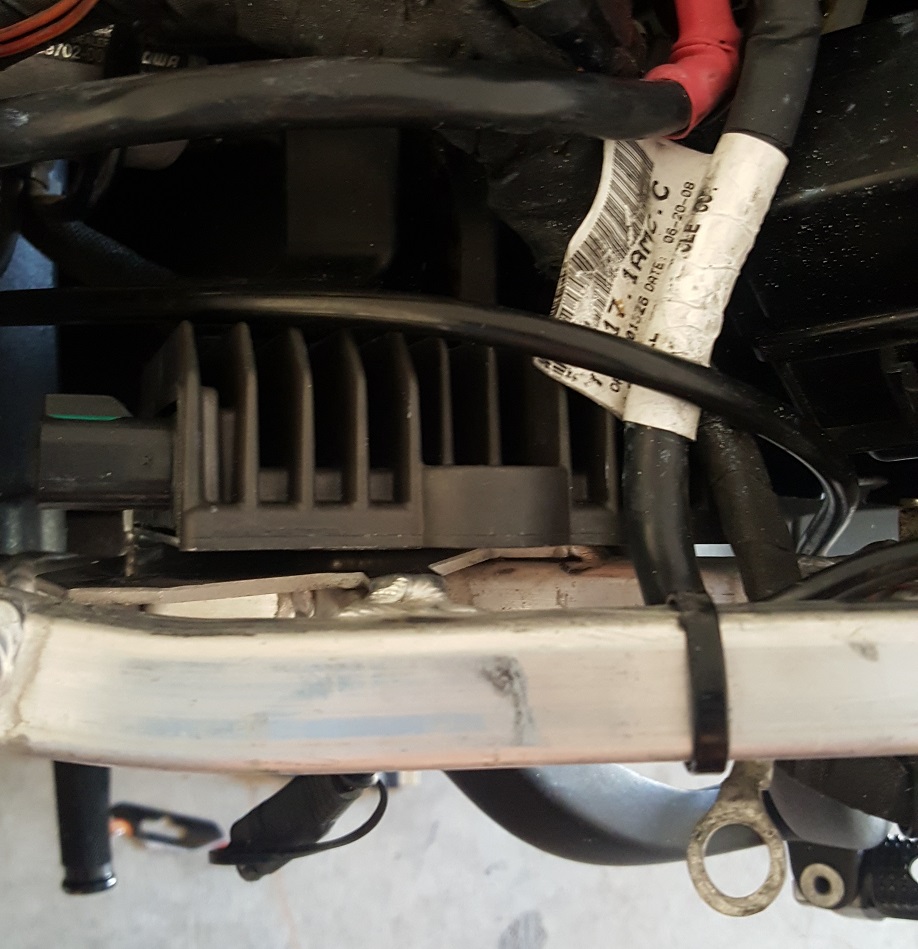 However, my question now is: What do I do with this wire? 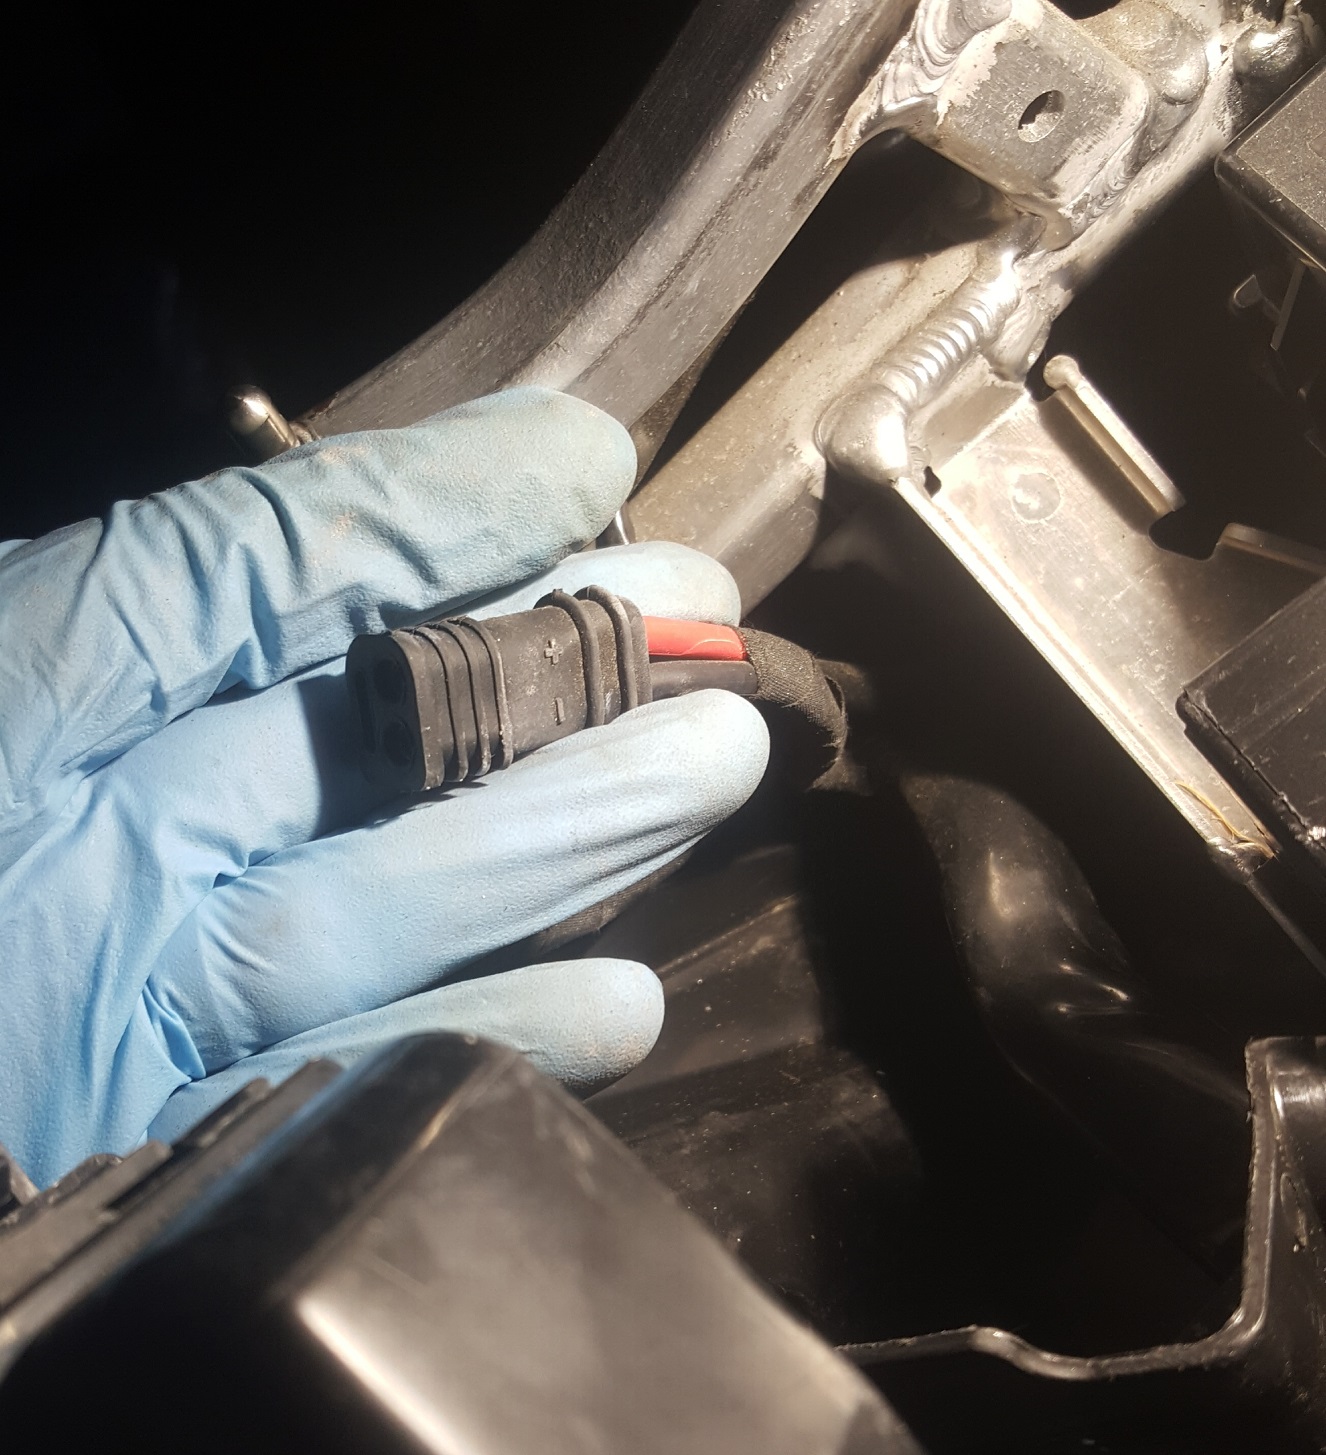 Seems as though the old VR connected to it. I thought I could just attach my new VR to the battery, but it seems the old VR went off in a different direction. Do I solder the old end on to my new VR? | ||
Panshovevo |
Seems like you should be able to wire the new VR directly to the battery, but there was a recent post where a guy had wired his 847 direct, and was getting high voltage readings. He wired it to that plug, and the problem went away, last I heard. If there is more to the story, I'd love to hear about it, as I have an SH 847 waiting to be installed on my '09 CR as soon as I get the motor back together and in the bike. | ||
Wesbronco |
I bought this from Roadstercycle so it came ready to connect direct to battery post. I just wanted to confirm that I wasn't bypassing anything that needed power by leaving the old VR plug unused. The old plug disappears into the wrappings and into the fusebox(?). I assume it connects to the battery post from there, but just wanted to hear from other members. thanks. | ||
Joe7bros |
Wired mine direct to battery, no problem. Also, mounted the V/R to the tail tidy, behind the license plate; also no problem. | ||
Wesbronco |
Thanks Joe7bros, I thought about that, but couldn't bring myself to put it behind the license plate due to common ground concerns. I know a motorcycle doesn't have speakers, so its not like I will hear any whining noises, and I don't see a lot of people complaining about voltage drops, or charging issues, but I couldn't find any spot on my license plate holder that was remotely connected to ground. I felt more comfortable with the chassis of a voltage regulator connected ground, so that was the final reason I put it in the original spot. Considering I haven't seen a lot of other issues from people with it behind the license plate, its just one of those things. (Message edited by wesbronco on August 01, 2017) | ||
Fred_is_not_me |
Did you make any modifications to the order on Roadstercycle or did you just order the $200 super kit? Do we need longer battery wire or stator wire? Did you have to cut and crimp anything or was it plug and play? Did you go back to the original harness setup or keep the HD bypass fix? | ||
1life2live |
I did the SH847 voltage regulator in the stock position this past spring so I can answer from my own experience: Did you make any modifications to the order on Roadstercycle or did you just order the $200 super kit? I made zero modifications to the super kit. Do we need longer battery wire or stator wire? I did not. Did you have to cut and crimp anything or was it plug and play? Really plug and play. I crimped the 3 yellow wires. Like others stated before, the hardest part is cutting the plastic so that the rather large VR fits. Drilling was easy. Did you go back to the original harness setup or keep the HD bypass fix? Original harness - take out the HD bypass. | ||
Fred_is_not_me |
Thanks. Bought everything... Looking to install few more questions... Are you using the original regulator mounting screws or did you cut then off? How is this thing mounted  ? ? How the heck did you get it in that position? I am having a heck of a time with all the wires and the bar that goes across. Do you have any more pics of the plastic you cut? (Message edited by Fred_is_not_me on July 01, 2018) | ||
Coastrambler |
One little thing. The VR case is not grounded. At least mine isn't. A Compufire I think. Had it on behind the license plate for several years now. It gets hardly warm to the touch. | ||
1life2live |
Pic of the holes drilled for the VR 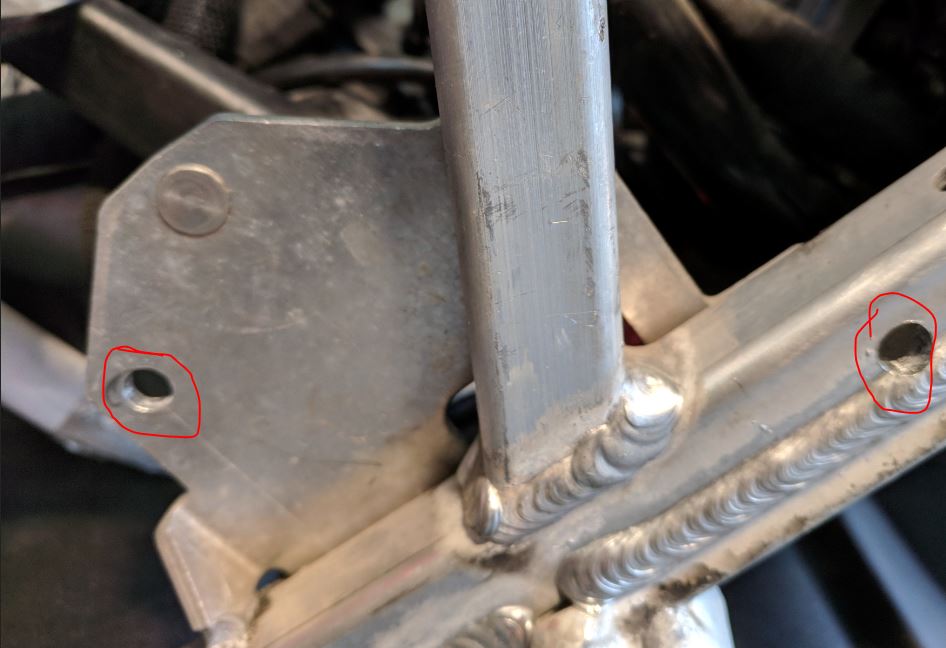 Pic of the area where the plastic was cut. Also showing original VR bolts cut off 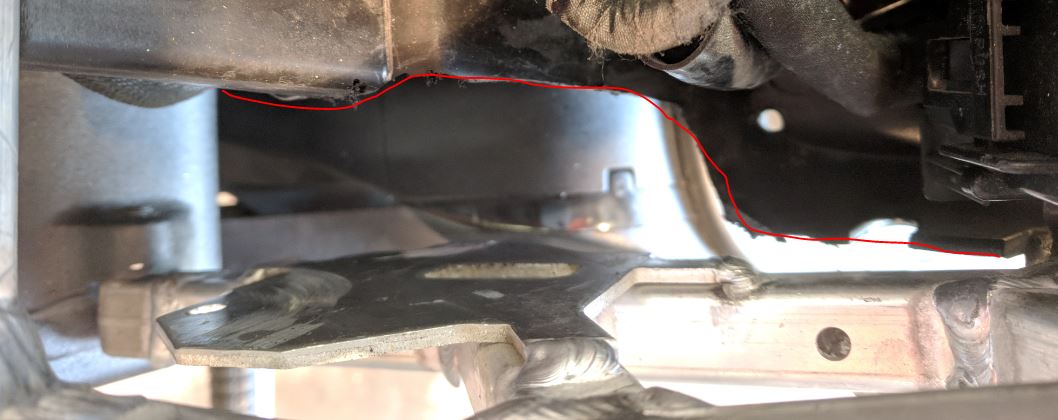 Pic showing VR bolted to the frame: I did use MX-4 thermal compound paste on the back of the VR before mounting. 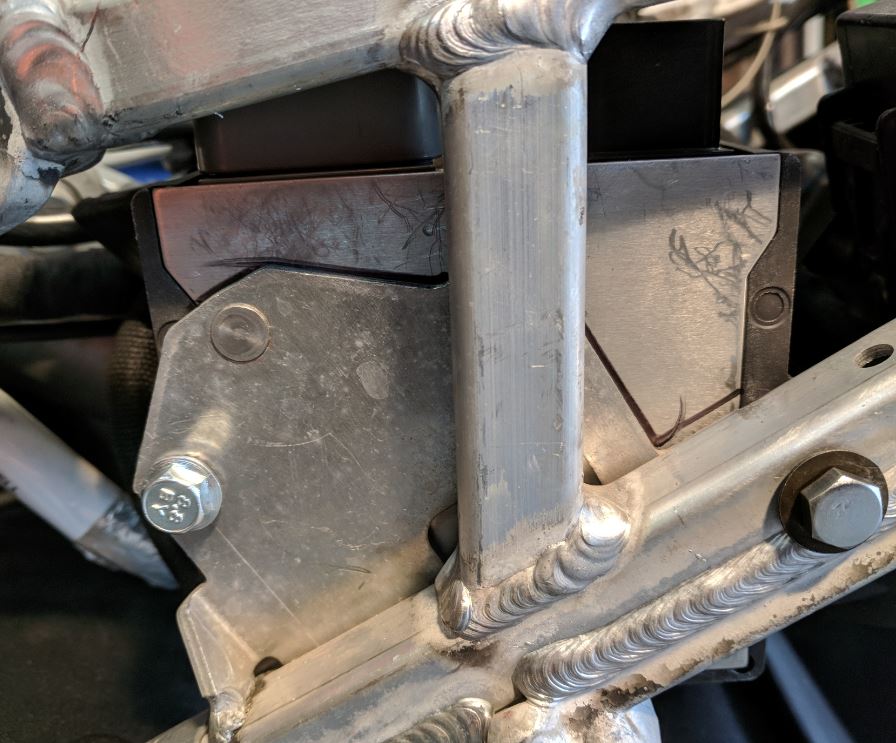 Pic showing VR wire routing to the stator connector: 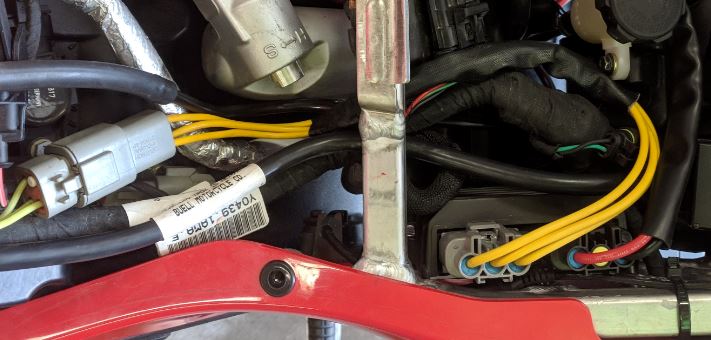 | ||
Fred_is_not_me |
That was helpful, thanks! I was thinking about doing it up like that, but the way I was configuring was to point the inputs toward the front of the bike. I had drilled out the top bolt and cut out a part of the regulator screw to slip on the bottom bolt. I was worried about water, but I imagine these connectors are water resistant. Could be wrong... I was also trying to avoid drilling into the frame if I could. Don't think it will make a different either way. 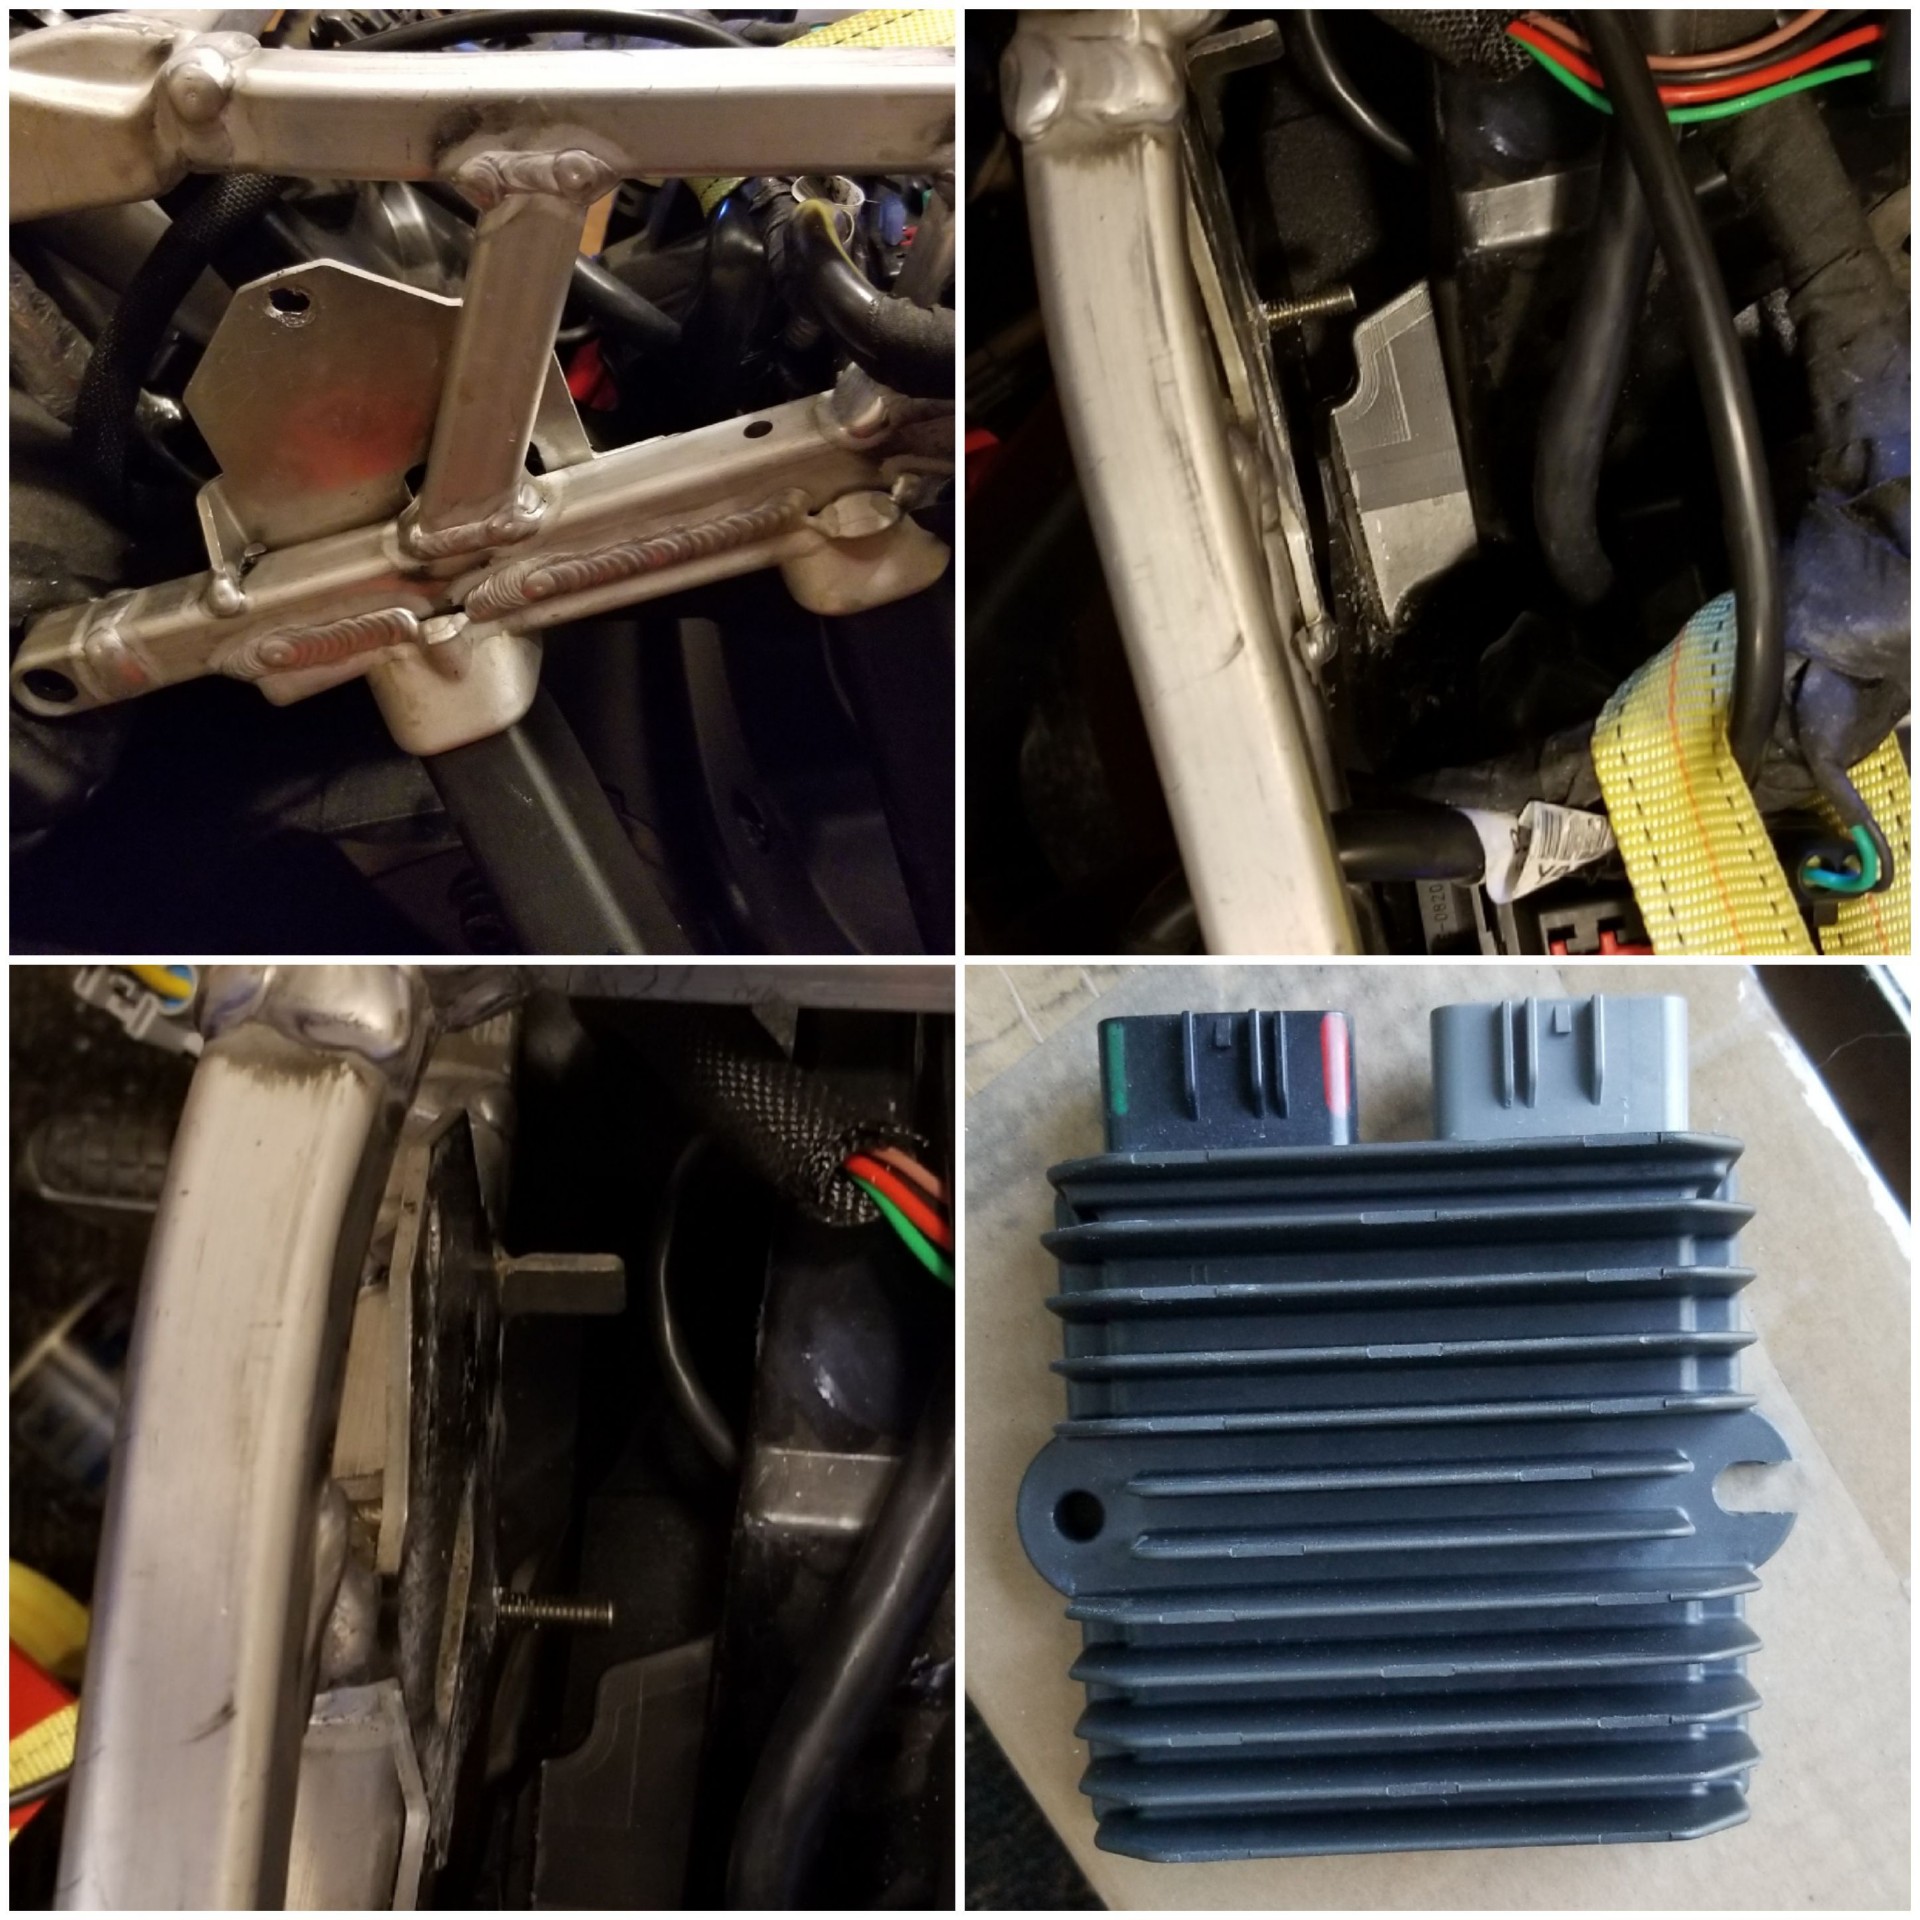 | ||
Fred_is_not_me |
Just an update in mine. I attempted to weld some of this, but I haven't tig welded for ever and my helmet was too dark  . I ended up burning a massive hole right through the aluminum piece I made. . I ended up burning a massive hole right through the aluminum piece I made. I took a plastic welder and melted some of the plastic to allow for a little more room. Don't know how much of this harness I can get rid of, though. 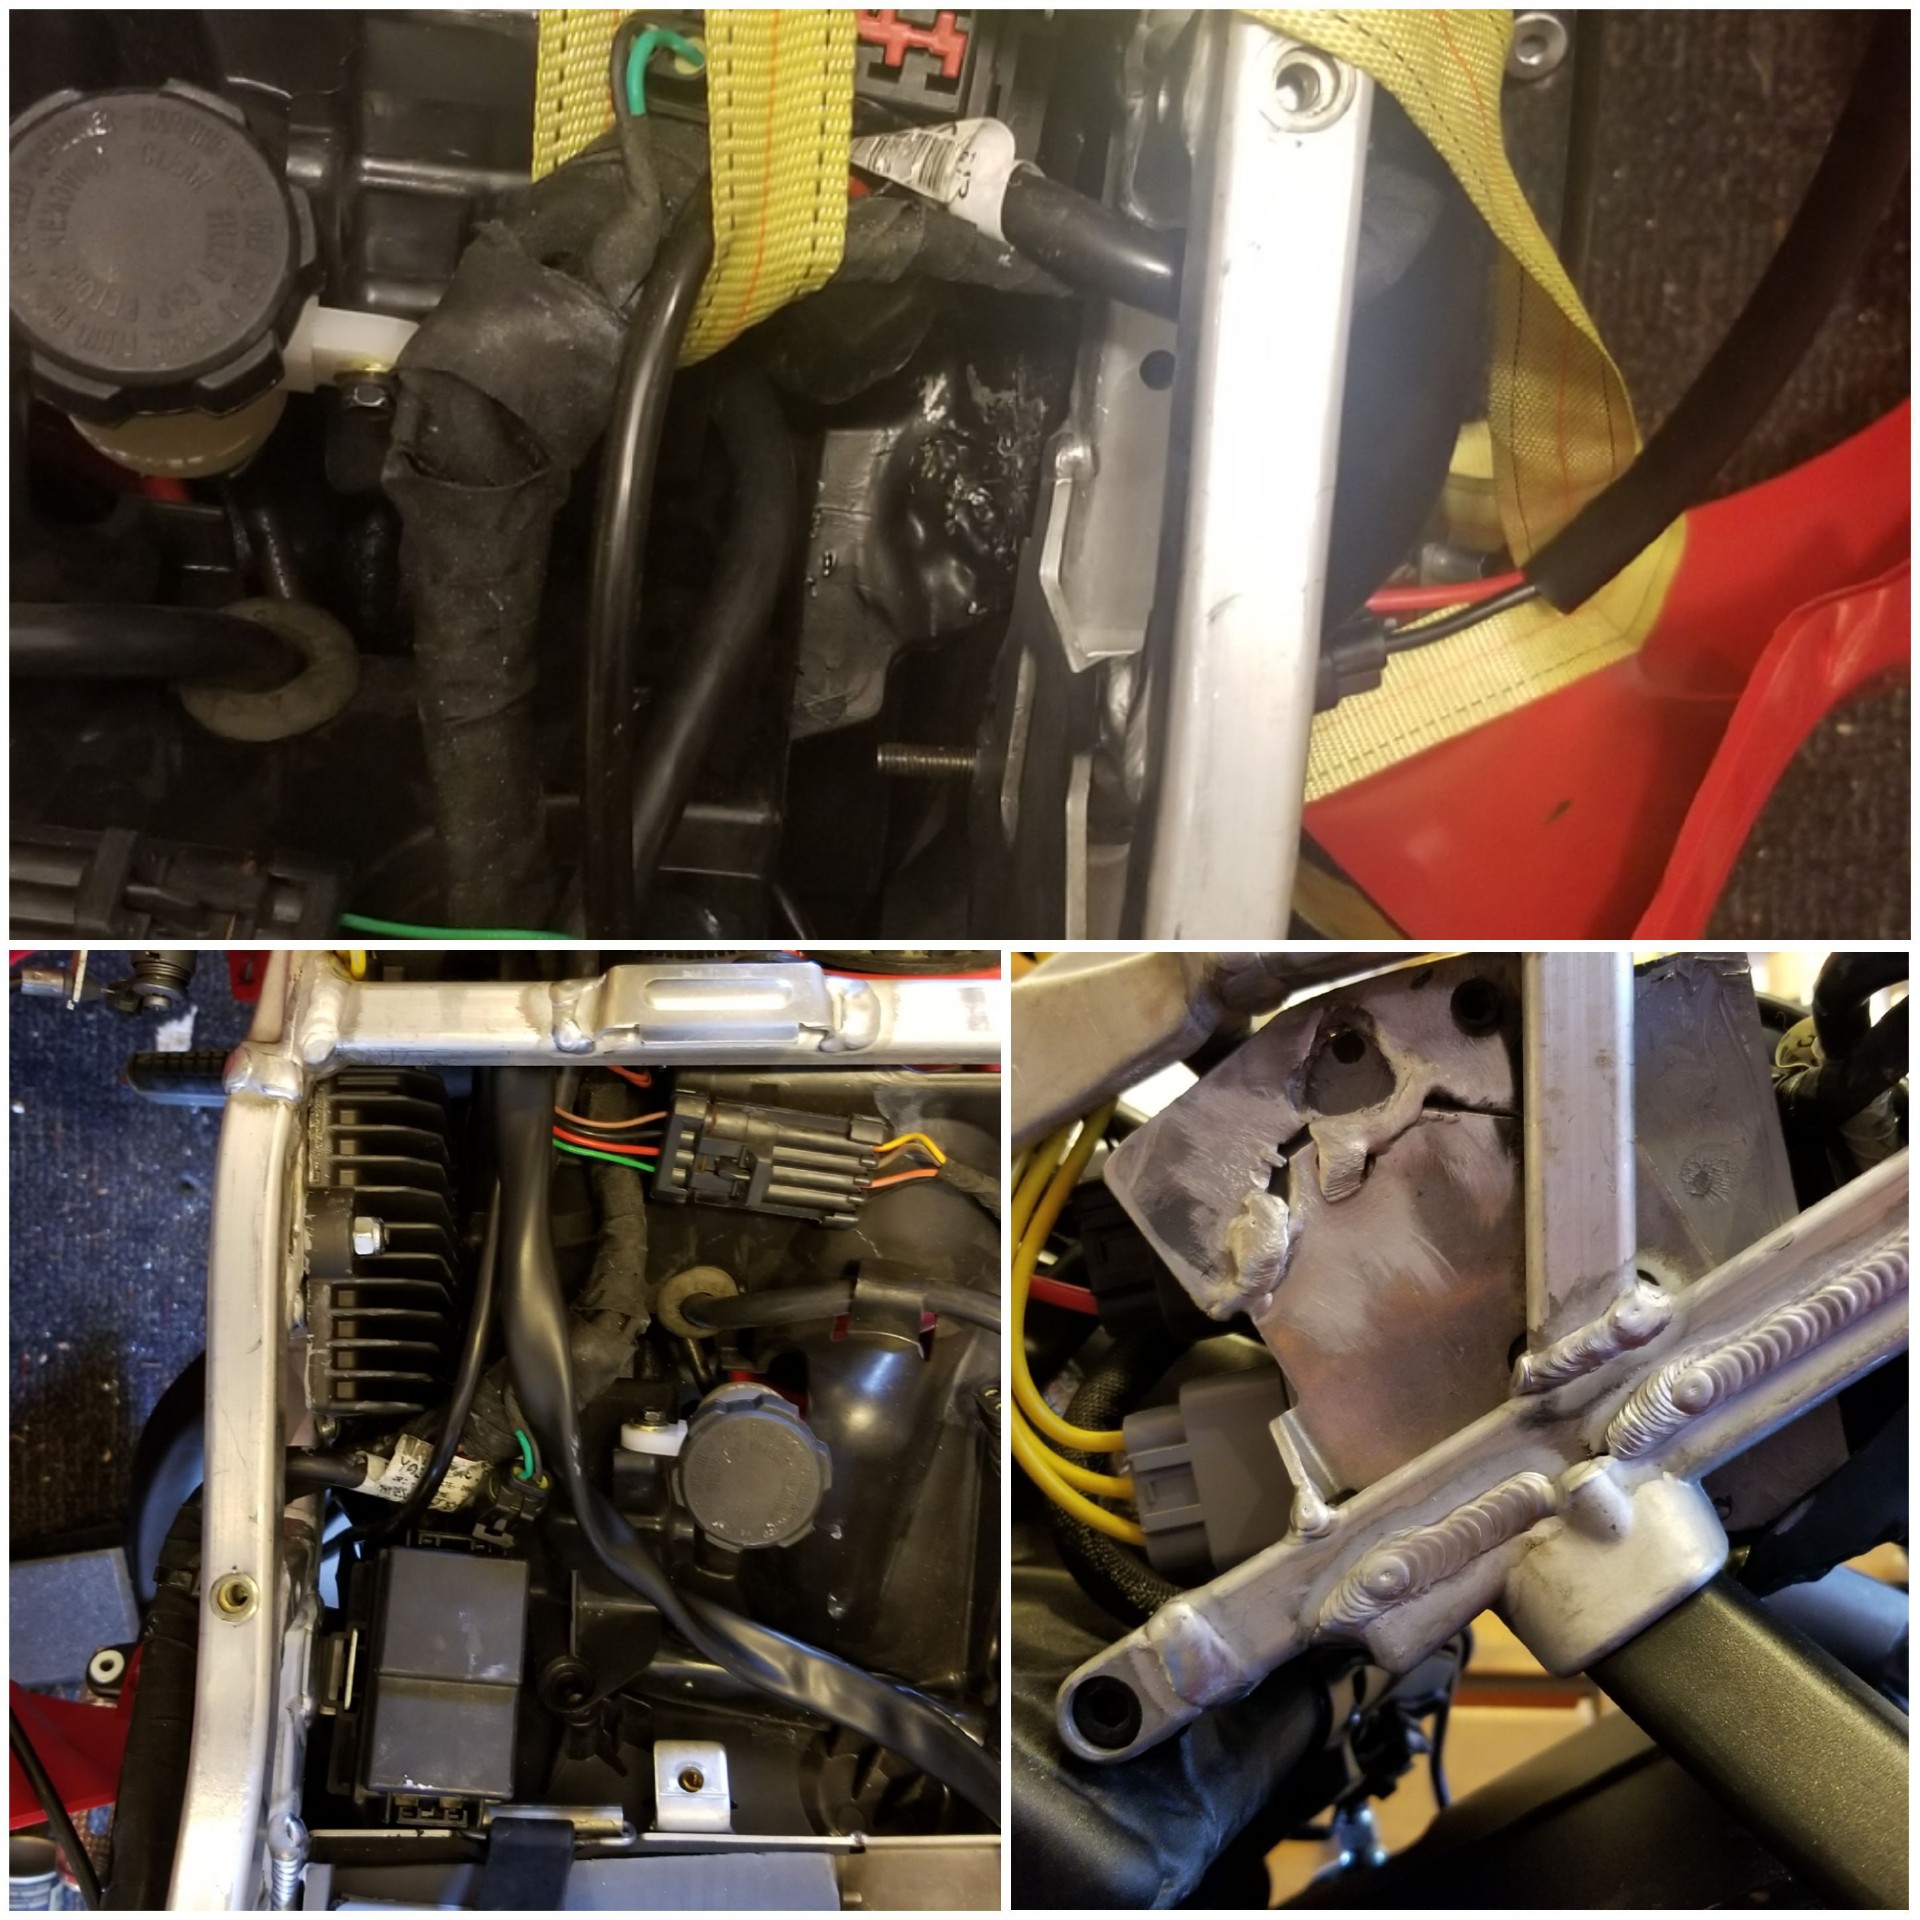 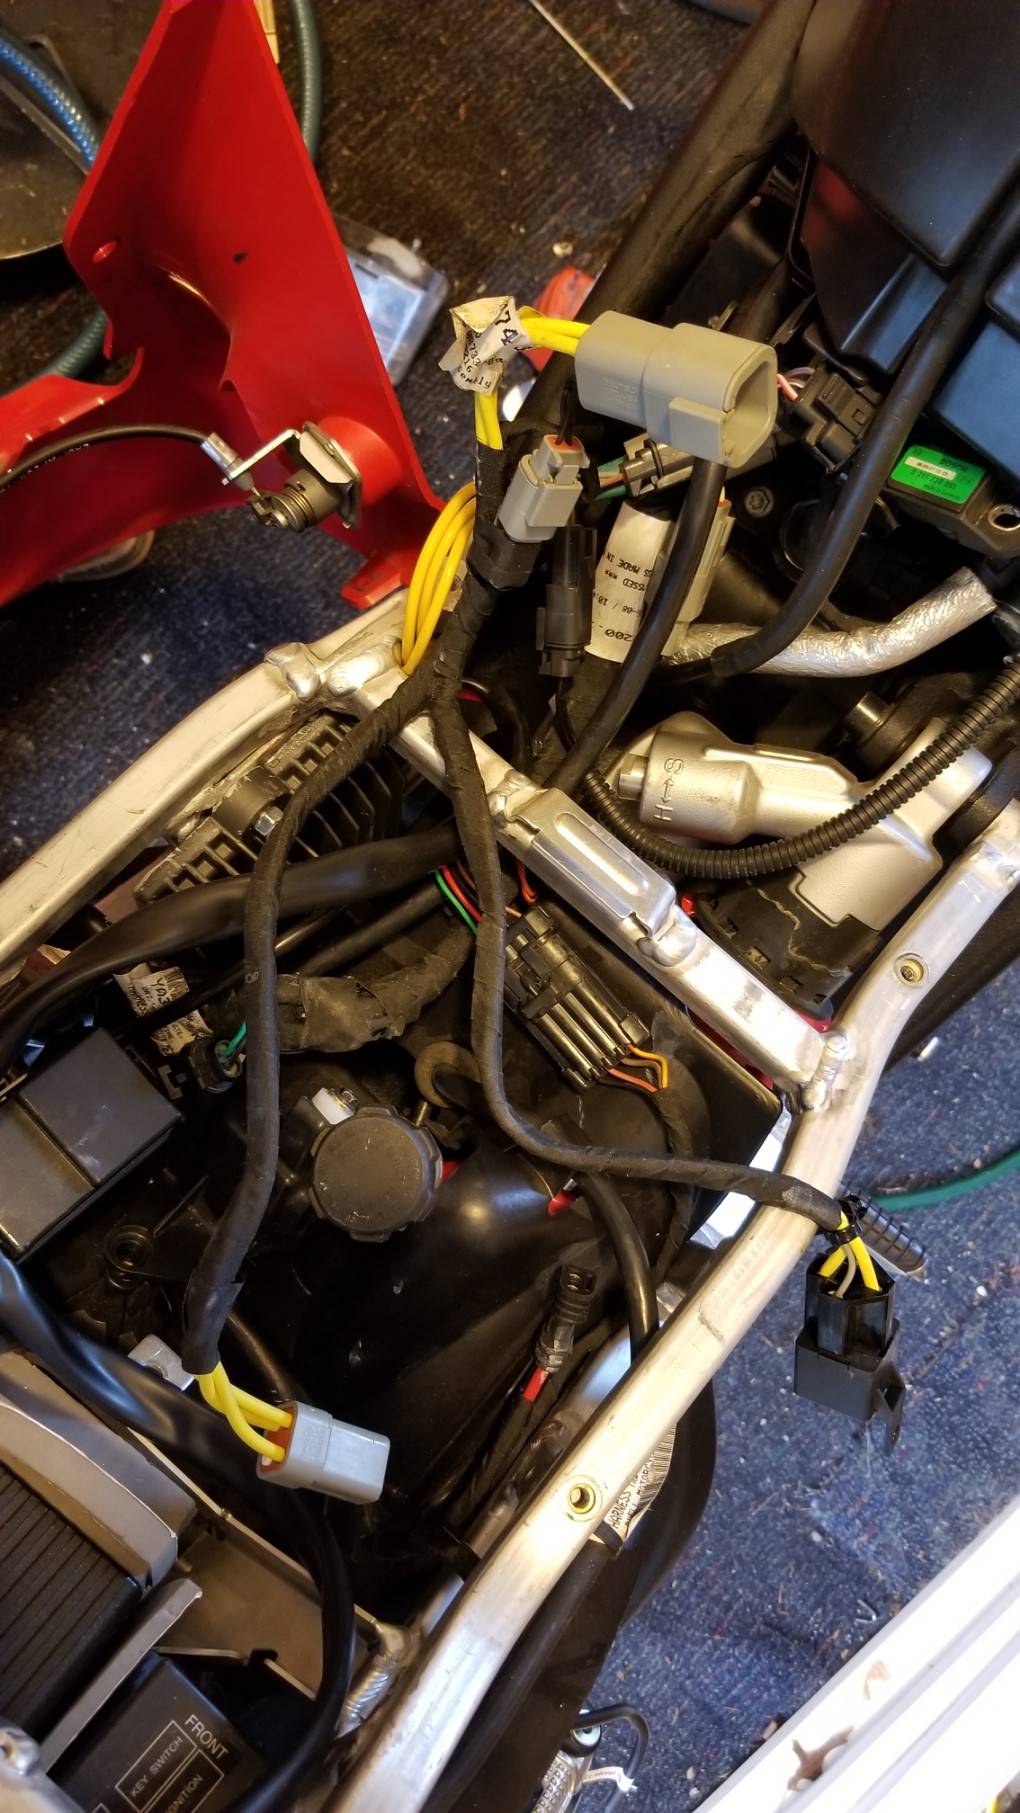 | ||
Dktechguy112 |
1life2live, Can you please let me know the size(s) of the holes you drilled for the new SH847 VR? I just bought one and I plan to install it in the stock location as well. |