| Author | Message | ||
Cocheeze15 |
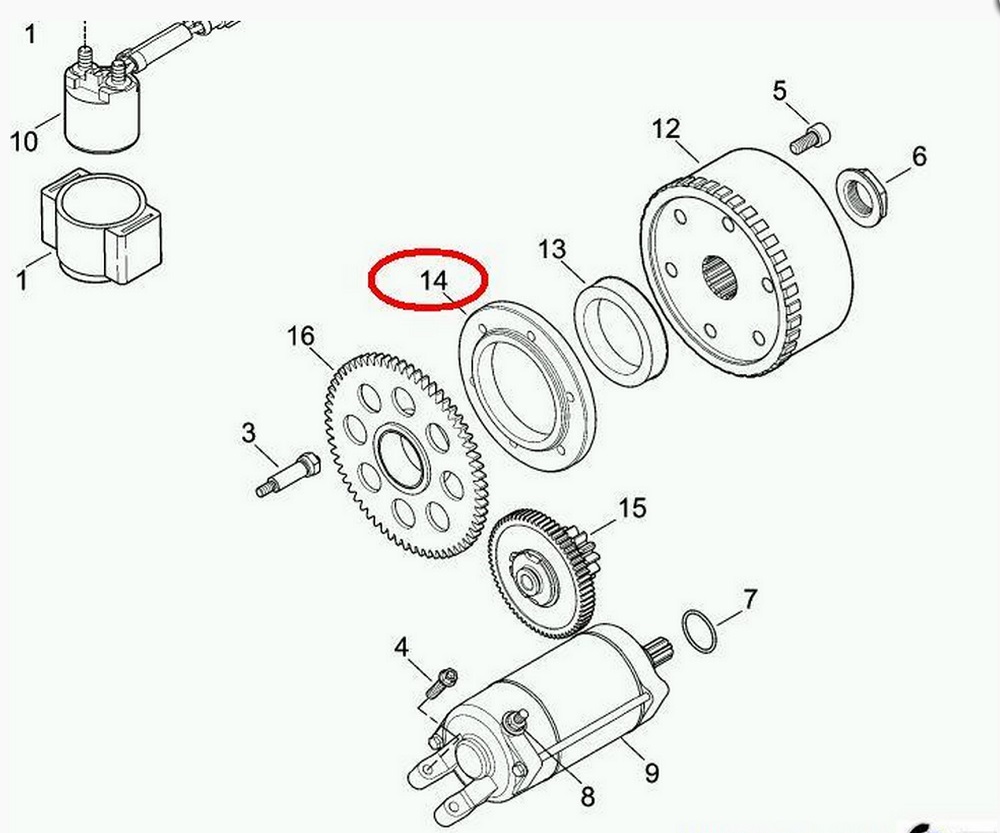
Just got my rotor back from twin cycles with the oil jet put in, but they took the sprag clutch off. Of course that's the one thing I don't have a photo of, and the manual doesn't really say anything. Should the raised portion around the hole be against the back of the rotor, or the opposite way? | ||
Terrys1980 |
In this drawing it appears the raised part goes against the starter gear. | ||
Terrys1980 |
 | ||
Shawns |
If you are referring to the larger of the 2 raised portions the larger goes into the sprag clutch 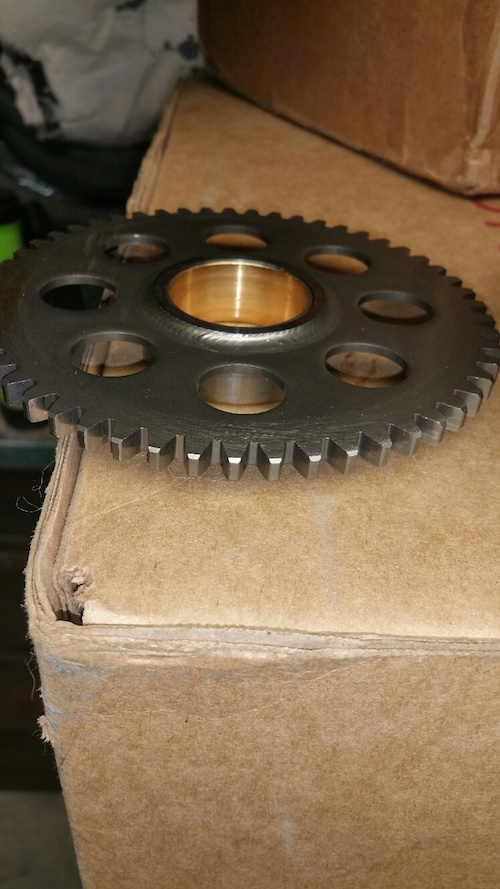 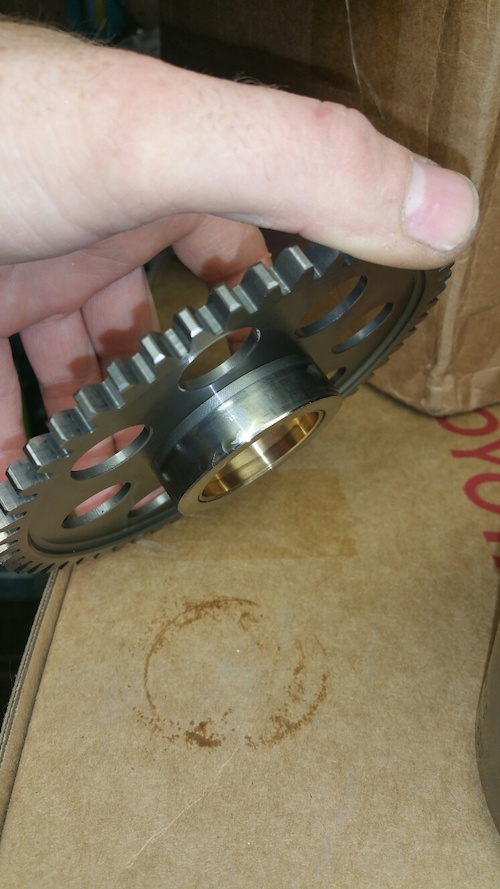 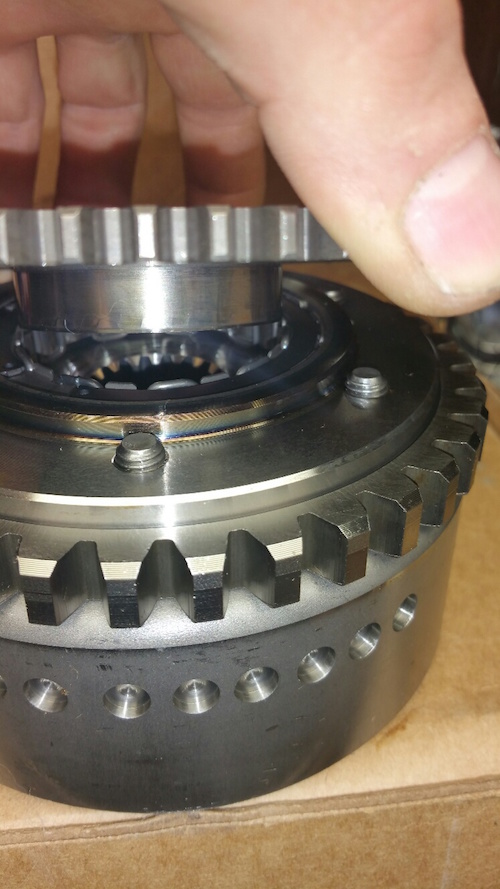 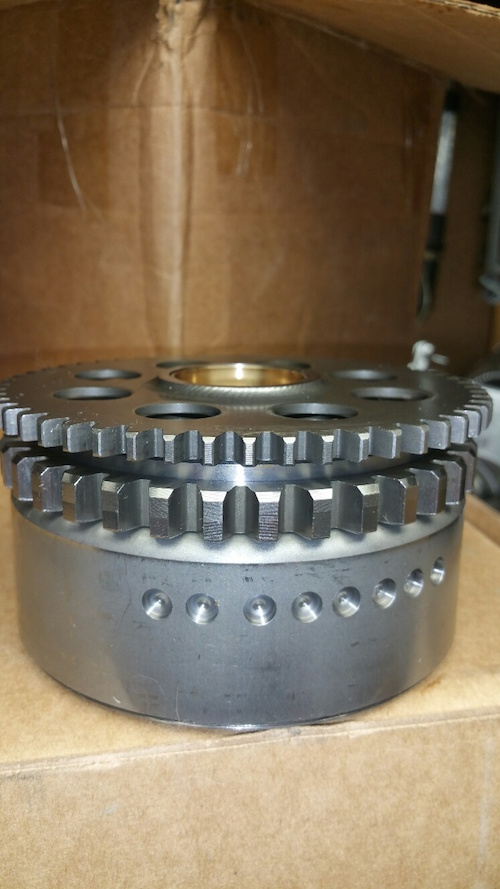 | ||
Cocheeze15 |
Wow, thanks, you're the man! | ||
Shawns |
No worries. Glad to help | ||
Superdav3 |
I need a EBR ECM, very interested, | ||
Jeepinbueller |
I guess I'll piggyback here: So I removed the rotor nut, took off the thrust washer, and the rotor/sprag assembly came right off (after breaking the sprag screws loose). Is there a preferred way of removing the sprag clutch and housing from the rear of the rotor? I haven't tried TOO hard yet, but it definitely doesn't just slide out of the rotor. That being said, once I get the sprag removed from the rotor, what can I do to inspect the sprag bearing, sprag housing, and starter gear (callout #16 in illustration above) to see what is damaged? So far, the bearings are all in place and nothing looks damaged from what I can see, and there's no troubleshooting in the manual about determining if the sprag is bad. (Message edited by jeepinbueller on September 10, 2015) | ||
X1brett |
Jeep, possibly you would use a heat gun to heat up the rotor to get it to expand slightly, making it easier to remove the sprag clutch. I know when I was trying to install the sprag clutch onto my new rotor (with oiling hole), the sprag clutch didn't want to fit into the rotor. I had the sprag clutch in the refrigerator and used a heat gun on the rotor. With the sprag cold and rotor hot, the sprag fit nicely into the rotor. Other than an obvious visual inspection, I don't know how to check for a bad sprag clutch. | ||
Jeepinbueller |
Thanks brett. I will use some heat over lunch and see if I can't get them separated. Thanks for the install tip, too. I can't seems to find these parts anywhere... I haven't called, but both Surdyke and New Castle H-D both have you check a PDF for parts stock, and I couldn't find any of the needed parts. Y0536.1AM Buell 1125R, CR Clutch Sprag Y0537.1AM Buell 1125R, CR Housing sprag clutch Y0539.1AMA (maybe) Buell 1125R, CR starter gear 53T | ||
Jeepinbueller |
Checked the surface finish where the sprag bearings contact the starter gear hat: the area is semi-metallically bright, but is not smooth to the touch. No deep knicks or irregularties--just a consistent rough finish. I'm assuming this is okay since it's a wear surface: please confirm, somebody. Still trying to separate the sprag housing from the rotor: I threaded the sprag clutch screws into the holes (from the rear) to help me pull it off ... methinks I need to light up the OA torch and put the propane one down, as I'm guessing it's not hot enough (don't want to damage/warp the rotor, though)! There is a very small knick in the metal wire/spring that hold the bearings in the sprag (it weaves in and out of the bearings laterally)--it looks like it caught the starter gear somehow. I doubt this is the cause of my failure, though. If I order a new sprag clutch, is the housing pretty much required/smart? (Message edited by jeepinbueller on September 10, 2015) | ||
Stevel |
The Sprague clutch rollers are NOT cylindrical, they are oval in shape. In use, they lay down in one direction and allow rotation. In the other direction, they try to stand up through friction and jam between the Sprague race and the gear surface. The direction the bind occurs in is reversible by installing the rollers with the opposite tilt. Both surfaces and the rollers must be smooth to function. When a Sprague fails, the rollers and both mating surfaces must usually be replaced. Failure to do that will either not allow the Sprague to function at all or it will be doomed to early failure. These are precision surfaces with a very fine finish, without which, it will not function reliably. That means that after failure, it is normal to replace both the Sprague and the gear. Both the gear surface and the Sprague are heat treated and hardened to resist wear. Heating these components beyond about 200C will compromise the heat treatment, so don't do it. Disassembly is all about finesse, not brute force or heat. Properly done, they just slip apart. | ||
Stevel |
The key to disassembly is to rotate the gear in the slipping direction and at the same time lift the gear out of the Sprague. Keep the gear square with the Sprague or it will bind. | ||
Jeepinbueller |
Thanks Steve! Guess I'll be ordering up all three pieces. I have the starter gear off the sprag (sprague) just fine: it's the sprag and sprag housing stuck in the back of the charging system rotor, currently. | ||
Jeepinbueller |
I think we are just barely missing one another (misunderstanding), Steve. Looking up at Terry's exploded BOM illustration, I have #13 and 14 stuck in the back of 12, presumably just friction force. My starter gear (#16) is not a problem as it slipped right out of the sprag without issues. The sprague and rotor have a friction fit that I'm trying to overcome... and I've been a dummy. I need to install the sprag screws in there normal position (within the rotor) but leave them loose and give them a tap with a heavy hammer and work the sprague out. | ||
Jeepinbueller |
Here is where I am... Wear on the starter gear sprag bearing interface 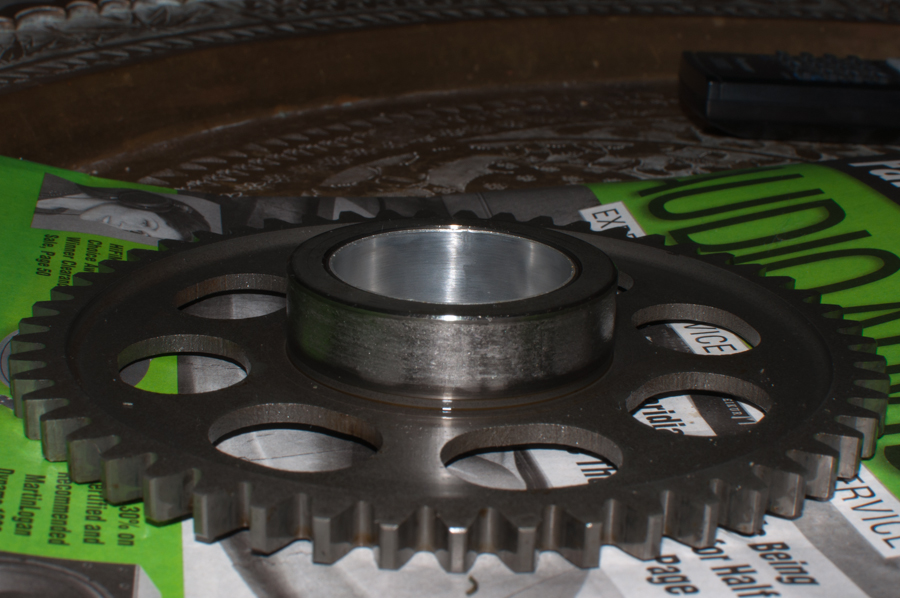 Sprag housing stuck within rotor. Am I correct that the circlip holds the sprag clutch in the housing as a unit? Or am I missing something there. You can see the worn part of the retainer at 2 o'clock. All the bearings seem okay? 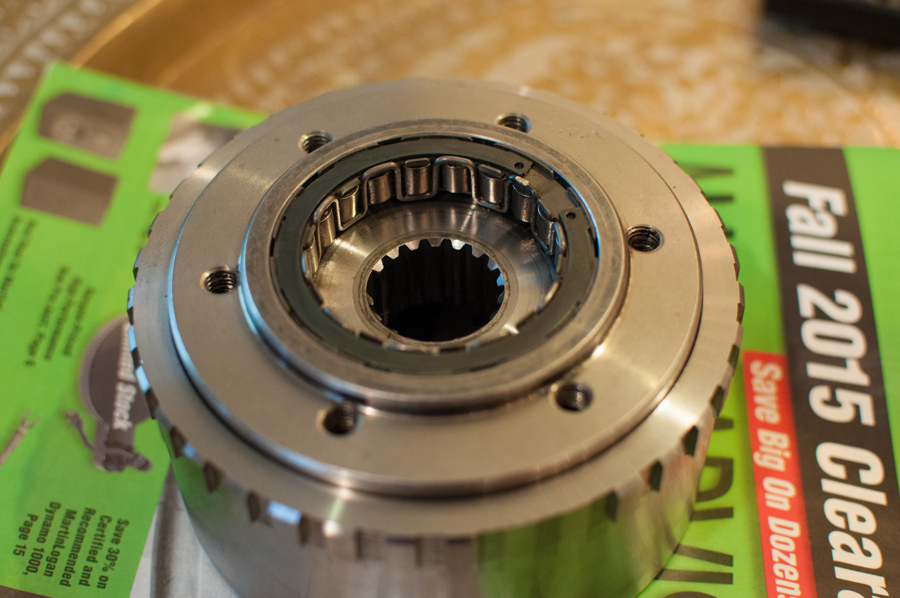 | ||
Stevel |
You need to separate #12 from #14 first. Re-insert the 6 screws, but leave them loose by a couple of turns. Then tap the screws from behind gently and evenly. Once separated, all will be clear. | ||
X1brett |
Jeep, if I remember correctly, the rotor has a strong magnetic pull to the sprag clutch. Possibly this is some of the issue you are describing. I don't doubt that is is fitting very snugly also, mine did. | ||
Jeepinbueller |
Thanks for the aid, guys. Got my mind slowed down enough to think: going to bring the assembly into the shop at work to use the arbor press on the screws and slowly push that sucker out. After that my plans are to... - Remove circlip and press the sprag clutch out of sprag housing. - Keep the circlip to install new sprag clutch into new sprag housing. - Install new sprag clutch into sprag housing (making sure bearings are orientated correctly), secure with reused circlip. - Install sprag housing assembly into rotor, secure with machine screws. Yadda yadda Parts are ordered!! $400+ for all three from New Castle. Ouchie | ||
Jeepinbueller |
Got all my parts today. Going to assemble tonight after I get some oil and the right thread treatments for the sprag clutch housing machine screws (Loctite 648) and rotor nut (Loctite 271/272). I have the 271, but I'll probably get the equivalent Permatex if there is one for the 648 since I couldn't find it. Questions, and these are because I don't have the newest revision of the FSM... mine is very vague on the sprag clutch and rotor install: 1.) Which way does the arrow stamped into the sprag clutch go when looking from the backside of the rotor? I can't get the circlip out since I don't have the right set of pliers, but once I do remove it I want to verify. Also, the quality issues with the sprag clutch bearings being installed backwards. 2.) Are there any surfaces that should be lubed with engine oil as I'm assembling? 3.) I don't plan on reapplying the goo on the inside of the ignition cover holding the stator wires. Hope this is okay. | ||
Zac4mac |
Do not use 271 in lieu of 272, it will break down from the heat. 272 is for high temps. Red 272 - tighten to 210 ft-lb. Back off 720 degrees, 2 turns, then tight to 295. a 2 ft breaker bar with 150 lb at 3 o'clock is 300 ft-lb. Z | ||
Jeepinbueller |
10-4, thanks for the correction, Zac. I'll be sure I have the right stuff on-hand. So I took the circlip out of the sprag bearing and installed it... on second look, it probably didn't even need to be removed to slide it into the sprag housing. There's no channel the circlip hold onto, just the smooth inner surface of the bearing race on the housing, right? Just seems odd the sprag can slide out of the housing even with the circlip in place. Proceeding! |