| Author |
Message |
    
Brokengq
| | Posted on Tuesday, July 01, 2014 - 05:21 pm: | 


|
Rob, pretty sure the service manual tells you to pull the circlip  hope its going well man. Hope to hear some good news soon! hope its going well man. Hope to hear some good news soon! |
    
Sl33py
| | Posted on Tuesday, July 08, 2014 - 05:38 pm: | 


|
Progress! Got the rewound stator back last night and hope to button her up tonight after work. Buddy from here is coming up to lend a hand and can't wait to be back in the saddle!!!
Nillaice - be sending you the locking tool hopefully this week or weekend - sorry for the long loan!!
Rob |
    
Brokengq
| | Posted on Tuesday, July 08, 2014 - 07:21 pm: | 


|
Awesome! Good luck man, hope it runs great. |
    
Sl33py
| | Posted on Wednesday, July 09, 2014 - 04:04 am: | 


|
She's alive! Started up, right to 14.2v at idle. Fan-flipping-tastic!
I know i should take her for a couple short rides and make sure no leaks etc., but i'm going to wing it and ride into work tomorrow. Can't wait!
Long night, but garage is a bit cleaned up and parts are all back on the bike so she's ready to roll!
I forgot what a PITA the rubber seal around the air intakes was... a little blood to the motorcycle gods and we got it to fit.
Buddy from badweb came and lent a hand - I definitely wouldn't have finished tonight otherwise.
Thanks guys!
Rob |
    
Dannybuell
| | Posted on Wednesday, July 09, 2014 - 10:09 am: | 


|
Wooooo Hoooo! |
    
Sl33py
| | Posted on Wednesday, July 09, 2014 - 03:56 pm: | 


|
Recap:
Following the threads here, and service manual - was able to get this done.
Some items i got that helped:
Instead of the HD Dowels for guiding the case on and retaining the gasket in the process - i used these threaded brass 6mm rods ($8 on amazon).
Permatex High-Temp Red RTV - ordered the "powerbead can" from Amazon as well and it wouldn't dispense (old/dry propellant?). So ran to local auto parts and picked up small squeeze tube (3 oz) - worked perfect (and plenty extra) if not quite as easy to dispense.
I have a nice 3/8" CDI 5-100lb digital torque wrench. I forgot it did in/lbs, so grabbed a small Tekton 1/4" 20-200 in/lb torque wrench ($38)
For the 32mm socket i bought the 1/2" deep socket kit ($50, but good to have in future).
Had the 25" breaker bar already.
Used some generic wire (14-16g) as mechanics wire to fish the stator wire down and back.
Loctite / Permatex:
272 -- 27200
648 -- 64000
I used the permatex versions of the above as they were easy to find. Fingers crossed the 64000 is loctite 648 equivalent! I asked and someone said it was...
A related post (from Shawns)has a response from EBR with this info:
quote:Hi Shawn,
Per the 2010 model year 1125R manual, we recommend:
Loctite 648 for the (6) sprag clutch bolts
Loctite 243 for the (3) stator screws and (2) cable cover fasteners
Loctite 272 for the charging rotor nut, torqued to 295 ft-lbs.
Thank you,
EBR Customer Service
For the rotor nut, used the infamous HF 300lb torque wrench. Worked perfectly and no issues. Coupon got it for around $65 which was too good to pass up.
Needed an adapter for the 3/4" torque wrench to 1/2" 32mm deep socket - I got the bigger set/kit (~$20), or you can grab just the one for ~$7.
Rotor, Nut, Gasket from EBR.
Rewound stator from CustomRewind.com - $140 shipped. Hindsight i would pay and ask to have it returned expedited. Took longer than expected to get it back.
No 1yr warranty like Rick's hotshot stator, but i think the quality was good. Talking with both Kirk and Gary (owner) - they know what they are doing and I like supporting them over buying a taiwan part for almost x2 the cost (even if it would've been faster). 16AWG higher temp wire like the DIY'ers have used.
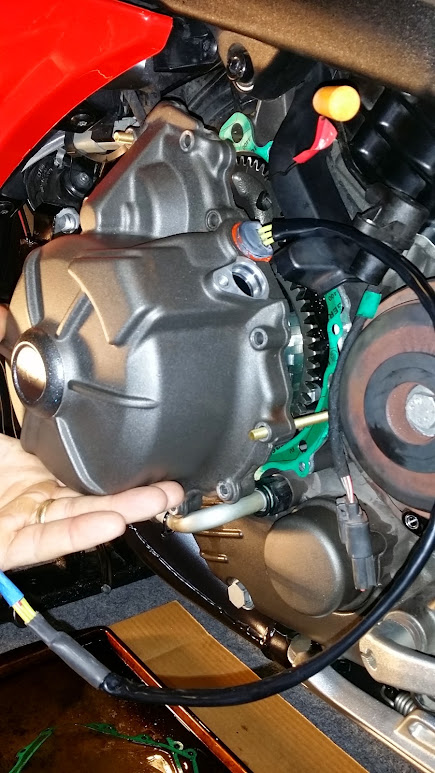
And of course some pics:
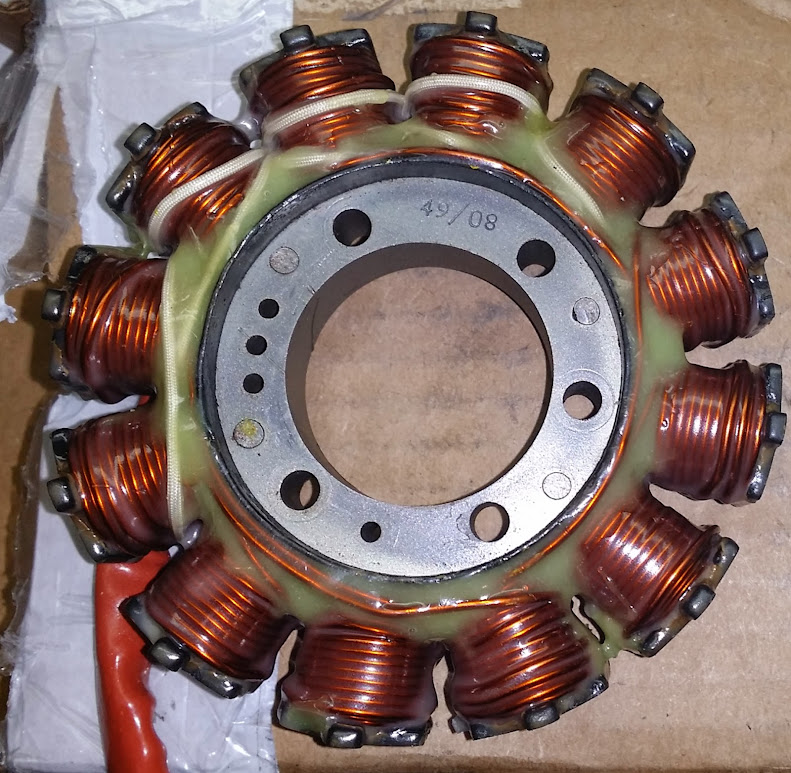
close-up of the wind (looks like a great job to me!):
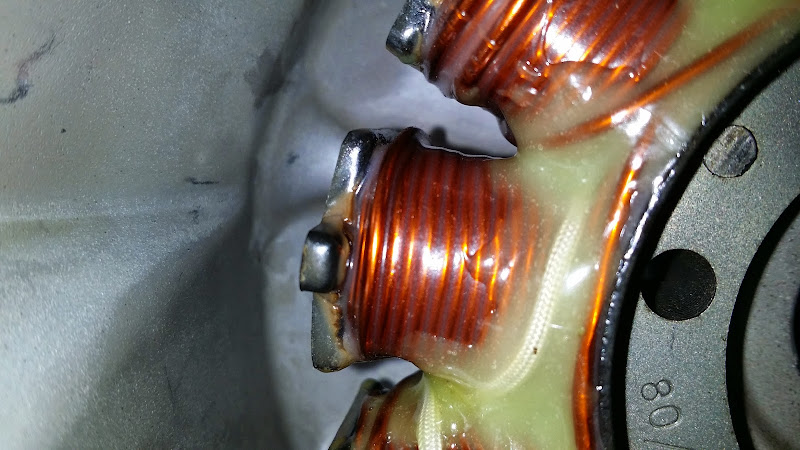
Using the brass threaded rods as guides:

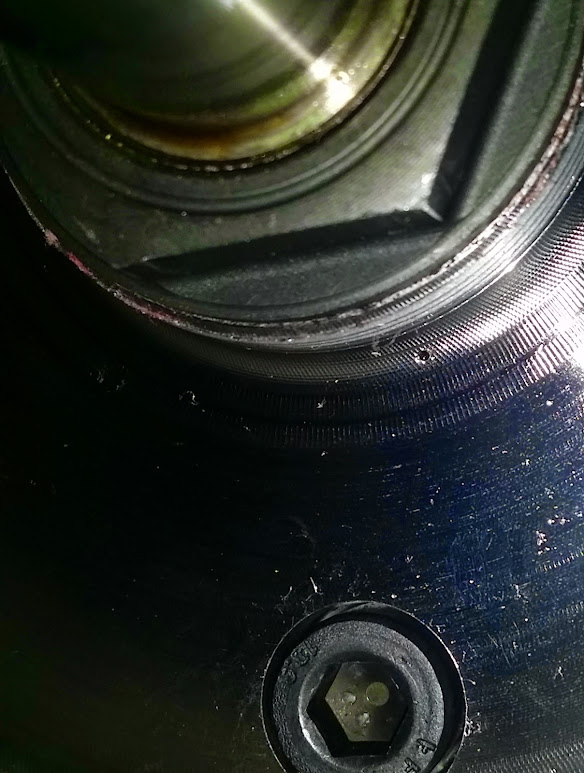
The EBR modified rotor for *hopefully* better cooling!:
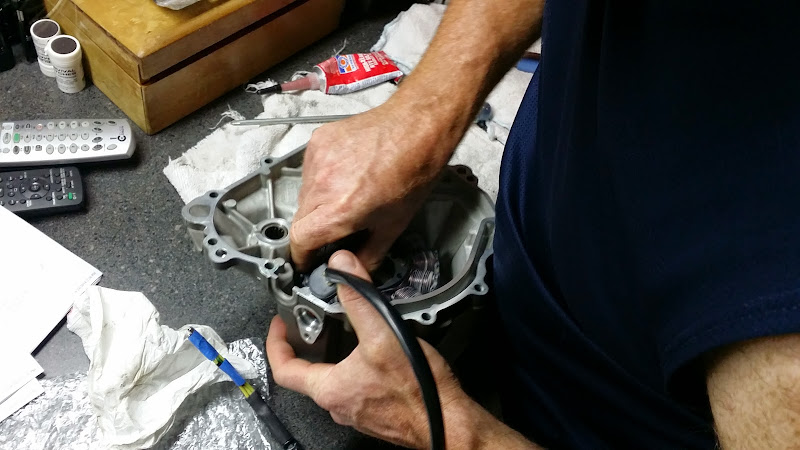
And my new buddy from badweb who helped and can't thank him enough! It wouldn't have been finished last night w/o the extra set of hands!!
Buttoning it up:

That's it folks. A long, long-winded, picture full, and hopefully helpful thread for the next guy doing this!
Thanks for the info and all the help - could not have done it without badweb/your help!!
Rob |
    
Figorvonbuellingham
| | Posted on Wednesday, July 09, 2014 - 06:25 pm: | 


|
Custom rewind from Alabama? |
    
Sl33py
| | Posted on Wednesday, July 09, 2014 - 06:46 pm: | 


|
FigorVB - yes indeed. Custom Rewind (customrewind.com) in Birmingham AL - absolute top notch guys.
I talked with both of them (Gary can be tough to understand, but Kirk is crystal clear). The knowledge of those two guys made it worth the lack of warranty, and i don't have a TW Hotshot to compare with, but it feels well done and the windings look as immaculate as you can with 100's of feet of wire involved.
If it were to fail in < a year, i know with a phone call they would hook me up and help make it right. Not a warranty, but still some peace of mind. Great customer service and it only takes a minute talking to them to know they are doing everything they can to make the best replacement stator for our bikes.
compared to the 5k mi i got out of my last HD/Buell one, i'm hopeful w/ the additional cooling and better windings to be done for quite a while.
Rob |
    
Bubba_
| | Posted on Wednesday, July 09, 2014 - 07:40 pm: | 


|
appreciate the recap Sl33py
and the pics...
the helpful hints were good too.
i like the dowel workaround you came up with.
that stator looks like a quality rewind.. fwiw, from a poor ole novice. |
    
Pnw_uly
| | Posted on Thursday, July 10, 2014 - 11:21 am: | 


|
"And my new buddy from badweb who helped and can't thank him enough! It wouldn't have been finished last night w/o the extra set of hands!!"
After all my efforts cultivating my BadWeb persona as a Son-of-a-Bitch, you have go and post that ? ? ? Just kidding, was great to lend a hand, and learned a lot for doing the same upgrade on my CR.
This website is awesome. Not certain if it's a characteristic of like-minded Buell enthusiasts, but from info sharing, tool loaning, assistance rendering, idea bouncing, etc., it's different than most other websites out there, and reinforces my pride as a member of the Buell/EBR community.
Okay, enough of the bromance - - "Son-of a Bitch" mode reactivated. . .
Ride Safe. |
    
Shawns
| | Posted on Thursday, July 10, 2014 - 06:00 pm: | 


|
Thats so true and funny. |
    
Brokengq
| | Posted on Thursday, July 10, 2014 - 06:08 pm: | 


|
Congrats Rob! Hope its riding perfect.
I love BadWeb. In fact, I never close it on my phone. Its like my Buell/EBR crack for the day. Never met a person on here I didn't like. Sometimes I just hope they all like me back  I'll continue to come here as long as I can hold a bike up. I'll continue to come here as long as I can hold a bike up. |
    
Sl33py
| | Posted on Thursday, July 10, 2014 - 06:46 pm: | 


|
Thanks everyone! Especially PNW_Uly. I never even knew your BWB alias - just got the email and had a stranger show up to my house!
Only issue i had after the final button-up was my own fault. Had a bit of an oil leak and was starting to stress a bit (did not want to have to crack it open again and see what i did wrong)... then i remembered i didn't do my final tighten down on the oil drain plug (D'oh!) Gave it a bit of a turn/tighten last night at home and no leaks this am!
Running like a champ, and the week or two on the Electra Glide helps me appreciate the 25R all the better. More comfortable on my low back to lean forward than to slouch when i ride (my own fault), and SO MUCH more nimble in traffic and slow stop-go. Better balanced and a "smidge" more power doesn't hurt either.
Love love love my bike and a happy camper to be back on the road! |
    
Shawns
| | Posted on Thursday, July 10, 2014 - 10:12 pm: | 


|
I am on this damn site all the time..lol. Even the resident Buell mechanic references the site when he gets stumped on mine. |
    
Pnw_uly
| | Posted on Friday, July 11, 2014 - 02:41 pm: | 


|
"Thanks everyone! Especially PNW_Uly. I never even knew your BWB alias - just got the email and had a stranger show up to my house!"
My greatest contribution to this effort was compelling you to remove that Harley key chain from the ignition key of your 1125R. . .
Without a thread hi-jack, Rob's been assisting me with the same issue - - he was at my house until 1:00 a.m. this morning helping me button up the CR ! ! ! How's that for BadWeb camaraderie? ? ?
Thanks again, could not have done it without your assistance. 14.2 volts all the way in to work this morning, so looks like another successful transplant.
Paul |
    
Sl33py
| | Posted on Friday, July 11, 2014 - 05:26 pm: | 


|
Round 2 (literally):
PNW_Uly (aka Badweb SOB) and I got his bike done last night! He helped me with mine earlier this week and we finished up around 1am this morning getting his back together and on the road!
He got a new OEM and is going to rewind the old for the next time it's needed (great to have a spare for sure):

OEM Windings to compare w/ the rewind i got:

I have to say they do look nice, but how they look is less important than longevity IMO. I think the rewound one i have is nearly as neat especially since heavier wire and coating for higher temp.
Couple action shots...
And finally ready to ride!

It's good to have this info handy:
Torque specs (roughly in the order doing it as reassemble):
Sprague bolts (if you replaced rotor) - 11Nm / 97 in-lbs
Rotor Nut - 2 times to 210lbs, back off 2 turns between, and final to 295lbs
Stator fasteners (3 bolts) - 11Nm / 97 in-lbs
Stator cable cover - 4Nm / 35 in-lbs
Crank locking tool plug - 15Nm / 11 ft-lbs
Oil Strainer Inspection cover bolts - 11Nm / 97 in-lbs
Oil Filter Cover bolts - 11Nm / 97 in-lbs
Reference:

Dowel locations, and torque sequence.
Ignition Cover Fasteners - 11 Nm / 97 in-lbs
Fill up the oil, reconnect battery, and start her up!!
Of course some lessons learned:
Stator side case gasket - before you put on the threaded guides (if you get the ones i got, place the gasket in place and then place the rods. Keeps from any wear or chewing up the gasket w/ the rod's threads.
Mechanic's wire - not magic, but dependent on good tape and lube to fish back up. We had a bit of an issue w/ cheap-o HF electrical tape and had to re-engineer the routing as a result. Better tape and more surface contact of the fish wire/mechanics wire to the leads. A bit of a spin around the 3 wires or in and out of the 3 wires w/ a solid wrap the second time worked perfectly.
Not sure if it matters, but routing the Stator's 3 wires *behind* the CPK and other wire (goes to kickstand sensor for non-US bikes) seems to make it easier to place the CPK plastic cover back. Mine is in front of it and his is behind those wires - definitely easier behind.
Still a PITA, but the inner airbox and gasket around the intakes - pull both front and back up over the intakes and start at the front intake and work your way back. Lube the breather hose and opening before you place the inner airbox cover down to make it easier to fish through and up into airbox.
Longer straight allen keys are helpful. A good micro torque is really needed. Even if your HF says it does 5-100 lbs - at 8lbs (98 in/lbs) we couldn't get it to click at the correct value (or click at all). The little tekton one i listed is a great inexpensive option worth having specifically for those crank case bolts if nothing else.
Lastly - it helps to have a good buddy who stays until 1am to get your bike running! PNW did that w/ me on Tue and I returned the favor last night!
His bike is absolutely immaculate. His KICKSTAND is cleaner than my entire bike. I definitely need to give her a bath this weekend!
Nillaice - Since i had the tool we used it last night and it should be heading back to you directly. Thank you sir!
Another long post, but hopefully it will help the next guy doing this. Added what i kept having to find (torque specs and order).
Rob |
    
Brokengq
| | Posted on Friday, July 11, 2014 - 05:49 pm: | 


|
Not sure if it matters, but routing the Stator's 3 wires *behind* the CPK and other wire (goes to kickstand sensor for non-US bikes) seems to make it easier to place the CPK plastic cover back. Mine is in front of it and his is behind those wires - definitely easier behind.
That's what I was talking about a few weeks ago. That cover is a bear if you don't know exactly where to put the wiring. Nice to see you found a workaround. |
    
Shawns
| | Posted on Friday, July 11, 2014 - 05:51 pm: | 


|
It's a shame they didm' leave a bit more room to run the wires. |
    
Pnw_uly
| | Posted on Saturday, July 12, 2014 - 11:30 am: | 


|
Great write-up Rob, that section on the torque specs and sequence plus "lessons learned" ought to be printed out for anyone tackling this project.
Hot and lots of stop-and-go traffic on the commute home yesterday, voltage dipped to 12.8 with coolant temp at 200 degrees, then right back in the 13+ range once moving...
Nillaice - Tool back to you today via USPS.
Thanks again to Rob and this site for all the great info and assistance. |
    
Sl33py
| | Posted on Saturday, July 12, 2014 - 05:53 pm: | 


|
quote:Great write-up Rob, that section on the torque specs and sequence plus "lessons learned" ought to be printed out for anyone tackling this project.
Hot and lots of stop-and-go traffic on the commute home yesterday, voltage dipped to 12.8 with coolant temp at 200 degrees, then right back in the 13+ range once moving...
Nillaice - Tool back to you today via USPS.
Thanks again to Rob and this site for all the great info and assistance.
Paul - you should look at removing the HD "fix" and i think your voltage will go up. My lowest (similar 200-203 coolant in stop/go) voltage was around 13.2 i think.
3 days of commuting in the heat and 200+ each time - going to quickly see if the new EBR rotor and higher temp rewind will hold up!
Anyone have more info for PNW_uly on removing the wiring harness fix to help w/ voltage?
Also - Paul - up for a coolant flush job soon? get the stuff and do both bikes? Will shoot you a txt.
Rob |
    
Noobuel
| | Posted on Saturday, July 12, 2014 - 11:59 pm: | 


|
With the EBR Rotor, Rick's Hotshot stator, the HD harness removed, and the stock VR the lowest I think I've seen is 13.5v. Some of that riding in San Diego (east county) temperatures north of 100 ambient. |
    
Pnw_uly
| | Posted on Monday, July 14, 2014 - 10:35 pm: | 


|
"Paul - you should look at removing the HD "fix" and i think your voltage will go up..."
"With the EBR Rotor, Rick's Hotshot stator, the HD harness removed, and the stock VR the lowest I think I've seen is 13.5v."
After seeing the voltage drop to 12.2 on the commute in this morning !?!? (bad, bad traffic), bypassed the H-D "fix" before the ride home and voltage for the return commute never dipped below 13.5 volts.
Happy Camper. . . |
    
Nillaice
| | Posted on Tuesday, July 15, 2014 - 12:42 am: | 


|
Teamwork makes the dream work!
Good job to both of you SOB's  |
|