| Author | Message | ||
Tattoodnscrewd |
Turned my red 1125CR into the proper color and made it a sport tourer ... 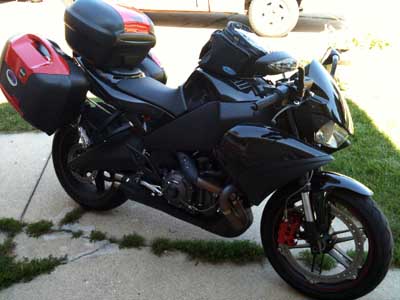  | ||
No_rice |
except for the red bags ya dun good  lol lol | ||
Sekalilgai |
nice! | ||
Cowboytutt |
Looks good. I don't know about you, but I find the stock seat is a real pain and needs an upgrade. CR's are such cool looking bikes! Glad I got one too. -Tutt | ||
Tattoodnscrewd |
Yea, yea, yea, Tim .... I borrowed the side cases from Mackay ... and I painted the top case way back when I thought I was stuck with a red bike .... I have to get my own side cases now - then I will paint all 3 to match again ... I also want to add a cross piece on the brackets I made (hacked up a set of Moto Guzzi brackets I picked up for cheap), then blast and powdercoat them the same as the frame. But I found use #31 for a top case !! Not only can it haul beverages .. it can keep 'em cool ... briefly .. haha 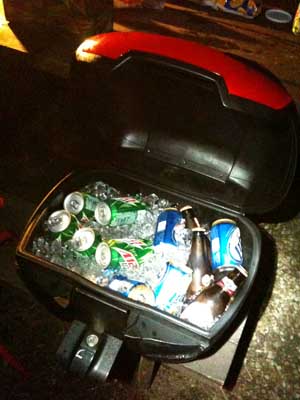 And a few more shots ... 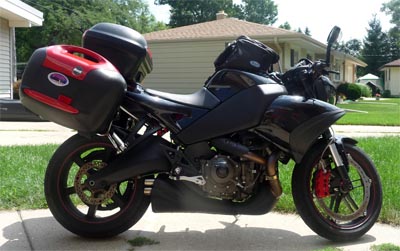 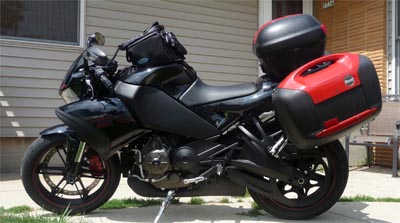 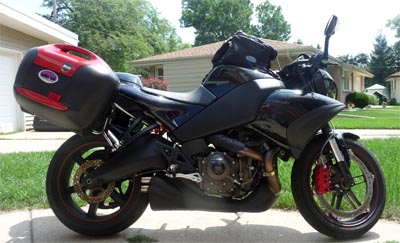 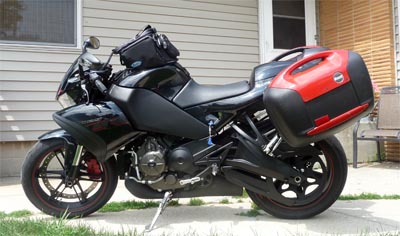 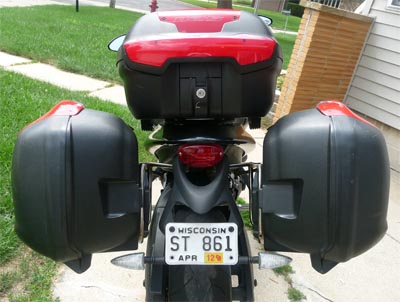 | ||
Aeholton |
Nicely done! | ||
Ccryder |
Pretty cool installation. You do have loads of storage room. My only comment is it looks like the CR is wheels for your roll around suitcases ;+} (Note: That coming from the first hard bag equipped 1125rt owner/fabricator) 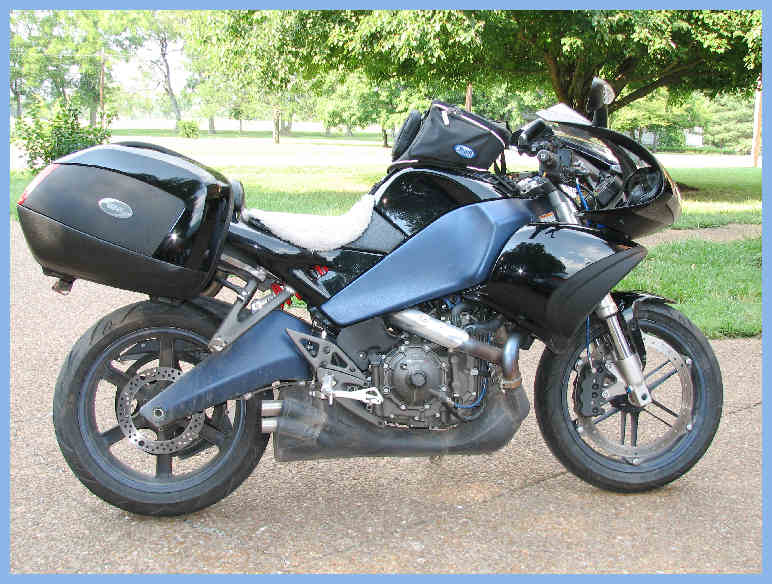 I went with Givi V35 versus the V41 or the Uly bags since IMHO they were too big for the looks of the 1125 (IMHO). Time2Work Neil S. | ||
Tattoodnscrewd |
I was going to go with the Hepco & Becker Junior bags as the cosmetics would be better ... but after an 800 mile camping trip, I don't see using anything smaller .. kinda like what's the point, the crap I fit in them bags ... I hauled cases of beer, 20 lb bags of ice, bundles of fire wood .. you name it .. I hauled it .. so I will stick with the big ol' bags - they do serve their purpose ! - and I am actually narrower (although not by much) than a Uly. And honestly - a bike with bags isn't the prettiest thing to look at anyway IMO ... I have my M2, S1 and CB750 cafe for the true naked rides ... the CR is more of a utility bike for me ... but a fun one ! (Message edited by tattoodnscrewd on August 03, 2010) | ||
Nukeblue |
now you need the high bars! they're sweet. love the hard bags, my cheapness got me the nylon set | ||
Nm5150 |
Can you carry a passenger with the bags off!!??I love the set up. | ||
Ccryder |
I've got the convertibars on mine and I can carry a passenger with the bags mounted. (Message edited by ccryder on August 03, 2010) | ||
Tattoodnscrewd |
I can carry a passenger with/without the side cases, that was a must in the fabrication of the brackets - have to be able to fit my wife on it. Obviously with the 'trunk monkey' (as dubbed by Buell employees) I can't fit a passenger but it can be swapped with the passenger seat in a matter of seconds.. Lean angle was only slightly affected, and only slightly - unlikely that I will realize full lean angle while fully loaded with them bags on ... Only 3 bolts a side and the whole bracket is off, no modification to the bike needed, only different hardware/bolts. | ||
A_s_r |
Any chance you could take a few detailed pics of the side case bracket set up? | ||
Ccryder |
Look here for some picts of my 1125rt: http://www.badweatherbikers.com/buell/messages/290 431/369913.html?1213799586 | ||
Tattoodnscrewd |
I didn't have time to clean them up before my trip and I was rained on twice during so the raw spots and the welds look a bit dirty ... The spot right in front of the license plate at the rear of the bracket is where the cross piece will go. The entire bracket assembly will be one piece and will bolt right on/off. The bags/brackets were tested very well this past week and are solid as can be, I don't even believe a cross piece is necessary, but more rigidity can't hurt. 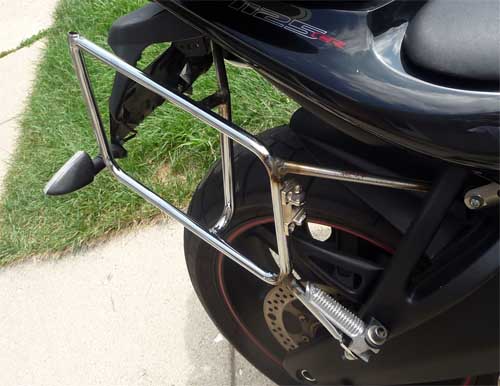 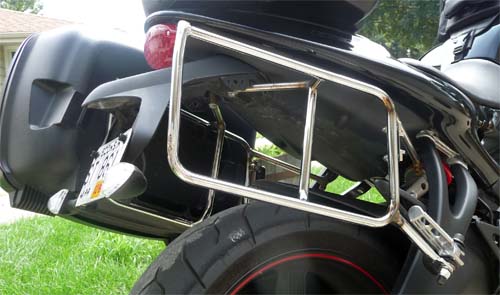 | ||
Ratbuell |
Very nice. You should check out some of the Hepco-Becker dealers out there, they make a backrest pad that goes on the Journey topcase. Not very useful on a Uly, what with the tripletail...but in your setup, it'd be just about awesome! http://eurotechmotorsports.com/forms/Linecard.cfm? do=detail&q_part=700.308 | ||
Tattoodnscrewd |
I've seen the backrest, but while riding, with having the clubman bars, I am not even close to the top case, when at a light just sitting on it the top case is probably too close for it ... but I did think on it when I first saw that backrest. What I would be interested in though is the luggage rack they make for the Journey top case ... as I said earlier, this was done with a purpose and looks are not the primary goal, if they were I wouldn't have turned it into a bagger ... haha I ride as close to year round as one can without riding through snow, and this has been dubbed my work bike so storage was my main objective. | ||
Tattoodnscrewd |
One last set of pics. I just finished adding 2 cross brace sections at the rear and took better pictures of the mounting. Adding 2 might be overkill but I didn't want any open ends on the tubing plus it is now strong enough to stand the bike up with. It also goes on/off as 1 piece easily. I still need to sandblast the brackets and coat them black. In these pics not all of the hardware is tightened down (under the tail and the lower mounts) I just wanted to make sure it would go on and off now that it is one piece. 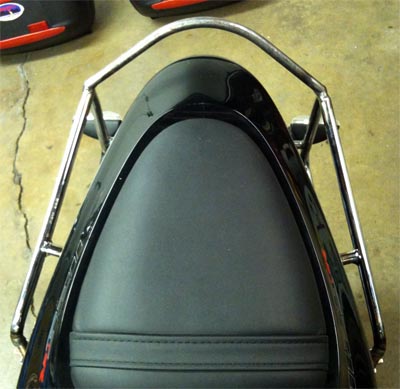 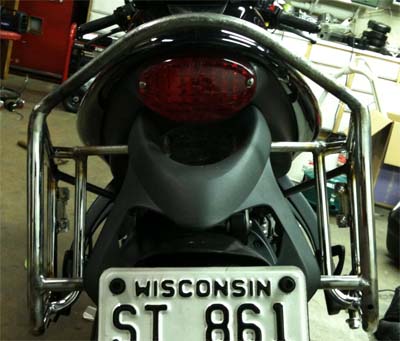 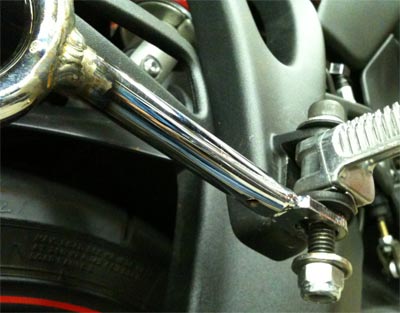  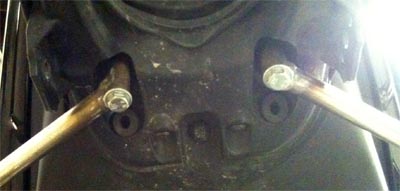 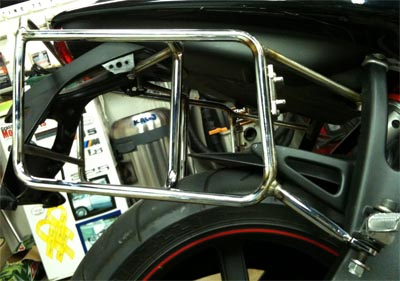 | ||
Ccryder |
Nice fabrication job on the brackets. Where did you get the longer bolts for the upper foot peg mounts? What are you using for the attachment inside the tail? | ||
Tattoodnscrewd |
Thanks ! In doing this I wanted it to be completely reversible and I wanted no real modifications to the bike, spent the better part of 3 days to get them right. The only thing I would call invasive was the lengthening and rerouting of the turn signals. I made a license backing plate with tabs for the signals and notched the inner plastic piece of the plate holder and ran the the lengthened wires within that so it looked clean. In replacing the hardware ... I took all the stock bolts from the bike with me to the local hardware store (not the Home Depot, Lowe's or the like) ... there is a hardware store a few minutes from me that has a plethora of hardware, I found all I needed there. The attachment under the tail is using 2 of the 3 bolts that hold the plastic license plate holder up, it is safe to do so because it is not threaded into the aluminum subframe but a threaded nut if you will on the other side, there is at least a good half inch worth of threads there. Also the front 2 mounting points are so strong that the ones up under the tail aren't really that stressed. If it ever became a problem there (which I seriously doubt, I could easliy use the third mount there and connect all three into one mounting plate but that would be serious overkill, like I said- you can actually stand the bike up with the brackets and you can drag the bike backwards with the brackets) (Message edited by tattoodnscrewd on August 05, 2010) | ||
A_s_r |
Very nicely done Tatood. I really like how closely your brackets follow the contours of the tail section. My wife has the Hepco & Becker setup on her XB, and those hang out in the breeze pretty far. | ||
Asdf |
Now, all that you need to do is to ditch the pods and install Erik Buell Racing lowers. As always, your work is impeccable. Beautiful job! | ||
Ratgin |
Thats a nice setup. Ive never been a fan of top boxes but that one looks good. now just need you to send me a set of brackets | ||
Redbuell1203 |
WOW thank you for posting this. I have been working on mine now for the last 2 weeks and never thought about using the rear peg as a mounting point. Well to the hardware store I go. (Message edited by redbuell1203 on August 05, 2010) | ||
Ccryder |
Hmm, Austin search is your friend. I did mine 2 years ago and I don't think I was the only one. What did you bolt to under the seat besides plastic? | ||
Tattoodnscrewd |
The under seat mounting point isn't to plastic, it does go to the subframe, but those 3 points that the license holder bolts through aren't threaded into the aluminum subframe, they are bolted to the aluminum plate under the area where the seat latches via a threaded nut attached to the plate.. the aluminum plate/box is welded to the square tubing of the subframe. Very solid. It might be easier to take pictures of that spot ... give me a few. (Message edited by tattoodnscrewd on August 05, 2010) | ||
Tattoodnscrewd |
OK ... here are two pictures, the 3 bolts used to mount the plastic license plate bracket bolt to the subframe, not to plastic ... all I did was use longer bolts. the first picture shows the 2 bolts/points at which I mounted the brackets to under the tail, the 2nd picture is the third bolt/point that the under tail license piece is attached with, that bolt/point I did not use. 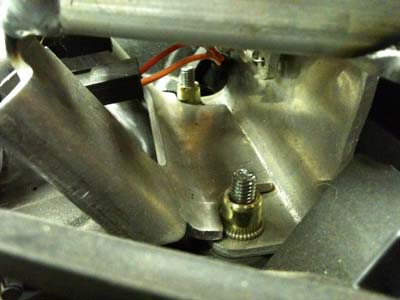  | ||
Ccryder |
Rivet-nuts are our friends! I made up a steel nut plate Inside the tail section to bolt my cross plate to under the inner fender. The strap ties the right and left side rails together. My 1125rt has fallen over once with no bending or damage to the bags or frame. I can't say as much for the chunk of flesh I lost in my shin just above my riding boot. Time2run Neil S. | ||
Rpm4x4 |
I just want to say OUTSTANDING!!!!  | ||
A_s_r |
That set up is almost enough to make me want to put the passenger pegs back on. Almost. I wish I had the tools, skills, and time to fabricate something that nice. | ||
Xl1200r |
Did these a while back for my Firebolt and they click right into my CR as well: 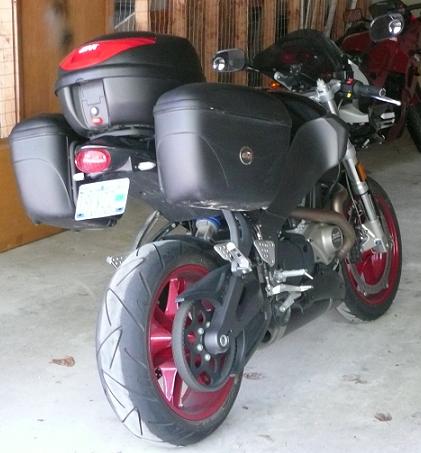 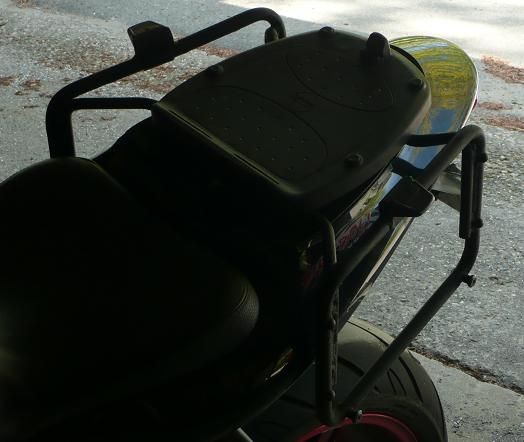 Original thread: http://www.badweatherbikers.com/buell/messages/327 77/361473.html?1210962106 |