| Author | Message | ||
Mikef5000 |
First off, this was Ken's (Sekalilgai's) original idea. I saw it at the One Last Ride ride and wanted to try it as well. The main material is this 1/4" 'MaxiFlex' coolant hose. http://wihatools.com/300seri/344maxi_flex_hose_320 0.htm  A single 11" piece has 22 pieces, which is plenty unless you want the shield perfectly vertical. It's hard plastic pieces that snap together TIGHT. Male ends fit perfect into the windshield grommets on the flyscreen. 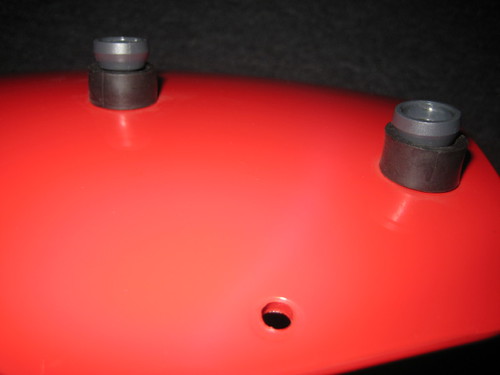 10-32 1" Stainless socket head bolts fit perfect inside the peice, and are the perfect length. Use a washer and lock nut on the inside. (Socket head bolt like this, but stainless steel)   Then you can snap one more piece into the mounted one: 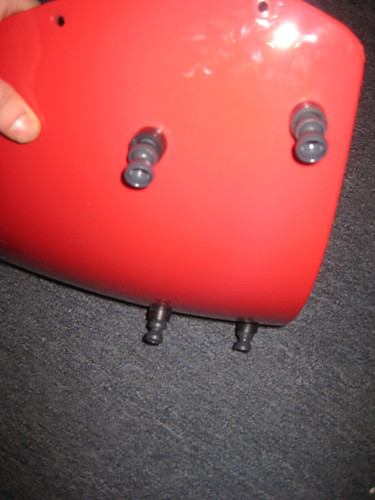 The windshield side is a bit more detailed: 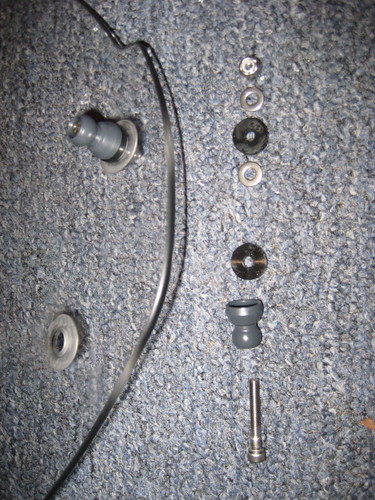 3/8" Rubber faucet 'bushings' are a perfect fit. The order from the inside of the windshield goes: 10-32 1.25" Stainless socket head bolt Plastic Piece Rubber Bushing Windshield Stainless Washer (this fits into a resession in the windshield and centers the bolt) Rubber Bushing Stainless Washer Stainless Lock Nut  Add one more piece to each one: 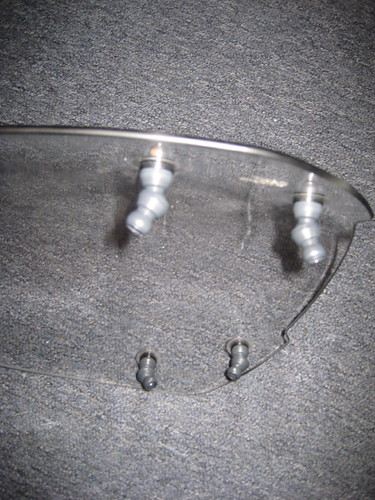 Then you need to add one more piece to all 4, and then they'll snap together. To get the needed angles, you need a minimum of 5 pieces (including the 1 bolted to the flyscreen and 1 bolted to the windshield) BAM! 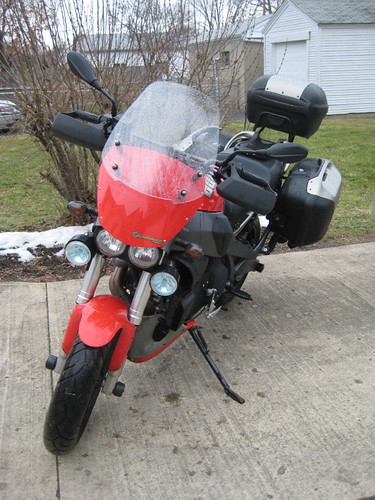 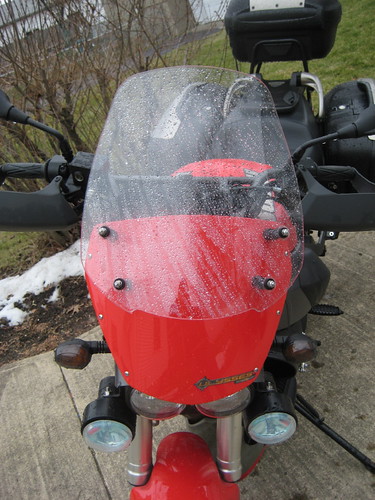  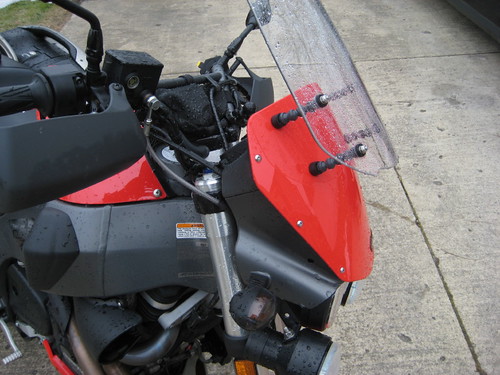 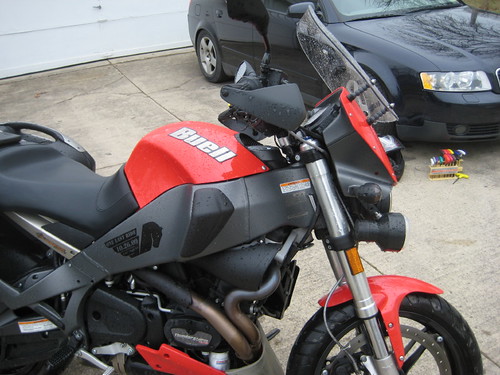 Top View  Rider View  The great news is it takes 1 minute to add a piece or two to the top mounts, to increase the angle of the shield. The bad news is you cannot remove pieces from the bottom mount to accomplish the same. I was hoping for only 3 or so pieces on the bottom, but I needed 5 to get the angles right. FYI, These pieces snap together TIGHT! I am not worried in the least about them coming apart at speed. I don't know if it will eliminate the buffeting, or if it will even help, but I do know that for $15 for the parts and hardware, it was worth a try! (Message edited by mikef5000 on January 21, 2010) | ||
Paralegalpete |
looks good and the angle looks about right. | ||
Sekalilgai |
Nice going Mike! BTW if you'd like, Lowe's has little plastic screw caps that don't look out of place on the windshield. like these p/n 91620A200 at http://www.mcmaster.com/#91620a200/=5h52qr | ||
Mikef5000 |
I saw you had the screw covers. I was thinking the Auto Parts store; they have them for license plate bolts. I'll think about adding them. | ||
Motorbike |
Mike, I see that your design moves the windshield ahead but not up like the Palmer brackets do. Have you had a chance to ride yet with this setup? I was just wondering if opening the space between the flyscreen and windshield makes a lot of difference. I ordered and received the Palmer brackets for my 08 XT but have not installed them yet. Here in Minnesota we have ice all over the roads and I don't plan to ride for at least 2 or 3 more months. It is always neat to see what ideas you guys come up with. Thanks for posting along with the nice pics! | ||
Crempel |
If you want a little hint from my experience....I found (with the Palmer and tall Buell screen) that having the leading edge higher than the top edge (i.e shallower angle than the flyscreen) works just about perfect for both noise and buffetting. For me, anyways. Very smooth airflow. You might give that a try since as you described its easy to change. Love the snap together thingies tho. Good luck. | ||
Glen |
so Mike, hows about the story on those driving lights/mounts? they look like EG's setup but the mounts have me curious. | ||
Mikef5000 |
I rode a bit today (took the long way to work and back), the setup's still not great. I still get A LOT of wind noise in the helmet, and when I stand on the pegs and get in clean air it becomes silent and smooth. time to start adjusting and conducting further testing. My lights are the same idea as EG's setup. Optilux (I think) from Walmart, in some ABS reducers with an end cap on the end. Mine are mounted via a single 'Corner Support' brace, which is bolted on the inside to the turn signal shafts. I replaced the bulbs with 35 watt HID bulbs. I can't for the life of me find the thread I posted about them and the install, so here are some pics:   Bracket bolted to the signal 'shaft'   I'm going to put an additional bracket on the rear of the endcaps just to make them 'triangulated', before next season and I start taking it out and abusing it. | ||
Glen |
thanks mike, imma get the stuff together tommorow to get that same setup on mine | ||
Whisperstealth |
Mike, I too have a red 09, but not your talent. Wanna just trade? - Think with all that practice how fast it would be to do it all over again??? Between you, EG, and some others, I'm getting great idea's and invaluable lessons and information, Thanks! - But really, wanna trade?  |