| Author | Message | ||
7873jake |
The Journey line of cases has that funky red fascia on the rear of the case. Anyone know if H-B or some after-market supplier makes an insert for the red reflective 'thingy' or is it up to me to figure out how to make an LED backing to fit in/behind the red plastic? I've dug through the H-B website and found nothing related to lighting for the Journey line. Thought I'd see if anyone else had done something to make that area light up. | ||
Mikef5000 |
If you can wait for another couple weeks, I'll have my write-up posted (I know I keep saying a couple weeks, but I keep ordering more stuff!). If not, This'll get you started. There are much easier ways to do it, but I wanted running lights and flashing brighter brake lights. 2x 30cm SMD 5050 White LED Strips:  http://cgi.ebay.com/ebaymotors/2x-30cm-12V-white-1 2-5050-SMD-LED-Strip-Black-bottom_W0QQcmdZViewItem QQhashZitem4149f11ed2QQitemZ280413413074QQptZMotor sQ5fCarQ5fTruckQ5fPartsQ5fAccessories 1x 1/4 watt 150 ohm resistor  Radio Shack 1x Diode 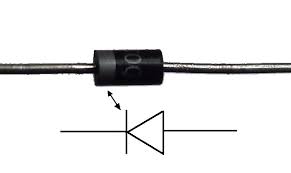 Radio Shack 1x 2-wire LED Flasher 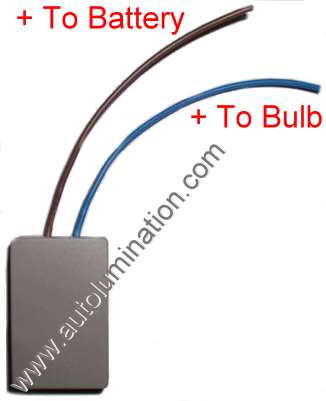 http://autolumination.com/1156_1157.htm About half way down the page. 1x Connector  Any auto parts store OK, Tap into a switched power line (such as your license plate light or tail light. Run a wire off that, we'll call that WIRE A. Add the resistor to this wire. Then tap into your brake light power line, and run a wire off that. This wire will have the diode first, then the first wire of the brake light flasher. The second wire of the brake light flasher will tap into WIRE A AFTER the resistor. That is now your power wire to your lights, so it will go to the red wire in the connector, and then after the connector it will connect to the positive wires of the LEDs. The only other wire you need is a ground. Ground to the chassis, then run up to the connector, then to the 2nd wires out the LEDs. BAM! Pictures, video, and wiring diagrams will come later. | ||
7873jake |
The old adage of great minds doing something alike fits here somewhere. I found the flexible, waterproof LED's tonight at Auto Zone for $15 for 2. I now need to go hunting for the goods you've listed here and then start bench testing my solder joints and wake up my heat gun. THANK YOU!!! | ||
Mikef5000 |
Not a problem. All I've done is bench testing, I can't wait to install this, but I've got an entire box of electrical stuff that I'm hoping to install at the same time. It'll be an entire days project, but the result should be quite awesome! If you get it done post up pictures! | ||
Mikef5000 |
Also, at radio shack I just bought a 100 pack of various resistors (all 1/4 watt) for $6.50 and simply bench tested one of every resistance till I found the one of my liking. Noticeably dimmer than the full brightness 'brake light' mode, yet still bright enough to be seen as a tail light. My preference was the 150 ohm I believe. You might like another, so buying the variety pack might be a safer bet. | ||
7873jake |
Do you have a spec on the diode? I recently replaced a diode in my Philips 42" plasma (78 cents @ "the shack" vs $1300 for a replacement controller board on a $1000 TV...) and realized that there were different specs on different diodes? When you know a solder joint could be the difference between 78 cents and $1000, its amazing how much clarity one can find. | ||
Mikef5000 |
I pretty much just got a standard 99 cents for two diode. I think it said it could handle like 3 amps? All I know is these LED's will pull well under 1 amp, so it should work fine. I can get a part number if you'd like, but they all work the same, so as long as you don't get a tiny one, you'll be fine. | ||
7873jake |
My local Radio Shack only has 100 ohm and 220 ohm resistors so, if I recall, I can wire two 220's in parallel to get about 140 ohms, I think... its been a while since I've done non-checkbook math. Your links and descriptions have driven me to sit down and lay out the diagram on paper and for that I am grateful. I've had far less homework this week because of this.  | ||
Stevem123 |
I hate to break it to you but you need to use red LEDs. I tried the white ones and they make the lens look pink when lit up. The red ones look much better and are plenty bright. | ||
Mikef5000 |
I threw one strip of LED's in the reflector to see how pink it was going to be, and it's not bad at all! This is full brightness (aka, brake light mode, normally it will be just a hair dimmer) and remeber this is just one strip (of 2) that's just sitting in there, that's why it's crooked. Without Flash: 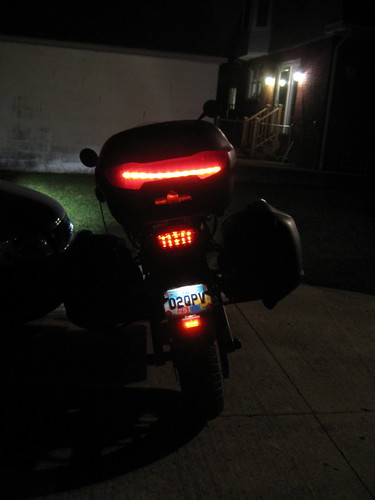 With Flash: 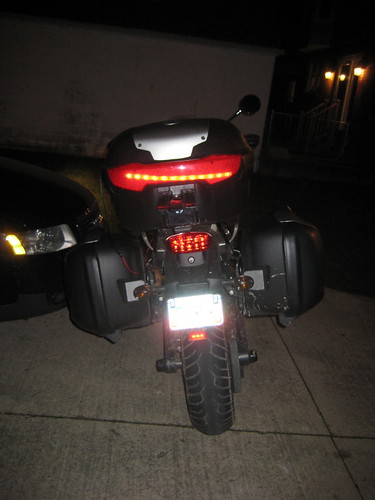 Close-up:  Red enough for me! |